Table of Contents
Advertisement
Quick Links
MOTO GUZZI DESEA AGRADECERLE
por haber elegido uno de sus productos. Hemos preparado este manual para permitirle apreciar todas sus cualidades. Le aconsejamos que lea todo
su contenido antes de conducir por primera vez. Contiene información, consejos y advertencias para el uso de su vehículo; asimismo, descubrirá
características, detalles y soluciones que lo convencerán de lo acertado de su elección. Estamos seguros de que teniendo todo esto en cuenta, le
resultará fácil conocer su nuevo vehículo, el cual podrá disfrutar por mucho tiempo con total satisfacción. La presente publicación es parte integrante
del vehículo y en caso de venderlo debe ser entregada al nuevo propietario.
MOTO GUZZI WOULD LIKE TO THANK YOU
for choosing one of its products. We have drawn up this booklet to provide a comprehensive overview of your vehicle's quality features. Please read it
carefully before riding the vehicle for the first time. It contains information, tips and precautions for using your vehicle. It also describes features, details
and devices to assure you that you have made the right choice. We believe that if you follow our suggestions, you will soon get to know your new vehicle
well and will use it for a long time at full satisfaction. This booklet is an integral part of the vehicle, and should the vehicle be sold, it must be transferred
to the new owner.
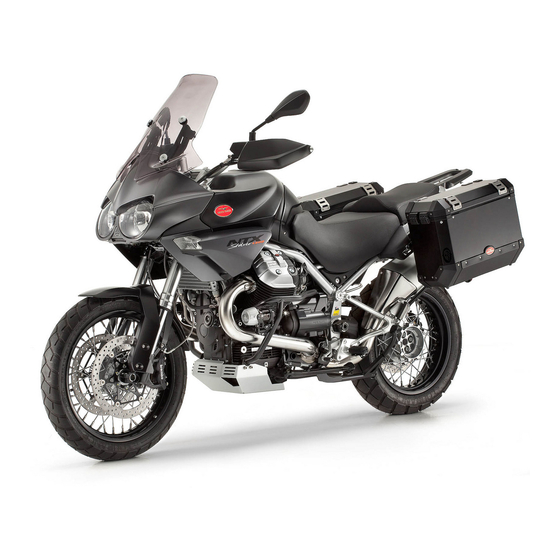
Stelvio 1200 8V - Stelvio 1200 NTX
Ed. 11 2011
Advertisement
Table of Contents

Related Manuals for MOTO GUZZI Stelvio 1200 8V


Summary of Contents for MOTO GUZZI Stelvio 1200 8V
- Page 1 This booklet is an integral part of the vehicle, and should the vehicle be sold, it must be transferred to the new owner. Stelvio 1200 8V - Stelvio 1200 NTX Ed. 11 2011...
- Page 2 The instructions in this manual have been prepared to offer mainly a simple and clear guide to its use; it also describes routine maintenance procedures and regular checks that should be carried out on the vehicle at an authorised Moto Guzzi Dealer or Workshop, The booklet also contains instructions for simple repairs.
- Page 3 Seguridad de las personas Personal safety El no-cumplimiento total o parcial de estas prescrip- Failure to completely observe these instructions will ciones puede comportar peligro grave para la incolu- result in serious risk of personal injury. midad de las personas. Salvaguardia del ambiente Safeguarding the environment Indica el comportamiento correcto para que el uso del...
-
Page 5: Table Of Contents
INDICE INDEX NORMAS GENERALES..............GENERAL RULES................Introducción................10 Foreword..................10 Monóxido de carbono............... 10 Carbon monoxide............... 10 Combustible................11 Fuel.................... 11 Componentes calientes............12 Hot components................. 12 Puesta en marcha y Conducción..........12 Start off and Riding..............12 La frenada................13 The braking................ - Page 6 Pulsante arranque............... 52 Engine stop switch................. 52 Interruptor parada motor.............. 52 System ABS................... 52 Sistema ABS................52 System ATC (Antiskid system)............58 Sistema ATC (Antiskid system)........... 58 Power supply socket..............61 Toma de corriente................ 61 The saddle..................62 El sillin..................62 Opening the saddle..............
- Page 7 Puesta en servicio de una batería nueva......... 117 Checking the electrolyte level............. 118 Comprobacion del nivel del electrolito........118 Charging the battery..............118 Recarga batería............... 118 Long periods of inactivity............... 119 Larga inactividad................119 Fuses..................... 121 Fusibles..................121 Lamps.................... 124 Bombillas..................
-
Page 9: Normas Generales
Stelvio 1200 8V - Stelvio 1200 NTX Cap. 01 Normas generales Chap. 01 General rules... -
Page 10: Introducción
Introducción Foreword NOTA NOTE EL TIEMPO PREVISTO PARA REALI- CARRY OUT MAINTENANCE OPERA- ZAR LAS OPERACIONES DE MANTE- TIONS AT HALF THE INTERVALS NIMIENTO, DEBE SER REDUCIDO A SPECIFIED IF THE VEHICLE IS USED LA MITAD SI EL VEHÍCULO SE UTILI- IN PARTICULAR RAINY OR DUSTY ZA EN ZONAS LLUVIOSAS, POLVO- CONDITIONS, OFF ROAD OR FOR... -
Page 11: Combustible
Combustible Fuel ATENCIÓN CAUTION EL COMBUSTIBLE UTILIZADO PARA THE FUEL USED TO POWER INTER- LA PROPULSIÓN DE LOS MOTORES NAL COMBUSTION ENGINES IS HIGH- DE EXPLOSIÓN ES EXTREMADA- LY FLAMMABLE AND MAY BE EX- MENTE INFLAMABLE Y PUEDE RE- PLOSIVE UNDER CERTAIN CONDI- SULTAR EXPLOSIVO EN DETERMI- TIONS. -
Page 12: Componentes Calientes
LA CAÍDA O LA EXCESIVA INCLINA- IF THE VEHICLE FALLS OR IS ON A CIÓN DEL VEHÍCULO PUEDEN PRO- STEEP INCLINE FUEL CAN LEAK. DUCIR DERRAMES DE COMBUSTI- BLE. Componentes calientes Hot components El motor y los componentes de la insta- The engine and the exhaust system com- lación de escape alcanzan altas tempe- ponents get very hot and remain in this... -
Page 13: La Frenada
EN MUCHOS CASOS EL MOTOR CON- CONTINUE TO OPERATE WITH LIMI- TINÚA FUNCIONANDO CON RENDI- TED PERFORMANCE; IMMEDIATELY MIENTO LIMITADO; DIRIGIRSE INME- CONTACT AN OFFICIAL Moto Guzzi DIATAMENTE A UN Concesionario DEALER. Oficial Moto Guzzi. IF THE ALARM WARNING LIGHT AND... -
Page 14: Aceite Motor Y Aceite Cambio Usados
REALIZADO DE FORMA CORRECTA Guzzi DEALER TO HAVE THE CIRCUIT EL CONTROL MENCIONADO ANTE- CHECKED. RIORMENTE, DIRIGIRSE A UN CON- CESIONARIO OFICIAL Moto Guzzi PA- RA EL CONTROL DE LA INSTALA- CIÓN. Aceite motor y aceite cambio Used engine oil and gearbox usados ATENCIÓN... -
Page 15: Líquido Frenos Y Embrague
SE MANIPULA POR MUCHO TIEMPO PERIODS OF TIME AND ON A REGU- Y COTIDIANAMENTE. LAR BASIS. SE RECOMIENDA LAVAR CUIDADO- WASH YOUR HANDS CAREFULLY SAMENTE LAS MANOS DESPUÉS DE AFTER HANDLING OIL. HABERLO EMPLEADO. HAND THE OIL OVER TO OR HAVE IT ENTREGARLO O HACERLO RETIRAR COLLECTED BY THE NEAREST USED POR LA EMPRESA DE RECUPERA-... -
Page 16: Electrolito Y Gas Hidrógeno De La Batería
NOS PARA LOS OJOS. EN CASO DE PLENTY OF COLD, CLEAN WATER CONTACTO ACCIDENTAL CON LOS AND SEEK MEDICAL ADVICE. OJOS, ENJUAGAR INMEDIATAMEN- KEEP OUT OF THE REACH OF CHIL- TE CON ABUNDANTE AGUA FRÍA Y DREN. LIMPIA, Y CONSULTAR INMEDIATA- MENTE A UN MÉDICO. - Page 17 QUINCE MINUTOS, LUEGO DIRIGIR- CONSULT AN EYE SPECIALIST IMME- SE INMEDIATAMENTE A UN OCULIS- DIATELY. IF THE FLUID IS ACCIDEN- TA. SI SE INGIERE LÍQUIDO ACCI- TALLY SWALLOWED, DRINK LARGE DENTALMENTE, BEBER ABUNDAN- QUANTITIES OF WATER OR MILK, TE CANTIDAD DE AGUA O LECHE, FOLLOWED BY MILK OF MAGNESIA CONTINUAR CON LECHE DE MAGNE- OR VEGETABLE OIL AND SEEK MED-...
-
Page 18: Soporte
Soporte Stand ANTES DE SALIR, ASEGURARSE BEFORE SETTING OFF, MAKE SURE QUE EL CABALLETE HAYA REGRE- THE STAND HAS BEEN COMPLETELY SADO COMPLETAMENTE A SU POSI- RETRACTED TO ITS POSITION. CIÓN. DO NOT REST THE RIDER OR PAS- NO CARGAR SOBRE EL CABALLETE SENGER WEIGHT ON THE SIDE LATERAL EL PESO DEL CONDUC- STAND. -
Page 19: Vehìculo
Stelvio 1200 8V - Stelvio 1200 NTX Cap. 02 Vehìculo Chap. 02 Vehicle... - Page 20 02_01...
-
Page 21: Ubicación Componentes Principales
02_02 Ubicación componentes Arrangement of the main principales (02_02) components (02_02) Leyenda (versión NTX): Key (NTX version): 1. Faro delantero 1. Headlamp 2. Toma 12V 2. 12 V socket 3. Tablero de instrumentos 3. Instrument panel 4. Espejo retrovisor izquierdo 4. - Page 22 10. Compartimiento portaherra- 11. Passenger grab handle mientas 12. Left side top box 11. Asa de agarre pasajero 13. Passenger left footrest 12. Maletero lateral izquierdo 14. Left rider footrest 13. Estribo izquierdo pasajero 15. Side stand 14. Estribo izquierdo del conductor 16.
- Page 23 02_03...
- Page 24 02_04 Key (standard version): Leyenda (versión estándar): 1. Headlamp 1. Faro delantero 2. 12 V socket 2. Toma 12V 3. Instrument panel 3. Tablero de instrumentos 4. Left rear-view mirror 4. Espejo retrovisor izquierdo 5. Fuel tank cap 5. Tapón del depósito de combus- 6.
- Page 25 12. Compartimiento portaherra- 14. Left rider footrest mientas 15. Side stand 13. Estribo izquierdo pasajero 16. Gear shift lever 14. Estribo izquierdo del conductor 17. Engine oil level dipstick 15. Caballete lateral 18. Fairing lug 16. Leva de mando del cambio 19.
-
Page 26: Tablero De Instrumentos
02_05 Tablero de instrumentos Dashboard (02_05) (02_05) Instrument panel / controls location key: Leyenda ubicación mandos / instru- mentos: 1. Clutch control lever 1. Leva de mando embrague 2. Instruments and gauges 2. Instrumentos e indicadores 3. Ignition switch /steering lock 3. -
Page 27: Conjunto De Instrumentos
Official Moto Guzzi extraviada dirigirse a un concesionario dealer to enable these keys or to disable oficial Moto Guzzi. En el momento de la a key that has been lost. When the vehi-... -
Page 28: Grupo Testigos
entrega del vehículo, luego de girar la lla- cle is delivered and approximately ten ve a la posición ON y durante diez se- seconds after the key is set to ON, the gundos aproximadamente, el tablero so- instrument panel requests a personal licita el ingreso de un código personal de five-digit code to be entered. -
Page 29: Representacion Visual Digital Por Cristales Liquidos
7. Testigo luz de carretera (color azul) 8. Testigo Warning general (color rojo) Representacion visual digital Digital lcd display (02_08, por cristales liquidos (02_08, 02_09) 02_09) The following indicators will light up for a couple of seconds on the instrument pan- Girando la llave de contacto a la posición el when the ignition key is set to "ON": ON, en la pantalla se encienden durante... -
Page 30: Teclas De Mando
- NIVEL COMBUSTIBLE (zona D) - POSSIBLE SERVICING KEY (zone H) - RELOJ (zona E) - ATC (Antiskid system) (zone I) - TEMPERATURA AMBIENTE (zona F) - TRIP COMPUTER AND ADDITIONAL FUNCTIONS (zone L) - VELOCIDAD (zona G) - EVENTUAL LLAVE CONTROL PERIÓ- DICO (zona H) - ATC (Antiskid system) (zona I) - ORDENADOR DE VIAJE Y FUNCIO-... - Page 31 NOTA NOTE CON CADA PRESIÓN PROLONGADA EVERY TIME THE SELECTOR IS HELD DEL SELECTOR A LA DERECHA O A DOWN TO THE RIGHT OR LEFT, YOU LA IZQUIERDA SE PUEDE PASAR DE CAN GO FROM ONE CONFIGURA- UNA CONFIGURACIÓN A OTRA. (*) TION TO ANOTHER.
- Page 32 La indicación del parcial visualizado se The trip odometer is displayed at the low- indica en la zona inferior de la pantalla (E) er part of the display (E) and can be: y puede ser: - TRIP ODOMETER (1) - ODÓMETRO PARCIAL (1) - TRAVELLING TIME (2) - TIEMPO DE RECORRIDO (2) - CONSUMPTION WHEN RIDING (3)
- Page 33 zar cíclicamente las siguientes funcio- - ATC (Antiskid system) (6); nes: (***) - MENU (function disabled when riding) - ATC (Antiskid system) (6); (7); - MENÚ (función excluida con el vehículo - CHRONOMETER (8); en movimiento) (7); - CURRENT CONSUMPTION (9); - CRONÓMETRO (8);...
- Page 34 Desplazando el selector hacia la dere- Moving the selector to the right, press cha, con un breve presión, se activa el briefly to turn the system on. sistema. 02_16 Para desactivar el sistema, desplazar el To turn off the system, move the switch selector hacia la izquierda con una breve to the left by briefly pressing it, until the presión, hasta visualizar la leyenda OFF...
- Page 35 CRONÓMETRO CHRONOMETER Para acceder a la función CRONÓME- To enter the CHRONOMETER function: TRO: • In the TRIP function, select • De la configuración TRIP, selec- CHRONOMETER by holding cionar CRONÓMETRO presio- down the selector. nando el selector de forma pro- The bottom zone of the display shows the longada.
-
Page 36: Funciones Avanzadas
SUALIZAR MEDIDAS del menú CRO- NÓMETRO. Funciones avanzadas (02_19, Advanced functions (02_19, 02_20, 02_21, 02_22, 02_23, 02_20, 02_21, 02_22, 02_23, 02_24, 02_25) 02_24, 02_25) MENÚ MENU La función puede ser seleccionada sólo The function can be selected only with con el vehículo parado y permite progra- the vehicle at a standstill. - Page 37 CONFIGURACIONES, aparece When the selection is confirmed on SET- pantalla con las siguientes opciones: TINGS (selector held down), a screen displays the following options: - SALIR - EXIT - AJUSTE HORA - TIME ADJUSTMENT - CAMBIO MARCHA - GEAR SHIFT - RETROILUMINACIÓN - BACKLIGHTING - °C/°F...
- Page 38 Cada vez que se presiona el selector se value reaches 59, it returns to 0 the next aumenta de uno el valor de los minutos; time the selector is pressed. al alcanzar el valor 59, si se presiona The procedure ends when the selector is nuevamente el selector, se vuelve a 0.
- Page 39 - REVOLUCIONES MÁXIMAS PRO- If the set threshold value is exceeded, the GRAMABLES 8500 warning light on the instrument panel starts to flash. It turns off when the value Al superar el umbral fijado, el testigo de goes back below the threshold limit. alarma del tablero parpadea hasta que se retorna por debajo de dicho umbral.
- Page 40 Presionando prolongadamente el selec- Hold down the selector to store the data; tor, se memoriza el dato y el tablero vuel- the instrument panel goes back to the ve al menú CONFIGURACIONES. SETTINGS menu. 12H / 24H 12H / 24H Esta función selecciona la modalidad de This function selects the time display visualización de la hora.
- Page 41 Al finalizar la operación, el tablero vuelve Once the operation is finished, the instru- al menú CONFIGURACIONES. ment panel shows the SETTINGS menu. Si es la primera memorización, se solicita If it is the first time a code is stored, only únicamente que se ingrese el nuevo có- the new code is requested.
- Page 42 CRONÓMETRO CHRONOMETER Cuando se confirma la selección (presio- When the selection is confirmed on nando prolongadamente el pulsador CHRONOMETER (SET button held SET) en CRONÓMETRO, aparece una down), a screen displays the following pantalla con las siguientes opciones: options: - SALIR - EXIT - VISUALIZAR MEDIDAS - VIEW TIMES...
- Page 43 Para habilitarla se debe introducir un có- access code available only from Moto digo de acceso que solo poseen los cen- Guzzi service centres. tros de asistencia Moto Guzzi. IDIOMAS LANGUAGES dentro de esta función se puede selec- The display language can be selected cionar el idioma de la pantalla.
- Page 44 UMBRAL SERVICE SERVICE THRESHOLD Al superar los umbrales de los intervalos When a maintenance interval threshold is de mantenimiento, se visualiza un icono exceeded, an icon with a spanner (H) is con el símbolo de la llave inglesa (H). shown. Primer encendido: 1.500 km (932 mi) First ignition: 1,500 km (932 mi) Encendidos sucesivos: cada 10.000 km...
-
Page 45: Conmutador De Encendido
Si se encienden durante lapsos breves el testigo de alarma y el icono de SERVICE, no son índice de un mal funcionamiento. Conmutador de encendido Ignition switch (02_26) (02_26) The ignition switch is located on the headstock upper plate. El interruptor de arranque se encuentra en la placa superior del tubo de la direc- The vehicle is supplied with two keys ción. -
Page 46: Bloqueo Del Volante
LOCK: La dirección está bloqueada. No LOCK: The steering is locked. It is not es posible poner en marcha el motor ni possible to start the engine or switch on accionar las luces. Se puede sacar la lla- the lights. The key can be extracted OFF: The engine and lights cannot be set OFF: El motor y las luces no se pueden to work. -
Page 47: Luces De Aparcamiento
Luces de aparcamiento Parking lights (02_28) (02_28) The vehicle has front and rear parking lights. Considering that it is preferable to El vehículo está equipado con luces de park the vehicle in adequate and well-lit estacionamiento delanteras y traseras. areas, parking lights are very useful when Aunque es preferible estacionar el vehí- parking the vehicle in a dark or poorly lit culo en las áreas específicas y en lugares... -
Page 48: Conmutador Intermitentes
Presionado, pone en funcionamiento el Press it to activate the horn. avisador acústico. 02_29 Conmutador intermitentes Switch direction indicators (02_30) (02_30) NOTE NOTA ELECTRICAL COMPONENTS FUNC- LOS COMPONENTES ELÉCTRICOS TION ONLY WHEN THE IGNITION KEY FUNCIONAN SÓLO CON EL INTE- IS SET TO "ON"... -
Page 49: Commutador Luces
Commutador luces (02_31) High/low beam selector (02_31) NOTA NOTE LOS COMPONENTES ELÉCTRICOS FUNCIONAN SÓLO CON EL INTE- ELECTRICAL COMPONENTS FUNC- RRUPTOR DE ARRANQUE EN POSI- TION ONLY WHEN THE IGNITION KEY CIÓN «ON» IS SET TO "ON" Conmutador de luces Light switch •... -
Page 50: Pulsador Ráfaga Luz De Carretera
Pulsador ráfaga luz de Passing button (02_32) carretera (02_32) Uses the high beam flash in case of dan- ger or emergency. Permite utilizar el destello de la luz de carretera en casos de peligro o emergen- Releasing the switch deactivates the high cia. -
Page 51: Boton Accionamiento Intermitentes De Emergencia
ARRANQUE O PUESTA EN MARCHA THEY ARE NOT MAINTAINED HOW- DEL MOTOR. EVER, AFTER REMOVING THE BAT- TERY. EN CAMBIO NO SE MANTIENEN DES- PUÉS DE UNA DESCONEXIÓN DE LA BATERÍA. Cuando se activan los puños calefacta- When the heated grips are activated, the dos, se visualiza el símbolo (B) en la (B) symbol appears on the display. -
Page 52: Start-Up Button
Pulsante arranque (02_36) Start-up button (02_36) Presionando el pulsador, el motor de Press the button and the starter motor arranque pone en funcionamiento el mo- spins the engine. tor. 02_36 Interruptor parada motor Engine stop switch (02_37) (02_37) It acts as an engine cut-off or emergency stop switch. - Page 53 EL ABS es un dispositivo que impide el The ABS system is a device to avoid bloqueo de las ruedas en caso de una wheels locking in case of emergency frenada de emergencia, aumentando la braking, thus increasing vehicle stability estabilidad del vehículo durante la frena- at braking when compared with a tradi- da, respecto de un sistema de frenos...
- Page 54 If a failure is found, the warning light turns se enciende permanentemente para in- on permanently to indicate the malfunc- dicar la anomalía. Automáticamente el tion. The ABS device is automatically de- dispositivo ABS se desactiva. activated. NOTE IF THIS OCCURS, CONTACT AN OFFI- CIAL Moto Guzzi DEALER.
- Page 55 NOTA EN ESTE CASO DIRIGIRSE A UN CON- CESIONARIO OFICIAL Moto Guzzi. ABS device deactivation Desactivación dispositivo ABS To deactivate the system, proceed as fol- Para desactivar el sistema, operar como lows: se indica a continuación: • Start the engine.
- Page 56 (3.1 mi/h) y el testigo en el ta- SYSTEM DETECTS A FAILURE. TO blero (ABS) se apagará. ACTIVATE THE ABS SYSTEM AGAIN ATENCIÓN TURN THE IGNITION SWITCH TO "OFF" AND THEN TO "ON". SI EL PULSADOR ABS SE PRESIONA DURANTE MÁS DE DIEZ SEGUNDOS EL SISTEMA DETECTA UNA ANOMA- LÍA.
- Page 57 RA, QUE LA DISTANCIA ENTRE LA ONE SPECIFIED. TAKE YOUR VEHI- RUEDA FÓNICA Y EL SENSOR SEA CLE TO AN AUTHORISED Moto Guzzi LA PREVISTA. PARA EL CONTROL Y WORKSHOP FOR CHECKING AND LA REGULACIÓN DIRIGIRSE A UN TA- ADJUSTMENT.
-
Page 58: Sistema Atc (Antiskid System)
0,3 - 2,00 mm (0,012 - 0,079 in) Distancia entre la rueda fónica y el sensor trasero 0,3 - 1,5 mm (0,012 - 0,059 in) Sistema ATC (Antiskid System ATC (Antiskid system) system) ATC is a system that controls rear wheel spin in the event of brief loss of grip, in ATC es un sistema que controla el desli- order to increase the stability of the vehi-... - Page 59 LLAR GIRADO GENERA UNA CONDI- DO NOT SPEED RECKLESSLY, ROAD CIÓN DE INESTABILIDAD DIFÍCIL- HOLDING IS DETERMINED BY LAWS MENTE GESTIONABLE. OF PHYSICS WHICH EVEN THE ATC SYSTEM CANNOT OVERCOME. NO CORRER IMPRUDENTEMENTE, EL AGARRE A LA CARRETERA DEL VEHÍCULO ESTÁ SUJETO A LEYES FÍSICAS PARTICULARES QUE NI SI- QUIERA EL ATC PUEDE ELIMINAR.
- Page 60 NOTE NOTA IF THIS OCCURS, CONTACT AN OFFI- EN ESTE CASO DIRIGIRSE A UN Con- CIAL Moto Guzzi dealer. cesionario Oficial Moto Guzzi. Characteristic Características Técnicas Distance between tone wheel and Distancia entre la rueda fónica y el...
-
Page 61: Toma De Corriente
0,3 - 2,00 mm (0,012 - 0,079 in) Distance between tone wheel and rear sensor Distancia entre la rueda fónica y el sensor trasero 0.3 - 1.5 mm (0.012 - 0.059 in) 0,3 - 1,5 mm (0,012 - 0,059 in) Toma de corriente (02_40, Power supply socket (02_40, 02_41) -
Page 62: El Sillin
CEN LOS MOVIMIENTOS DEL MANI- LLAR. El sillin (02_42, 02_43, 02_44) The saddle (02_42, 02_43, 02_44) Se puede modificar la altura del asiento del conductor: The height of the rider saddle can be ad- justed: • Parar el vehículo, posicionarlo •... -
Page 63: Abertura Sillín
PARA EXTRAER LOS TAPONES DE TO REMOVE THE RUBBER BUMP- GOMA, LEVANTAR LA PARTE BAJA Y ERS, LIFT THE LOW PART AND PULL EXTRAER EL TAPÓN DE LOS DOS THEM OFF THE TWO CHASSIS PINS. PERNOS DEL CHASIS. 02_44 Abertura sillín (02_45) Opening the saddle (02_45) •... -
Page 64: Compartimiento Porta-Doc./Kit Herramientas
• • Colocar la parte delantera del Put the front of the passenger asiento del pasajero en su alo- saddle in place. • jamiento. Lower the rear part and position • Bajar la parte trasera y colocar the passenger saddle so that el asiento del pasajero de ma- both retaining hooks are proper- nera que los dos enganches de... -
Page 65: La Identificación
La identificación (02_47, Identification (02_47, 02_48) 02_48) Write down the chassis and engine num- ber in the specific space in this booklet. Es conveniente tomar nota de los núme- The chassis number is handy when pur- ros del chasis y del motor, en el espacio chasing spare parts. -
Page 66: Regulación Parabrisas
NÚMERO DE MOTOR ENGINE NUMBER El número de motor está estampillado en The engine number is printed on the base el bloque motor lado izquierdo. of the engine crankcase, left hand side. Motor Nº....Engine No..... Regulación parabrisas (02_49) Adjusting the windscreen (02_49) Es posible regular manualmente el para-... - Page 67 APERTURA DE LA TAPA COVER OPENING • • Colocar el vehículo sobre el ca- Park the vehicle on its centre ballete central. stand. • • Introducir la llave (1) en la ma- Introduce the key (1) in the pan- nilla de la tapa de las maletas nier cover handle (2).
- Page 68 • Girar la llave (1) en sentido an- tihorario y extraerla de la manilla (5). • • Retirar la maleta (7) extrayén- Remove the pannier (7) by slid- dola desde atrás del chasis por- ing it at the back from the pan- tamaletas.
-
Page 69: El Uso
Stelvio 1200 8V - Stelvio 1200 NTX Cap. 03 El uso Chap. 03... -
Page 70: Controles
SONAL INJURY OR VEHICLE DAM- SAR GRAVES LESIONES PERSONA- AGE. DO NOT HESITATE TO CON- LES O DAÑOS GRAVES AL VEHÍCU- TACT AN Official Moto Guzzi Dealer IF LO. SI NO SE COMPRENDE EL YOU DO NOT UNDERSTAND HOW FUNCIONAMIENTO DE ALGÚN MAN-... - Page 71 ONTROLES PRELIMINARES RIDE CHECKS Freno de disco delantero y trasero Controlar el funcionamiento, la Front and rear disc brake Check for proper operation. Check carrera en vacío de las palancas brake lever empty travel and brake de mando, el nivel del líquido y fluid level.
- Page 72 Lubricar articulaciones work without gripping and/or regular la carrera si es necesario. sliding. Embrague Controlar el funcionamiento, la Steering Check that the rotation is uniform, carrera en vacío de la leva de smooth and there are no signs of mando, el nivel del líquido y clearance or slackness.
-
Page 73: Abastecimiento
Controlar tapón authorised Moto Guzzi repair combustible esté correctamente shop. cerrado. Tone wheels (only for vehicles with Check that the tone wheels are ABS system) perfectly clean Interruptor de parada del motor Controlar funcionamiento (ON - OFF) correcto. Luces, testigos, avisador acústico,... - Page 74 ATENCIÓN CAUTION NO AGREGAR ADITIVOS U OTRAS DO NOT ADD ADDITIVES OR ANY SUSTANCIAS AL COMBUSTIBLE. OTHER SUBSTANCES TO THE FUEL. SI SE USA UN EMBUDO U OTRO OB- WHEN USING A FUNNEL OR ANY JETO, ASEGURARSE DE QUE ESTÉ OTHER ELEMENT, MAKE SURE IT IS PERFECTAMENTE LIMPIO.
-
Page 75: Regulación Amortiguadores Traseros
• Cerrar nuevamente la tapa (1). MAKE SURE THE CAP IS TIGHTLY CLOSED. ASEGURARSE DE QUE EL TAPÓN ESTÉ CORRECTAMENTE CERRADO. Regulación amortiguadores Rear shock absorbers traseros (03_03, 03_04) adjustment (03_03, 03_04) La suspensión trasera esta compuesta The rear suspension consists of a spring- por el grupo muelle-amortiguador, que se shock absorber unit linked to the frame conecta mediante Silent-block, al chasis... - Page 76 cer la mayoría de las condiciones de riding conditions, to transport the rider conducción a velocidad moderada o ele- plus luggage. vada, para el transporte del conductor However, this set can be modified for con equipaje. specific needs according to vehicle use. Sin embargo es posible personalizar la regulación en función del uso del vehícu- BEFORE...
- Page 77 CLE ON THE STREET UNTIL THE OP- RANTE LA CONDUCCIÓN. SI FUERA TIMUM ADJUSTMENT IS OBTAINED. NECESARIO, DIRIGIRSE A UN Conce- sionario Oficial Moto Guzzi. PROBAR REPETIDAMENTE EN VEHÍCULO EN CARRETERA HASTA OBTENER LA REGULACIÓN OPTIMA. TABLA DE REGULACIÓN DEL AMOR-...
-
Page 78: Regulación Horquilla Delantera
Extensión - condiciones de 18 clics partiendo del tornillo (1) Rebound - maximum load 18 clicks starting from screw (1) máxima carga completamente cerrado conditions fully tightened (1) PUEDE RESULTAR NECESARIO (1) THE SETTING SHOWN IN THE TA- MODIFICAR LA REGULACIÓN INDI- BLE MAY NEED TO BE MODIFIED AC- CADA EN LA TABLA EN FUNCIÓN CORDING TO THE TYRE AND ROAD... - Page 79 La suspensión delantera está compuesta The front suspension consists of a hy- por una horquilla hidráulica unida me- draulic fork connected to the headstock diante dos placas al tubo de la dirección. by means of two plates. Para configurar el ajuste del vehículo, ca- For adjusting the suspension set up, da vástago de la horquilla está...
- Page 80 Los calibrados para carga normal corres- ponden al estándar de fábrica. REGULACIONES DE LA HORQUILLA FORK SETTINGS Pretensado del muelle, tuerca (1) - desde totalmente abierta, enroscar Spring preloading, nut (1) - regular tighten (clockwise) 8 turns from condiciones de carga normales (sentido horario) 8 vueltas load conditions fully open...
-
Page 81: Regulación Leva Freno Delantero
(1) PUEDE RESULTAR NECESARIO (1) THE SETTING SHOWN IN THE TA- MODIFICAR LA REGULACIÓN INDI- BLE MAY NEED TO BE MODIFIED AC- CADA EN LA TABLA EN FUNCIÓN CORDING TO THE TYRE AND ROAD DEL TIPO DE NEUMÁTICO Y DEL TE- TYPE. -
Page 82: Regulación Leva Embrague
Regulación leva embrague Clutch lever adjustment (03_07) (03_07) Se puede regular la distancia entre los Adjust the distance between the lever extremos de la palanca y el puño, girando end and the hand grip by turning the set el dispositivo. screw. - Page 83 ATENCIÓN THIS OCCURRENCE IS PERFECTLY ES POSIBLE QUE DEL EMBRAGUE NORMAL AND IT WILL DISAPPEAR SE DESPRENDA UN LEVE OLOR DE ONCE THE CLUTCH DISC HAS BEEN QUEMADO, DURANTE EL PRIMER BROKEN IN. PERIODO DE USO. ESTE FENÓMENO IT IS IMPORTANT TO STRAIN ENGINE ES PERFECTAMENTE NORMAL Y DE- COMPONENTS DURING...
-
Page 84: Arranque Dificultoso
Moto Guzzi DEALER PREVISTO, DIRIGIRSE A UN CONCE- CHECKS INDICATED IN THE "AFTER SIONARIO OFICIAL Moto Guzzi PARA RUN-IN" TABLE IN THE SCHEDULED QUE EJECUTE LOS CONTROLES MAINTENANCE SECTION TO AVOID CONTEMPLADOS EN LA TABLA "FIN INJURING YOURSELF, OTHERS AND / DEL RODAJE"... -
Page 85: Aparcamiento
Aparcamiento Parking La elección de la zona de estacionamien- It is very important to select an adequate to es muy importante y se deben respetar parking spot, in compliance with road sig- la señalización vial y las indicaciones que nals and the guidelines described below. se presentan a continuación. -
Page 86: Escape Catalítico
NO CARGAR SOBRE EL CABALLETE LATERAL EL PESO DEL CONDUC- TOR NI EL DEL PASAJERO. Escape catalítico Catalytic silencer El vehículo cuenta con un silenciador con The vehicle has a silencer with a "plati- catalizador metálico del tipo "trivalente al num - palladium - rhodium three-way"... - Page 87 If the noise produced by the exhaust sys- cios y que el sistema de escape funcione tem increases, get immediately in touch correctamente. with the Dealer or with a Moto Guzzi au- Si el ruido producido por el sistema de thorised repair shop. escape aumenta, contactar inmediata- mente con un CONCESIONARIO o un Taller autorizado Moto Guzzi.
-
Page 88: Soporte
NOTA NOTE ESTÁ PROHIBIDO ALTERAR EL SIS- DO NOT TAMPER WITH THE EX- TEMA DE ESCAPE. HAUST SYSTEM. Soporte (03_08, 03_09, 03_10, Stand (03_08, 03_09, 03_10, 03_11, 03_12) 03_11, 03_12) EL CABALLETE LATERAL Y EL CEN- THE SIDE AND CENTRE STANDS TRAL DEBEN GIRAR LIBREMENTE, SHOULD TURN SMOOTHLY, GREASE EN CASO DE SER NECESARIO EN-... - Page 89 • Girar el manillar completamente CAUTION hacia la izquierda. MAKE SURE THE VEHICLE IS STA- ATENCIÓN BLE. ASEGURARSE DE LA ESTABILIDAD DEL VEHÍCULO. En el caballete lateral se encuentra un A safety switch is installed on the side interruptor de seguridad que tiene la fun- stand to inhibit ignition or to stop the en- ción de impedir o interrumpir el funciona- gine when a gear is engaged and the side...
-
Page 90: Sugerencias Contra Los Robos
• • Empujar la leva del caballete Push the centre stand lever central (Pos. A) y apoyarlo en el (Pos. A) and rest the stand on suelo. the ground. OPERAR CON CAUTELA. PROCEED WITH CAUTION. LA OPERACIÓN DE POSICIONAMIEN- PLACING THE VEHICLE ON ITS TO DEL VEHÍCULO EN EL CABALLE- STAND MIGHT BE DIFFICULT SINCE 03_12... - Page 91 RIOS DAÑOS A LA INSTALACIÓN DE DENTS WITH CONSEQUENT PHYSI- FRENOS Y PROVOCAR ACCIDENTES CAL INJURIES OR EVEN DEATH. CON LOS CONSIGUIENTES DAÑOS FÍSICOS O LA MUERTE NUNCA dejar la llave de contacto colo- NEVER leave the ignition key in the lock cada y siempre bloquear el manillar.
-
Page 92: Normas Basicás De Seguridad
Normas basicás de seguridad Basic safety rules (03_13, (03_13, 03_14, 03_15, 03_16, 03_14, 03_15, 03_16, 03_17) 03_17) Follow the instructions given below atten- tively to avoid injuring persons, damaging Prestar la máxima atención a las indica- property or the vehicle in the event of the ciones siguientes porque fueron redacta- rider or the passenger falling off the ve- das para evitar daños a las personas, a... - Page 93 balanceo con la consiguiente pérdida de While getting on and off, the vehicle may equilibrio y la posibilidad de una caída o become unstable due to its weight and it vuelco. may fall or overturn. ATENCIÓN CAUTION EL CONDUCTOR ES SIEMPRE EL PRI- THE RIDER MUST GET ON THE VEHI- MERO QUE ASCIENDE AL VEHÍCULO CLE FIRST AND GET OFF LAST TO BE...
- Page 94 CAUTION COMPROMETERÍA EL EQUILIBRIO Y LA ESTABILIDAD DEL VEHÍCULO. ANY BAGS OR OBJECTS STRAPPED TO THE REAR OF THE VEHICLE CAN ATENCIÓN REPRESENT AN OBSTACLE WHILE GETTING ON AND OFF. EL EQUIPAJE O LAS COSAS FIJADAS A LA PARTE TRASERA DEL VEHÍCU- SWING YOUR RIGHT LEG OVER THE LO PUEDEN CREAR UN OBSTÁCULO SEAT IN A CONTROLLED MOVEMENT...
- Page 95 • • Apoyar ambos pies a tierra y en- Place both feet on the ground, derezar el vehículo en posición straighten and balance the ve- de marcha, manteniéndolo en hicle keeping it upright in riding equilibrio. position. ATENCIÓN CAUTION EL CONDUCTOR NO DEBE EXTRAER THE RIDER MUST NOT EXTRACT OR O INTENTAR EXTRAER LOS ESTRI- ATTEMPT TO EXTRACT THE PAS-...
- Page 96 GULAR Y CARENTE DE OBSTÁCU- LOS. • • Con el taco del pie izquierdo, With the left shoe heel, lower accionar en el caballete lateral y and extend the side stand com- extenderlo completamente. pletely. ATENCIÓN CAUTION SI NO LOGRARA APOYAR AMBOS IF YOU CAN NOT REACH THE PIES EN EL PISO, APOYAR EL DERE- GROUND WITH BOTH FEET WHEN...
- Page 97 • • Inclinar la motocicleta hasta que Tilt the motorcycle until the el caballete toque el suelo. stand touch the ground. • • Empuñar correctamente el ma- Grasp the handlebar firmly and nillar y descender del vehículo. get off the vehicle. •...
-
Page 99: El Mantenimiento
Stelvio 1200 8V - Stelvio 1200 NTX Cap. 04 mantenimiento Chap. 04 Maintenance... -
Page 100: Premisa
Guzzi Dealer for prompt and accurate dirigirse a un CONCESIONARIO OFI- service. CIAL Moto Guzzi, en donde se le garan- WARNING tiza un servicio esmerado y rápido. THIS VEHICLE HAS BEEN PROGRAM- ADVERTENCIA MED TO INDICATE IN REAL TIME ANY ESTE VEHÍCULO ESTA PREPARADO... -
Page 101: Control Del Nivel De Aceite Motor
Control del nivel de aceite Engine oil level check (04_01, motor (04_01, 04_02, 04_03) 04_02, 04_03) Controlar periódicamente el nivel de Check the engine oil level regularly; aceite del motor, sustituirlo en los inter- change oil at the specified intervals indi- valos previstos en la tabla de manteni- cated in the maintenance table. -
Page 102: Llenado De Aceite Motor
DESPUÉS DE UN VIAJE O DESPUÉS DE HABER RECORRIDO APROXIMA- DAMENTE 15 Km (10 mi) FUERA DE LA CIUDAD (SUFICIENTES PARA ELEVAR LA TEMPERATURA DEL ACEITE DEL MOTOR). • • Parar el motor. Shut off the engine. • • Mantener el vehículo en posi- Keep the vehicle upright with ción vertical con las dos ruedas both wheels on the ground. - Page 103 ATENCIÓN CAUTION NO SOBREPASAR LA MARCA "MAX" DO NOT GO BEYOND THE "MAX" AND NI DESCENDER POR DEBAJO DE LA BELOW THE "MIN" LEVEL MARK TO MARCA "MIN", PARA EVITAR GRA- AVOID SEVERE ENGINE DAMAGE. VES DAÑOS AL MOTOR. Si es necesario, restablecer el nivel de Fill with engine oil as required: aceite del motor: •...
-
Page 104: Sustitución Aceite Motor
TUCIÓN DEL ACEITE DEL MOTOR Y DEL FILTRO DE ACEITE DEL MOTOR TAKE YOUR VEHICLE TO AN Official PODRÍAN RESULTAR DIFICULTOSAS Moto Guzzi Dealer IF NECESSARY. Y COMPLEJAS PARA PERSONAS INEXPERTAS. IF YOU WISH TO PERFORM THESE OPERATIONS YOURSELF, FOLLOW EN CASO DE NECESIDAD, DIRIGIRSE THESE INSTRUCTIONS. - Page 105 EL MOTOR CALIENTE TIENE ACEITE OIL BECOMES VERY HOT WHEN THE CON ALTA TEMPERATURA, EXTRE- ENGINE IS HOT; BE CAREFUL NOT MAR LOS CUIDADOS PARA NO QUE- TO GET BURNED WHEN CARRYING MARSE DURANTE LAS SIGUIENTES OUT THE OPERATIONS DESCRIBED OPERACIONES.
- Page 106 • • Colocar un recipiente cuya ca- Place a container with +4,000 pacidad supere los 4000 cm3 cm³ (244 cu in) capacity under (244 cu in) en correspondencia the drainage plug (3). • con el tapón de drenaje (3). Unscrew and remove the drain- •...
- Page 107 SUSTITUCIÓN DEL FILTRO DE ACEI- ENGINE OIL FILTER REPLACEMENT TE MOTOR Sustituir el filtro de aceite en cada Change the engine oil filter each time cambio de aceite del motor. you change the engine oil. • • Quitar el filtro de aceite motor Unscrew the engine oil filter (5) (5) desenroscándolo de su alo- from its seat.
-
Page 108: Nivel Aceite Cardán
To top-up or change the oil in the car- ceder al llenado. dan shaft transmission unit, contact Para llenar y eventualmente sustituir an Official Moto Guzzi Dealer. el aceite del grupo transmisión cardá- nica, dirigirse a un Concesionario Ofi- cial Moto Guzzi. -
Page 109: Neumáticos
Neumáticos (04_11, 04_12) Tyres (04_11, 04_12) Este vehículo posee neumáticos sin cá- This vehicle is fitted with tyres without in- mara de aire (Tubeless). ner tubes (Tubeless). ATENCIÓN CAUTION CONTROLAR PERIÓDICAMENTE LA CHECK TYRE INFLATION PRESSURE PRESIÓN DE INFLADO DE LOS NEU- REGULARLY AT AMBIENT TEMPER- MÁTICOS A TEMPERATURA AMBIEN- ATURE. - Page 110 Y POR ÚLTIMO, EL VEHÍCULO PO- SOME TYRE TYPES HOMOLOGATED DRÍA DERRAPAR EN CURVAS. FOR THIS VEHICLE FEATURE WEAR INDICATORS. CONTROLAR EL ESTADO SUPERFI- CIAL Y EL DESGASTE, YA QUE UN THERE ARE SEVERAL TYPES OF ESTADO DEFICIENTE DE LOS NEU- WEAR INDICATORS.
- Page 111 DESPUÉS DE REPARAR UN NEUMÁ- USING THE SPECIFIC TOOLS AND TICO, SE DEBE PROCEDER AL EQUI- WITH THE ADEQUATE KNOWLEDGE. LIBRADO DE LAS RUEDAS. HAVE YOUR TYRES AND WHEELS SERVICED AT AN OFFICIAL DEALER USAR EXCLUSIVAMENTE NEUMÁTI- OR A SPECIALISED TYRE WORK- COS CON LAS DIMENSIONES INDICA- SHOP.
- Page 112 En caso Official Moto Guzzi Dealer to check de tonos bajos dirigirse cuanto antes a un spoke adjustment. Concesionario Oficial Moto Guzzi para...
-
Page 113: Desmontaje Bujía
CIÓN DE LAS BUJÍAS, DIRIGIRSE A THE SPARK PLUGS REFER TO AN Of- UN Concesionario Oficial Moto Guzzi ficial Moto Guzzi Agent OR, IF YOU O, EN CASO DE SER PERSONAS EX- ARE EXPERIENCED AND QUALIFIED, PERTAS Y CALIFICADAS, OBSER-... -
Page 114: Desmontaje Filtro Aire
TROL Y LA SUSTITUCIÓN DEL FIL- PLACE THE AIR FILTER REFER TO TRO DE AIRE, DIRIGIRSE A UN CON- AN Official Moto Guzzi Agent. IF YOU CESIONARIO OFICIAL Moto Guzzi O, ARE ADEQUATELY TRAINED AND EN CASO DE SER PERSONAS EX-... -
Page 115: Llenado Liquido Circuito De Frenos
Braking system fluid top up frenos CAUTION ATENCIÓN FOR TOP-UP OF THE BRAKE FLUID REFER TO AN Official Moto Guzzi PARA LLENAR CON LÍQUIDO LOS Agent OR, IF YOU ARE EXPERIENCED SISTEMAS DE FRENO, DIRIGIRSE A AND QUALIFIED, YOU MAY REFER TO... -
Page 116: Control Líquido Embrague
FOR TOP-UP OF THE CLUTCH FLUID BRAGUE, DIRIGIRSE A UN Concesio- REFER TO AN Official Moto Guzzi nario Oficial Moto Guzzi O, EN CASO Agent OR, IF YOU ARE EXPERIENCED DE SER PERSONAS EXPERTAS Y CA- AND QUALIFIED, YOU MAY REFER TO... -
Page 117: Use Of A New Battery
Puesta en servicio de una Use of a new battery (04_16, batería nueva (04_16, 04_17) 04_17) • • Asegurarse de que el conmuta- Make sure that the ignition dor de arranque esté en la posi- switch is set to "OFF". •... -
Page 118: Comprobacion Del Nivel Del Electrolito
- IN GOOD CONDITION (NOT CORRO- DED OR COVERED BY DEPOSITS); - COVERED BY NEUTRAL GREASE CONTROLAR QUE LOS TERMINALES OR PETROLEUM JELLY. DE LOS CABLES Y LOS BORNES DE LA BATERÍA SE ENCUENTREN: - EN BUENAS CONDICIONES (Y NO CORROÍDOS O CUBIERTOS DE DE- PÓSITO);... -
Page 119: Larga Inactividad
• Conectar la batería al cargador CAUTION de baterías. ATENCIÓN WHEN RECHARGING OR USING THE BATTERY, BE CAREFUL TO HAVE THE ROOM ADEQUATELY AIRED. DO DURANTE LA RECARGA O USO, VEN- NOT BREATH GASES RELEASED TILAR ADECUADAMENTE EL LOCAL, WHEN THE BATTERY IS RECHARG- EVITAR LA INHALACIÓN DE LOS GA- ING. - Page 120 AL CONSUMO DE CORRIENTE DEL TION BY THE MULTIFUNCTION COM- ORDENADOR MULTIFUNCIÓN. PUTER. ATENCIÓN CAUTION EXTRAER LOS FUSIBLES DE 30A IM- REMOVING THE 30 A FUSES RESETS PLICA PONER A CERO LAS FUNCIO- THESE FUNCTIONS: DIGITAL CLOCK, NES: RELOJ DIGITAL, INFORMACIO- TRIP INFORMATION AND CHRONOM- VIAJE MEDICIONES...
-
Page 121: Fusibles
TACT AN Official Guzzi Dealer. EXISTA UN CORTOCIRCUITO O UNA SOBRECARGA. EN ESTE CASO CON- SULTAR UN CONCESIONARIO OFI- CIAL Moto Guzzi. Si se detecta que un componente eléc- Checking the fuses is necessary when- trico no funciona o funciona en forma... - Page 122 Para el control: To check: • • Colocar en 'OFF' el conmutador Set the ignition switch to 'OFF' to de arranque, para evitar un cor- avoid an accidental short circuit. • tocircuito accidental. Open the cover of the secon- • Abrir la tapa de la caja de los fu- dary fuse box on the right side of sibles secundarios ubicada en...
- Page 123 FUSIBLES SECUNDARIOS AUXILIARY FUSES Los fusibles secundarios se encuentran The secondary fuses are located in the en la parte delantera de la motocicleta, front part of the motorcycle, below the in- debajo del tablero, en el lado izquierdo strument panel, on the left side of the del bastidor delantero.
-
Page 124: Bombillas
FUSIBLES PRINCIPALES MAIN FUSES Los fusible principales están situados en The main fuses are located in the central la parte central de la motocicleta, debajo part of the motorcycle, under the rider del asiento del conductor, en el lado de- saddle, on the right side. - Page 125 RA PERMITIR EL ENFRIAMIENTO DE WEAR CLEAN GLOVES OR USE A LA MISMA. CLEAN DRY CLOTH TO REPLACE THE BULB. SUSTITUIR LA BOMBILLA USANDO GUANTES LIMPIOS O USANDO UN DO NOT LEAVE PRINTS ON THE PAÑO LIMPIO Y SECO. BULB AS THIS MAY CAUSE IT TO OVERHEAT OR EVEN BLOW OUT.
- Page 126 • Girar el manillar hacia la izquier- turn the handlebar to the right to da para extraer las bombillas del remove the right headlight bulb. faro izquierdo, girar el manillar hacia la derecha para extraer las bombillas del faro derecho. BOMBILLA DE LUZ DE CRUCE / DE LOW-BEAM HIGH-BEAM...
-
Page 127: Regulación Proyector
BOMBILLA LUZ DE POSICIÓN TAIL LIGHT BULB • • Sujetar el portalámparas de luz Pull out the tail light bulb holder de posición (3), tirar de él y ex- (3) from its seat. • traerlo de su alojamiento. Remove the bulb (4) and re- •... - Page 128 SE DEBEN ADOPTAR PROCEDIMIEN- TOS ESPECÍFICOS. Para realizar un control rápido de la For a quick inspection of the correct orientación correcta del haz luminoso de- aiming of the front light beam: lantero: • Place the vehicle 10 m (32.8 ft) •...
- Page 129 - desenroscando el tornillo (1) el haz lu- minoso sube; Al finalizar la regulación: After adjusting: NOTA NOTE CONTROLAR LA CORRECTA ORIEN- CHECK THAT THE LIGHT BEAM VER- TACIÓN VERTICAL DEL HAZ LUMINO- TICAL DIRECTION IS CORRECT. Para la regulación horizontal del haz In order to carry out horizontal adjust- luminoso: ment of the light beam:...
-
Page 130: Indicadores De Dirección Delanteros
Indicadores de dirección Front direction indicators delanteros (04_30, 04_31, (04_30, 04_31, 04_32) 04_32) CAUTION ATENCIÓN BEFORE REPLACING A BULB, TURN THE IGNITION SWITCH TO «KEY OFF» ANTES DE SUSTITUIR UNA BOMBI- AND WAIT A FEW MINUTES FOR THE LLA, COLOCAR EL INTERRUPTOR DE BULB TO COOL OFF. - Page 131 • • Desconectar el conector (1) Disconnect the connector (1) 04_30 • • Girar el portalámparas (2) un Turn the bulb holder (2) a quar- cuarto de giro en sentido horario ter turn clockwise and remove it. y extraerlo. 04_31 •...
-
Page 132: Faros Adicionales
Faros adicionales Additional light Activación de faros Additional light activation adicionales (04_33) (04_33) Para utilizar los faros adicionales: To use the additional lights: • • colocar el interruptor de encen- set the ignition switch to "ON". • dido en "ON". Turn on the additional lights by •... -
Page 133: Grupo Óptico Trasero
REFER TO AN Official Moto Guzzi BOMBILLA, DIRIGIRSE A UN Conce- Agent OR, IF YOU ARE EXPERIENCED sionario Oficial Moto Guzzi O, EN CA- AND QUALIFIED, YOU MAY REFER TO SO DE SER PERSONAS EXPERTAS Y THE INSTRUCTIONS IN THE WORK-... -
Page 134: Indicadores De Dirección Traseros
EL MISMO Concesionario Oficial Moto Guzzi. Indicadores de dirección Rear turn indicators (04_36, traseros (04_36, 04_37, 04_38) 04_37, 04_38) ATENCIÓN CAUTION ANTES DE SUSTITUIR UNA BOMBI- BEFORE REPLACING A BULB, TURN LLA, COLOCAR EL INTERRUPTOR DE THE IGNITION SWITCH TO «KEY OFF» ARRANQUE EN LA POSICIÓN «OFF»... - Page 135 • • Extraer el asiento del conductor. Remove the passenger seat. • • Desenroscar y sacar los dos tor- Undo and remove the two upper nillos superiores (1). screws (1). • • Desenroscar y sacar los dos tor- Undo and remove the two lower nillos inferiores (2).
-
Page 136: Luz Placa
• Instalar correctamente el conec- tor. Luz placa (04_39) Number plate light (04_39) ESPERAR A QUE EL MOTOR SE EN- ALLOW ENGINE TO COOL OFF. FRÍE COMPLETAMENTE. CAUTION ATENCIÓN DO NOT PULL THE ELECTRICAL CA- PARA EXTRAER EL PORTALÁMPA- BLES WHEN TAKING OUT THE BULB RAS NO JALAR LOS CABLES ELÉC- HOLDER. -
Page 137: Espejos Retrovisores
Espejos retrovisores (04_40, Rear-view mirrors (04_40, 04_41) 04_41) NUNCA CONDUZCA CON LOS ESPE- DO NOT RIDE WITH REAR-VIEW MIR- JOS RETROVISORES GIRADOS IN- RORS INCORRECTLY SET. CORRECTAMENTE. BEFORE RIDING OFF, ALWAYS ASEGURARSE SIEMPRE, ANTES DE MAKE SURE THEY ARE CORRECTLY PARTIR, DE QUE SE ENCUENTREN ADJUSTED TO RIDE. -
Page 138: Freno De Disco Delantero Y Trasero
• • Sacar hacia arriba y extraer el Slide up and remove the com- grupo espejo retrovisor comple- plete rear-view mirror unit. Repeat the procedure to remove the oth- Eventualmente repetir la operación para er rear-view mirror, if necessary. extraer el otro espejo retrovisor. Rear-view mirrors adjustment: Regulación espejos retrovisores: •... - Page 139 CAUTION PRODUCTO DESENGRASANTE DE ALTA CALIDAD. TAKE YOUR VEHICLE TO AN Official Moto Guzzi Dealer TO HAVE THE ATENCIÓN REAR WHEEL REMOVED. PARA EXTRAER LA RUEDA TRASE- RA DIRIGIRSE A UN CONCESIONA- RIO OFICIAL Moto Guzzi. ATENCIÓN CAUTION CONTROLAR EL DESGASTE DE LAS...
-
Page 140: Inactividad Del Vehiculo
Guzzi Dealer to replace all the calliper pastillas de las pinzas del freno, dirigién- pads. dose a un CONCESIONARIO OFICIAL Moto Guzzi. Inactividad del vehiculo Periods of inactivity (04_45) (04_45) Take some measures to avoid the side effects of not using the vehicle. - Page 141 • • Extraer la batería. Store the vehicle in cool, dry • Lavar y secar el vehículo. place, with minimum tempera- • Pasar cera sobre las superficies ture variations and not exposed pintadas. to sun rays. • • Inflar los neumáticos. Wrap and tie a plastic bag •...
-
Page 142: Limpieza Del Vehiculo
NOTA NOTE SACAR LAS BOLSAS PLÁSTICAS DE TAKE THE PLASTIC BAGS OFF THE LOS EXTREMOS DEL SILENCIADOR. EXHAUST PIPE OPENING. • • Descubrir y limpiar el vehículo. Uncover and clean the vehicle. • • Controlar el estado de carga de Check the battery for correct la batería e instalarla. - Page 143 sal, productos químicos anti- icing chemical products on the congelantes en carreteras du- roads in winter). • rante el período invernal). Always clean off any smog and • Se debe dedicar especial aten- pollution residue, tar stains, in- ción para evitar que en la carro- sects, bird droppings, etc.
- Page 144 ATENCIÓN CAUTION ANTES DE LAVAR EL PARABRISAS, AFTER CLEANING YOUR MOTORCY- ABLANDAR LA SUCIEDAD CON UN CLE, BRAKING EFFICIENCY MAY BE POCO DE AGUA. LUEGO LIMPIAR TEMPORARILY AFFECTED DUE TO CON UN PAÑO SUAVE Y HÚMEDO. THE PRESENCE OF WATER ON THE FRICTION SURFACES OF THE BRAK- ATENCIÓN ING CIRCUIT.
- Page 145 agua). Luego enjuagar con abundante greasing detergent, brushes and old agua y secar con una gamuza. Para lim- cloths. Anodised or painted aluminium piar las partes exteriores del motor, utili- parts such as forks, wheel rims, frame, zar detergentes desengrasantes, pince- footrests etc.
- Page 146 ATENCIÓN STEAM JETS DIRECTLY TO THE FOL- LOWING PARTS: WHEEL HUBS, CON- TROLS ON THE RIGHT AND LEFT SIDE OF THE HANDLEBAR, BEAR- NO UTILIZAR AGUA (O LÍQUIDOS) A INGS, BRAKE PUMPS, INSTRUMENTS UNA TEMPERATURA SUPERIOR A AND GAUGES, EXHAUST SILENCER, LOS 40°C (104°F) PARA LA LIMPIEZA IGNITION SWITCH/STEERING LOCK.
- Page 147 SECAR CON CUIDADO EL ASIENTO AL FINALIZAR LA LIMPIEZA. ATENCIÓN NO APLICAR EN EL ASIENTO CERA DE PROTECCIÓN, PARA EVITAR RESBALAMIENTOS. SI SE UTILIZA UN SISTEMA DE LAVA- IF YOU USE A HIGH PRESSURE DO DE ALTA PRESIÓN PARA LIMPIAR WASHING SYSTEM TO CLEAN THE LAS LLANTAS, MANTENER UNA DIS- WHEEL RIMS, KEEP A DISTANCE OF...
-
Page 148: Transporte
04_48 SI EL VEHÍCULO SE UTILIZA EN CA- IF YOU RIDE ALONG ROADS TREA- RRETERAS DONDE SE HAYA ARRO- TED WITH SALT, YOU SHOULD IMME- JADO SAL ES IMPORTANTE LIMPIAR- DIATELY CLEAN YOUR VEHICLE: LO INMEDIATAMENTE: LA SAL TIENE SALT IS HIGHLY CORROSIVE. UN EFECTO MUY CORROSIVO. - Page 149 EN CASO DE AVERÍA NO REMOLCAR EL VEHÍCULO, SINO SOLICITAR LA INTERVENCIÓN DE UN MEDIO DE AU- XILIO.
-
Page 151: Datos Técnicos
Stelvio 1200 8V - Stelvio 1200 NTX Cap. 05 Datos técnicos Chap. 05 Technical data... - Page 152 DIMENSIONES MASA WEIGHT AND DIMENSIONS Longitud máxima (sin accesorios) 2.305 mm (90,75 in) Maximum width (without 2305 mm (90.75 in) accessories) Anchura máxima al manillar 956 mm (37,64 in) Maximum width at handlebar 956 mm (37.64 in) Anchura máxima del vehículo con 1080 mm (42.52 in) accesorios Maximum width of vehicle with...
- Page 153 Diámetro interior/carrera 95 x 81,2 mm (3.74 x 3.20 in) Bore / stroke 95 x 81.2 mm (3.74 x 3.20 in) Cilindrada 1151 cm³ (70 cu in) Engine capacity 1151 cm³ (70 cu.in) Relación de compresión 11: 1 Compression ratio 11 : 1 Arranque Eléctrico...
- Page 154 Difusor diámetro 50 mm (1.97 in) Diffuser diameter: 50 mm (1.97 in) Combustible Gasolina súper plomo, Fuel Premium unleaded petrol, octanaje mínimo 95 (N.O.R.M.) y minimum octane rating 95 (NORM) 85 (N.O.M.M.) and 85 (NOMM) CAPACITIES APACIDAD Aceite motor Cambio de aceite y filtro del aceite Engine oil change filter...
- Page 155 Distancia entre electrodos 0,6 - 0,7 mm (0.024 - 0.028 in) Electrode gap 0.6 - 0.7 mm (0.024 - 0.028 in) Batería 12 V - 18 Ampere/hora Battery 12 V - 18 Ampere/hour Generador (con magneto 12 V - 550 W Alternator (permanent magnet 12 V - 550 W permanente)
- Page 156 Testigo ABS ABS warning light CHASSIS HASIS Tipo Tubular de acero con alto límite de Type high strength tubular steel frame deformación elástica y motor with engine as stressed element autoportante Trail 125 mm (4.92 in) Avance 125 mm (4.92 in) Headstock angle 27°...
- Page 157 FRENOS BRAKES Delantero doble disco flotante de acero inox Front Ø 320-mm (12.6 in) stainless steel diám. 320 mm (12,6 in) pinzas double floating disc, radial callipers radiales pistones with 4 opposed pistons. contrapuestos. Rear Ø 282-mm (11.1 in) stainless steel Trasero disco de acero inox diám.
-
Page 158: Datos
Transmisión final a cardán Final drive with U-joint Relación 12/44 = 1: 3.6667 Ratio 12/44 = 1:3.6667 UEDAS Y EUMÁTICOS Presión sólo con Presión con Rueda Modelo Llanta Medida conductor conductor + pasajero Pirelli Scorpion Trail 110/80 R19 2,5 bar (250 kPa) (36,3 2,5 bar (250 kPa) (36,3 Delantera (de serie) 2,50 x 19"... - Page 159 CON ESTE TIPO DE NEUMÁTICOS LA WITH THIS TYRE TYPE, THE MAXI- VELOCIDAD MÁXIMA PERMITIDA ES MUM SPEED ALLOWED IS 170 km/h DE 170 km/h (105,63 mi) (105.63 mi) ES OBLIGATORIO PEGAR EN EL VE- IT IS MANDATORY TO APPLY THE LA- LOCÍMETRO LA ETIQUETA (QUE SE ONTO SPEEDOMETER...
-
Page 160: Herramientas En Dotación
Herramientas en dotación Kit equipment (05_01) (05_01) The tools supplied are: La dotación de herramientas com- - 4 - 5 mm (0.15 - 0.20 in) L-shaped hex prende: Allen keys (1); - llaves macho hexagonales dobladas 4 - - 10 - 13 mm (0.39 - 0.51 in) double open 5 mm (0.15 - 0.20 in) (1);... -
Page 161: El Mantenimiento Programado
Stelvio 1200 8V - Stelvio 1200 NTX Cap. 06 mantenimiento programado Chap. 06 Programmed maintenance... -
Page 162: Tabla Manutención Programada
For this purpose, Moto Guzzi has formu- lated a series of checks and scheduled A tal fin Moto Guzzi dispuso una serie de services (at the owner's expense), are controles y de intervenciones de mante-... - Page 163 LA MITAD SI EL VEHÍCULO SE UTILI- IN PARTICULAR RAINY OR DUSTY ZA EN ZONAS LLUVIOSAS, POLVO- CONDITIONS, OFF ROAD OR FOR RIENTAS, EN RECORRIDOS ACCI- TRACK USE. DENTADOS O EN CASO DE CONDUC- CIÓN DEPORTIVA. Tabla de mantenimiento periódico Routine maintenance table I: CONTROLAR Y LIMPIAR, REGULAR, I: INSPECT AND CLEAN, ADJUST, LU-...
- Page 164 ABLA DE MANTENIMIENTO PERIÓDICO Km x 1.000 Pernos de fijación bridas de tubos de escape Bujías Carburación en ralentí (CO) Cuerpo de mariposa Caballetes (5) Cables de la transmisión y mandos Correa del alternador Cojinetes de la dirección y juego de la dirección Cojinetes de las ruedas Discos de freno Filtro de aire...
- Page 165 Km x 1.000 Aceite motor Aceite / retenes de aceite horquilla Aceite transmisión final Perno leva embrague (6) Neumáticos - presión/desgaste (1) Revoluciones motor en ralentí Regulación del juego de las válvulas Ruedas Apriete de los bulones Apriete de los bornes de la batería Apriete niples ruedas (1) Sincronización cilindros Articulación estribos (5)
- Page 166 Km x 1.000 Desgaste de las pastillas de freno (1) OUTINE MAINTENANCE TABLE km x 1,000 Exhaust pipe flange bolts Spark plugs Carburetion at idle (CO) Throttle body Stands (5) Transmission cables and controls Alternator belt Steering bearings and steering clearance Wheel bearings Brake discs Air filter...
- Page 167 km x 1,000 Clutch fluid (2) Gearbox oil Engine oil Fork oil / oil seals Final drive oil Clutch lever pin (6) Tyres - pressure / wear (1) Engine idle speed Valve clearance adjustment Wheels Bolts and nuts tightening Battery terminals tightening Wheel nipple tightening (1) Cylinder synchronisation Footrests joint (5)
- Page 168 km x 1,000 Brake pad wear (1) RODUCTOS ACONSEJADOS Producto Denominación Características ENI i-RIDE PG RACING 10W-60 Aceite motor SAE 10W - 60. Como alternativa a los aceites aconsejados, se pueden utilizar aceites de marca con rendimientos iguales o superiores a las especificaciones CCMC G-4 A.P.I.
- Page 169 Producto Denominación Características especificaciones Fluido sintético SAE J1703, NHTSA 116 DOT 4, ISO 4925. ECOMMENDED PRODUCTS Product Description Specifications ENI i-RIDE PG RACING 10W-60 Engine oil SAE 10W - 60. As an alternative to recommended fluids, use top branded oils with performances that meet or exceed the requirements of CCMC G-4 API.
- Page 171 TABLA DE MATERIAS ABS: 52 Datos técnicos: 151 Horquilla: 78 Tablero: 26 Accesorios: 66 Tablero de instrumentos: 26 Aceite cardán: 108 Testigos: 13, 28 Aceite motor: 14, 101, 102, Embrague: 15, 82, 116 Identificación: 65 Amortiguadores: 75 Escape: 86 Intermitentes: 48, 51 Arranque: 52, 84 Espejos: 137 Espejos retrovisores: 137...
- Page 173 TABLE OF CONTENTS Turn indicators: 134 Tyres: 109 ABS: 52 Engine oil: 14, 101, 102, 104 Maintenance: 99, 161, 162 Accessories: 66 Engine stop: 52 Maintenance Table: 162 Advanced functions: 36 Mirrors: 137 Air filter: 114 Warning lights: 13 Fork: 78 Fuel: 11 rear-view mirrors: 137 Battery: 16, 117, 118...
- Page 174 Only by purchasing Moto Guzzi Original Spare Parts will you get a product designed and tested during the bike designing phase. Moto Guzzi Original Spare Parts are subject to systematic quality control procedures so that their reliability and performance over time is guaranteed.
- Page 175 Not all versions/models shown in this publication are available in all countries. The availability of individual versions should be checked with the Official Moto Guzzi sales network. © Copyright 2011- Moto Guzzi. All rights reserved. Reproduction of this publication in whole or in part is prohibited. Moto Guzzi - After sales service.
Need help?
Do you have a question about the Stelvio 1200 8V and is the answer not in the manual?
Questions and answers