Table of Contents
Advertisement
Quick Links
Dear Customer,
Thank you for choosing a Moto Guzzi vehicle.
We have prepared this guide to give you some of the main points and recommendations for using your vehicle. Before you start riding, we
recommend that you read the complete version in all its parts, available only in digital form, accessible via the QRcode on the cover or by
connecting to the website https://manuals.motoguzzi.com.
We recommend that you keep this guide to facilitate consultation and deliver it to the new Owner in the event of sale, as it constitutes an
integral part of the vehicle. Happy reading and enjoy your journey!
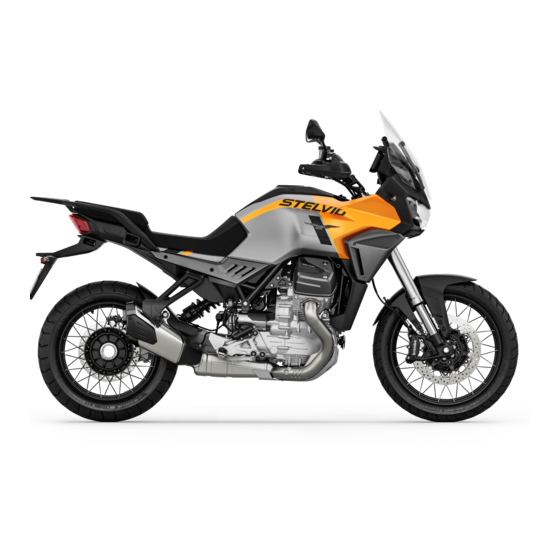
Stelvio
Ed: 01-05_2023 Cod. 2Q000560; 2Q000560QK (EN)
Advertisement
Table of Contents

Subscribe to Our Youtube Channel
Related Manuals for MOTO GUZZI Stelvio 1000 2023


Summary of Contents for MOTO GUZZI Stelvio 1000 2023
- Page 1 Dear Customer, Thank you for choosing a Moto Guzzi vehicle. We have prepared this guide to give you some of the main points and recommendations for using your vehicle. Before you start riding, we recommend that you read the complete version in all its parts, available only in digital form, accessible via the QRcode on the cover or by connecting to the website https://manuals.motoguzzi.com.
- Page 2 The instructions given in this manual are intended to provide a clear and simple guide for using your vehicle. Details are also given of routine maintenance procedures and regular checks which should be carried out on the vehicle by a Moto Guzzi dealer or authorised service centre.
- Page 3 This use and maintenance manual contains paragraphs identified by signal word DANGER, with warnings for avoiding accident or injury, and paragraphs identified by the signal words WARNING and NOTE, with information to help the user avoid improper use of the vehicle and its components.
-
Page 4: Table Of Contents
LIST OF TOPICS HEATED SADDLE CONTROL..........60 GENERAL MANDATORY REQUIREMENTS...... GENERAL SAFETY INSTRUCTIONS........7 STARTER BUTTON..............61 CARBON MONOXIDE............7 ENGINE STOP SWITCH............61 FUEL..................7 RIDING MODE BUTTON............61 HOT PARTS................7 CRUISE CONTROL BUTTON..........61 INDICATOR LAMPS............... 7 THE IMMOBILIZER SYSTEM..........63 COOLANT................ - Page 5 LIST OF TOPICS MAINTENANCE..............TECHNICAL DATA.............. FOREWORD................90 DATA..................109 ENGINE OIL LEVEL............... 90 SPARE PARTS AND ACCESSORIES........ CHECKING THE ENGINE OIL LEVEL........ 90 WARNINGS................113 ENGINE OIL TOP-UP............91 SCHEDULED MAINTENANCE........... ENGINE OIL CHANGE............91 THE VALUE OF SERVICE........... 115 ENGINE OIL FILTER REPLACEMENT........
-
Page 6: General Mandatory Requirements
Stelvio CHAPTER 01 General mandatory requirements... -
Page 7: General Safety Instructions
handling these components, make sure that FUEL USED TO DRIVE EXPLOSION General Safety Instructions you are wearing insulating gloves or wait ENGINES IS HIGHLY INFLAMMABLE until the engine and the exhaust system BECOME EXPLOSIVE have cooled down. UNDER SPECIFIC CONDITIONS. IT Carbon monoxide IS THEREFORE RECOMMENDED TO CARRY... -
Page 8: Coolant
OPEN CONTAINERS WHERE IT MAY DO NOT DISPOSE OF OIL INTO THE BE REACHED AND DRUNK BY AN ENVIRONMENT. ANIMAL. KEEP OUT OF THE REACH OF PERFORM THE MOTOR OIL LEVEL KEEP OUT OF THE REACH OF CHILDREN. CHECK. IF THE INSUFFICIENT MOTOR CHILDREN. -
Page 9: General Precautions And Warnings
THEY COULD IGNITE (E.G. ACID IS COMPATIBLE WITH THE PROTECTIVE FABRICS, JACKET, BATTERY BEING ACTIVATED. ETC.). BATTERY ELECTROLYTE • ENGINE TEMPERATURE General precautions and TOXIC, CORROSIVE AND, IS VERY HIGH, IT IS POSSIBLE CONTAINS SULPHURIC ACID, MAY warnings THAT THE COOLING FAN WILL CAUSE BURNING IF IT COMES INTO CONTINUE TO RUN FOR SEVERAL DANGER OF OVERHEATING... - Page 10 Unless otherwise specified in this Use and Maintenance Manual, do not remove any mechanical or electrical component. WARNING SOME OF THE CONNECTORS ON THE VEHICLE MAY BE ACCIDENTALLY SWAPPED, AND MAY COMPROMISE NORMAL VEHICLE OPERATION AND/ OR CAUSE IRREPARABLE DAMAGE TO PARTS OF THE VEHICLE IF INCORRECTLY INSTALLED.
-
Page 11: Vehicle
Stelvio CHAPTER 02 Vehicle... -
Page 12: Main Components Distribution
Main components distribution... - Page 13 3 . Front left turn indicator 7 . Left rear-view mirror Key for location of main 4 . USB port 8 . Left light switch components 5 . OBD2 port 9 . Fuel tank cap 1 . Headlamp 6 . Instrument cluster 10 .
- Page 14 11 . Air filter 27 . Engine oil load cap with inspection 43 . Front right brake calliper dipstick 12 . Left side fairing 44 . Rear brake oil tank 28 . Horn 13 . Main fuses 45 . Rear brake lever 29 .
-
Page 15: Instrument Cluster
Instrument cluster 4 . Set button (MODE SET); 7 . Low beam / high beam / flash high beam Instrument cluster - Key switch; 5 . Right button (MODE RIGHT); 1 . Audible warning device; 8 . Cruise control selector; 6 . -
Page 16: Digital Instrument Cluster
10 . Neutral indicator light, green; two pre-programmed keys. The dashboard accepts a maximum of four keys at the same 11 . Immobilizer / over-revs indicator lamp, time: contact an Official Moto Guzzi Dealer red. to enable these keys or to disable a key... -
Page 17: Digital Display
If the GUZZI MIA ECU is present, pressing THANKS TO WHICH, BASED ON THE and holding the "MODE RIGHT" button AMBIENT LIGHTING, CAN SWITCH accesses navigation mode. FROM DAY TO NIGHT MODE. Pressing and holding the button changes "HEADLAMP MODE" the digital display mode from ROAD to FUNCTION (SEE... - Page 18 (Where the components are present): tyre hazard icon (displayed ROAD screen key pressure, heated handgrips, heated seat; temperatures from -15 C° (5 F°) a +3 C 1) On-board computer log (TRIP LOG A / ° (37.4 F°)) / Battery warning indicator 2) Riding mode active;...
-
Page 19: Warnings
This message reset once the scheduled maintenance has been 22) Driving in reserve (only when the completed by an authorised Moto Guzzi reserve indicator is on) (displayed in km or Dealer or service centre. mi); 23) General warning icon;... - Page 20 When this light comes on, it indicates that the ABS system has been deactivated by the user. Two levels of ABS deactivation can be selected: ORDER PROTECT ENGINE, THE ELECTRONIC CONTROL ABS only active on the front wheel (the rear UNIT HAS A STRATEGY WHICH, wheel will be without ABS control) IF THE COOLANT TEMPERATURE...
- Page 21 DETECTS A VALID SIGNAL FROM THEREFORE CONTACT AN Official level in the tank exceeds the reserve BOTH SENSORS. THE FLASHING CAN Moto Guzzi Dealer. threshold. LAST UP TO THREE MINUTES. FUEL LEVEL The tank fuel level gauge is represented on the display by a number of bars.
-
Page 22: Alarms
TO PULL OVER . message will be displayed depending on the the rider to go to an Official Moto Guzzi cause. Dealer at a reduced speed. Oil failure... - Page 23 Pop-up area which will turn red. DRIVE CAREFULLY AND CONTACT AN Official Moto Guzzi Dealer AS SOON AS POSSIBLE. Immobilizer alarms For immobilizer alarms, refer the specific paragraph "Immobilizer system operation".
- Page 24 TURN SIGNAL TO INDICATE THAT DRIVE CAREFULLY AND CONTACT AN message "ALARM CAN HLU" accompanied THEY ARE ABOUT TO PULL OVER Official Moto Guzzi Dealer AS SOON by the general warning icon the Pop-up area AS POSSIBLE. AND STOP. which will turn red.
- Page 25 Pop-up that the TPMS control unit must be area will turn red. configured by an Official Moto Guzzi Dealer in order to communicate with the vehicle's control unit. As long as this error is present,...
-
Page 26: Mapping Selection
it will not be possible to display information is less aggressive, the engine brake and regarding the state of the tyres. traction control are set to the intermediate level. The RAIN mode is intended for use on surfaces with poor traction. The engine response is mild, the engine brake is efficient and the traction control is set to the maximum level. -
Page 27: Electronic Controls Of The Vehicle
IN FLASHING MODE ON THE DISPLAY (I.E. MODE IS PRESELECTED ONLY PENDING IMPLEMENTATION BY THE ECU), THE PRESELECTED NEW RIDING MODE WILL NOT BE EFFECTIVELY IMPLEMENTED UNTIL THE THROTTLE GRIP IS RELEASED. IF A NEW RIDING MODE IS SELECTED WHILE THE THROTTLE IS OPEN, THE NEW RIDING MODE REQUESTED WILL To access the Riding Mode setting screen, Using the "MODE UP"... - Page 28 MGCM: Moto Guzzi Engine Control; In all Riding modes the ABS can be set With the ABS deactivated, by pressing and to values 1 (minimum intervention) or 2 holding the Riding mode button or by a "Key MGCT: Moto Guzzi Traction Control;...
- Page 29 THIS OCCURS, CONTACT ABS warning lamp flashes until the vehicle OFFICIAL Moto Guzzi dealer. reaches a speed of 3.1 mph (5 km/h), after which it goes out. ATTENTION WHEN THE ABS STARTS WORKING, A PULSING IS FELT ON THE BRAKE LEVER.
- Page 30 AN ABS SYSTEM, NON-APPROVED MAXIMUM CAUTION AND CONTACT THE VEHICLE IN FRONT OF YOU. BRAKE PADS TYRES AN official Moto Guzzi dealer. COMPROMISE SMOOTH BRAKING, DRASTICALLY REDUCING DRIVING SAFETY. ATTENTION THE ABS SYSTEM USES SIGNALS RECEIVED FROM THE TWO TONE...
- Page 31 0.3 - 2.00 mm (0.012 - 0.079 in) At key-on and after the initial instrument cluster check cycle, the MGCT indicator light MGCM - Moto Guzzi Engine Control flashes slowly if the system has remained is the system that controls and manages the active since the previous use.
- Page 32 SYSTEM, MAXIMUM INTERVENTION OF LEVEL "4". ATTENTION ATTENTION THIS IS ALSO POSSIBLE WITH THE MGCT SYSTEM MOTORCYCLE IN MOTION. BEEN DEACTIVATED, THE POP-UP AREA WILL TURN ORANGE AND THE WORDS "MGCT OFF" WILL IF THE MGCT SYSTEM HAS BEEN SET APPEAR, WARNING RIDER...
- Page 33 MOTORCYCLE IN MOTION. THIS OCCURS, CONTACT MGCT SYSTEM ACTS OFFICIAL Moto Guzzi dealer. THE REAR WHEEL ON THE BASIS OF INFORMATION RECEIVED FROM TONE WHEELS INSTALLED ON BOTH MGCT system warning light key WHEELS. IMPORTANT - Indicator light off: with system activated...
- Page 34 OFFICIAL MOTO GUZZI OR TO DOWNWARD GEAR WHEN THE DEALER. MGQS - Moto Guzzi Quick Shift (if ENGINE RPM IS LESS THAN 2000 rpm, applicable) USE THE CLUTCH. It is a system that allows increasing and decreasing gears without acting on the clutch and without changing the position of the accelerator knob.
-
Page 35: Control Buttons
Multimedia Platform), also access phone CONTROLS. EACH RIDER information and music and media content. PERSONALISE THE LEVELS TO THEIR OWN PREFERENCE IN ACCORDANCE The navigation buttons are as follows: WITH ABILITY, RIDING STYLE AND 1 . MODE SET (select / confirm / press and ROAD CONDITIONS. - Page 36 • E) Tyre pressure info (where provided) When in ROAD mode (*) only, pressing • MGCT (Moto Guzzi Traction Control) • F) Phone information. (if applicable) "MODE RIGHT" briefly repeatedly cycles • G) Music information. (if applicable)
- Page 37 " Guzzi MIA " system via Bluetooth as described later in section"H) Media Information"; • install the "Moto Guzzi" app on your smartphone and access it (can be performed also from the instrument Heated saddles information cluster, without using the application);...
- Page 38 MIA» management: SYSTEM (BT-ROUTER), AUDIO • Accept the incoming call: PRESS AUTOMATICALLY ROUTED TO THE MODE SET BRIEFLY (1) MOTO GUZZI MIA SYSTEM. • Reject incoming call: PRESS AND THERE HEADSET HOLD MODE SET (2) CONNECTED "MOTO • Interrupt outgoing call: PRESS AND GUZZI MIA"...
- Page 39 Information"; dedicated area of the travel log, the current • install the "Moto Guzzi" app on your call and indications for possible operations smartphone and access it (can be will be displayed.
- Page 40 • Next musical track: PRESS MODE UP vehicle equipped with BRIEFLY (2) "MOTO GUZZI MIA" accessory, which communicates with the smartphone via • Previous musical track: PRESS MODE Bluetooth. Using the specific "MOTO DOWN BRIEFLY (3) application installed GUZZI" smartphone, it is possible to exchange data with the vehicle and manage multimedia contents.
- Page 41 SMARTPHONE ICON ON THE DISPLAY. connected to the vehicle in order to using the "Moto Guzzi" app. (This can also correctly use the multimedia functions be performed from the instrument cluster of the system. For this reason, the without using the application).
- Page 42 • turn the ignition key to "OFF" and then to "ON", then wait until the animation on the screen ends; • the display must show the pop up "No connected device"; IT IS RECOMMENDED TO PAIR A • repeat the pairing procedure from the MAXIMUM OF 2 SMARTPHONES AND start.
- Page 43 INTERCOM AND VOCAL COMMANDS MANAGEMENT The "Moto Guzzi" system manages the connection between the intercom and smartphone upon activation by the user. WARNING Pressing MODE briefly again deactivates the connection. The state SAFETY REASONS, "INTERPHONE OFF" is now shown on the...
-
Page 44: Advanced Functions
Then it will be possible to access the The "Vehicle" menu contains the following various infotainment-related messages via options: the MODE UP and MODE DOWN buttons. 1.1) Headlamp mode - where required 1.2) Shift light 1.3) MGQS - where required 1.4) Emergency brake (Brake light) 1.5) Calibration 1.6) Front radar - where required... - Page 45 modes will be displayed cyclically every time shifting, in both directions, without acting on you press the button. the clutch. Auto = Automatic The activation status can be changed by briefly pressing the button. The function will Manual = Manual be cyclically changed by further pressing the Emergency = Emergency;...
- Page 46 Press MODE SET briefly to go back to the main MENU. WHEN THE TEXT "Calibration done To calibrate the MGCT system (Moto Guzzi - Key OFF (60s)" APPEARS ON THE DISPLAY, STOP THE VEHICLE Traction Control) ride along a flat straight...
- Page 47 TYRES OTHER THAN THOSE INDICATED THIS MAINTENANCE BOOKLET USED, OBTAIN SAME PERFORMANCE FROM THE MGCT SYSTEM THE SETTING LEVELS OF THE SYSTEM ITSELF MAY NEED TO BE MODIFIED. Once in the menu, the status of the system Radar enabled with acoustic signals can be set by briefly pressing the MODE...
- Page 48 distance between the vehicle and the In the event of a front radar malfunction, RIGHT button, which will cycle through the approaching object increases, the warnings the pop-up area of the dashboard will two possible statuses: will end. turn orange and the words "Front Radar Radar disabled (OFF): on the dashboard Disabled"...
- Page 49 The "Service" menu contains the following set by default as five zeros (00000) and options: the message "INSERT YOUR PERSONAL CODE" appears on the display for ten 2.1) Change user code seconds when the ignition is switched on. 2.2) Code recovery This function allows you to change the code 2.3 Windshield itself and remove this message.
- Page 50 currently in use. Both keys stored in the • BIG: the top fairing can be adjusted up The functions available in the "Dashboard" vehicle memory are needed to access this to a maximum speed of 150 km/h or 93 menu are described in the following function.
- Page 51 with a brief press on the MODE RIGHT 3.3.1) Speed button. Once the maximum level is reached, This function may be used to change the unit a further press will restart the setting from of measurement used for speed: the minimum value. Keep the MODE RIGHT button pressed to continuously increase the •...
- Page 52 Each "Riding mode" is composed of the "Dashboard" menu. following entries: 3.3.4) Pressure (visible if applicable) MGCM (Moto Guzzi Engine Control) This function is used to change the display MGCT (Moto Guzzi Traction Control) of the tire pressure measurement unit: 3.5) Riding modes language (Riding...
- Page 53 Using the MODE RIGHT button, select the ABS: 1 - 2 (1 = active on front wheel RIDING MODE you want to edit, then use only, 2 = active on both wheels) the MODE UP or MODE DOWN buttons to position on the item of which you want to edit 5) Multimedia and change the intervention level using the...
-
Page 54: Gps Navigation
SETTING DESTINATION Combined with "Moto Guzzi" ADDRESS VIA THE "MOTO GUZZI" application, the "Moto Guzzi MIA" system Press MODE SET briefly to return to the APPLICATION, THE DIGITAL DISPLAY allows the display of GPS indications on "Multimedia" menu. AUTOMATICALLY DISPLAYS the digital display. -
Page 55: Navigation Screen Key
2) Riding mode selected; (Where the Guzzi MIA control unit is Navigation screen key present: telephone, music, media player. 3) Clock (displayed in 24 or 12 hour format, 1) Trip computer log (TRIP LOG A / TRIP without the AM / PM indication); (Where the components are present): LOG B) / Navigation information heated seat, heated handgrips;... -
Page 56: Key Switch
hazard icon (displayed 21) Driving in reserve (only when the Ignition switch temperatures from -15 °F (5 °C) to +3 °F reserve indicator is on) (displayed in km or The ignition switch is on the front of the fuel (37.4 °C)) / Battery alert indicator (voltage mi);... -
Page 57: Engaging The Steering Lock
• Turn the handlebar fully to the left. KEEP THE SPARE KEY IN DIFFERENT PLACE, NOT WITH THE VEHICLE. • Turn the key to «OFF». • Push in the key and turn it anticlockwise (to the left), steer the handlebar slowly LOCK (1): The steering is locked. -
Page 58: High Beam Flash Switch
• pressing the selector into position (1) switches on the high beam headlight • press the selector into position (3) to "HEADLAMP MODE" flash the high beam headlamp to signal FUNCTION (SEE SECTION danger or an emergency. "ADVANCED FUNCTIONS") IS SET TO When the low beam headlights are on (DRL "AUTO"... -
Page 59: Heated Handgrip Control
Once the heated knobs page is reached, it is WHEN THE LOW BEAM HEADLIGHTS possible to activate them by briefly pressing ARE ON (A), THE BRIGHTNESS OF the MODE UP button and then, with further THE DRL LIGHTS (B) IS DIMMED. presses, increase the level of heat intensity. -
Page 60: Heated Saddle Control
THE HEATED GRIPS ARE OFF WITH EACH KEY OFF-ON. ACTIVATION, INTENSITY ADJUSTMENT AND DEACTIVATION Heated saddle control SADDLE HEATING INDEPENDENT BETWEEN THE TWO (if applicable) SADDLES. The heated saddle is switched on, off and the heat level is set using the control When the heating of the saddles is buttons. -
Page 61: Starter Button
Engine stop switch Riding mode button Press this button briefly to change Riding ATTENTION Mode, selecting one of the five available riding modes by rotation, even while riding. EACH OFF-ON KEY SWITCHES THE Only in OFF-ROAD mode and with the SADDLE HEATING OFF. - Page 62 Briefly pressing the cruise control selector The maximum and minimum settable speed switch to the left (pressure less than values depend on the gear currently 1 second) starts the system (change selected from OFF to ON state), the start of the Once at the required speed, the cruise system is indicated by the flashing of control system may be activated by the...
-
Page 63: The Immobilizer System
ONLY PERFORMED observing as usual the previously described For enhanced theft protection, the vehicle Authorised Moto Guzzi Dealer conditions and keeping the selector pressed is equipped with an electronic immobilizer upward (for more than 1 second) if you want DATA... -
Page 64: The Saddle
It is then possible to start the passenger saddle from the lock. motorcycle so you can go immediately to an Authorised Moto Guzzi Dealer. • Once the passenger and rider saddles have been removed, there is access to the vehicle battery (1), the OBD2 socket (2) and the fuse boxes (3). -
Page 65: Usb Port
BEFORE SETTING OFF, MAKE SURE THAT THE SADDLE IS CORRECTLY LOCKED INTO POSITION. USB port The vehicle is equipped with a USB socket, • Keeping the saddle in position, press Refitting the saddles: located on the left side of the fairing, below downward the front part to engage the the instrument cluster. -
Page 66: Obd Socket
The OBD2 socket is located under the Chassis No..... OF THE CABLE TO AVOID THAT IT rider's seat, between the fuse boxes WILL BE SMASHED. WARNING PREVENT WATER AND/OR HUMIDITY FROM DAMAGING THE USB PORT, DO NOT CONNECT ANY ENGINE NUMBER DEVICES IN CASE OF RAIN. -
Page 68: Use
Stelvio CHAPTER 03... -
Page 69: Controls
Lubricate the joints brake lever empty DO NOT HESITATE TO CONTACT and adjust the travel travel brake if necessary. AN Official Moto Guzzi Dealer IF fluid level. Check YOU DO NOT UNDERSTAND HOW leaks. Check Clutch lever SOME CONTROLS WORK OR IF... -
Page 70: Refuelling
AND/OR COMPROMISE ENGINE Pre-ride checks Pre-ride checks PERFORMANCE. cleanliness Side stand Check that damage. slides smoothly and Fuel tank capacity (including reserve) that snaps 20,2 +/- 1,5 l (4.44 +/- 0.33 UK gal; 5.34 +/- back rest Refuelling 0.40 US gal) position upon spring To refuel: Fuel tank reserve 4,5 l (0.99 UK gal;... -
Page 71: Adjusting The Rear Shock Absorbers
The label on each pump dispenser Adjusting the rear shock shows only one value; if for example it absorbers shows E5 it means that the petrol supplied is unleaded, with 5% ethanol. DURING REFUELLING AVOID FUEL The V100 Stelvio's rear shock absorber is LEAKAGES, WHICH CAUSE... -
Page 72: Rear Shock Absorbers Setting
ABSORBERS" CAREFULLY. position after having been compressed. IF NECESSARY, CONTACT AN Official By adjusting the spring pre-load, the seat of Moto Guzzi Dealer. ATTENTION the spring itself is moved. Carrying out the adjustment, you can decrease or increase the stiffness of the spring and therefore... -
Page 73: Front Fork Adjustment
To adjust the rebound (return) braking, use • PRE-LOAD (KNOB) FROM a flat-head screwdriver to turn the adjuster COMPLETELY OPEN (**) CLOSE (*): 1 (2) located at the top of the shock absorber. click • HYDRAULIC BRAKING (ADJUSTER) Turn the adjuster clockwise to increase - FROM COMPLETELY CLOSED (*) braking, or counter-clockwise to decrease OPEN (**): 125 turns... -
Page 74: Setting The Front Fork
TO HAVE THE FRONT FORK OIL AND of the preload adjustment. OIL SEALS REPLACED, CONTACT AN WARNING Official Moto Guzzi Dealer. The front suspension consists of a hydraulic fork connected to the headstock by means WHEN SPRING PRE-LOAD of two plates. -
Page 75: Front Brake Lever Adjustment
FRONT BRAKE LEVER MUST BE REMOVED, CHECKED AND CHANGED BY AN Official Moto Guzzi COUNT NUMBER CASE UNEVEN ROAD Dealership. CLICKS AND/OR REVOLUTIONS OF SURFACES, WITH THE PRESENCE OF ADJUSTMENT SETTINGS ALWAYS POTHOLES AND/OR DEPRESSIONS, Adjusting the rear brake START... -
Page 76: Clutch Lever Adjustment
WARNING TO ADJUST THE BRAKE LEVER CLEARANCE, CONTACT AN Official Moto Guzzi Dealer. CONTACT AN Official Moto Guzzi dealer TO REMOVE AND REPLACE THE CLUTCH LEVER. WARNING WARNING WARNING FOR REMOVAL AND REPLACEMENT OF THE CONTROL PEDAL, CONTACT AN Official Moto Guzzi Dealer. -
Page 77: Engine Starter
TO PREVENT THE RISK OF INJURY TO YOURSELF OR OTHERS AND/OR DAMAGE TO THE VEHICLE, TAKE THE YOUR MOTORCYCLE TO AN FAILURE OBSERVE THIS AUTHORISED Moto Guzzi DEALER AT WARNING COULD LEAD THE SPECIFIED MILEAGE INTERVALS UNCONSCIOUSNESS EVEN TO HAVE THE CHECKS LISTED IN THE DEATH DUE TO SUFFOCATION. -
Page 78: Setting Off And Riding
ENCOUNTERED FAULT, MOTORCYCLE COMPENSATES FOR THEREFORE IT IS NECESSARY TO INCREASED ELECTRIC POWER IF THE LOW FUEL WARNING LIGHT CONTACT AN Authorised Moto Guzzi CONSUMPTION TEMPORARILY ON THE DASHBOARD TURNS ON, Dealer. RAISING IDLE SPEED; REFUEL THE VEHICLE AT ONCE. - Page 79 • Turn on the engine. IF THE LOW FUEL WARNING LIGHT ON THE DASHBOARD TURNS ON, • Adjust the inclination of the rear-view REFUEL THE VEHICLE AT ONCE. mirrors to ensure proper visibility. IF THE MOTORCYCLE TURNS OFF ACCIDENTALLY THE ECU ALLOWS WARNING A RESTART WITHIN THE NEXT 5 SECONDS.
- Page 80 OR THE VEHICLE TO REAR UP ON THE RIDE IN THE CORRECT GEAR AND To slow down: BACK WHEEL. DO NOT ACCELERATE SPEED FOR THE CONDITIONS. DO • Release the throttle grip (Pos. A). SUDDENLY WHEN RELEASING THE NOT OPERATE THE THROTTLE GRIP •...
-
Page 81: Engine Stop
ICE, MUD, ETC.) USE MODERATE ATTENTION SPEED, AVOID SUDDEN BRAKING OR MANOEUVRES THAT MAY CAUSE TO A LOSS OF TRACTION AND POSSIBLY TO A FALL OR CRASH. STOP THE VEHICLE MAINLY USING THE FRONT BRAKE. Engine stop THE REAR BRAKE MUST ONLY BE •... -
Page 82: Catalytic Converter
DO NOT LEAN THE VEHICLE AGAINST DURING REFUELLING AND NEAR A WALL OR LAY IT ON THE GROUND. FUEL VAPOURS, AVOIDING CONTACT WITH NAKED FLAMES, ENSURE THAT THE VEHICLE AND, SPARKS OR OTHER SOURCES WHICH AVOID PARKING THE VEHICLE NEAR IN PARTICULAR, PARTS OF THE DRY BRUSHWOOD OR IN PLACES MAY CAUSE THEM TO IGNITE OR... -
Page 83: Stand
Lean the vehicle until the stand touches If the noise produced by the exhaust system the ground. increases, get immediately in touch with the Dealer or with a Moto Guzzi authorised • Turn the handlebar fully leftwards. repair shop. WARNING... -
Page 84: Theft Prevention Tips
detergent to prevent abrasive particles from theft prevention tips accumulating in the disc ventilation holes and causing accelerated brake pad wear. ATTENTION IN MANY CASES, STOLEN VEHICLES CAN BE IDENTIFIED BY DATA IN THE ATTENTION USE / MAINTENANCE BOOKLET. WHEN USING DISC LOCKING... -
Page 85: Basic Safety Rules
Mounting and dismounting the vehicle SUCH TAMPERING WITH USING ENGINE KEEP should always be performed with total ORIGINAL STRUCTURAL PARTS IS THE MOTORCYCLE STOPPED COULD freedom of movement and with the hands STRICTLY FORBIDDEN LAW, CAUSE THE CLUTCH TO OVERHEAT. free of all objects. - Page 86 USED DURING MOUNTING DISMOUNTING. PASSENGER SHOULD ALWAYS USE THE LEFT THE RIDER SHOULD ALWAYS BE THE FOOTREST FOR MOUNTING AND BEFORE STARTING, MAKE SURE FIRST TO GET ON AND THE LAST DISMOUNTING FROM THE VEHICLE. THAT THE CASES ARE CLOSED TO GET OFF THE VEHICLE AND AND CORRECTLY ATTACHED TO THE DISMOUNT...
- Page 87 LOSS OF BALANCE THE LEFT SIDE IS "PROTECTED" BY THE SIDE STAND) AND KEEP YOUR LEFT FOOT READY TO BE POSITIONED. • Place both feet on the ground and keep the vehicle balanced in the driving position. • Show the passenger how to dismount from the vehicle.
- Page 88 • Correctly grip the handlebar, and dismount from the vehicle. • Turn the handlebar completely to the left. • Place the passenger footrest in its place. ATTENTION CHECK STABILITY VEHICLE.
- Page 89 Stelvio CHAPTER 04 Maintenance...
-
Page 90: Maintenance
THE OIL LEVEL MUST BE CHECKED tools and technical training. For periodic WHEN THE ENGINE IS WARM. maintenance, servicing or technical advice, contact an Official Moto Guzzi Dealer for Engine oil level prompt and accurate service. WARNING Checking the engine oil level Check the engine oil level frequently. -
Page 91: Engine Oil Top-Up
ENGINE OIL LEVEL, CONTACT AN • Remove the cap and dipstick again and THE CARDAN SHAFT TRANSMISSION official Moto Guzzi dealer. UNIT, CONTACT AN Official Moto Guzzi check the engine oil level; Dealer. • The oil level is correct when it close to the "MAX"... - Page 92 HANDLEBAR, THUS REDUCING GRIP THE TYRE IF IT IS WORN OR IF THERE AND ROAD HOLDING SPECIALLY IS A PUNCTURE LARGER THAN 5 mm WHEN CORNERING. (0.197 in) IN THE TREAD AREA. ON THE OTHER HAND, AN UNDER- THE WHEELS MUST BE BALANCED INFLATED TYRE CAUSES...
-
Page 93: Spark Plug Removal
VERY HOT. CONTACT WITH SKIN OR CLOTHES MAY CAUSE SEVERE TO REMOVE, CHECK AND REPLACE BURNS AND/OR INJURIES. THE AIR FILTER, CONTACT AN Official Moto Guzzi Dealer. Checking the coolant Coolant level • Shut off the engine and wait until it cools off. -
Page 94: Top Up Coolant
WARNING not have to be replaced, have the braking If the brake pads and/or brake disc do system checked at an Official Moto Guzzi not have to be replaced, have the braking Dealership. system checked at an Official Moto Guzzi Dealership. -
Page 95: Topping Up Brake Fluid
DOES NOT NEED ANY INTERVENTION, If the fluid does not reach the "MIN" • Make sure the ignition switch is set to EXCEPT FOR SPORADIC CHECKS reference, have the clutch system checked "KEY OFF"; AND RECHARGE. by an Official Moto Guzzi dealer. - Page 96 • Remove the rider saddle; • Remove the two fixing screws (1); • Move the protection cap (5), then WARNING unscrew and remove the screw (6) from the positive terminal (+). • Release the plastic securing the battery • Move the positive lead (7) sideways (2) from its mountings to the tank and away from the battery.
-
Page 97: Prolonged Inactivity
Checking and cleaning terminals and To check: leads • Set the ignition switch to 'OFF' to avoid • Partially remove the battery from its an accidental short circuit; ONCE REMOVED, BATTERY housing. • Remove the passenger saddle and the MUST BE PUT AWAY IN A SAFE PLACE •... - Page 98 Headlamp key-on If there is a problem with the main AUXILIARY FUSES (1) positive fuses, DO NOT replace them, but take your vehicle to an Official Moto Guzzi A) 10A fuse Rear position, horn, G) 3A fuse dealer. Positive key-on...
-
Page 99: Front Light Cluster
25 degree angle when cornering, and only when the low beam is switched on. • When leaning into a right hand turn, TO REMOVE, CHECK AND REPLACE the right hand LED bending assist light FRONT LIGHT ASSEMBLY illuminates (A). LAMPS, CONTACT AN Authorised Moto Guzzi Dealership. -
Page 100: Headlight Adjustment
In order to carry out the vertical Headlight adjustment adjustment of the light beam: Low beam headlamps • Place the vehicle in a vertical position and ensure its stability; • Adjust the adjusting screws (1) and (2), COMPLIANCE WITH LOCAL located under the instrument cluster, LEGAL REQUIREMENTS, SPECIFIC to adjust the left (1) and right (2) low... -
Page 101: Front Turn Indicators
TO REMOVE, CHECK AND REPLACE REAR LIGHT ASSEMBLY, • Loosen the fastening nut (2) by ensuring CONTACT AN Authorised Moto Guzzi that the threaded clamp (3) cannot Once the main-beam headlamp has been Dealership. rotate. correctly adjusted, reinstall the flap (2) and •... -
Page 102: Front And Rear Disc Brake
(2). • Turn the mirror, correctly adjusting the inclination. Repeat the operations for adjusting the rear- TAKE YOUR VEHICLE TO AN Official view mirror on the opposite side. Moto Guzzi Dealer TO HAVE THE FRONT WHEEL REMOVED. ATTENTION... -
Page 103: Vehicle Inactivity
garaging the motorcycle as one can forget PLACE THE VEHICLE ON SUITABLE ATTENTION to do so afterwards. SUPPORTS TO KEEP THE TYRES OFF THE GROUND. Proceed as follows: • Remove the battery. EXCESSIVE WEAR OF THE FRICTION • Wash and dry the motorcycle. ATTENTION MATERIAL MAKES THE PAD METAL •... -
Page 104: Vehicle Cleaning
Vehicle cleaning fluid or bird excrement in general. Moto Guzzi recommends using quality must be removed immediately, otherwise products for cleaning the vehicle. The USE OF HOT WATER INTENSIFIES THE permanent stains on the paint can appear. - Page 105 under the frame can be detected water or AFTER HEAVY RAIN, WASHING OR WARNING dirt. IN CASE OF RAPID TEMPERATURE CHANGES, THE LENSES OF THE Since water outside the headlight will dry FRONT LIGHT ASSEMBLY due to the heat and ventilation during use of BECOME FOGGY.
- Page 106 TEMPORARILY AFFECTED DUE TO WARNING PRESENCE WATER THE FRICTION SURFACES OF THE BRAKING CIRCUIT. ALLOW LONGER BRAKING NEVER USE CLOTHS SOAKED IN DISTANCES PREVENT PETROL, DIESEL OIL OR KEROSENE ACCIDENTS. CLEANING PAINTED BRAKE REPEATEDLY TO RESTORE PLASTIC SURFACES NORMAL OPERATION. DAMAGE LUSTRE FINISH OR ALTER THE MECHANICAL...
-
Page 107: Transport
SOLVENTS A ROAD TREATED WITH SALT: SALT IS PETROL BY-PRODUCTS HIGHLY CORROSIVE. (ACETONE, TRICHLOROETHYLENE, TURPENTINE, PETROL, THINNERS) Transport CLEAN SADDLE. INSTEAD DETERGENTS WITH SURFACE ACTIVE AGENTS ATTENTION EXCEEDING 5% (NEUTRAL SOAP, DEGREASING DETERGENTS ALCOHOL). DRY THE SADDLE WELL AFTER BEFORE TRANSPORTING CLEANING. -
Page 108: Technical Data
Stelvio CHAPTER 05 Technical data... -
Page 109: Data
ENGINE CAPACITY Data Idle engine speed Fuel tank reserve 1400 +/- 100 rpm 4.5 l (0.99 UK gal; DIMENSIONS AND capacity 1.19 US gal) MASS Clutch Multi plate Engine oil clutch with anti- Oil change and oil Maximum Length 2195 mm (86.42 in) judder function. - Page 110 TRANSMISSION SUSPENSION RIMS AND WHEELS Gear ratios, 4th Front Type 22 / 28 = 1 : 1,272 hydraulic telescopic with spokes gear fork, Ø 46 mm (1.81 Front 3.00" x 19" Gear ratios, 5th 24 / 26 = 1: 1,083 gear Travel Rear...
- Page 111 ELECTRICAL SYSTEM INDICATOR LAMPS Fuses MI warning light 40- 30 - 20 - 15 (3) - 10 (2) - 7.5 (6) - 5 Turn indicators (3) - 3 A Permanent magnet Overspeed 12V - 550W alternator threshold / gear shift warning lights BULBS Immobilizer warning light...
-
Page 112: Spare Parts And Accessories
Stelvio CHAPTER 06 Spare parts and accessories... -
Page 113: Warnings
Warnings PIAGGIO GROUP SELLS ITS OWN COMPONENTS, COMPROMISE THE LINE ACCESSORIES, WHICH CORRECT FUNCTIONING OF THE ARE APPROVED FOR USE WITH VEHICLE AND USERS' SAFETY. ATTENTION PIAGGIO VEHICLES AND COVERED PIAGGIO WARRANTY. THEREFORE ESSENTIAL ATTENTION CONTACT A DEALERSHIP OR AN AUTHORISED SERVICE CENTRE IN TO PREVENT ACCIDENTS AND TO ORDER... -
Page 114: Scheduled Maintenance
Stelvio CHAPTER 07 Scheduled maintenance... -
Page 115: The Value Of Service
It is Moto Guzzi products, only Moto Guzzi a good idea to report small performance Official Network mechanics know this anomalies right away to an Authorised... - Page 116 EVERY 12 EVERY 24 Km x 1000 (mi x 1000) 1,5 (0.9) 12 (7.5) 24 (14.9) 36 (22.4) 48 (29.8) 60 (37.3) 72 (44.7) MONTHS MONTHS Steering bearings and steering play Front wheel bearings Diagnosis by tool Brake discs - Pads wear (4) Air filter Engine oil filter...
- Page 117 EVERY 12 EVERY 24 Km x 1000 (mi x 1000) 1,5 (0.9) 12 (7.5) 24 (14.9) 36 (22.4) 48 (29.8) 60 (37.3) 72 (44.7) MONTHS MONTHS Clutch fluid Coolant Fork oil (5) Engine oil (3) Final drive oil Headlight aiming Fork oil seals (1) Tyres - pressure / wear Transmission oil filler...
-
Page 118: Recommended Products
• (1) Replace in case of leaks. • (2) Check every month. • (3) Check every 500 km (310 mi). • (4) Check and clean, adjust or replace if necessary every 1,000 km (621 mi). • (5): Replace at whichever of the following occurs first: 48,000 km (29.8 mi) or 4 years. Recommended products Piaggio Group recommends the use of products from its official partner Castrol for the scheduled maintenance of its vehicles. - Page 119 Product Description Specifications Petroleum jelly neutral grease for battery terminals SAE J 1703; FMVSS 116; ISO 4925; CUNA DOT 4 brake fluid Synthetic brake fluid. NC 956 DOT4...
- Page 120 This publication may not include all versions and variants relating to each individual country. The Moto Guzzi brand is owned by Piaggio & C. S.p.A. ©...
Need help?
Do you have a question about the Stelvio 1000 2023 and is the answer not in the manual?
Questions and answers