Table of Contents
Advertisement
Quick Links
Advertisement
Table of Contents

Related Manuals for SoftBank 102SH


Summary of Contents for SoftBank 102SH
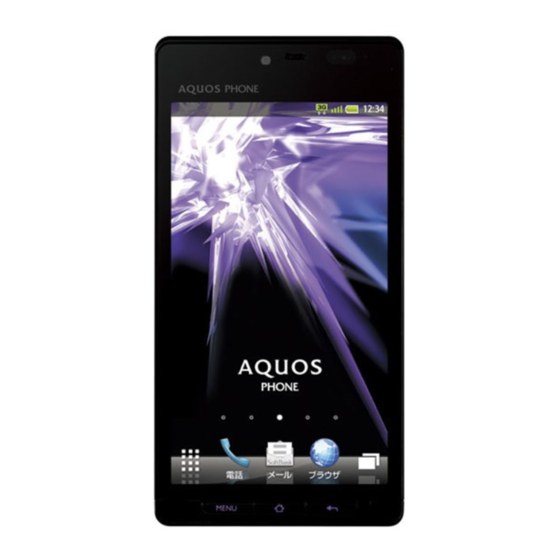
- Page 1 102SH/102SHII User Guide...
-
Page 3: Table Of Contents
Introduction Introduction.................3 Getting Started Package Contents............... 6 Parts & Functions.............. 6 About USIM Card..............7 SD Card................9 Battery Installation............12 102SH/102SHII User Guide Charging Battery.............. 14 Contents Handset Power On/Off............ 15 Using Touch Panel............16 Basic Operations Handset Interface.............20 Applications...............21 My Phone Number............. - Page 4 Still Images & Video............70 Connectivity Connecting to Wi-Fi............72 Using Bluetooth ..............75 ® Global Services Global Roaming..............80 Calling from Outside Japan..........81 Settings Wireless & Network Settings.......... 84 Sound Settings..............86 Application Settings............87 Accounts & Sync Settings..........89 Privacy Setting..............89 Language &...
-
Page 5: Introduction
・SoftBank 102SH and 102SHⅡare compatible with 3G and GSM network technologies. SoftBank 102SH & 102SHⅡ This guide is for SoftBank 102SH and 102SHⅡ. Operation descriptions are for both models unless specified by model name. Guide Usage Notes ・Most operation descriptions are based on default settings. -
Page 7: Getting Started
Getting Started Package Contents............... 6 Parts & Functions.............. 6 About USIM Card..............7 SD Card................9 Battery Installation............12 Charging Battery.............. 14 Handset Power On/Off............ 15 Using Touch Panel............16... -
Page 8: Package Contents
Package Contents Parts & Functions Package Contents Handset Parts ・Handset (SoftBank 102SH/102SHⅡ) ・Battery (SHBED1) ・Micro USB Cable (SHDDL1) ・Micro USB Charging Adapter (SHCDL1) ・Desktop Holder (SHEED1) ・microSDHC Card (complimentary sample) ・クイックスタート (Japanese) ・お願いとご注意 (Japanese) with English "Quick Tips" Name Description ・Warranties (Japanese) for handset and Micro USB Charging... -
Page 9: About Usim Card
About USIM Card USIM Card is an IC card containing customer and authentication information, including handset number. Inserting USIM Card Name Description Power off first. External Capture photos or record video Camera Mobile Remove Battery Cover Use as a flashlight or camera flash Light Extend for One Seg reception Antenna... -
Page 10: Removing Usim Card
Removing USIM Card Secure Tray Power off first. Remove Battery Cover Insert battery ・Hold handset in one hand; with your other hand, use notch ・With recycling symbol up, align battery terminals with below Display to gently remove Battery Cover. contacts. Remove battery Replace Battery Cover ・Use tab (○) to lift battery. -
Page 11: Sd Card
SD Card Insert battery Handset supports SD Card up to 32 GB. However, some SD Cards may not operate properly. Unmounting SD Card ・With recycling symbol up, align battery terminals with contacts. Always perform Unmount microSD before removing SD Card. (Complimentary SD Card preinstalled.) Replace Battery Cover In Home Screen,... - Page 12 Removing SD Card Inserting SD Card Before removing SD Card, always perform Unmount microSD, Power off first. then power off. Remove Battery Cover Remove Battery Cover ・Hold handset in one hand; with your other hand, use notch ・Hold handset in one hand; with your other hand, use notch below Display to gently remove Battery Cover.
- Page 13 Erase microSD Important SD Card Usage Note SD Card files may be lost/altered accidentally. Keep a copy of contacts, etc. in a separate place. SoftBank Mobile is not liable for any damages resulting from accidental loss/ alteration of information. ・Never power off or remove battery while files are being...
-
Page 14: Battery Installation
Battery Installation General Use Keep SD Card out of infants' reach; may cause suffocation Inserting Battery if swallowed. Remove Battery Cover ・Hold handset in one hand; with your other hand, use notch below Display to gently remove Battery Cover. Insert battery ・With recycling symbol up, align battery terminals with contacts. -
Page 15: Removing Battery
Battery Usage Notes Removing Battery General Power off first. Charge battery at least once every six months; uncharged battery may die or affect files/settings. Remove Battery Cover Replacement Replace battery if operating time shortens noticeably. Bulges Depending on usage, bulges may appear near end of battery life;... -
Page 16: Charging Battery
Charging Battery AC Charger Battery must be inserted in handset to charge it. Use Micro USB Charging Adapter with AC Charger ZTDAA1 (sold separately). Desktop Holder ・AC Charger and Micro USB Charging Adapter are not water or dustproofed. Do not charge battery while handset is wet. Use Desktop Holder with AC Charger ZTDAA1 (sold separately). -
Page 17: Handset Power On/Off
・To use Fast transfer mode, install USB Cable driver on the PC beforehand. ・Battery may not charge or charge slowly depending on PC Long Press until SoftBank logo appears status/environment. Battery may not charge if SD Card is not inserted. Open Port Cover and insert Micro USB Cable into External After Power On Graphics, Unlock window appears. -
Page 18: Using Touch Panel
Using Touch Panel Power Off Touch Display to navigate menus, open functions, scroll pages, etc. (Long) Tap item or key to open or execute corresponding function/ operation. Power off Long Touch Touch item for 1+ seconds (handset vibrates) to move icon, open menu, etc. - Page 19 Swipe/Flick Swipe or flick to toggle sheets, pages, etc. Spread & Pinch Spread or pinch to enlarge or reduce images, etc. Calibrating Touch Panel Calibrate Touch Panel to improve response. Hold handset normally during calibration. In Home Screen, Settings About phone Adjust touch panel Tap center of each circle...
-
Page 21: Basic Operations
Basic Operations Handset Interface.............20 Applications...............21 My Phone Number............. 22 Manner Mode & Offline Mode......... 23 Text Entry.................24 Using Google Accounts.............26 Google Play™..............27 Security Codes..............29 USIM PIN................30 Sleep Mode................ 31 Software Update.............. 31... -
Page 22: Handset Interface
Handset Interface Handset Customization In Home Screen, press then tap Settings to change Home Screen & Launcher settings. ・ Checkbox ( ) appears beside some options. Tap to Perform most operations from Home Screen or Launcher. select ( ) or cancel ( ) option. -
Page 23: Applications
Applications Switching Applications Open list of active applications and switch between them. Activating Applications In Home Screen, Launcher, etc., (Long) In Home Screen, Active applications appear. Launcher appears. ・Swipe left/right to toggle lists. Swipe left/right to toggle pages Tap application Application switches. -
Page 24: My Phone Number
My Phone Number Closing Applications In any application, press repeatedly until Home Screen or Confirming Handset Number Launcher returns. (Some applications may remain active.) To select and close applications, follow these steps: In Home Screen, Settings Profile In any application, Profile opens. -
Page 25: Manner Mode & Offline Mode
Manner Mode & Offline Mode Saving User Information to Profile Activating Manner Mode In Home Screen, Settings Profile Mute ringtones and other handset sounds to avoid disturbing others around you. ・Shutter click, video recording tones, etc. still sound even in Manner mode. -
Page 26: Text Entry
Text Entry QWERTY Keyboard Layout Keyboard Basics Use a keyboard to enter characters as follows: 12-Key: Multiple characters assigned to each key. QWERTY and Android: Single letters assigned to each key. ・Tap a text entry field for keyboards. ・ In any keyboard, Long Touch to switch between 12- Key keyboard and QWERTY keyboard. - Page 27 Alphabet Flick Input In 12-Key keyboard, follow these steps to enter Keitai in Half In 12-Key entry, flick key for target character. Alphabet: ・Long Touch a key for guidance; flick toward target character to enter. In a text entry window, appears) Target Operation...
-
Page 28: Using Google Accounts
Using Google Accounts Create Sign in to a Google Account to use Google services. Some applications may be limited or disabled without a Google Account. Creating a New Google Account In Home Screen, Settings Accounts & sync Tap First name field Enter first name Next Enter last name... -
Page 29: Google Play
In Launcher (Basic functions), (Play Store) Sign in Google Play opens. ・If confirmation appears, follow onscreen instructions. ・ (Market) is preinstalled on SoftBank 102SH. Activate (Market) and upgrade to Play Store. Tap free application Download Accept & download Download (installation) starts. -
Page 30: Updating Applications
(due to viruses, etc.). Application Purchase Disclaimer SoftBank Mobile cannot be held liable for any damages to self or others that arise from purchase of applications. Google Play opens. ・If confirmation appears, follow onscreen instructions. -
Page 31: Security Codes
For details, contact SoftBank Customer Support, General Information. ・Do not reveal Handset Code or Center Access Code (Network Password). SoftBank Mobile is not liable for misuse or damages. ・Incoming/outgoing call restriction settings will be locked if incorrect Center Access Code (Network Password) is entered three times consecutively during the setting. -
Page 32: Usim Pin
SoftBank Customer Support, General Information. Entering incorrect PUK Code ten consecutive Locking USIM Card times activates PUK Lock, disabling handset. For recovery, USIM Card must be reissued at a SoftBank Shop (fees apply). In Home Screen, Settings Location & security... -
Page 33: Sleep Mode
Software update starts. Sleep mode is canceled. Before Software Update ・When Security Lock is active, unlock it as well. Always back up important information. SoftBank Mobile cannot be held liable for damages from lost information, Missed Calls & New Messages etc. -
Page 35: Handset Interface
Handset Interface Home Screen Basics............34 Launcher Basics..............35 Status Bar................. 36 Notifications Panel............37 Customizing Home Screen..........38... -
Page 36: Home Screen Basics
Swipe left/right to toggle Home Screen sheets. Home Screen includes multiple sheets. Add shortcuts, widgets ・ From any sheet, press or folders to each sheet. for top sheet. Window Description (SoftBank 102SH) Switching to 3D View Handset status/notifications appear here Use Google Search In Home Screen,... -
Page 37: Launcher Basics
Use Home Screen sheet index to switch, add or delete sheets. Launcher includes multiple pages; add pages as needed. Application layout in Launcher varies between SoftBank 102SH and 102SHⅡ; sample screenshots are based on SoftBank In Home Screen, Sheet list 102SH. -
Page 38: Status Bar
Status Bar Using Launcher Page Index Indicators (new message notification, handset status, etc.) Use Launcher page index to toggle, add or delete pages. appear at the top of Display. In Launcher, Page list Notification Indicators Launcher page index appears. Notification indicators appear on the left. Tap page Indicator Description... -
Page 39: Notifications Panel
Notifications Panel Status Indicators Open notifications, confirm handset status or change various Status indicators appear on the right. settings. Opening Notifications Panel Tap Status Bar Indicator Description Battery Strength Signal Strength No Signal Offline mode Roaming Notifications panel opens. 3G Data in Use ・... -
Page 40: Customizing Home Screen
Customizing Home Screen Select image Set wallpaper Set to wallpaper Set Wallpaper or add shortcuts. Setting Wallpaper In Home Screen, Long Touch open area Wallpaper is set. ・If prompted, follow onscreen instructions. Home settings opens. Wallpaper Live wallpapers Wallpaper gallery ・... -
Page 41: Adding Shortcuts
Managing Shortcuts Adding Shortcuts Moving Shortcuts Follow these steps to add an application shortcut: In Home Screen, Long Touch shortcut Drag it to target location In Home Screen, Long Touch open area Removing Shortcuts In Home Screen, Long Touch shortcut Drag it to (trash) Home settings opens. -
Page 43: Phone
Phone Placing/Answering Calls........... 42 Optional Services..............43 Using Address Book............48... -
Page 44: Placing/Answering Calls
Placing/Answering Calls To end the call, End call See below to dial directly or answer calls. (Handset does not support Video Call.) Placing a Call In Home Screen or Launcher, (Phone) Call ends. ・After calls to/from unsaved numbers, Save to Address Book confirmation appears. -
Page 45: Optional Services
Use these SoftBank Optional Services: Your location is automatically reported to the corresponding agency (police, etc.) when you place emergency calls (110, 119 or 118) with SoftBank 3G handsets. Optional Services ・Registration/transmission fees do not apply. ・Positioning accuracy is affected by location/signal... - Page 46 Initiating Call Forwarding Call Forwarding activates. In Home Screen, Settings Call settings Initiating Voicemail In Home Screen, Settings Call settings Call settings opens. Voicemail/divert Call settings opens. Voicemail/divert Voicemail/divert menu opens. Voicemail/divert menu opens. Settings/stop Divert menu opens. Settings/stop Always No answer Voicemail Divert menu opens.
-
Page 47: Activating Call Waiting
Activating Call Waiting Using Group Calling A separate contract is required. A separate contract is required. In Home Screen, Settings Call settings During a call, Add Call Call settings opens. Enter number Call Other service settings When call connects, More Merge calls All lines connect to each other. -
Page 48: Using Caller Id
Other service settings incorrect Center Access Code (Network Password) is entered three times consecutively during the setting. To resolve, Other service settings opens. the code must be changed. For details, contact SoftBank Customer Support, General Information. ・If you have previously changed Network Password on a... - Page 49 Additional Operations Bar outgoing calls Bar incoming calls Tap option Setting Missed Call Notification Activate this function for records of calls missed when handset is off/out-of-range. Activate Voicemail then follow these steps: In Call settings, Missed calls Settings Call Follow voice guidance Setting Handset Response to Missed Calls In Call settings, Missed calls...
-
Page 50: Using Address Book
Using Address Book Rejecting Calls with No/Undisplayable Caller ID or from Payphones Save contacts including names, phone numbers, mail addresses, etc. In Call barring menu, Reject call Number not sent Payphone Unavailable Adding Contacts In Home Screen, In Launcher (Basic functions), (Address Book) Address Book opens. - Page 51 Important Address Book Usage Note If handset is left with no battery or an exhausted one, contacts may be altered/lost; handset damage may also affect information recovery. SoftBank Mobile is not liable for any resulting damages. Keep separate copies of contacts, etc.
-
Page 53: Messaging & Browser
Messaging & Browser Mail Types................. 52 Sending S! Mail/SMS............52 Receiving & Replying S! Mail/SMS........54 Handling S! Mail/SMS............56 Creating/Sending Gmail............56 Opening Received Gmail........... 57 Using Email................58 Browsing the Internet............60... -
Page 54: Mail Types
Mail Types Sending S! Mail/SMS S! Mail Sending S! Mail Exchange messages with S! Mail-compatible SoftBank handsets Follow these steps to send S! Mail to a number/address saved and e-mail compatible devices (other mobiles, PCs, etc.) in Address Book: beyond SMS character entry limit; attach media files, etc. - Page 55 Sending SMS Tap mail address (or number) Follow these steps to send SMS via sent/received mail records: In Home Screen or Launcher, (Mail) Enter subject Next Enter message Folder list appears. Send Create S! Mail is sent. ・Handset saves failed S! Mail messages to Unsent Folder; automatically attempts redelivery up to two times.
-
Page 56: Receiving & Replying S! Mail/Sms
Receiving & Replying S! Mail/SMS Important S! Mail/SMS Transmission Note Handset receives S! Mail/SMS messages automatically; set message retrieval to manual or retrieve Server Mail as needed. If Outbox is full, handset automatically deletes sent messages, unprotected ones first. Opening New Messages When message arrives, ringtone sounds and appears on Status Bar... -
Page 57: Retrieving Complete Messages
Important Message Retrieval Notes Replying to Messages Retrieval System To reply from message window, skip ahead to By default, complete message including attachments is retrieved; transmission fees may apply depending on subscribed price plan. In Home Screen or Launcher, (Mail) Automatic Message Deletion If Inbox is full, handset automatically deletes oldest received messages, opened/unprotected ones first. -
Page 58: Handling S! Mail/Sms
Handling S! Mail/SMS Creating/Sending Gmail Use Google webmail service. Sign in to a Google Account Opening Messages beforehand. Follow these steps to open received messages: Creating/Sending Messages In Home Screen or Launcher, (Mail) In Home Screen, In Launcher (Basic functions), (Gmail) Folder list appears. -
Page 59: Opening Received Gmail
Opening Received Gmail Gmail Composition Operations Adding Cc/Bcc Recipients Gmail groups all related messages by subject. (Conversation view) In Mail Composition window, Add Cc/Bcc Add recipient Opening New Messages Attaching Files When Gmail message arrives, ringtone sounds and appears. In Mail Composition window, Attach Select file... -
Page 60: Using Email
Using Email Opening Messages Mail Account Setup In Home Screen, In Launcher (Basic functions), (Gmail) Confirm user name (user ID), password, server name, etc. beforehand. In Home Screen, In Launcher (Convenient 2), (Email) Inbox opens. Tap conversation (subject) Account setup menu opens (if no account is set up). Enter mail address and password Next ・... - Page 61 Creating/Sending Messages Opening New Messages When Email message arrives, ringtone sounds and appears. In Home Screen, In Launcher (Convenient 2), (Email) Drag Status Bar down for Notifications panel Inbox opens. Notifications panel opens. ・For multiple accounts, Email window opens. Tap message notification Compose Message window opens.
-
Page 62: Browsing The Internet
Browsing the Internet Opening Messages View Internet sites via Browser. In Home Screen, In Launcher (Convenient 2), Using Browser (Email) In Home Screen or Launcher, (Browser) Inbox opens. ・For multiple accounts, Email window opens. Handset connects to the Internet. ・Flick up/down to scroll. Tap message ・Internet connection confirmation appears upon tapping URL within message text;... -
Page 63: Saving Bookmarks
Saving Bookmarks Opening Bookmarks In Home Screen or Launcher, (Browser) In Home Screen or Launcher, (Browser) Handset connects to the Internet. Handset connects to the Internet. Open target page Bookmarks Bookmarks Tap bookmark Corresponding page opens. Using History In Home Screen or Launcher, (Browser) Bookmarks opens. - Page 64 (eavesdropping, falsification, impersonation, etc.). Browser Operations Signing in to My SoftBank Access My SoftBank to check service charges or reward Handset connects to the Internet. points, change contract details (subscribed price plan, optional services, etc.), customize handset address, use anti-spam settings, and more.
-
Page 65: Camera
Camera Photo Camera..............64 Video Camera..............65 Capturing 3D Images............67... -
Page 66: Photo Camera
Photo Camera Photo Viewfinder Operations Adjusting Brightness Capturing Photos In Photo Viewfinder, drag vertically for Brightness Scale Capture JPEG images. Insert SD Card beforehand. (Captured photos are saved to SD Card.) Adjusting Zoom In Photo Viewfinder, drag horizontally for Zoom Slider In Home Screen, In Launcher (Camera/AV), Locking Focus... -
Page 67: Video Camera
Video Camera Important Camera Usage Note Mind your manners when using Camera. Recording Video Record MPEG-4 or H.264/AAC video. Insert SD Card beforehand. (Recorded videos are saved to SD Card.) ・Available format varies by recording size. In Home Screen, In Launcher (Camera/AV), (Video Camera) Video Viewfinder appears. - Page 68 Video Viewfinder Operations Important Camera Usage Notes Adjusting Brightness General Use Mind your manners when using Camera. In Video Viewfinder, drag vertically for Brightness Scale Continuous Recording Time Adjusting Zoom Recording capacity is 2 GB per file (recording stops when In Video Viewfinder, drag horizontally for Zoom Slider exceeded).
-
Page 69: Capturing 3D Images
Capturing 3D Images Capturing 3D Photos In Home Screen, In Launcher (Camera/AV), (Camera (3D photos)) 3D Photo Viewfinder appears. ・If confirmation appears, follow onscreen instructions. Frame subject on Display Shutter clicks. Move handset to the right Photo is captured when progress bar reaches ;... -
Page 71: Music & Images
Music & Images Music.................. 70 Still Images & Video............70... -
Page 72: Music
Music Still Images & Video View still images and video saved to SD Card; use Slideshow or Playing Music play 2D video in 3D. Supported File Formats: Opening/Playing Files ・3GPP, 3GPP2, MP4, MP3, AMR, WMA, ASF, PIFF, OGG Vorbis, Supported File Formats: WAVE, MIDI, XMF, RTTTL/RTX, OTA, iMelody Image File Format... -
Page 73: Connectivity
Connectivity Connecting to Wi-Fi............72 Using Bluetooth ..............75 ®... -
Page 74: Connecting To Wi-Fi
Connecting to Wi-Fi Connect Use household Wi-Fi networks, etc. to connect to the Internet. Connection is established. Connecting Selected Access Points ・May omit password entry for some access points. ・Password (indicated by WEP, WPA, KEY, etc.) may be found on a label on your wireless LAN router. For details, contact the vendor of your wireless LAN router. -
Page 75: Registering Private Access Points
Registering Private Access Points WPS method Handset supports WPS standard that automatically configures settings for easy Wi-Fi network access upon establishing a connection on handset. In Home Screen, Settings Wireless & networks ・Enter PIN that appears on Display into the access point. Start Access point registration starts. -
Page 76: Using Public Wireless Lan Services
Using Public Wireless LAN Services Tap Login ID field Enter login ID Follow these steps to connect to BB mobilepoint: ・To use public wireless LAN services, subscription with the corresponding ISP, etc. is required. Tap Password field Enter password Done In Home Screen, Settings Wireless &... -
Page 77: Using Bluetooth
Using Bluetooth Wi-Fi Operations ® Connecting Access Points Manually Wirelessly transfer files/data between handset and compatible devices (handsfree devices, etc.). In Wi-Fi settings, Add Wi-Fi network Tap Network SSID field Enter Network SSID Done Activating Bluetooth ® Tap security protocol Done Save ・For some security protocols, complete other fields as... - Page 78 Device Search & Pairing Connecting Paired Bluetooth Devices ® Search for nearby Bluetooth devices and pair them with ® handset; transfer files to/from paired devices. In Home Screen, Settings Wireless & ・Activate Bluetooth and make devices to be paired ® networks discoverable first.
-
Page 79: Troubleshooting
Bluetooth Connection Operations Troubleshooting ® Unpairing Devices Cannot use Bluetooth ® Offline mode may be active. Cancel it to use In Bluetooth settings, Long Touch device Unpair Bluetooth functions. ® Disconnect & unpair Disconnecting Handsfree Devices, Etc. Important Bluetooth Usage Notes ®... -
Page 81: Global Services
Global Services Global Roaming..............80 Calling from Outside Japan..........81... -
Page 82: Global Roaming
Global Roaming Selecting a Network Operator Handset is Global Roaming Service eligible. Use the same Handset connects to an appropriate network operator handset number outside Japan. automatically by default. Follow these steps to select a network operator manually: Switching Network Services Handset connects to 3G Network automatically by default. -
Page 83: Calling From Outside Japan
Calling from Outside Japan Calling Landlines & Mobiles within the Same Country See SoftBank Mobile Website for details: http://mb.softbank.jp/en/global_services/ Access roaming area/rate information or print it out to carry with you while traveling abroad. In Home Screen or Launcher, (Phone) - Page 84 ・ Tap Abroad assistant to toggle Enable ( ) and Disable ( Roaming assistant appears. ・Do not add + before the number. Other country number Country code list appears. Tap country Handset dials the number. Calling SoftBank Handsets Always select 日本(JPN)
-
Page 85: Settings
Settings Wireless & Network Settings.......... 84 Sound Settings..............86 Application Settings............87 Accounts & Sync Settings..........89 Privacy Setting..............89 Language & Keyboard Settings........90 Date & Time Settings............91 About Phone..............92... -
Page 86: Wireless & Network Settings
Wireless & Network Settings Home Network Settings Enabling/Disabling DLNA Device Media File Wireless & Network Settings Sharing In Home Screen, Settings Wireless & Offline Mode networks Home network settings Home network server Disabling/Enabling All Wireless Connections ・ Set up Wi-Fi for home NW server beforehand. -
Page 87: Vpn Settings
Changing Handset Name that Appears on Other Adding Access Points Devices In Home Screen, Settings Wireless & In Home Screen, Settings Wireless & networks Mobile networks Access Point Names networks Bluetooth settings Device name New APN Tap item Complete Enter name setting Done Save... -
Page 88: Sound Settings
Sound Settings Incoming Lamp Setting Incoming Illumination Sound Settings In Home Screen, Settings Sound settings Incoming lamp Blinking pattern Blinking Manner Mode color Tap item Activating Manner Mode Notification Sound In Home Screen, Settings Sound settings Manner mode Tap option Changing Notification Sound In Home Screen, Settings... -
Page 89: Application Settings
Application Settings Audible Selection Enabling/Disabling Tap Sounds Application Settings In Home Screen, Settings Sound settings Audible selection Unknown Sources ・ Tap Audible selection to toggle on ( )/off ( ・ Disable Audible selection to extend Battery Time. Enabling/Disabling Installation of Non-Android Market or Non-Google Play Applications Screen Lock Sounds In Home Screen,... -
Page 90: Manage Applications
Manage Applications Enabling/Disabling Mock Locations Opening Application Properties In Home Screen, Settings Applications In Home Screen, Settings Applications Development Allow mock locations Manage applications Tap application ・ Tap Allow mock locations to toggle on ( )/off ( ・Confirm version/memory usage, uninstall/force-stop application, etc. -
Page 91: Accounts & Sync Settings
Accounts & Sync Settings Privacy Setting Accounts & Sync Settings Privacy Setting Background Data Reset All Enabling/Disabling Automatic Application Data Deleting All Handset Files Transmission in Background In Home Screen, Settings Privacy In Home Screen, Settings Accounts & Reset all Enter Handset Code Read sync... -
Page 92: Language & Keyboard Settings
Language & Keyboard Settings Enabling/Disabling Flick Input In Home Screen, Settings Language & Language & Keyboard Settings keyboard iWnn IME - SH edition Flick input ・Flick Input is to flick key for target character. Select Language ・ Tap Flick input to toggle on ( )/off ( ・... -
Page 93: Date & Time Settings
Date & Time Settings Enabling/Disabling Spelling Correction upon Tapping Letters Date & Time Settings In Home Screen, Settings Language & keyboard Android keyboard Touch to correct Automatic words ・ Tap Touch to correct words to toggle on ( )/off Setting Date Automatically In Home Screen, Settings Date &... -
Page 94: About Phone
Display) appears in details instructions window; tap it for settings. ・Available when a new version of Android operating system is released. Adjust Touch Panel Enabling/Disabling Automatic Update Check (SoftBank 102SH) Calibrating Touch Panel In Home Screen, Settings About phone In Home Screen, Settings... - Page 95 Model Number Confirming Model Number In Home Screen, Settings About phone ・ See below Model number Android Version Confirming Android Operating System Version In Home Screen, Settings About phone ・ See below Android version Baseband Version Confirming Baseband Version In Home Screen, Settings About phone ・...
-
Page 97: Appendix
Appendix Specifications..............96 Customer Service.............. 97... -
Page 98: Specifications
Specifications Battery Item Description Handset Voltage 3.7V Battery Type Lithium-ion Item Description Capacity 1,520 mAh Weight 106 g (137 g with battery) Size (W x H x 45.0 x 57.0 x 5.4 mm (without protruding Continuous 3G: 450 minutes parts) Talk Time GSM: 380 minutes Materials/... -
Page 99: Customer Service
For information about SoftBank handsets or services, contact us at the following numbers. SoftBank Customer Support General Information From a SoftBank handset, dial toll free at 157 From a landline/IP phone, dial toll free at 0800-919-0157 Customer Assistance (Repairs/Lost Handsets) -
Page 101: Safety Precautions
Safety Precautions Safety Precautions............100 Important Product Information........107 Handset & Hardware Care..........109 General Notes..............110 FCC Notice..............112 Specific Absorption Rate (SAR)........113 Water & Dust Resistance..........113... -
Page 102: Safety Precautions
Read Safety Precautions before using handset. Separately) & SD Card Observe precautions to avoid injury to self or others, or damage to property. SoftBank Mobile is not liable for any damages resulting from use of this product. Safety Precautions Use specified battery, Desktop Holder, Micro These labels show degree of risk from improper use;... - Page 103 Do not expose handset or related hardware to hot air from dryers, etc. to dry them or for Do not place handset, battery, Desktop Holder other purposes. Avoid saunas or hot water. or Charger in/on ovens, microwave ovens, pressure cookers, induction stoves or other Battery may leak, overheat, burst or ignite.
- Page 104 Do not dispose of an exhausted battery with Eyes may be severely damaged. ordinary refuse. Tape over battery terminals before disposal. Take battery to a SoftBank Shop, or follow the local disposal regulations.
- Page 105 Handset Power off before boarding aircraft to avoid possible radio wave interference with aircraft operations. If mobile phone use is allowed on board, follow airline or Do not shine Mobile Light in eyes. cabin crew instructions regarding handset use. May temporarily affect eyesight or startle, leading to accidents.
- Page 106 Desktop Holder & AC Charger (Sold Separately) Do not use handset when it may affect a vehicle's electronic equipment. Handset use inside vehicles may cause electronic equipment to malfunction, resulting in accidents. Do not cover/wrap Charger/Desktop Holder while charging. Charger/Desktop Holder may overheat, resulting in fire, malfunction, etc.
- Page 107 Do not touch Charger if thunder is audible. Grasp plug to disconnect Charger before May cause electric shock, etc. cleaning. May cause electric shock, etc. Do not use Desktop Holder inside vehicles. Extreme temperature or vibration may cause fire or damage Always grasp plug (not cord) to disconnect handset, etc.
- Page 108 3D Images Persons with implanted pacemaker/defibrillator should keep handset more than 22 cm away. Radio waves may interfere with implanted pacemakers or Users with a history of photosensitivity, a defibrillators. heart condition or sleep loss/fatigue, under the influence of alcohol, or in poor physical condition for other reasons, should avoid viewing 3D images.
-
Page 109: Important Product Information
SoftBank Customer Support, General Information. personal use. ・SoftBank Mobile is not liable for any damages resulting from accidental loss/alteration of handset/SD Card files or settings. Keep separate copies of contacts, etc. 3D Conversion ・Handset transmissions/One Seg reception may be disrupted inside buildings, tunnels or underground, or when moving into/out of such places. -
Page 110: Bluetooth Function
Bluetooth Function ® Wireless LAN (hereafter "Wi-Fi") uses radio waves to enable SoftBank Mobile is not liable for any damages resulting from communication between compatible devices, thus allowing data/information leakage due to use of handset Bluetooth ® connection to a local area network from anywhere within function. -
Page 111: Handset & Hardware Care
・If handset is left with no battery or an exhausted one, data ・Do not subject Headphone Jack to strong impacts while may be altered/lost. SoftBank Mobile is not liable for any using Headphones with Microphone; water/dust resistance resulting damages. -
Page 112: General Notes
run in the background when Sleep mode is active. (Some Some applications are not installed on SoftBank applications may not run properly when Sleep mode is 102SH/102SHⅡ. active.) Follow these steps to specify applications to ... -
Page 113: European Rf Exposure Information
The guidelines use a unit of measurement known as the Specific Absorption Rate, or SAR. The SAR limit for mobile devices is 2 W/kg and the highest SAR value for 102SH and 102SHⅡ when tested at the ear was 0.486 W/kg*. As... -
Page 114: Fcc Notice
15 of the FCC Rules. These limits are designed to provide model. reasonable protection against harmful interference in a The highest SAR value for 102SH and 102SHⅡ as reported to residential installation. This equipment generates, uses and the FCC when tested for use at the ear is 0.315 W/kg, and can radiate radio frequency energy and, if not installed and when worn on the body in a holder or carry case, is 0.576 W/... -
Page 115: Specific Absorption Rate (Sar)
World Health Organization (WHO). as a phone after being gently submerged to the depth of The highest SAR value is 0.449 W/kg for SoftBank 102SH, and 1 m in still tap water at room temperature, left there for 0.456 W/kg for SoftBank 102SHⅡ. SAR tests were conducted approximately 30 minutes, then removed from it. - Page 116 ・Handset does not float on water. requested parts replacement incurs fees and requires ・Keep handset out of heavy rain. handset submission. For details, contact a SoftBank Shop or ・Do not let liquid-exposed handset remain wet; exposure to SoftBank Customer Support, General Information.
- Page 117 Washing Handset Drying Handset Wipe off dirt, sand, beverage, etc., gently with cloth. Then Dry Headphone Jack, Earpiece, Microphone, Speaker and with Battery Cover closed, hold handset approximately 10 cm Camera window when exposed to water. below faucet or shower head and wash with low-pressure tap water (6 liters/min.
- Page 119 A About Phone..............92 About USIM Card..............7 Accounts & Sync Settings..........89 Applications...............21 Application Settings............87 B 102SH/102SHII User Guide Battery Installation............12 Index Browsing the Internet............60 C Calling from Outside Japan..........81 Capturing 3D Images............67 Charging Battery.............. 14 Connecting to Wi-Fi............72 Creating/Sending Gmail............56...
- Page 120 M V Mail Types................. 52 Video Camera..............65 Manner Mode & Offline Mode......... 23 Music.................. 70 W My Phone Number............. 22 Water & Dust Resistance..........113 Wireless & Network Settings.......... 84 N Notifications Panel............37 O Opening Received Gmail........... 57 Optional Services..............43 P...
- Page 122 SoftBank 102SH/102SHII User Guide July 2012, Second Edition SOFTBANK MOBILE Corp. Visit SoftBank Shop for assistance Model : SoftBank 102SH/102SHII Manufacturer : SHARP CORPORATION...
Need help?
Do you have a question about the 102SH and is the answer not in the manual?
Questions and answers