Leister Uniplan E Operating Instructions Manual
Automatic hot air welding machine
Hide thumbs
Also See for Uniplan E:
- Operating instructions manual (76 pages) ,
- Operating instructions manual (96 pages)
Advertisement
OPERATING INSTRUCTIONS
GB
LEISTER Uniplan E
Automatic hot air welding machine
Read the operating instructions carefully before use and
keep for future reference.
APPLICATION
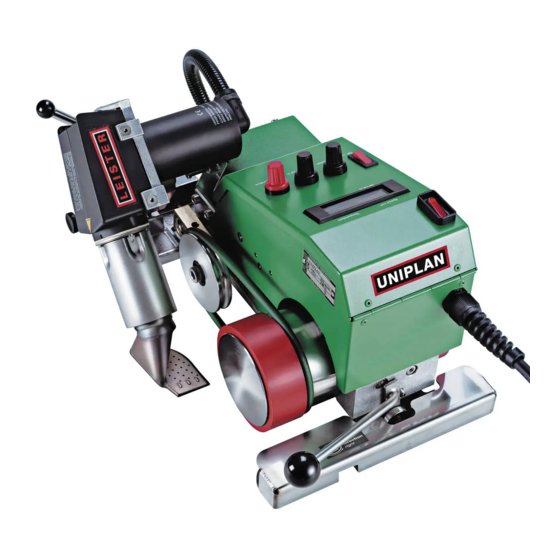
LEISTER Uniplan E
Overlap Automatic Welding Machine
• Overlap and tape welding of coated fabric covers, foils and sealing membranes
made of PVC-P, PE, ECB, CSPE, EPDM, PVDF etc. as well as PE coated tape fabric
for lorries, tents, agricultural covers, building trade, biotopes, swimming pools,
marquees, boat covers, inflatable boats, advertising hoardings etc.
Welding seam width 20 or 30 mm
LEISTER Process Technologies, Riedstrasse, CH-6060 Sarnen / Switzerland
Tel. + 41 41 662 74 74
Fax + 41 41 662 74 16
www.leister.com
sales@leister.com
®
1
Advertisement
Table of Contents

Related Manuals for Leister Uniplan E


Summary of Contents for Leister Uniplan E
-
Page 1: Operating Instructions
Welding seam width 20 or 30 mm LEISTER Process Technologies, Riedstrasse, CH-6060 Sarnen / Switzerland Tel. + 41 41 662 74 74 Fax + 41 41 662 74 16 www.leister.com... -
Page 2: Technical Data
WARNING Danger! Unplug the tool before opening it, as live compo- nents and connections are exposed. Incorrect use of hot air tools can present a fire and explosion hazard, particularly in the proximity of flammable materials and explosive gases. Danger of getting burned! Do not touch the end of the heater tube and nozzle when they are hot. -
Page 3: Tool Description
TOOL DESCRIPTION Overlap 20/30 mm LEISTER Uniplan E 24 23 25 12 Operating components Main components 16. Lifting device lever 1. Housing/chassis 17. Main switch 2. Mains cable 18. Drive switch 3. Hot air blower 19. Potentiometer for welding speed 4. -
Page 4: Operation
OPERATION LEISTER Uniplan E Operational condition • Check the nozzle’s basic setting. (Detail A) • Automatic drive Automatic drive is adjusted as required, depending on nozzle position by means of switch pin (26) and set screw (27). • Guide roller According to the application, the guide roller (25) is set to "active"... -
Page 5: Welding Parameters
Air-Vol % Temperature Accessory additional weight • Assembling additional weight – Attach additional weight holder (29) to the Uniplan E tool by means of cylindrical head screw M8x20 (28). – Put additional weight (30) into additional weight holder (29). Welding process •... -
Page 6: Maintenance
• Have your Service Centre check the motor brushes after about 1,000 hours of operation. • Repairs should only be carried out by authorised LEISTER Service Centres. They guarantee a correct and reliable repair service within 24 hours, using original spare parts in accordance with the circuit diagrams and spare parts lists. - Page 7 ® Service Record LEISTER Uniplan E This document should be handed to the authorised LEISTER Service Centre for updating when repaired or serviced. This document is to be retained and kept by the owner of the tool. Technical Data Automatic hot air welding machine type...
- Page 8 ® LEISTER Process Technologies, Riedstrasse, CH-6060 Sarnen / Switzerland Tel. + 41 41 662 74 74 Fax + 41 41 662 74 16 www.leister.com sales@leister.com...
- Page 9 Automatic Flooring Welding Machine • Welding of PVC coverings and melt welding of linoleum floor coverings. LEISTER Process Technologies, Riedstrasse, CH-6060 Sarnen / Switzerland www.leister.com sales@leister.com Tel. + 41 41 662 74 74 Fax + 41 41 662 74 16...
- Page 10 WARNING Danger! Unplug the tool before opening it, as live compo- nents and connections are exposed. Incorrect use of hot air tools can present a fire and explosion hazard, particularly in the proximity of flammable materials and explosive gases. Danger of getting burned! Do not touch the heater tube and nozzle when they are hot.
- Page 11 ACCESSORIES LEISTER Uniplan S • Assembly of additional weight – Fasten the additional weight holder (22) to the Uniplan S machine with cheese head screw M8×20 (23). – Attach the additional weight (24) to the additional weight holder (22). Additional weight accessories...
- Page 12 TOOL DESCRIPTION Overlap 20/30 mm LEISTER Uniplan S 17 18 19 Main components Operating components 1. Housing/chassis 14. Lifting device lever 2. Mains cable 15. Drive switch 3. Hot air blower 16. Potentiometer for welding speed 4. Welding nozzle 17. Air blower switch 5.
- Page 13 OPERATION LEISTER Uniplan S Operating condition • Check the nozzle’s basic setting (see diagram). • Connect the tool to the mains. The mains voltage must correspond with the voltage rating stated on the tool. Tool positioning • Swivel hot air blower (3) using swivel lever (20) up to the stop.
- Page 14 TOOL DESCRIPTION LEISTER Unifloor S 15 16 17 Main components Operating components 1. Housing 13. Drive switch 2. Mains cable 14. Potentiometer for welding speed 15. Air blower switch 3. Hot air blower 4. Welding nozzle with cover 16. Potentiometer for air temperature 17.
- Page 15 OPERATION LEISTER Unifloor S Operating condition • Check the nozzle setting: the nozzle must maintain a distance from the base material and the welding rod of about 2-3 mm. • When welding linoleum, lower the cover on to the welding nozzle (4) (see Detail A:Page 6).
-
Page 16: Service And Repair
• Have your Service Centre check the motor brushes after about 1,000 hours of operation. • Repairs have to be carried out by authorised LEISTER Service Centres only. They guarantee, within 24 hours, a correct and reliable repair service using original spare parts in accordance with the circuit diagrams and spare parts lists.
Need help?
Do you have a question about the Uniplan E and is the answer not in the manual?
Questions and answers