Stûv 30 Installation Instructions Manual
Hide thumbs
Also See for 30:
- Installation and use manual (64 pages) ,
- Installation & use manual (53 pages) ,
- Installation & directions for use (52 pages)
Table of Contents
Advertisement
Quick Links
zione | instalación | instalação | instalace | installation | installatie | installazione | instalación | instalação |
instalace | installation | installatie | installazione | instalación | instalação | instalace | installation | installatie
| installazione | instalación | instalação | instalace | installation | installatie | installazione | instalación | insta-
lação | instalace | installation | installatie | installazione | instalación | instalação | instalace | installation |
installatie | installazione | instalación | instalação | instalace | installation | installatie | installazione | instala-
ción | instalação | instalace | installation | installatie | installazione | instalación | instalação | instalace |
installation | installatie | installazione | instalación | instalação | instalace | installation | installatie | installa-
zione | instalación | instalação | instalace | installation | installatie | installazione | instalación | instalação |
instalace | installation | installatie | installazione | instalación | instalação | instalace | installation | installatie
| installazione | instalación | instalação | instalace | installation | installatie | installazione | instalación | insta-
lação | instalace | installation | installatie | installazione | instalación | instalação | instalace | installation |
installatie | installazione | instalación | instalação | instalace | installation | installatie | installazione | instala-
ción | instalação | instalace | installation | installatie | installazione | instalación | instalação | instalace |
installation instructions
downloaded from:
www.thestoveyard.com
installation instructions
For ProFESSIoNALS
[en]
Stûv 30
July 2013 – SN 138804 > ...
Advertisement
Table of Contents

Related Manuals for Stûv 30


Summary of Contents for Stûv 30
-
Page 1: Installation Instructions
| installazione | instalación | instalação | instalace | installation | installatie | installazione | instala- ción | instalação | instalace | installation | installatie | installazione | instalación | instalação | instalace | Stûv 30 installation instructions July 2013 – SN 138804 > ... -
Page 2: Table Of Contents
Final positioning of the stove Connection with outside air Levelling the stove Installing the lock for the rotary Stûv 30 Connection to the flue - the various configurations Connection to flue - top exit for fixed hearth Connection to flue - top exit for rotating hearth Connection to the smoke flue –... -
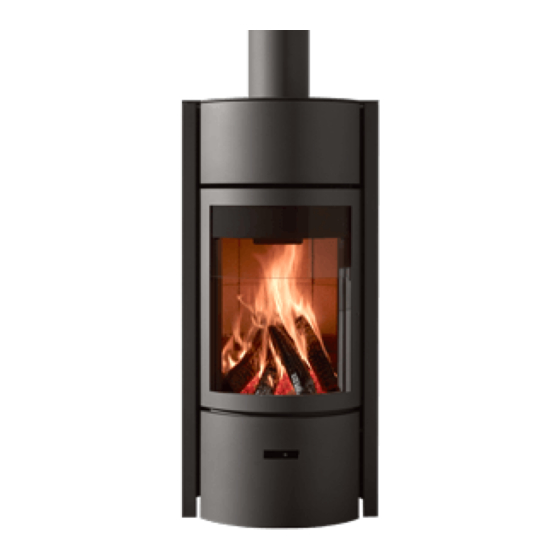
Page 3: Presentation Of The Product
EN 13240 : 2001 and 13240-A2 : 2004 standards (stoves) Stûv 30 stoves are protected by Patent no. 1130323. Stûv sa B-5170 Bois-de-Villers (Belgium) 13 QA131324008 EN 13240 : 2001 / A2 : 2004... - Page 4 Minimum draught needed to obtain the rated calorific output 12 Pa 12 Pa 6 Pa Weight-flow ratio of smokes 8,1 g/s 8,2 g/s 30 g/s Average smoke temperature at rated power 319 °C 331 °C 153 °C Stûv 30 - installation [en] - 07/13 SN 138804 - ...
-
Page 5: Dimensions
[diagram 1/b] can be considerable. Whatever the direction of the rotating stove, ensure safe distances from combustible materials are maintained. * safe distances from combustible materials Stûv 30 - installation [en] - 07/13 SN 138804 - ... - Page 6 Profile view 1160 oval floor plate View from above Floor plate thickness = 2 mm round floor plate View from above Floor plate thickness = 2 mm Ø 1160 Stûv 30 - installation [en] - 07/13 SN 138804 - ...
-
Page 7: Recommendations
(local Any modification made to the system and national) and all standards may be dangerous and will invalidate (national and European). the guarantee. Stûv 30 - installation [en] - 07/13 SN 138804 - ... -
Page 8: Overview
Top smoke exit kit Available in diameter 150 or 180 mm d. Stûv 30.3 rotary kit e. BBQ grille f. Floor plate g. Bottom external air supply h. Top external air supply Stûv 30 - installation [en] - 07/13 SN 138804 - ... -
Page 9: Preparation Of The Area
Careful not to crush the flue. building. max. permitted the ideal solution Length of flue number of elbows The Stûv 30 is designed to be directly 1 m 6 elbows connected to an outside air inlet (independent of the air in the house). 2 m 6 elbows We recommend this set-up. -
Page 10: Smoke Flue
Smoke flue take care to avoid heat loss ! Ensure the flue’s dimensions meet As the Stûv 30 is a highly efficient local regulations and the applicable stove, the smoke flue must be of If several flues are available : only use installation standards in line with good good quality. -
Page 11: Holding Capacity Of The Structure
10 cm tools 10 cm 0,4 x 2,5 ph 2 0,4 x 2,5 10 cm ph 2 6, 8, 10 & 13 10 cm Stûv 30 - installation [en] - 07/13 SN 138804 - ... 10 cm... -
Page 12: Installation
[diagram 2]. If you are unable to transport the stove on its pallet to its final position, please observe the following unpacking instructions. Stûv 30 - installation [en] - 07/13 SN 138804 - ... -
Page 13: Unpacking
[photo 3] supports the stove during handling to avoid putting pressure on the doors or the drum. It is later removed when the stove is moved into its final position. Stûv 30 - installation [en] - 07/13 SN 138804 - ... -
Page 14: Removing The Exterior Parts Of The Stove
[photo 2]. > remove the doors : half open them gently [photo 3], lift them off their hinges and slide them to the left [photo 4]. Stûv 30 - installation [en] - 07/13 SN 138804 - ... - Page 15 (continued) > take of the front > remove the side panels Stûv 30 - installation [en] - 07/13 SN 138804 - ...
-
Page 16: Separating The Hearth From Its Pallet
Separating the hearth from its pallet To release the hearth from the pallet, take out the 6 screws located near the feet of the Stûv 30. Stûv 30 - installation [en] - 07/13 SN 138804 - ... -
Page 17: Removal Of The Contents Of The Combustion Chamber
The stove can now be moved to its final position : tilt the stove onto its front. Note : remember to put a soft protective cloth between the drum ring and the hand-lift truck. Stûv 30 - installation [en] - 07/13 SN 138804 - ... -
Page 18: Connection With Outside Air
48 cm. Cut it if necessary. > Connect the flue to the back of the stove (using 2 M5x6 hexagonal head screws and a size 8 spanner) [photo 6]. Stûv 30 - installation [en] - 07/13 SN 138804 - ... - Page 19 [photo 14]. > Prepare the 2 panels by removing the lower pre-cut part (using a metal saw) [photo 15]. Smooth the panel edges with a half-moon file. Stûv 30 - installation [en] - 07/13 SN 138804 - ...
- Page 20 Connection with outside air (continued) Stûv 30 - installation [en] - 07/13 SN 138804 - ...
-
Page 21: Levelling The Stove
Note ! The holes in the lower ring can be used to fix the stove to the floor [diagram 6]. Please note: We strongly recommend attaching the Stûv 30 stove to the ground. This step ensures the stability of the system. Chemical or mechanical means may be used for attachment. -
Page 22: Installing The Lock For The Rotary Stûv 30
Installing the lock for the rotary Stûv 30 Torx n° Allen n° To be able to fit the lock for the rotary Stûv 30, you must have a vertical smoke exit. Stûv 30 - installation [en] - 07/13 SN 138804 - ... -
Page 23: Connection To The Flue - The Various Configurations
360° 360° 360° option: Rotating platter 360° rear connection (P 26) This connection is not compatible with the rotating platter option. Torx n° Allen n° Stûv 30 - installation [en] - 07/13 SN 138804 - ... Torx n° Allen n°... -
Page 24: Connection To Flue - Top Exit For Fixed Hearth
> Be sure to fit all the screws in the M6X16 top pate in order to prevent leakage of fumes > Check the correct positioning of each seal M6X16 Stûv 30 - installation [en] - 07/13 SN 138804 - ... -
Page 25: Connection To Flue - Top Exit For Rotating Hearth
Connection to flue - top exit for rotating hearth > Check the correct positioning of each seal M6X16 M6X16 M6X16 Stûv 30 - installation [en] - 07/13 SN 138804 - ... -
Page 26: Connection To The Smoke Flue - Back Outlet
Connection to the smoke flue – back outlet > Check the correct positioning of each seal M6X16 M6X16 Stûv 30 - installation [en] - 07/13 SN 138804 - ... -
Page 27: Attachment Of The Smoke Flue
Accessories for the connection to the smoke flue Stûv offers a range of accessories for connecting the Stûv 30 to the smoke flue. – Recessable wall connector [photo 1], – Black duct ; straight and bent [photo 2]. -
Page 28: Directing The Stove
> 270° rotation when the stove is placed in front of a corner or a pillar [diagram 5]. Warning! Note that the stove turns in an off- centre fashion Stûv 30 - installation [en] - 07/13 SN 138804 - ... - Page 29 > 90° rotation : only configuration possible in this case [diagram 7 and photo 8]. Smoke connection at the back [diagram 9] In this configuration, the stove does not turn [diagram 10]. Stûv 30 - installation [en] - 07/13 SN 138804 - ...
- Page 30 (look closely at the photos). Note that the stops can be fitted asymmetrically so that movement is possible in one direction only. 270° Stûv 30 - installation [en] - 07/13 SN 138804 - ...
-
Page 31: Positioning Of The Ground Plate
First position the front section [diagram1] > Add the rear section [diagram2] , lifting it slightly so that the two sections slot together correctly [diagram 3]. Stûv 30 - installation [en] - 07/13 SN 138804 - ... -
Page 32: Final Assembly
- Fit the upper stiffener. Warning! the front screw fits in the hole situated the furthest to the rear, while the rear screw fits in the innermost hole [diagram 9] Stûv 30 - installation [en] - 07/13 SN 138804 - ... - Page 33 Final assembly (continued) > the front [photos 10 & 11]. > the top plate[photo 12 & 13]. > the door of the ash box [photo 14]. Stûv 30 - installation [en] - 07/13 SN 138804 - ...
-
Page 34: Adjusting The Minimum Valve Opening Stop
When the fire is lit for the first time, it “Cleaning between the fixed part may give off some smoke and odours : of the stove and the drum.” ventilate the room well. Consult the instructions for use. Stûv 30 - installation [en] - 07/13 SN 138804 - ... - Page 37 ADDRESS WHERE WORkS WERE CARRIED OUT ........POST CODE .................... TOWN/PLACE ..................COUNTRY ....................INStALLAtIoN ENgINEEr COMPANY ....................Your StûV StoVE 30 SERIAL N° ....................DATE OF INSTALLATION ................ FLuE ChArACtErIStICS HEIGHT OF FLUE IN M ................DIAMETER OF FLUE IN MM ..............
- Page 39 T +372 56 249 004 - www.tulering.ee Peacock trading Estate, Goodwood Rd Slipgatan 2 – 117 39 Stockholm S050 4NT Eastleigh – Hampshire T 0707 883 53 – www.eldoform.se T 0870 727 0105 jetmastersales@aol.com www.jetmaster.co.uk Stûv 30 - installation [en] - 07/13 SN 138804 - ...
- Page 40 This document is available in several languages : accept responsibility for any errors that may have been made. Contact your distributor or visit www.stuv.com Editor: Gérard Pitance – rue Jules Borbouse 4 – 5170 Bois-de-Villers – Belgium 93104551 - installation instructions - 30(13)
Need help?
Do you have a question about the 30 and is the answer not in the manual?
Questions and answers