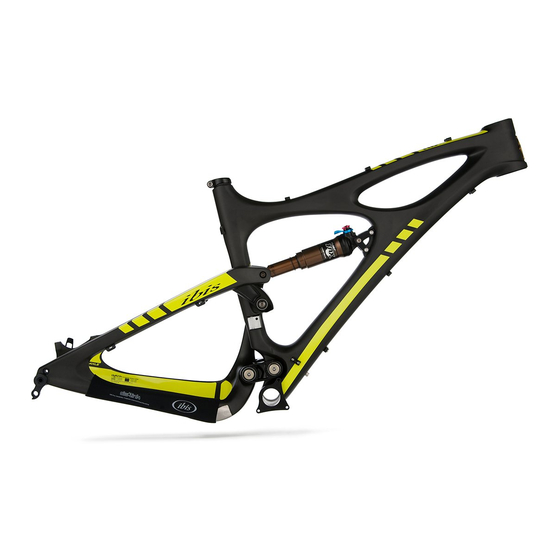
Please utilize a professional level service for these items to get the best performance and enjoyment from your Ibis. This Set-Up Guide is also available online with enhanced functions and additional information: http://tinyurl.com/lput6oh...
Contents Introduction Build Geometry/Quick Specs 4–5 Sizing Guide 6–7 8–15 Cable Routing Chain Guides Front Derailleur Compatibility Chart Bike Setup Tips and Tricks 18–20 Head Angle Chart Ride Fork Setup 22–27 26–27 Fork Air Pressure Chart Rear Shock Set-Up 28–33 Rear Shock Air Pressure Chart 33–35 Maintain...
Page 4
Frame Geometry Chart Size Small Medium Large X-Large Size Small Medium Large X-Large Size Size Small Small Medium Medium Large Large X-large X-Large Size Small Medium Large X-Large Seattube 15” 17” 19” 21” Seattube 15” 17” 19” 21” Seattube Seattube 15”...
Page 5
Frame Geometry Chart Tranny Silk Silk Sl Hakkalügi 26” 700c 700c Size Small Medium Large X-Large Size Size Small Medium Large X-Large Size Small Medium Large X-Large Size Size Size Seattube 15” 17” 19” 21” Seattube Seattube 15” 17” 19” 21”...
Page 8
To keep the cable quiet inside the frame, through the frame before you mount there are a couple methods. The first: the fork. The housing provided in Ibis Install three zip ties on the housing about build kits is a little longer than you an inch apart, so that they will be lo- need and works fine as a pilot.
Page 9
Bike Set-Up Tips and Tricks Ripley Routing...
Page 10
Bike Set-Up Tips and Tricks Ripley Routing pull the housing out of the top tube and the zip ties, use a piece of 7/16” OD, Dice, a clean system to hold all the Rip- through the top of the head tube about 1/4”...
Page 11
Bike Set-Up Tips and Tricks Ripley Routing derailleur cable should be routed on the inside of the clevis. The second tie above or FD casing with that 2nd tie over the the middle of the shock should be used mid shock, as they don’t move with the on the rear derailleur and rear brake suspension.
It’s avail- Ibis is manufacturing a shield for the disconnect the hose to cut down the able in the Ibis store on our website steerer to prevent this steerer rub. lines. If you do not have to cut down or through your Ibis retailer.
Bike Set-Up Tips and Tricks Mojo SL Routing with the stem and upper headset parts removed. If your Ripley does not have one, please contact us and we'll send you one.
Page 14
Bike Set-Up Tips and Tricks Cable Routing Ripley Routing Mojo HDR and Mojo SL-R Routing This information is shown in a video: http://tinyurl.com/qbv9y46...
Page 15
Bike Set-Up Tips and Tricks Cable Routing Mojo HDR and Mojo SL-R Caliper Routing This information is shown in a video: http://tinyurl.com/meaxqa6...
Page 16
Chainrings shifters specific to 3X and 2X. For e*thirteen Cranks on Ripley Mojo HDR SRAM components to shift properly on It has come to our attention that some This information is shown in a video: the e*thirteen crankset, you must use people are experiencing difficulty with http://tinyurl.com/mlsoqla a SRAM 3X front derailleur.
Page 17
Shimano 40/28 Shimano 2x10 Direct Mount (M986-D / M786-D) not E-type Shimano & SRAM 3x10 Shimano & SRAM 3x10 Direct Mount (M981-D / M77110-D / M66110-D) not E-type Mojo SL-R (Direct Mount): SRAM 36/22 SRAM 38/36 High Direct Mount SRAM 38/24...
Page 18
Mojo HDR, Mojo SL-R and Ripley. ers! When in doubt, ride dirty. Thread the chain through the gears...
Page 19
The Mojo SL-R, HDR and Ripley all have come with the frame on the top tube handlebars in place without excessive a 142mm x 12mm Maxle.
Page 20
Bike Set-Up Tips and Tricks Paint There is a protective clear coat applied over the final carbon weave on all of our gloss clear and matte clear frames. You can repair small chips and scratches with clear nail polish (not supplied.) Colored frames are painted with a high quality polyurethane enamel.
51mm offsets, so if you (or rigid (or close to it) for out of the sad- feel sluggish. In order to conserve mo- your retailer) got the from from Ibis, dle efforts or riding on the road. Most mentum and remain compliant the sus- it's got the right offset.
Page 23
‘Righty Tighty, Lefty Loosie’ (same damping from climb mode. And once sion circuit. The Mojo SL-R features the goes for the shock). you set the lever to Trail mode, changing 32mm chassis Velvet RL2 with 140mm...
Page 24
Fork Setup Setting Sag 1. Add recommended air for rider weight (see charts on following pages). With bike on level ground, bounce up and down a bit to over- come stock stiction. Settle into your riding position.
Page 25
Fork Setup Setting Sag 2. Slide o-ring until it rests on wiper, 3. Measure sag–the distance from o-ring to wiper. then dismount without disturbing Start with sag of 15-20% of travel and adjust to o-ring's position. your preference.
Rear Shock Setup Ripley Sag (or ProPedal turned off for earlier See the chart on page 33 to get your shocks), sit on your bike in a normal starting pressure for setting the Rip- riding position. Reach down and ley's sag. Shoot for .45” (~11mm) of slide the o–ring up the shock shaft sag on the shock.
Page 29
Rear Shock Setup Trail mode, changing between soft, bounced off the saddle after a bump Lower Hardware: medium, and firm settings on the or drop (like riding off a curb in the • 40mm wide with an 8mm bore dark outer dial enable you to further saddle.) If the rebound setting is too fine tune the low-speed compression slow the shock will be partially com-...
Page 30
Rear Shock Set-Up Want to go bigger still? We offer the on sticking with the stock Fox 34 CTD we prefer the low compression, medium optional DHX RC4 and the Cane Creek 160 fork, a much larger rear shock will rebound high volume can shock.
Page 31
Rear Shock Set-Up est performance shocks on the market. The reduced surface area provides a very active and supple ride quality while the smaller air canister gives you a progressive spring curve. With adjust- able rebound and lockout adjustment this shock compliments the Ripley’s own capabilities well.
Page 32
Rear Shock Set-Up Tuning the RC4 4) Set the low speed compression tuned by bracketing. Faster, aggres- There is a wide range of adjustment adjuster to control pedaling & corner- sive riders or courses with really big on the RC4 and you can control ing feel.
Page 33
Rear Shock Set-Up way in, raise Boost Valve pressure to going back to re-bracket the bottom max–200psi–and re-test. Conversely out volume adjustment since they are if you’re unable to achieve full travel related. A warning on BV pressure: at the factory spec 160psi with the whatever you do, DO NOT GO BE- bottom out volume adjuster all the LOW 125psi.
Page 34
Shock Setup Starting Pressures for Setting Sag X-Fusion Microlite RL (Ripley) X-Fusion O2 RCX (HDR 26”) 30% Sag 35% Sag 30% Sag 35% Sag RIDER WEIGHT PRESSURE RIDER WEIGHT PRESSURE RIDER WEIGHT PRESSURE RIDER WEIGHT PRESSURE Cane Creek Double Barrel Air CS Base Tune MOJO HDR 160 MOJO HDR 650b ADJUSTMENT...
Page 35
Shock Setup Starting Pressures for Setting Sag X-Fusion O2 RCX (HDR 650b) X-Fusion O2 RCX (SL-R) 30% Sag 35% Sag 35% Sag 30% Sag RIDER WEIGHT PRESSURE RIDER WEIGHT PRESSURE RIDER WEIGHT PRESSURE RIDER WEIGHT PRESSURE...
Page 37
Ibis replacement/ for you. Replacement is super simple and requires these common tools: Ripley Bearing Specs: Eccentric Core Inner Bearings: •...
Page 38
New links with (Enduro P/N 6902 2RS) bearings installed are available in the Ibis webstore as well. The current You can find bearings used on the version of the Mojo SL lower link has Mojo here: been extensively redesigned and http://tinyurl.com/p5sgyuf...
Frame Hardware Mojo HDR i b i s hea d b a d ge m4x 8 b hcs hd c a b l e g u i de hd c a b l e g u i de m 4 r i v nut m 5x8 sh cs l 6 .3 shoc k m ou nt m 5 x 8 s hcs...
Page 41
Frame Hardware Mojo SL seat -binder washer-m6 -imm t shock -reducer-fox -up rpi v i bis-assy-uprlin k p in-upp er-s hockey e m5-lo-shcs -bolt nut-piv-shft-lwr-f t bolt- bu tton-m8 b olt-m8x60-shc s shaft-pivot-lower-f t m6-p in-lwrlnk-s a ib is-assy-lwrlin k lwrlink-m6 -was her chainsuck-plat e...
Page 42
Frame Hardware Mojo SL-R was he r- m6- i mmt s e at-b inder n u t- p i v -s h ft - l wr -ft ib is -a s s y - u pr l i nk pi n- uppe r-s hockey e...
Page 43
Frame Hardware Ripley w a s h e r - 1 0 x 5 m 5 x8 b h c s 4 2x30 x7 be a r in g lo we r le ft e cc co re c a p m 8x8 fh cs p i n u p p e r s h o c k e ye 69 8 bearin g...
Ripley Swingarm Removal This information is shown in a video: http://tinyurl.com/n8f9o4p Step 1 Step 2 Put your Ripley in a work stand. Remove both of the eccentric core Remove the front derailleur, bolts using 6mm allen wrenches. cranks, brakes and the rear wheel. Remove the upper shock bolts (4mm Allen) and lower clevis bolts (5mm).
Page 47
Ripley Swingarm Removal Step 4 Step 3 Gently remove the cap, and then you Remove the countersunk bolt from will be able to push the eccentric core each eccentric core cap. You might out of the frame. need to use a 12mm open end wrench to prevent the eccentric from rotating.
Page 48
To reinstall the swingarm, work in the Instructions on removal and re-instal- reverse order. Add grease to the core lation of the bearings using the Ibis when reinstalling, and a lightly grease Clemens Tool (drawing to the right) the inner lip of the eccentric cap. Don't...
Page 49
Ripley Swingarm Removal zontal and at the 9 o'clock position when the frame is parallel with the ground. Gently slide the swingarm onto the ec- centrics. Insert the swingarm bolts, lower bolt from the non drive side, upper from the drive side. The conehead nut goes on the lower bolt, on the drive side.
Page 50
Mojo Swingarm Removal Step 1 Step 2 Step 3 Put your freshly cleaned Mojo in a Using a 5mm Allen wrench, Remove the upper link from the front work stand. Remove the front derail- remove all four 5mm bolts that hold triangle.
Page 51
Mojo Swingarm Removal Step 4 Step 5 Step 6 Next, remove the axle in the lower link Remove this main pivot axle. Remove the axle in the lower link that that passes through the front triangle Pull the swingarm and the lower passes through the swingarm using with two 6mm Allen wrenches.
(800) FOX-SHOX / 369-7469 Ibis Cycles will make replacement parts service@foxracingshox.com available at a minimum charge to the Ibis Cycles warrants Ibis frames to be free For International Warranty Service: from defects in materials and workman- original owner. Ibis Cycles does this at...
Page 53
Documentation Rider Info. Bike Info. Nearest Ibis Dealer Name Model Name Address Paint Color Address Ft. Triangle Serial Number Tel. No. Service Manager Swingarm Serial Number Email Tel. No. Fork Settings Shock Settings First Ride on the New Rig: Route...
Chuck’s Recipe Impress your Riding Buddies with 3. Combine almond butter, brown Chuck’s Homemade Energy Bars sugar and corn syrup (or honey) in a large microwaveable bowl; Ingredients microwave on High until bubbling, 1 to 2 minutes. Add vanilla and stir •...
Contact Info Contact Information Toll Free (formerly called an 800 number but all 800’s are used up we guess) 1–866–424–7635 (1–866–IBIS–635) Not Toll Free (unless maybe you’re at work) 1–831–461–1435 (Or if you’re all fancy and internationally savvy: +1–831–461–1435) Electronic Mail (sometimes referred to as “email”) askchuck@ibiscycles.com...
Page 56
Alphabetical Index Air Can Volume Reducer Kit Method Man Airstream 2–3 MRP Guides Bearing Specs, Mojo Opinions Bearing Specs, Ripley Peanut Butter Wrench Beer Rear Shock Air Pressure Chart Bird's Eye View Rear Shock Tuning 28-35 Bottle Cage Rebounding from a bad relationship Cable Routing 8–15 RC4 Tuning...
Page 57
Video Index Ripley Cable Routing Mojo HDR Chain Guide Installation This information is shown in a video: http://tinyurl.com/qbv9y46 http://tinyurl.com/mlsoqla http://tinyurl.com/kveevrf Cable Routing for Mojo HDR and SL-R Balance That Thing Ripley BB http://tinyurl.com/pt8msdr http://tinyurl.com/ksp43lj http://tinyurl.com/pfu3xey Cable Routing Mojo HDR Working on Ripley Replacing the Eccentric Link (and Mojo HD): http://tinyurl.com/k93bkm3...
Need help?
Do you have a question about the Mojo SL-R and is the answer not in the manual?
Questions and answers