
Related Manuals for Quantum Rehab 1650


Summary of Contents for Quantum Rehab 1650
- Page 1 21 Healey Road, Dandenong, 3175, Victoria Australia www.quantumrehab.com ACN# 088 609 661...
- Page 2 Performing a prohibited action can cause injury to personnel and/ or damage to equipment (black symbol with red circle and red slash). NOTE: Supplemental information that may be helpful to operate the equipment. 088 609 661 Copyright © 2004 Pride Mobility Products Corp. INFMANU2544 www.pridemobility.com Quantum 1650/RevA/Jan04...
-
Page 3: Table Of Contents
T A B L E C O N T E N T S INTRODUCTION..........................4 SAFETY ..............................5 III. THE QUANTUM 1650........................14 IV. ASSEMBLY............................20 COMFORT ADJUSTMENTS......................21 VI. BATTERIES AND CHARGING ....................25 VII. OPERATION ............................28 VIII. CARE AND MAINTENANCE ......................31 IX. -
Page 4: Introduction
We want to hear your questions, comments, and suggestions about this manual. We would also like to hear about the safety and reliability of your new power chair, and about the service you received from your Quantum Rehab Specialist. Please notify us of any change of address, so we can keep you apprised of important information about safety, new products, and new options that can increase your ability to use and enjoy your power chair. - Page 5 T = Terminal Post Connect Red wire to T with + Connect Black wire to T with – Two (2) Battery Configuration: T = Terminal Post Connect Red wire to T with + Connect Black wire to T with – Quantum 1650/RevA/Jan04 www.pridemobility.com...
- Page 6 3-pronged adapter to an electrical outlet having 2-pronged plug access. Failure to heed could result in personal injury and/or property damage. Prevent personal injury and equipment damage. Do not connect an extension cord to the AC/DC converter or the battery charger. www.pridemobility.com Quantum 1650/RevA/Jan04...
- Page 7 Pride has designed and engineered your power chair to provide maximum mobility and utility. A wide range of accessories is available from your Quantum Rehab Specialist to further customise your power chair to better suit your needs and/or preferences. However, under no circumstances should you modify, add, remove, or disable any feature, part, or function of your power chair.
-
Page 8: Weight Limitations
WARNING! When on any sort of an incline or decline, never place the power chair in freewheel mode while seated on it or standing next to it. Doing so may result in personal injury and/or damage to your power chair. WARNING! Never travel down an incline rearwards. This may result in personal injury. www.pridemobility.com Quantum 1650/RevA/Jan04... - Page 9 Reduce your power chair’s speed when driving on uneven terrain and/or soft surfaces. n Avoid tall grass that can entangle the running gear. n Avoid loosely packed gravel and sand. n If you feel unsure about a driving surface, avoid that surface. Quantum 1650/RevA/Jan04 www.pridemobility.com...
- Page 10 Your power chair is equipped with a manual freewheel system to allow for manual maneuverability by a trained attendant. For more information about how to place your power chair into and out of freewheel mode, see III. “The Quantum 1650.”...
-
Page 11: Motor Vehicle Transport
Turn the power off. See VII. “Operation.” n Ensure your power chair is not in freewheel mode. See III. “The Quantum 1650.” n Turn both caster wheels toward the transfer destination to improve power chair stability during transfer. -
Page 12: Positioning Belts
Positioning Belts Your Quantum Rehab Specialist, therapist(s), and other healthcare professionals are responsible for determining your requirement for a positioning belt in order to operate your power chair safely. WARNING! If you require a positioning belt to safely operate your power chair, make sure it is fastened securely. - Page 13 NOTE: For further information on EMI/RFI, go to www.pridemobility.com. If unintended motion or brake release occurs, turn the power chair off as soon as it is safe to do so. Quantum 1650/RevA/Jan04 www.pridemobility.com...
-
Page 14: The Quantum 1650
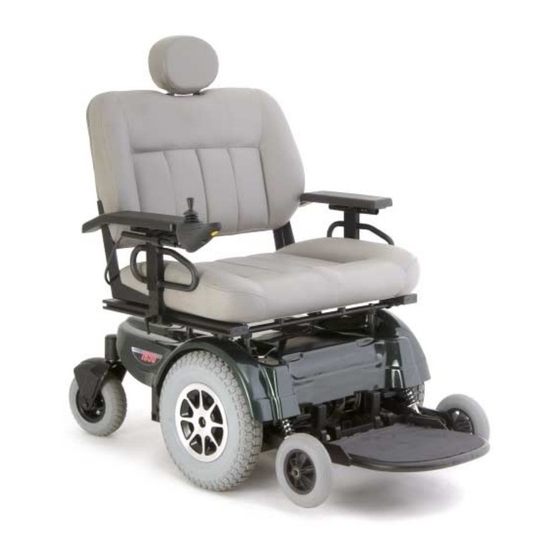
THE QUANTUM 1650 The Quantum 1650 has two main assemblies: the seat and the power base. See figures 5 and 6. Typically, the seat assembly includes the armrests, seatback, and seat base. The seat may also have some optional accessories attached to it, such as a rear basket, a cane and crutch holder, or a cup holder. - Page 15 T H E Q U A N T U M 1 6 5 0 SEAT RECEIVER REMOTE PLUS CONNECTOR SEAT RECEIVER SEAT RECEIVER FOOT PLATFORM SEAT RECEIVER FREEWHEEL LEVER FREEWHEEL LEVER Figure 6. The Quantum 1650 Power Base Quantum 1650/RevA/Jan04 www.pridemobility.com...
- Page 16 295 kg Power Chair Weights: Base: 81 kg Seat: 29 kg Batteries: 24 kg each (Group 24), 17 kg each (NF-22) *Contact your Quantum Rehab Specialist for extended range package installation information. **Depends on user weight and terrain. www.pridemobility.com Quantum 1650/RevA/Jan04...
- Page 17 The standard battery package has two battery connectors. The extended range package has four battery connectors. THERMAL FUSE BATTERY CONNECTORS POWER MODULE MOTORS BATTERY CONNECTORS POWER BASE FRAME Figure 7. Quantum 1650 Electrical Components (4-battery configuration shown) Quantum 1650/RevA/Jan04 www.pridemobility.com...
- Page 18 1 6 5 0 MANUAL FREEWHEEL LEVERS The Quantum 1650 has a manual freewheel lever on each motor. Manual freewheel levers enable you to disengage the drive motors from the gearboxes and maneuver the chair manually. WARNING! Do not use the power chair while the drive motors are disengaged! Do not disengage...
- Page 19 WARNING! Do not attempt to use either manual park brake levers to stop your power chair. Serious injury may result. WHEEL WHEEL MOTOR MOTOR MANUAL PARK BRAKE MANUAL PARK BRAKE Figure 8a. Manual Park Brake Engaged Figure 8b. Manual Park Brake Disengaged Quantum 1650/RevA/Jan04 www.pridemobility.com...
-
Page 20: Assembly
SEAT INSTALLATION The Quantum 1650 seat is attached to the power base by four seat pins. Each pin is inserted into a receiver on the power base frame. The seat pins have holes that enable you to adjust the seat height. Ball detent pins are inserted through the receiver and through the seat pins to secure the seat WARNING! Do not pick up the seat frame by the armrests. -
Page 21: Comfort Adjustments
If your power chair is equipped with a high-back seat, refer to the following information. WARNING! If your power chair was configured by your Quantum Rehab Specialist, please consult your healthcare professional before changing the seat position or making any other adjustment. Some adjustments may degrade your power chair’s performance and safety by changing its center of gravity. -
Page 22: Armrest Height Adjustment
You can position the controller for either left-hand or right- hand use. WARNING! Do not place the controller cable so that it can be pinched in the seat frame or the power base frame. Figure 12. Armrest Height Adjustment www.pridemobility.com Quantum 1650/RevA/Jan04... - Page 23 LEG REST ADJUSTMENT SCREWS 3. Align the adjustment holes in the leg rest hanger with those in the side rail. 4. Reinstall the adjustment bolt to secure the leg rest hanger. Figure 15. Heavy Duty Drop-In Leg Rests Quantum 1650/RevA/Jan04 www.pridemobility.com...
- Page 24 The anti-tip wheels constantly rub the ground. WARNING! Consult your Quantum Rehab Specialist before attempting to change the anti-tip wheel height! Changing the anti-tip wheel height affects handling under acceleration! WARNING! The higher you raise the anti-tip wheels, the more you increase your power chair’s tendency to tilt forward while decelerating.
-
Page 25: Batteries And Charging
Wash hands after handling. Charging the Batteries The battery charger is essential in providing long life for your Quantum 1650 batteries. The battery charger is designed to optimise your Quantum 1650’s performance by charging the batteries safely, quickly, and easily. Quantum 1650 power chairs use an off-board charger to charge the batteries. - Page 26 NOTE: Your power chair’s charger will not operate after the batteries have been discharged to nearly zero voltage. If this happens, call your Quantum Rehab Specialist for assistance. n Daily Use If you use your power chair on a daily basis, charge the batteries as soon as you are finished using your power chair.
- Page 27 Battery Disposal and Recycling If you encounter a damaged or cracked battery, immediately enclose it in a plastic bag and call your Quantum Rehab Specialist for instructions on disposal. Your Quantum Rehab Specialist will also have the necessary information on battery recycling, which is our recommended course of action.
-
Page 28: Operation
WARNING! Unless faced with an emergency situation, do not use the on/off key to stop the chair. This will cause the power chair to stop abruptly. WARNING! Always turn the power off when you are stationary to prevent unexpected movement. www.pridemobility.com Quantum 1650/RevA/Jan04... - Page 29 “ripple up and down of lights,” turn off the controller and allow the joystick to return to the neutral position. Then turn on the controller. NOTE: If you still get “ripple up and down of lights”, contact your Quantum Rehab Specialist. Quantum 1650/RevA/Jan04...
- Page 30 The off-board charger/programming socket is located on the front of the Remote Plus. If you use an off-board charger, the charger current should not exceed 12 amps. Contact your Quantum Rehab Specialist for more information. WARNING! Only chargers with Neutrik NC3MX plugs should be connected to the off-board charger/ programming socket.
-
Page 31: Care And Maintenance
M A I N T E N A N C E CARE AND MAINTENANCE Your Quantum 1650 is a sophisticated power chair. Like any motorised vehicle, it requires routine maintenance checks. You can perform some of these checks, but others require assistance from your Quantum Rehab Specialist. Preventive maintenance is very important. -
Page 32: Daily Checks
Check the rubber boot around the base of the joystick for damage. Visually inspect the boot. Do not handle or try to repair it. See your Quantum Rehab Specialist if there is a problem. n Visually inspect the controller communications cable. Make sure that it is not frayed, cut, or has any wires exposed. -
Page 33: Cleaning Instructions
Keep your power chair clean and free of foreign material, such as mud, dirt, hair, food, drink, etc. Yearly Checks Take your power chair to your Quantum Rehab Specialist for yearly maintenance. This helps ensure that your power chair is functioning properly and helps prevent future complications. -
Page 34: Battery Replacement
Lifting beyond your capacity can result in personal injury. To replace the batteries: 1. Turn off power to the controller. 2. Make sure that the power chair is in drive mode. See III. “The Quantum 1650.” 3. Unplug the controller communications cable from the power base. BATTERY CONNECTORS Figure 20. - Page 35 8. Remove the brushes. 9. Inspect for wear. See figure 24. If there is less than 63 mm of brush remaining, replace the brushes. Contact your Quantum Rehab Specialist for replacement brushes. WARNING! If an inspection determines WORN excessive wear on the brushes, they must be replaced or motor damage will result.
-
Page 36: Corrective Maintenance
A N D M A I N T E N A N C E When to See Your Quantum Rehab Specialist for Service The following symptoms could indicate a serious problem with your power chair. If necessary, contact your Quantum Rehab Specialist. -
Page 37: Optional Accessories
A C C E S S O R I E S OPTIONAL ACCESSORIES The following accessories are available from your Quantum Rehab Specialist. POSITIONING BELT An auto-type positioning belt is available for your power chair as an optional accessory. The positioning belt is designed to support the operator so that he/she does not slide down or forward in the seat and can be adjusted for operator comfort. -
Page 38: Oxygen Tank Holder
This option enables you to move the joystick from the front of the armrest to the side of the armrest without disconnecting it. Dust Cover This sturdy canvas cover helps protect your power chair when not in use. www.pridemobility.com Quantum 1650/RevA/Jan04... -
Page 39: Warranty
All electronic parts, including controllers and battery chargers, have a one (1) year warranty. Servicing to the controller or battery charger must be carried out by your Quantum Rehab Specialist. Any attempt to open or dismantle these items renders the guarantee void on that item. - Page 40 N O T E S www.pridemobility.com Quantum 1650/RevA/Jan04...
- Page 41 N O T E S Quantum 1650/RevA/Jan04 www.pridemobility.com...
- Page 42 N O T E S www.pridemobility.com Quantum 1650/RevA/Jan04...
- Page 43 Quantum 1650 Series your choice in power Quality Control - Quantum 1650 chairs. Q u a l i t y C o n t r o l - M o d e l 1 400 We have Controller...
Need help?
Do you have a question about the 1650 and is the answer not in the manual?
Questions and answers