Table of Contents
Advertisement
Quick Links
IMPORTANT SAFETY
INTO THE WATER
WARNING –
INSTRUCTIONS
To reduce the risk of
burns, electric shock, fire, or injury to persons:
When using electrical appliances, especially
1.
Except when charging, this appliance
when children are present, take basic safety
should never be left unattended when
precautions, including the following.
plugged in. Do not pull, twist, or wrap
line cord around appliance.
READ ALL INSTRUCTIONS
2.
This appliance should not be used by,
BEFORE USING
on, or near children or individuals with
certain disabilities.
KEEP AWAY FROM WATER
3.
Use this appliance only for its intended
purpose as described in this manual. Do
FOR HOUSEHOLD
not use attachments not recommended
by the
USE ONLY
manufacturer. Do not use an extension
cord to operate this appliance.
DANGER –
A
ny appliance is
4.
Never operate this appliance if it
electrically live, even when the switch is off.
has a damaged cord or plug, or if it
To reduce the risk of death or injury by
is not working properly, if it has been
dropped or damaged, or dropped
electric shock:
into water. Return the appliance to a
1. Unplug this appliance after using and
service centre for examination and
before cleaning.
repair.
2. Do not place or store appliance where it can
5.
Keep the cord away from heated surfaces.
fall or be pulled into a tub or sink.
6.
Never drop or insert any object into any
3. Do not use while bathing or in a shower.
opening on this appliance.
4. Do not place in, or drop into, water or
7.
Do not place appliance on any surface
other liquids.
while it is operating.
5. Do not reach for an appliance that has
8.
Do not use this appliance with a damaged
fallen into water. Unplug immediately. Dry
or broken comb or with teeth missing
location use only. Do not expose to liquid,
from the blades, as injury may occur.
vapor or rain.
Before use, make certain blades are
6. Except when charging, always unplug this
aligned properly. (See "Taking Care of
appliance from electrical outlet immediately
Your Trimmer.")
after using.
9.
Do not use outdoors or operate where
7. Never operate the adapter if the
aerosol (spray) products are being used or
specification is out of the rating.
where oxygen is being administered.
DO NOT REACH
10. Never operate the appliance with the
air openings blocked or place on a soft
surface, such as a bed or couch, where
Warning: Changes or modification to this unit
the air openings may be blocked. Keep the
not expressly approved by the party responsible
air openings free of lint, hair, and the like.
for compliance could void the user's authority
11. Always attach plug to appliance first, then
to operate the equipment.
to outlet. To disconnect, turn all controls
TROUBLESHOOTING
to OFF, then remove plug from outlet.
If your cordless/rechargeable trimmer does
12. Do not let skin come into contact with
not seem to be taking a charge, take the
moving blades.
following troubleshooting steps before
13. Do not short the polarity (output cord).
returning it for repair:
Ensure jack is plugged into the unit before
1. Be sure the electrical outlet is working
plugging the adapter into outlet.
by plugging in another appliance to test it.
14. Be sure voltage is correct before
2. Make sure the electrical plug is not
plugging in.
connected to a switch that turns power
15. CAN ICES-3(B).
off when lights are turned off.
SAVE THESE
3. Make sure that the adapter is inserted
into the trimmer properly, all connections
INSTRUCTIONS
are secure and the trimmer switch is in the
OFF position.
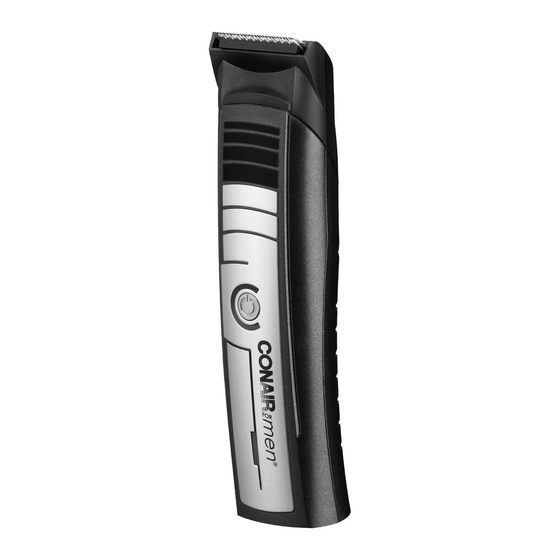
The Conair For Men
Face & Body Trimmer is a
®
OPERATING
professional grade rechargeable trimmer with
electro-chemically formed precision blades with
INSTRUCTIONS
an ultra-sharp cutting angle for smooth,
effortless cutting. Lithium-ion technology gives
IMPORTANT! Use only the adapter and
sustained power performance for reliable
attachments supplied with this appliance.
cordless use, even at low charge levels.
Please note, if the wrong adapter is used, the
Lightweight for easy handling, it can be used
LED will blink continuously. Once the wrong
with a power cord or cordless for total
adapter is removed the LED will continue to blink
convenience and control, and with five
for some time after removal. This is normal. When
professional interchangeable heads for allover
charging the appliance the blue LED charging
trimming and grooming you get a perfect result
light will flash slowly and continuously until the
every time. Also included are a 7-position
battery has fully charged, then the blue LED
trimmer comb attachment, a stubble comb
charging light will stop flashing but remain on.
attachment, a body groomer comb attachment,
1. Before using for the first time, the appliance
nose and ear trimmer, foil shaver, charging and
should be fully charged continuously for
storage base and a cleaning brush.
3 hours. This initial super-charge ensures
For connection to an electric supply not in the
optimum power performance to ensure
U.S.A., use an attachment plug adapter of the
smooth, fast trimming every time. Maximum
proper configuration for the power outlet.
battery capacity will be reached only after 3
charging and discharging cycles.
2. A 2-hour full charge will provide
MAINTENANCE
approximately 80 minutes of use and
INSTRUCTIONS
30 minutes quick charge will supply 20
minutes use.
3. Insert the appliance into the charging and
TAKING CARE OF YOUR TRIMMER
storage stand.
BLADE CARE
4. Ensure the appliance is switched off.
Because the trimmer blades are precision-made
5. Insert the adapter plug into the hole on
for a very special use, they should always be
the base of the stand and push firmly into
handled with care. Each time you finish using
position.
the trimmer use the cleaning brush provided to
6. Route the cord through the channel on the
brush away any loose hair that has collected in
base of the stand and secure in place.
the blades. Then store the trimmer in its storage
7. Should you wish to charge the appliance
pouch to protect the blades until the next use.
without using the charging stand, simply
Be especially careful when changing or
place the adapter plug directly into the
adjusting blades. When you have your trimmer
trimmer.
serviced, be sure that both blades are
8. Plug the adapter into any wall outlet (at the
voltage listed on the label affixed to the
sharpened or replaced at the same time.
adapter). Unplug the adapter when not in
To promote the long life of the appliance, use
use.
your trimmer only for the purpose intended by
9. The adapter may become warm while
the manufacturer.
charging – this is normal.
In order to maintain the optimum capacity of
10. The battery life can be improved by
the lithium-ion rechargeable batteries, the
periodically allowing the trimmer to run
trimmer should be fully discharged and then
until the motor stops. Immediately turn the
recharged for 2 hours every 3 months.
switch and fully recharge.
For optimum performance, we recommend you
CORDLESS OPERATION
charge the unit for at least 30 minutes before
1. Ensure appliance is charged for a minimum
using the appliance each time. This applies
of 30 minutes. The blue LED charging light
whether you are using corded or cordless power.
will flash when the adapter is correctly
PREPARATION FOR USE
inserted into the appliance and connected
Always inspect the appliance before use for
to the outlet.
noticeable signs of damage.
2. Once the appliance is fully charged the
Do not use if damaged.
•
blue LED charging light will stop flashing
•
Ensure the heads are free from hair and debris.
but remain on. Remove the cord from the
Ensure the appliance is sufficiently charged.
•
appliance, turn on and use as required.
•
Use on clean, dry hair that has been combed
until tangle-free.
ATTACHING AND REMOVING ACCESSORIES
as soon as you feel it is necessary. For better
Make sure that the unit is switched off before
results, we recommend cutting the beard when
changing the trimmer
it is dry. This helps make the cut precise and
head or accessories.
comfortable.
To attach a head, fit the base
To outline using the beard and mustache
of the accessory onto the unit,
trimmer:
Fig. 1
pressing it until you hear a click.
•
Do not attach a comb attachment.
To remove a head, hold the
•
Hold the trimmer upside
handle of the unit in one hand
down with the blade
and push up on the head with
facing downward.
your free hand (Fig. 1).
•
Move the trimmer gently
USING THE CUTTING GUIDE
downward in small strokes
The cutting guide guarantees
around the edge of the area
uniform cutting length.
you wish to outline.
•
Having defined the outline, hold the trimmer
IMPORTANT: Always attach the cutting guide
BEFORE turning the trimmer on, and turn unit
with the blades pointing upward and move
the trimmer upward against the direction of
off before changing the guide. The cutting
hair growth. This will trim the unwanted hair
length of your trimmer is manually adjustable.
adjacent to the outline.
To increase the cutting length,
push the cutting guide up. To reduce the
7-Position Comb Attachment
cutting length, push the cutting guide down.
for Beard and Mustache Trimmer
The selected length is displayed at the back of
•
Ensure the appliance is switched off.
the trimmer.
Attach the trimmer head.
•
Make sure you always trim or style your beard
•
Align the trimmer with the tracks at the back
against the hair growth.
of the handle. Slide the trimmer head onto
the tracks. Push down the
TYPES OF BEARDS/MUSTACHES
release mechanism to push
GETTING STARTED:
it right on to the handle.
Decide on the type of beard or mustache
•
The comb attachment will
be set to the shortest length
that best suits your face, taking into account
the size of your face and natural growth and
when the comb guide is fully pressed down.
With your thumb, push the guide up to
•
the required length (2–14mm). The comb
attachment has 7 positions; 2mm, 4mm,
6mm, 8mm, 10mm, 12mm and 14mm.
thickness of your
•
To remove the comb, place your thumb on the
beard and/or mustache. After deciding on the
back of the attachment and push up.
form of the beard and/or mustache, it is easy to
Using the Beard and Mustache Trimmer
maintain its appearance by using the trimmer
with 7-position Comb Attachment or Taper
Comb Attachment
•
Attach the 7-position comb attachments and
select the required length (2-14mm).
•
If you require more than one cutting length,
start with the longest length first.
•
Switch the trimmer on.
•
Hold the trimmer with the teeth of the
trimmer pointing upward.
•
Move the trimmer upward and outward
through the hair, against the direction of hair
growth.
The trimmer will work most efficiently when
•
cutting through hair at its own speed.
Never switch the appliance off while in the
•
hair.
Note: The beard and mustache trimmer can
be used without any comb attachments and
will cut roughly to a length of 0.5mm.
Stubble Attachment
The taper control with 6-position switch
enables super-fine cut adjustment for precision
trimming.
•
Attach taper control by
sliding the head onto the
tracks at the rear of the
handle.
To increase the length by
•
0.5mm to a cutting length
of 1mm, slide the switch across so the line is
lined up with the desired length (i.e., 1mm,
1.5mm, 2mm, 2.5mm and 3.0mm.)
To increase the length by a further 0.5mm to
•
a cutting length of 1.5mm, slide the switch
down so both 1 and 2 are visible above the
taper control switch.
Body Groomer With Comb Attachment
•
Ensure the appliance is switched off.
Attach the body groomer head by taking
•
Advertisement
Table of Contents

Related Manuals for Conair GMT7420LIC


Summary of Contents for Conair GMT7420LIC
- Page 1 Unplug the adapter when not in will cut roughly to a length of 0.5mm. has a damaged cord or plug, or if it The Conair For Men Face & Body Trimmer is a To promote the long life of the appliance, use ®...
- Page 2 • For an ultra-smooth finish, use This trimmer has a lithium ion batteries. To Conair will repair or replace (at our option) your unit free To maintain optimum performance, the of the appliance. the foil shaver attachment.
Need help?
Do you have a question about the GMT7420LIC and is the answer not in the manual?
Questions and answers