
Related Manuals for Deutscher HE660


Summary of Contents for Deutscher HE660
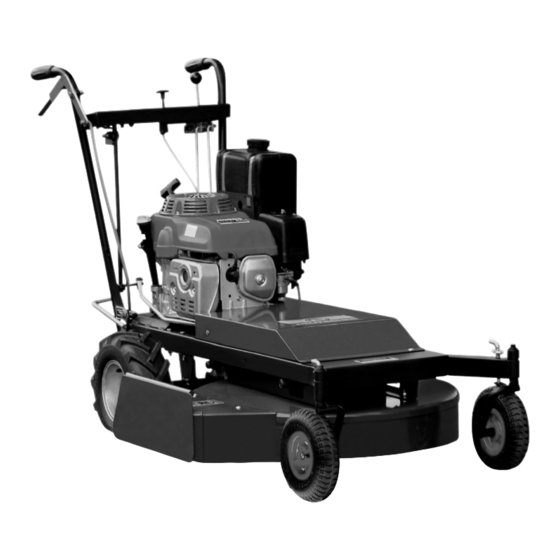
- Page 1 DEUTSCHER HE660 OWNER’S INSTRUCTION MANUAL AND PARTS LIST...
- Page 2 Exploded views and Part Numbers 14-19 ....Warranty HE660 Models 36157 HE660 Deutscher Honda GXV340 Limited slip differential 36257 HE660 Deutscher Honda GXV340 36258 HE660 Deutscher Honda GXV390 Electric Start 36158 HE660 Deutscher Honda GXV390 Electric Start. Limited slip differential...
-
Page 3: Handle Attachment
ASSEMBLY INSTRUCTIONS HANDLE ATTACHMENT (Pre delivery) (Refer to Figure 1) 1. Connect the handles to the side rails of the chassis using four 75mm M8 bolts. Fasten the four nuts securely. Inset rods ‘A’ through the holes in the levers ‘B’ and secure with R clips. 2. -
Page 4: Engine Preparation
ASSEMBLY INSTRUCTIONS 5. See Figure 2. Place tank straps “3” in the tank bracket “4” slots and bend tabs up and back against the bracket. Place the fuel tank in position and attach the straps at their lower end using two 6mm bolts. 6. -
Page 5: Safety Instructions
SAFETY INSTRUCTIONS BEFORE STARTING: • Know your controls. Read the owners manuals thoroughly. Learn how to stop the engine quickly in an emergency. • Inspect the area to be mown, remove all debris and obstacles that may be in the path of the mower. Do not attempt to shift obstacles while the mower is running. - Page 6 SAFETY INSTRUCTIONS • Use extreme caution when reversing or pulling the mower towards you. Ensure your footing is stable and be especially careful in uneven terrain. • Do not attempt to ride the mower. • Walk, never run. • Slopes: Do not mow excessively steep slopes.
-
Page 7: Specifications
ENGINE: Honda GXV340 recoil start or GXV390 electric start engines are used. See engine owner’s manual supplied with the mower. GEARBOX: Deutscher gearbox houses two forward gears, a reverse gear and a differential in an oil bath alloy housing. Recommended oil: EPX 85w/140... -
Page 8: Operation
Illustration 1 PRE-START CHECK Your Deutscher Mower comes to you tested and ready to operate, with engine and gearbox filled with oil. • Read all safety instructions and know how to stop engine quickly in any emergency. • Know your controls – Where they are and their function. -
Page 9: Gear Change
OPERATION TO DRIVE MOWER (See Illustration 1 on Page 8) • Release park brake. • Select gear (See Illustration 2) Low forward: Pull lever backward. High forward: move lever forward. Reverse: Move to right, then forward. Note: Pushing the mower forward slowly while operating the gear lever may improve the ease of gear selection. -
Page 10: Maintenance
MAINTENANCE MAINTENANCE LUBRICATION CHART Lubrication Daily 20hrs 100hrs Engine Refer to Engine Manual Gearbox Check Gearbox Change Gear Oil EPX 85w/140 Kingpins Cutter Deck slides Grease Gear Control linkages Clutch Control linkages Height Control linkages Throttle Cable GEARBOX Use gear oil 85w/140 Capacity = 750ml Fill Gear Box to Level Plug Illustration 3... - Page 11 MAINTENANCE GEARBOX BELT (Replacement): (See Illustration 4) • Before any inspection or replacements of the belts and associated parts, turn engine off and pull spark plug lead off the spark plug. • Be careful during adjustment of the mower to prevent entrapment of the fingers between moving blades, pulley’s and fixed parts of the mower.
- Page 12 MAINTENANCE • Adjust the cutter brake to ensure the cutter spindle stops when the belt is disengaged. (See next section) • Replace the gearbox belt and refit the belt guide. (Note: Belt guide is bolted the inside of the engine mounting plate (See illustration 4).
-
Page 13: Wiring Diagram
WIRING DIAGRAM HONDA GXV390 RT1 DAEU B LU E R ED R ED GREEN B LACK Item Part No. Part Description 1261 Key Switch 1368 Battery lead 330mm 1373 Battery lead 250mm 3415 Loom assembly H315 Battery 12 Volts WARNING: Incorrect wiring may result in damage to the engines electrical system. Only qualified and or competent electrical technicians should attempt any repairs or alterations. - Page 14 CHASSIS Item No. Part No Part Description Item No Part No Part Description 3339 Chassis Assembly 3337 Pulley, engine 1463 Connecting rod, front 1492 3371 Raise & lower rod, rear 1523 Plate, clutch pulley 3307 Top cover. 1350 Wheel complete (Bar tread) 1017 Bolt 8mm x 20 1497...
-
Page 15: Cutter Assembly
CUTTER ASSEMBLY Item Part No Part Description Item Part No Part Description 1646 Pulley 1897 Circlip 2092 Brake disc x 4 1244 12mm nut 2093 Brake pad assembly 1558 Push Rod 5350 Bolt 2007 Push rod connector 3295 Brake lever rod 1549 Spring brake return 1986... -
Page 16: Handle Bars & Controls
HANDLE BARS & CONTROLS Item New No. Part Description Item New No. Part Description 3334 Handle Bar assembly 1148 Throttle Knob 1586 Handle Grip 3423 Throttle Control 3322 Gear lever (Hand) 1154 Cable Clamp & Screw 3393 Gear lever cage 3417 Throttle Cable 1334... -
Page 17: Gearbox Assembly
GEARBOX ASSEMBLY... - Page 18 GEARBOX ASSEMBLY Item No. Part No. Part Description Item No. Part No. Part Description 1100 Screw, pulley 1695 Selector tappet reverse 1640 1739 High crown gear 1641 Spring washer 1699 Bearing, needle, axle 1642 Washer 1700 Spacer, diff. 1643 Pulley 1701 Low crown gear 1650...
- Page 19 FUEL TANK / SUNDRY PARTS Item No. Part No. Part Description Item No. Part No. Part Description 1746 Tank, 6.5lt 3343 Decal set 1329 Cap, fuel tank 1747 Strap 1748 Bracket, tank...
-
Page 20: Warranty Policy
• DEUTSCHER MOWERS PTY. LTD. will repair or replace, free of charge, any mower or part of a mower that is defective in materials or workmanship (or both) for a period of 24 months from the date of purchase. If parts or units are replaced, the replacement period will be no longer than 3 months.
Need help?
Do you have a question about the HE660 and is the answer not in the manual?
Questions and answers
What incline can this mower [HE660] safely mow?
The Deutscher HE660 mower can safely mow on slopes with an incline of up to 10 degrees to the horizontal.
This answer is automatically generated