Table of Contents
Advertisement
Quick Links
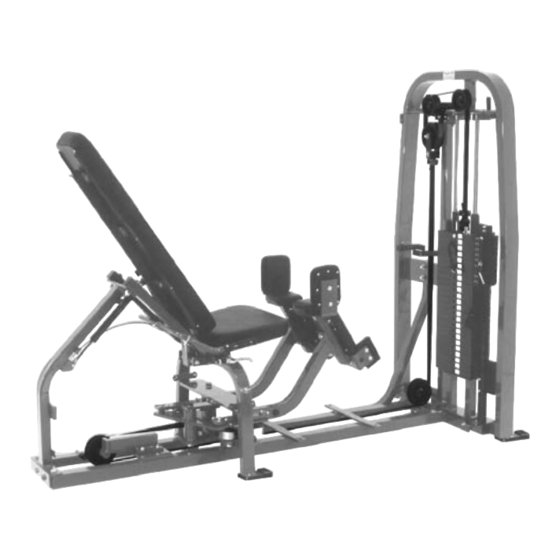
HIP
ABDUCTION
OWNER'S
MANUAL
REVISED: May 3, 2006
SERIAL NO.'S
______________
through
______________
Contents
Parts Manual
1
MOVEMENT ARM & WORKBOX ASSEMBLY
2
SEAT & WORKBOX TO BASE ASSEMBLY
3
ADJ. SEAT BACK & IDLER ASSEMBLY
4
SEAT BASE TO BACK FRAME ASSEMBLY
5
BELT & PULLEY ASSEMBLY
6
WEIGHT STACK ASSEMBLY
7
WEIGHT STACK ASSEMBLY
8
PARTS LIST
9
PARTS LIST
Maintenance
Manual
Follows page 9
See last pages of this manual for 2ST Strength
Circuit Exercise Order Diagram and 2ST Floor
Plan Kit.
PARTS AND SERVICE
709 Powerhouse Road
Independence, Virginia 24348
800-235-2233
Fax: 276-773-2298
181
89
157
169
168
162
161
159
99,109
42,44A
180
P
88
179
183
158
167
166
36
164
165
170
19-4908
78,85
160
Advertisement
Table of Contents

Related Manuals for Nautilus 2ST HIP ABDUCTION


Summary of Contents for Nautilus 2ST HIP ABDUCTION
- Page 1 78,85 99,109 42,44A ABDUCTION OWNER'S MANUAL REVISED: May 3, 2006 SERIAL NO.'S ______________ through ______________ Contents Parts Manual MOVEMENT ARM & WORKBOX ASSEMBLY SEAT & WORKBOX TO BASE ASSEMBLY ADJ. SEAT BACK & IDLER ASSEMBLY SEAT BASE TO BACK FRAME ASSEMBLY BELT &...
- Page 2 MOVEMENT ARM & WORKBOX ASSEMBLY...
- Page 3 SEAT & WORKBOX TO BASE ASSEMBLY...
- Page 4 ADJUSTABLE SEAT BACK & IDLER ASSEMBLY...
- Page 5 SEAT BASE TO BACK FRAME ASSEMBLY...
- Page 6 BELT & PULLEY ASSEMBLY REVISION 2...
- Page 7 24 WEIGHT STACK STANDARD PARTIAL SHIELD REF # ..PART #..320 lb. WEIGHT STACK (20-320) A ....01-0010 ..BOLTHH2 7/16-14 X 4 1/2 BLACK USE CAUTION B ....02-9190 ..1/4-20 X 3/4 TORX HD TYPE "F" SCREW BLACK C....03-1045 ..NUT 7/16 BLACK WHEN WORKING D....04-5070 ..RUBBER WEIGHT STACK WASHER WITH WEIGHT E ....05-4020 ..BOTTOM WEIGHT BUSHING...
- Page 8 MINI 24 ADD-ON WEIGHT KIT REF #...PART # ..DESCRIPTION AA ..02-4108 ..3/8-16 X 3/4 ALLEN CAP SCREW BB ..01-1258 ..1/2 X 3/4 HEX BOLT BLACK CC..01-4035 ..1/4 X 1-1/4 WIZ BOLT BLACK DD..02-4110..3/8 X 1-1/4 ALLEN CAP SCREW EE ..02-9190 ..1/4-20 X 1/2 TORX HD TYPE "F" SCREW BLACK FF ..03-5111..3/8 CLIP NUT GG ..03-4290 ..1/4 WIZ NUT BLACK ZINC HH..06-8150 ..1 1/4 EXT.
- Page 9 IN01 .....INSPECTION KIT 91..03-1055 ..1/2 NTE 41..12-1088 ..INSPECTION STICKER DECAL 91A ..03-4035 ..1/4-20 X 11/16 THREADED INSERT 42..12-1095 ..DECAL NAUTILUS NAMEPLATE 2 1/2 x 9 1/4 long 92..03-4060 ..1/4-20 CLIP NUT 43..19-1291 ..DECAL SERIAL # BAR CODE 93..04-5214 ..1/2 LOK WASHER 44..40-7167 ..BAG 50 X 46 X 86 X .002 THICK...
- Page 10 REF#..PART# ..DESCRIPTION REF#..PART# ..DESCRIPTION 96..07-9136 ..BRACKET LARGE LOWER BASE SHIELD 151..14-6290 ..ANKLE PAD 97..02-4134 ..1/4 x 1/2 PAN HD. "F" THD. CUTTING SCW. 152..01-1546 ..BOLT HH5 3/8 X 3/4 BLACK 99..14-2112..INSIDE MAIN SHIELD ..... 153..04-5135 ..3/8" BOLT CAP WASHER ..... 154..14-6324 ..PLATFORM E.L.
-
Page 11: Warranty Information
NAUTILUS® exercise equipment is originally installed. This warranty shall apply only within the boundaries of the continental United States. NAUTILUS® shall not be liable for any loss or WEIGHT-PIN damage, including incidental or consequential damages resulting directly or indirectly from the use or loss of use of our NAUTILUS®... -
Page 12: Table Of Contents
Nautilus' strict requirements. Should you, the owner of a Nautilus machine, need to replace any parts because of normal wear and tear, or should your machine ever need maintenance, Nautilus invites you to call our Virginia Headquarters office for information on parts and service. -
Page 13: Parts & Service
Always warm-up before and cool down after Never operate the machine without shields in exercising. place. Use only Nautilus selector pins in weight stack. Move slowly during each exercise. Do not jerk Never drop or insert any other object into or "throw" the weight. -
Page 14: Cleaning
Hydraulic Unit Adjustment 3. SHIELD REMOVAL Nautilus® 2ST machines are equipped with quick- release shield fasteners. To remove Quick-Release Note: The hydraulic unit only needs adjustment if the shielding, gently pull shielding away from the frame. seat will not stay in position.
Need help?
Do you have a question about the 2ST HIP ABDUCTION and is the answer not in the manual?
Questions and answers