Table of Contents
Advertisement
Quick Links
Advertisement
Table of Contents

Related Manuals for Caliber RMD 571


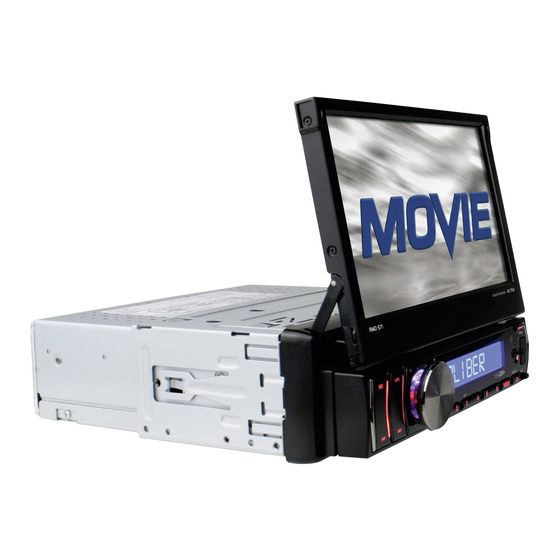
Summary of Contents for Caliber RMD 571
-
Page 2: Table Of Contents
Contents 1. Before Operation..................2 1.1 Precautions...................2 1.2 Battery Information of Remote Control.............2 1.3 The Remote Control Description..............3 1.4 Locations and Names of the Controls............4 1.5 Description of the Rear Cabinet..............5 1.6 Unit Installation..................6 2. Common Operation..................7 3. Radio Operation...................8 4. -
Page 3: Before Operation
1. Before Operation 1.1 Precautions 1. Read through this instruction manual before installation and use. 2. Clear the panel and case with soft dry cloth only, do not apply any kind of thinner, alcohol or sprays. 3. The apparatus shall not be exposed to dripping or splashing . 1.2 Battery Information of the Remote Control Replace Battery in the Remote Control: + side up... -
Page 4: The Remote Control Description
1.3 The Remote Control Description 1. TILT BUTTON OPEN BAND 2. MENU BUTTON M O DE MENU 3. POWER BUTTON 4. ^ BUTTON SETUP 5. >>| BUTTON 6. > BUTTON MOVIE MUSIC FILE TEXT PT Y 7. |<< BUTTON PHOTO LOUD EXIT 8. -
Page 5: Locations And Names Of The Controls
1.4 The Locations and Names of Controls on or in the unit 11 12 The Front Panel SD Card RESET The Front Facet after removing the front panel 1. OPEN button 12. INT/2 button 2. POWER/MUTE button 13. RPT/3 button 3. -
Page 6: Description Of The Rear Cabinet
1.5 Wires Connection Description The Description of the Wires Connection Wiring Connecting Socket 1 Fixing Screw Bolt GREEN PARKING LINE Wiring Connecting Socket 2 Radio Antenna jack Black Black WHITE REVERSAL LINE 1. Parking wire must be connected. And the parking brake must be engaged in order for the monitor to work. 2. -
Page 7: Unit Installation
1.6 UNIT INSTALLATION INSTALLATION INSTRUCTIONS THE UNIT IS INSTALLED TO BE AN ANTI-THEFT ONE. THE CHASSIS OF THE UNIT WEARS A SLIDING METAL HOUSING. PLEASE DO THE CONNECTION OF THE POWER, SPEAKERS AND ANTENNA ACCORDING TO THE REQUIREMENT OF THE INSTRUCTION BOOK , THEN INSTALL THE SLIDING METAL HOUSING IN THE CAR AS FOLLOWS. -
Page 8: Common Operation
2. Common Operation 1. To turn on/off the unit In power off mode, press the POWER button briefly to turn on the unit. In power on mode, press and hold the POWER button on the front panel or press the POWER button briefly on the remote control to turn off the unit. 2. -
Page 9: Radio Operation
10. To reset the player When the monitor , the small LCD display or some buttons are not working or sound is distorted, press the REL button and detach the front panel from the main unit, then press the RESET button to reset the program to factory default. 11.General setup Tap the icon setup to pop up GENERAL SETUP... - Page 10 3. TUNE/SEEK UP/DOWN BUTTONS In RADIO mode: 1) Long press the >>| or |<< button to automatically search up or down for a available station from the current frequency. 2) Briefly press the >>| or |<< button to manually search up or down with step by step for your desired station from the current frequency.
- Page 11 When PTY group is on, press the VOL+ or VOL- button on the remote control or rotate the VOL knob on the front panel to select one of PTY programs as follows: <-->NEWS<-->AFFAIRS<-->INFO<-->SPORT<-->EDUCATE<-->DRAMA <-->CULTURE <-->SCIENCE<--> VARIED<-->WEATHER<--> FINANCE <-->CHILDREN<-->SOCIAL<-->RELIGION<-->PHONE IN<-->TRAVEL <-->LEISURE<-->DOCUMENT< -->PTY NONE<-->POP M< -->ROCK M <-->EASY M<-->LIGHT M<-->...
-
Page 12: Usb And Mmc/Sd Operation
4. USB and MMC/SD Operation Load/unload USB or Card nsert an USB or MMC/SD Card into their slots respectively, then the root menu will be displayed on the monitor and it will play audio file automatically if the USB or MMC/SD Card include audio files. -
Page 13: Select Chapter/Track With Number Buttons
4.6 Select Chapter/Track with the Number Buttons When playing MP4/MP3/WMA files, press one of the 1~6 number buttons to directly select and play the 1st to 6th track /chapter then tapping the icons to turn the page up and down to select the tracks. Then tapping the icon to return to the MP3 playback interface... -
Page 14: Photo Playback
4.11 Photo Playback In photo playback, tapping the return to the select media mode, tapping the buttons to turn the page up and down to select your desire one or tapping the direction icons to select your desire one ,then tap the icon to confirm. -
Page 15: Trouble Shooting
5. Trouble Shooting Please read the user manual carefully before using the this player. If you have any troubles in using this player, try to solve the problems by the suggestions mentioned below. If you can not remove the trouble after using all the suggestions, please contact the company or the technical service centre authorized by us. -
Page 16: Specification
6. Specification General Specification Power Supply Requirement..........DC 12V Maximum Power Output....4 x 25W(measured at DC 14.4 V) Dimensions(w x h x d)..........178 x 58 x 176mm USB/CARD Specification Format..........RMVB/MP4/JPEG/MP3/WMA Video System................NTSC Audio System..............24 bit/96KHz Video Specification Video Type..............16:9 and 4:3 Video Output level........Composite:1.0¡À...
Need help?
Do you have a question about the RMD 571 and is the answer not in the manual?
Questions and answers