Table of Contents
Advertisement
Quick Links
Advertisement
Table of Contents

Related Manuals for Caliber RDN 802BT


Summary of Contents for Caliber RDN 802BT
- Page 1 RDN 8 02BT MANUAL ENGLISH...
-
Page 2: Installation
INSTALLATION Tools for Installation Use the 2 removal wrenches of the old unit to take out the old unit and place with this brand new car radio. The following tools and sup- plies may also be needed for the installation: Tools for Installation: Philips Screw-drivers /Machine Screws /Wire Stripper /Wire Cutter /Hammer /Pencil /Electrical Tape /Electric Drill Supplies for Installation: Machine Screws /Crimp Connectors /14 Gauge Wire for Power Connections /14-16 Gauge Speaker Wires The above are not supplied. - Page 3 INSTALLATION WARNING: Disconnect negative battery terminal from battery before starting installation. Consult the vehicle’s owner’s manual for proper instructions. NOTE: Mark the polarity of the existing speaker wires before disconnecting battery. NOTE: Remove the two transport screws from the top of the unit before installing. NOTE: Make sure there is enough space for the installation of this double-din unit.
-
Page 4: Wiring Diagram
WIRING DIAGRAM SUB 1 OUT (white) SUB 2 OUT (red) VIDEO 1 OUT (yellow) VIDEO 2 OUT (yellow) Camera IN (yellow) RCA OUT(F L)(white) RCA OUT(F R)(red) RCA OUT(R L)(white) REAR RADIO RCA OUT(R R)(red) Antenna ANTENNA Amp power (+12V output-blue/white) Connector A Connector B Connector C... - Page 5 WIRING DIAGRAM General Wiring Notes: Make sure You have a good chassis ground. Good ground connection will eliminate most electrical noise problems. A good chassis ground requires a tight connection to the .vehicle’s metal chassis. The area around the ground connection should be clean, bare metal without rust, paint, plastic, dust, or dirt for a good ground connection.
-
Page 6: Specifications
Specifications GENERAL Operating Power............................12 Volts DC, Negative Ground Output Wiring..........................Designed for using four speakers only RCA line out..............................low-level outputs - 1000MV Output Impedance..........................Compatible 4 to 8 Ohm Speakers Fuses.........................................10 amp Dimensions............................128mm(W) x 125mm(D) x 100mm (H) Weight........................................2.8 DVD/VIDEO/SYSTEM Discs compatible...............DVD, VCD 1.0/1.1/2.0/3.0, MP3, CD, CD-R, CD-RW, PICTURE-CD Video System..................................AUTO / PAL / NTSC TFT/SYSTEM Resolution..................................800RGB(H) X 480(V) -
Page 7: Basic Operation
BASIC OPERATION 1. Tuning the unit On / Off Press the Power Button to turn the unit on. The opening screen of the unit will be showing on the TFT monitor. Press and hold the POWER button again to turn the unit off. 2. -
Page 8: Radio Operation
Radio Operation 1. Choose Radio Band Touch the AM button on screen to choose among the five radio bands - three FM Bands (FM1, FM2, and FM3) and two AM Bands (AM1, and AM2). Each of the five bands can store up to six preset stations, for a total of 30 preset memory stations. 2. - Page 9 Radio Operation (Con’d) 6. Mono/Stereo Reception Control In FM radio mode, touch the ST button to select stereo or mono reception. 7. Local/Distance Reception Control In radio mode, touch the LOC button to select local or distance reception. 9. RDS Control (Optional) AF, TA, PTY are the RDS functions.
-
Page 10: Dvd/Vcd/Cd Operation
DVD/VCD/CD Operation 1. Selecting Tracks Press the SEEK >>| Button to advance to the next track. Track numbers will be shown on the display. Press and hold SEEK >>| to fast forward. Press the SEEK |<< Button to go to a previous track. Track numbers will be shown on the display. Press and hold the SEEK |<< Button to fast reverse. - Page 11 DVD/VCD/CD Operation (Con’d) 5. OSD (Display information) Press the OSD button so that the OSD will display on the monitor. Details such as title, track, playtime, etc, will be shown. 6. DVD System Setup Press the setup button to enter the DVD system setup. DVD system setup include password setting, rating level, region codes. 7.
- Page 12 DVD/VCD/CD Operation (Con’d) 15. Multi-Angle View Press the ANGLE button on the remote control to perform multi-angle playback. The number of angles change in sequential order. Note: The number of angles is different according to the disc. The function only work for discs having scenes recorded at different angles.
-
Page 13: Bluetooth Operation (Optional)
Bluetooth Operation (Optional) PAIRING At BT mode, search bluetooth device by the phone and “Caliber RDN802BT” will appear in your phone. Input “0000” as password to establish connection. DIAL PAD Touch the dial pad to dial the number you would like to call. Touch the CALL (green) button to send the number. - Page 14 Bluetooth Operation (Con’d) 1. View Received Calls Touch the RECEIVED CALLS button, the received calls will be displayed. There will be up/down arrows displayed for you to view them one by one. 2. View Missed Calls Touch the MISSED CALLS button, the missed calls will be displayed. There will be up/down arrows displayed for you to view them one by one.
- Page 15 Settings General Setting The general setting menu includes any key power, video warning, GPS monitor, BT phone book auto deleted, strong sort, brightness, steer, factory set, calibration, serial and version, GPS monitoring, language setting, reset factory.
- Page 16 Settings Audio Setting Time Setting You may set audio, touch sound, back car vol, user def vol, You can select Date, Time, Time mode and Time zone by GPS mix, report point remove mute, BT default vol button, BT tapping directly on the options or the arrows for up/down. call vol, def vol under this setting.
- Page 17 Settings Wall Paper Selection GPS Setting Tap the Wall button on the right bottom corner of the OSD. Enter the GPS setting to define the link of the execution file You will enter the wall paper selection screen. Select the of your GPS program.
- Page 18 Steering Wheel Control (Optional) Refer to the wiring diagram for connection. TAB STEERING WHEEL LOGO in the OSD. Press before the set up. Select from the 10 functions according to the number of available keys on the steering wheel of your vehicle. Press any key on your steering wheel, then tab the function key you would like to assign.
-
Page 19: Other Operations
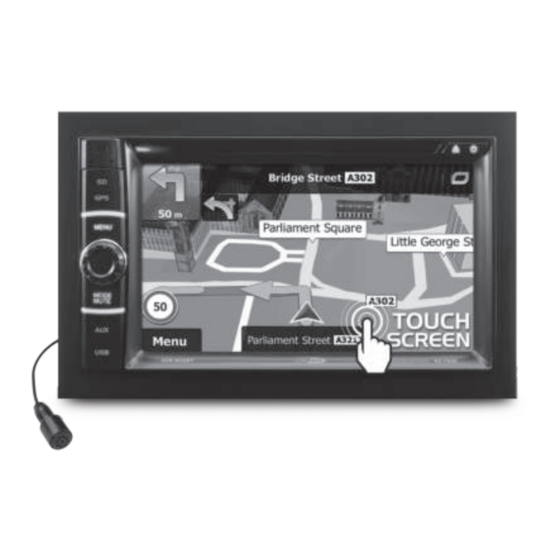
Other Operations 1. GPS Navigation (Optional) If GPS navigation is available with the system, Tap the GPS logo on the OSD to enter GPS navigation. Follow the on screen instruction to input destina- tion and start navigation. The operation varies from software to software. 2. -
Page 20: Maintenance
MAINTENANCE Cleaning the Unit Do not use any liquids to clean this unit. Do not use petroleum distillates to clean this unit. Use a clean, dry cloth to clean this unit. Replacing the Fuse Make sure the amperage matches the specified value when replacing the fuse(s). If the fuse is bad, check the power connection and replace the fuse with a new one. - Page 21 SIMPLE TROUBLESHOOTING GUIDE PROBLEM CAUSE / SOLUTION No Power Check whether the fuse is blown, replace with fuse of proper value if necessary. Unit stops responding or shows error Press the RESET button. in display Unable to receive radio stations Check whether the antenna is inserted or the antenna is properly connected;...
- Page 22 W W W. C A LIBER. NL CALIBER HEAD OFFICE • The Netherlands • Fax: +31 (0)416 69 90 01 • E-mail: info@caliber.nl...
Need help?
Do you have a question about the RDN 802BT and is the answer not in the manual?
Questions and answers