Advertisement
Table of Contents
- 1 Table of Contents
- 2 Important Precautions
- 3 Before You Begin
- 4 Assembly
- 5 Operation and Adjustment
- 6 Computer Function (Programmes)
- 7 Computer Function (Programme Graphs)
- 8 How to Fold, Move and Release the Treadmill
- 9 Maintenence Instructions
- 10 Fitness Guide
- 11 Troubleshooting
- 12 Additional Useful Information
- Download this manual
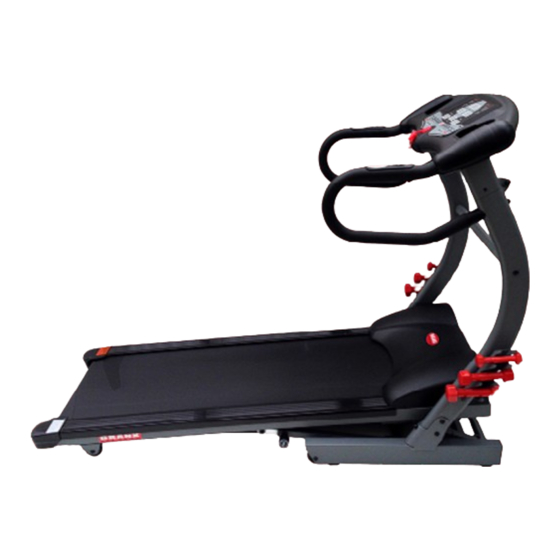
CARDIO PRO 4400
TREADMILL
USER MANUAL
Product may vary slightly from the item pictured due to model upgrades.
Before using this product, it is essential you read this ENTIRE user manual and ALL installation
instructions.
It describes equipment setup and instructs you on how to use it correctly and safely.
This treadmill is for (Home): Domestic use only. Branx Fitness equipment is NOT certified for use
with pacemakers.
NOTE: This manual may be subject to updates or changes. Up to date manuals are available
through our website at www.branxfitness.co.uk
www.branxfitness-helpdesk.co.uk
Advertisement
Table of Contents

Related Manuals for Branx Fitness CARDIO PRO 4400

Summary of Contents for Branx Fitness CARDIO PRO 4400
- Page 1 It describes equipment setup and instructs you on how to use it correctly and safely. This treadmill is for (Home): Domestic use only. Branx Fitness equipment is NOT certified for use with pacemakers. NOTE: This manual may be subject to updates or changes. Up to date manuals are available through our website at www.branxfitness.co.uk...
-
Page 2: Table Of Contents
3. Before You Begin ..............Page 6 Welcome to Branx Fitness and thank you for choosing me! I am your brand new Branx Fitness ‘Cardio Pro’ Treadmill. Please ensure you have read my user manual 4. Parts List and Exploded Diagram ........ -
Page 3: Important Precautions
Read all instructions before being stored in its upright folded position using. BRANX FITNESS LTD assumes no responsibility for personal injury or (See page 21) Please also keep all pets Never start the treadmill whilst you are property damage sustained by or through the use of this product. -
Page 4: Before You Begin
Please do it today. Your product code is: 4400 Branx Fitness will always confirm your warranty within a few days of receiving your email, so don’t worry if you don’t get an immediate response, it will be done and no delay on our part will ever affect your warranty. -
Page 5: Assembly
PART LIST - MODEL No. GV4400 ASSEMBLY Before continuing, please take a moment to look at the drawing below and Assembly requires two people. Please follow each step carefully below, be careful familiarise yourself with the parts that are labelled. of your hands at all times and when lifting ensure your fit and healthy enough to do so and always have assistance, watch that back to : ) by following our step by Qty. - Page 6 STEP 1. YOUR TREADMILL ARRIVES FLAT PACKED AND 95% PRE ASSEMBLED. STEP 5. PLEASE NOTE! BEFORE PLACING THE CONSOLE AREA FLAT AND IN TO ITS CORRECT POSITION PLEASE TAKE EXTRA CARE NOT TO CUT/DAMAGE THE STEP 2. CABLE WHICH RUNS RIGHT UP THROUGH THE RIGHT TREADMILL ARM (AS IF YOU FOLD UP THE CONSOLE CAREFULLY INTO PLACE UNTIL BOTH ARMS OF THE WERE STANDING USING THE TREADMILL) INTO THE CONSOLE.
- Page 7 STEP 8. STEP 12. SCREW INTO PLACE 1 X M8x16 SMALL SCREW WITH WASHER. OPENING YOUR ACCESSORY BOX WHICH INCLUDES: 1. 6 Training Dumbbells. (THE ABOVE IS REQUIRED FOR BOTH SIDES OF THE TREADMILL) 2. Dumbbell fitments and related screws STEP 9.
-
Page 8: Operation And Adjustment
CONSOLE OPERATION OPERATION AND ADJUSTMENT HOW TO PLUG IN THE POWER CORD When your treadmill arrives it is brand new and ready to go. Ensure where its being used the electrics are 100% safe and in compliance with current regulations. If in any doubt whatsoever contact your local fully certified and reputable electrician. - Page 9 If the speed is less than 3.5km/h when the “On/Off” button is pressed the running STEP-BY-STEP CONSOLE OPERATION belt will stop immediately. During the first few minutes of using the treadmill, inspect the alignment of the Note: If there is a thin sheet of clear plastic on the face of the console, remove walking belt.
-
Page 10: Computer Function (Programmes)
COMPUTER FUNCTION 8. The “Music” button Simply plug in your music player using your MP3 connector cable (See pictures Incline (it displays your auto incline range from 0-20%) below) provided and press the “Music” button to activate the speakers. Please note that an adaptor (not supplied) may be required for some music player Distance (it displays your distance travelled from 0 upto 99km) devices. - Page 11 COMPUTER FUNCTION (PROGRAMMES) Prog SPEED STAGE 1 STAGE 2 STAGE 3 STAGE 4 STAGE 5 STAGE 6 STAGE 7 STAGE 8 STAGE 9 STAGE 10 SPEED Km/h Incline % Prog SPEED SPEED Km/h STAGE 1 STAGE 2 STAGE 3 STAGE 4 STAGE 5 STAGE 6 STAGE 7...
- Page 12 Prog SPEED Prog SPEED STAGE 1 STAGE 2 STAGE 3 STAGE 4 STAGE 5 STAGE 6 STAGE 7 STAGE 8 STAGE 9 STAGE 10 STAGE 1 STAGE 2 STAGE 3 STAGE 4 STAGE 5 STAGE 6 STAGE 7 STAGE 8 STAGE 9 STAGE 10 SPEED Km/h...
-
Page 13: Computer Function (Programme Graphs)
COMPUTER FUNCTION (PROGRAMME GRAPHS) Programme 15 Programme 16 Programme 1 Programme 2 Programme 17 Programme 18 Programme 3 Programme 4 Programme 19 Programme 20 Programme 5 Programme 6 Programme 21 Programme 22 Programme 7 Programme 8 Programme 23 Programme 24 Programme 9 Programme 10 Programme 25... - Page 14 Programme 29 Programme 30 Programme 43 Programme 44 Programme 31 Programme 32 Programme 45 Programme 46 Programme 33 Programme 34 Programme 47 Programme 48 Programme 35 Programme 36 Programme 49 Programme 50 Programme 37 Programme 38 Programme 51 Programme 52 Programme 39 Programme 40 Programme 53...
- Page 15 Programme 57 Programme 58 Programme 71 Programme 72 Programme 59 Programme 60 Programme 73 Programme 74 Programme 61 Programme 62 Programme 75 Programme 76 Programme 63 Programme 64 Programme 77 Programme 78 Programme 65 Programme 66 Programme 79 Programme 80 Programme 67 Programme 68 Programme 81...
- Page 16 Programme 85 Programme 86 Programme 99 Programme 87 Programme 88 BLUE = Speed RED = Incline Programme 89 Programme 90 Programme 91 Programme 92 Programme 93 Programme 94 Programme 95 Programme 96 Programme 97 Programme 98 BLUE = Speed RED = Incline Page 30 www.branxfitness-helpdesk.co.uk Page 31...
-
Page 17: How To Fold, Move And Release The Treadmill
Unplug the power cord. CAUTION: You must be able to safely lift 25 kg (55 lbs.) in order to For such moves it is always recommended to instruct a qualified engineer from Branx Fitness (at a raise, lower, or move the treadmill. -
Page 18: Maintenence Instructions
FAILING TO DO THIS MAY VOID YOUR WARRANTY. If you need more lubricant, we recommend you use the Branx Fitness Treadmill Lubrication WARNING: UNPLUG POWER CORD BEFORE MAINTENANCE Kit. - Page 19 Adjusting Running Belt Alignment (if the belt is pulling to one side) 5. Lift your running belt and apply 10/12ml under both sides of your treadmill matt (See picture on page 35). Or apply a liberal amount to a lint free cloth and run the cloth along the length of the running deck (underneath the mat NOT on the matt/belt itself).
-
Page 20: Fitness Guide
Suggested Stretches FITNESS GUIDE The correct form for several basic stretches are shown below. Move slowly as you stretch never Starting Your Workout bounce. Begin each workout with a Warm Up session - 1. Hamstring Stretch a few minutes of stretching to help prevent strains, pulls and cramps. Sit with one leg extended. -
Page 21: Troubleshooting
The console will display information regarding operational faults with the treadmill. If your treadmill Your Branx Fitness Treadmill is very reliable and sturdy, with one of the lowest fault rates in the behaves in an unusual way and seems to have developed a fault, turn it off at the electrical outlet market place. -
Page 22: Additional Useful Information
LIMITED WARRANTY ADDITIONAL USEFUL INFORMATION BRANX FITNESS LTD, warrants this product to be free from defects in workmanship and material, under We at Branx Fitness have spent considerable time and efforts to ensure this user manual covers normal use and service conditions, for a period of (2) two years for parts and labour, (5) five years everything you will need in order to get up and running and also to carry out the standard regular for the motor (parts only) and lifetime for the frame from the date of purchase. - Page 23 Buy with confidence. Your satisfaction is assured when shopping with BRANX FITNESS... Branx Fitness Ltd Pixmore Business Centre, Pixmore Avenue, Letchworth, Hertfordshire, SG6 1JG 0800 8620412 www.branxfitness.co.uk www.branxfitness-helpdesk.co.uk...
Need help?
Do you have a question about the CARDIO PRO 4400 and is the answer not in the manual?
Questions and answers