Table of Contents
Advertisement
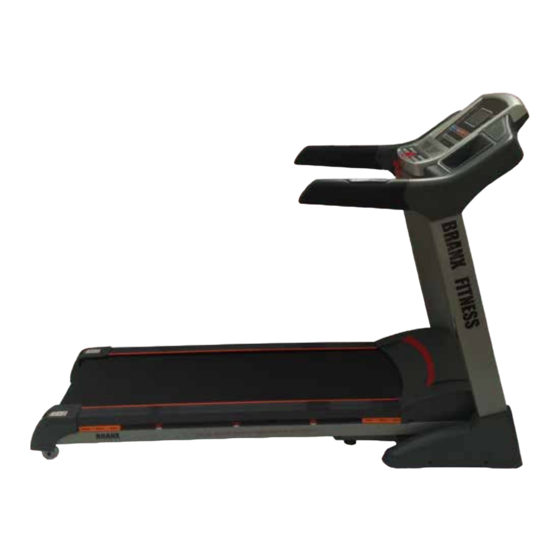
BRANX FITNESS ELITE RUNNER PRO
BF-ER-5088S-TR TREADMILL
USER MANUAL
Product may vary slightly from the item pictured due to model upgrades.
Before using this product, it is essential you read this ENTIRE user manual and ALL installation instructions.
It describes equipment setup and instructs you on how to use it correctly and safely.
This treadmill is for (Home): Domestic use only.Branx Fitness equipment is NOT certified for use with
pacemakers.
NOTE: This manual may be subject to updates or changes. Up to date manuals are available through our website
at www.branxfitness.co.uk
www.branxfitness.co.uk/productsupport
Advertisement
Table of Contents

Related Manuals for Branx Fitness ELITE RUNNER PRO BF-ER-5088S-TR

Summary of Contents for Branx Fitness ELITE RUNNER PRO BF-ER-5088S-TR
- Page 1 Before using this product, it is essential you read this ENTIRE user manual and ALL installation instructions. It describes equipment setup and instructs you on how to use it correctly and safely. This treadmill is for (Home): Domestic use only.Branx Fitness equipment is NOT certified for use with pacemakers.
-
Page 2: Table Of Contents
Hello. 2. IMPORTANT PRECAUTIONS ..............4 Welcome to Branx Fitness and thank you for choosing me! I am your brand new 3. BEFORE YOU BEGIN .................. 6 Branx Fitness ‘Elite Runner Pro’ Treadmill. Please ensure you have read my user manual in full before using me. -
Page 3: Important Precautions
(see page 25) Please also keep all pets Never start the treadmill whilst you are health problems. Read all instructions before using. BRANX FITNESS LTD assumes no away from the treadmill at all times. standing on the walking belt. Always hold responsibility for personal injury or property damage sustained by or through the use of the handrails whilst using the treadmill. -
Page 4: Before You Begin
The warranty team will respond to you to confirm your warranty or if they need any further details from you. Branx Fitness backs your treadmill with a strong warranty. For the factory to respond to any problems you may have, we need your warranty information on file. -
Page 5: Assembly
PART LIST – MODEL No. BF-ER-5088S-TR Before continuing, please take a moment to look at the drawing below and familiarise yourself with the parts that are labelled. Qty. Description Qty. Description Qty. Description main frame running deck rubber cover foot frame running belt screw nail incline frame... - Page 6 STEP 1. YOUR TREADMILL ARRIVES FLAT PACKED AND 95% PRE ASSEMBLED. STEP 5. PLEASE NOTE! BEFORE PLACING THE CONSOLE AREA FLAT AND IN TO ITS CORRCT POSITION PLEASE TAKE EXTRA CARE NOT TO CUT/DAMAGE THE CABLE STEP 2. WHICH RUNS RIGHT UP THROUGH THE RIGHT TREADMILL ARM (AS IF YOU WERE FOLD UP THE CONSOLE CAREFULLY INTO PLACE UNTIL BOTH ARMS OF THE STANDING USING THE TREADMILL) INTO THE CONSOLE) TREADMILL REACH THERE ASSEMBLY POINTS.
-
Page 7: Operation And Adjustment
STEP 7. OPERATION AND ADJUSTMENT TO PUT THE SIDE COVERS INTO PLACE REMOVE THE 2 SCREWS THAT ARE ALREADY SLIGHTLY SCREWED INTO THE TREADMILL, PLACE THE COVER INTO ITS CORRECT POSITION AND SCREW BOTH SCREWS INTO PLACE IN ORDER TO HOW TO PLUG IN THE POWER CORD SECURE SAFELY THE SIDE PLASTIC COVERS. - Page 8 CONSOLE OPERATION STEP-BY-STEP CONSOLE OPERATION Note: If there is a thin sheet of clear plastic on the face of the console, remove Before operating the console, make sure that the on/off switch near the power cord is in the on position (see diagram to the right). Next, make sure that the key is removed from the console and then plug in the power cord (see HOW TO PLUG IN THE POWER CORD on page...
- Page 9 During the first few minutes of using the treadmill, inspect the alignment of the 8. Listening to music whilst your exercising walking belt. Align the belt if necessary (see Adjusting Running Belt Alignment on Simply plug in your music player using your MP3 connector cable into the MP3 page 30).
-
Page 10: Computer Function (Programmes)
10. When you are finished exercising, remove the Safety Chord Step onto the foot rails and press the stop button. Next, change the incline of the treadmill to the lowest setting. The incline must be at the lowest setting when the treadmill is folded to the storage position or the treadmill will be damaged. - Page 11 Total standard time of each pre set programmee is 30 minutes. This can be shortened to 10mins COMPUTER FUNCTION (PROGRAMMES) and extended to a maximum of 99mins or anywhere inbetween with the stages coming to effect accordingly. Prog SPEED STG 1 STG 2 STG 3 STG 4...
-
Page 12: Computer Function (Programme Graphs)
COMPUTER FUNCTION (PROGRAMME GRAPHS) COMPUTER FUNCTION (PROGRAMME GRAPHS) CONTINUED Programme 1 Programme 2 Programme 9 Programme 10 Programme 3 Programme 4 Programme 11 Programme 12 Programme 5 Programme 6 Programme 13 Programme 14 Programme 7 Programme 8 Programme 15 Programme 16 Page 22 www.branxfitness.co.uk/productsupport Page 23... -
Page 13: How To Fold, Move And Release The Treadmill
COMPUTER FUNCTION (PROGRAMME GRAPHS) CONTINUED HOW TO FOLD, MOVE & RELEASE THE TREADMILL HOW TO FOLD THE TREADMILL FOR STORAGE Programme 17 Programme 18 Unplug the power cord. CAUTION: You must be able to safely lift 30 kg (66 lbs.) in order to raise, lower, or move the treadmill. -
Page 14: Maintenence Instructions
Your treadmill is an advanced electromechanical device that delivers high performance exercise For such moves it is always recommended to instruct a qualified engineer from Branx Fitness (at a options for you. To ensure the treadmill does you well it is imperative that you carry out the cost) or to disassemble the treadmill safely to assume the flat packed position and refit assembly cleaning and maintenance operations as outlined in this section. - Page 15 Keep the lubricant away from clothes, wash hands after use and avoid contact with eyes. Rinse thoroughly with clean water should If you need more lubricant, we recommend you use the Branx Fitness Treadmill Lubrication Kit. Visit www.branxfitness.co.uk contact with eyes occur and seek medical advice immediately.
-
Page 16: Fitness Guide
Adjusting Running Belt Alignment (if the belt is pulling to one side) FITNESS GUIDE The alignment of the mat has been pre-set at the factory, however, the mat can be caused to run Starting Your Workout out-of-line by a user’s running style (eg, more weight on one foot), or if it is placed on an uneven surface - so it may need adjusting from time to time. -
Page 17: Troubleshooting
TROUBLESHOOTING The correct form for several basic stretches are shown below. Move slowly as you stretch never Your Branx Fitness Treadmill is very reliable and sturdy, with one of the lowest fault rates in the bounce. market place. However we are aware that problems can and do always occur and at all times during your warranty period we will ensure your treadmill is working for you as it should. -
Page 18: Limited Warranty
BRANX FITNESS LTD obligation under this warranty is limited to replacing or repairing, at BRANX FITNESS LTD option, the product through one of its authorized service centers. All repairs for Please find below some specific error messages you may see on the display: which warranty claims are made must be pre-authorised by BRANX FITNESS LTD. -
Page 19: Additional Useful Information
ADDITIONAL USEFUL INFORMATION We at Branx Fitness have spent considerable time and efforts to ensure this user manual covers everything you will need in order to get up and running and also to carry out the standard regular maintenance off your treadmill. Also covered are solutions to possible problems and what to do if you need help.
Need help?
Do you have a question about the ELITE RUNNER PRO BF-ER-5088S-TR and is the answer not in the manual?
Questions and answers
Hi power to treadmill but no screen
The screen on the Branx Fitness ELITE RUNNER PRO BF-ER-5088S-TR treadmill may not be working due to a faulty connection between the display and the controller (E-06 error). To fix this, turn the treadmill off at the electrical outlet and then back on. If the issue persists, email service@branxfitness.co.uk for further assistance.
This answer is automatically generated
How heavi is the package
Hi have a Branx elite pro runner
My Branx Fitness Elite Pro-runner failed to response to input on the cross bar or arms - so if I was running along at 6.6km it wouldn't slow down and despite what I did it wouldn't stop until I pulled the magnetic fail safe off. Help and advice please