Table of Contents
Advertisement
Quick Links
Operating Instructions
Fixed-focus Lens
Commercial Use
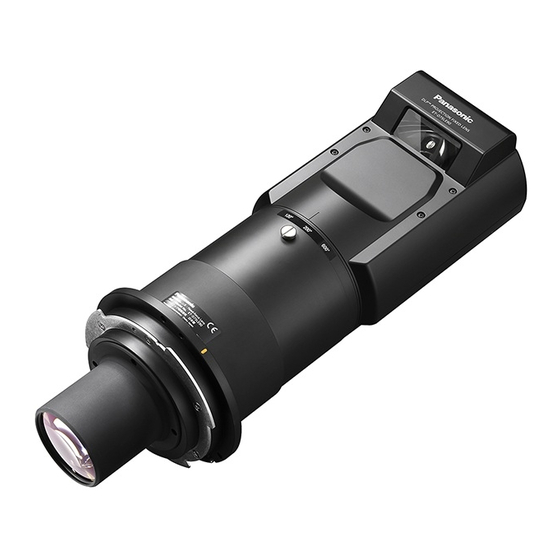
ET-D75LE90
Model No.
ENGLISH
Thank you for purchasing this Panasonic product.
■ To ensure correct use of this lens, please read the operating instructions supplied with the lens and the
projector carefully.
■ Before using this product, be sure to read "Read this first!" (
Page 3).
■ Please save this manual for future use.
TQZJ647-2
Advertisement
Table of Contents

Related Manuals for Panasonic ET-D75LE90


Summary of Contents for Panasonic ET-D75LE90
- Page 1 ET-D75LE90 Model No. ENGLISH Thank you for purchasing this Panasonic product. ■ To ensure correct use of this lens, please read the operating instructions supplied with the lens and the projector carefully. ■ Before using this product, be sure to read “Read this first!” ( Page 3).
-
Page 2: Table Of Contents
█ Contents Read this first! ..................3 Before Use.....................4 Attaching the Lens / Detaching the Lens ...........4 Before replacing the projection lens ............4 Attaching the Lens................... 5 Detaching the Lens ................. 5 Projection relationships...............6 Lens position setup and focus adjustment ........8 Lens position setup (Using projector functions) ........ -
Page 3: Read This First
Keep desiccant out of the reach of children. Information for users in the European Union Importer’s name and address within the European Union Panasonic Marketing Europe GmbH Panasonic Testing Centre Winsbergring 15, 22525 Hamburg, Germany Product Information (for Turkey only) AEEE Yönetmeliğine Uygundur. -
Page 4: Before Use
Before Use Supported projectors PT-DZ21K / PT-DS20K / PT-DW17K / PT-DZ16K / PT-DZ13K / PT-DS12K / PT-DW11K / PT-DZ10K Note z Models other than the above may also be supported. Refer to the operating instructions of the projector you are using. z In this document, the alphabet letters at the end of the projector part numbers are omitted. -
Page 5: Attaching The Lens
Attaching the Lens / Detaching the Lens (continued) Attaching the Lens * The illustration for this procedure uses PT-DZ21K as an example. Projection 1) Remove the projection lens cover.* lens cover 2) Align the mark on the projection (ii) lens (orange color) with the mark on the projector (O on the left side of the LOCK) and insert;... -
Page 6: Projection Relationships
Projection relationships The dimensional relationship between the screen and the projector is shown below. Dimensional relationship diagram Projected image Screen Note z The indications of this illustration are premised on aligning the projected image size and position to the full screen. z This illustration is not drawn to scale. - Page 7 Projection relationships (continued) Dimensional relationship z When using one of PT-DZ21K / PT-DS20K / PT-DW17K / PT-DZ16K / PT-DZ13K / PT-DS12K / PT-DW11K / PT-DZ10K For details on projection distance (L1), and A1, A2, L2, L3 and L4 values, refer to "Projected image size and Projection distance"...
-
Page 8: Lens Position Setup And Focus Adjustment
→ [PROJECTOR SETUP] → [STATUS] or by pressing the <STATUS> button on the remote control. *1: See software download page on Panasonic website (http://panasonic.net/avc/projector/pass/). You must be a registered PASS user to use the site described above. * PASS: Panasonic Professional Display and Projector Technical Support Website... -
Page 9: Lens Position Setup (Using The Supplied Lens Shift Gauge)
Lens position setup and focus adjustment (continued) Note z The lens position set using this procedure is the minimum value of A1 of "Projected image size and Projection distance" in the Appendix. Perform adjustment manually to move to the maximum value. z The lens position set using this procedure may deviate slightly from the adjustment made using the lens shift gauge. -
Page 10: Focus Adjustment Function
Lens position setup and focus adjustment (continued) Focus Adjustment Function After setting the lens position, adjust the focus. The focal balance between the center and periphery of the projected image changes depending on the size of the projected image. The lens is equipped with a focus balance adjustment function for the screen periphery. Adjusting the Focus ... -
Page 11: Adjustment Range By The Lens Position Shift (Optical Shift)
Adjustment range by the lens position shift (optical shift) Even after setting the lens position using "Lens position setup" noted on pages 8 and 9, the projection position can be adjusted within respective ranges using the optical axis shift function on the projector based on the projected image position for this lens position. -
Page 12: Specifications
154 mm (6-1/16") Dimensions Height 154 mm (6-1/16") Depth 448.5 mm (17-21/32") Approx. 6.5 k g (14.33 lb) Net Weight Dimensions (Unit: mm) 448.5 (17-21/32") 448.5 (17-21/32") Panasonic Corporation Web Site : http://panasonic.net/avc/projector/ © Panasonic Corporation 2014 HS1014KM2035 -KI Printed in Japan... -
Page 13: Dimensional Relationship
Appendix / Annexe ■ Dimensional relationship ■ Relations dimensionnelles The dimensional relationship between the screen and the projector is shown below. Les relations dimensionnelles entre l’écran et le projecteur sont indiquées ci-dessous. Projected image / Image projetée Screen / Écran Projected image height / Hauteur de l'image projetée SW Projected image width / Largeur de l'image projetée Diagonal length of the projected image / Diagonale de la zone de projection... - Page 14 The dimensions of the following table contain a slight error. Periods are used to represent decimal points in the calculation formulas in the following table. Les dimensions du tableau suivant peuvent présenter un léger écart. Les points sont utilisés pour indiquer les décimales dans les formules de calcul dans le tableau suivant. z PT-DZ21K (Unit / Unités : When the screen aspect ratio is 16:10...
- Page 15 z PT-DS20K (Unit / Unités : When the screen aspect ratio is 4:3 : [0.39:1]) (Throw ratio Lorsque le rapport d’aspect de l'écran est 4:3 : [0.39:1]) (Rapport de projection 3.05 (120") 1.829 2.438 0.96 -0.04 0.26 3.81 (150") 2.286 3.048 1.20 0.19...
- Page 16 (PT-DW17K) When the screen aspect ratio is 4:3 : [0.54:1]) (Throw ratio Lorsque le rapport d’aspect de l'écran est 4:3 : [0.54:1]) (Rapport de projection 3.05 (120") 1.829 2.438 1.31 0.30 0.40 – 0.74 3.81 (150") 2.286 3.048 1.63 0.63 0.53 –...
- Page 17 z PT-DZ13K / PT-DZ10K (Unit / Unités : When the screen aspect ratio is 16:10 : [0.36:1]) (Throw ratio Lorsque le rapport d’aspect de l'écran est 16:10 : [0.36:1]) (Rapport de projection 3.05 (120") 1.615 2.585 0.94 0.13 0.27 – 0.36 3.81 (150") 2.019 3.231...
- Page 18 z PT-DS12K (Unit / Unités : When the screen aspect ratio is 4:3 : [0.39:1]) (Throw ratio Lorsque le rapport d’aspect de l'écran est 4:3 : [0.39:1]) (Rapport de projection 3.05 (120") 1.829 2.438 0.96 0.15 0.28 3.81 (150") 2.286 3.048 1.20 0.38...
- Page 19 (PT-DW11K) When the screen aspect ratio is 4:3 : [0.54:1]) (Throw ratio Lorsque le rapport d’aspect de l'écran est 4:3 : [0.54:1]) (Rapport de projection 3.05 (120") 1.829 2.438 1.31 0.49 0.42 – 0.75 3.81 (150") 2.286 3.048 1.63 0.82 0.54 –...
- Page 20 PT-DW17K / PT-DZ16K = L1 + 0.029 = L1 - 0.277 PT-DZ13K / PT-DS12K / = L1 - 0.817 = A1 + 0.200 PT-DW11K / PT-DZ10K Panasonic Corporation Web Site : http://panasonic.net/avc/projector/ HS1014HK2035 -PJ © Panasonic Corporation 2014 Printed in Japan...
Need help?
Do you have a question about the ET-D75LE90 and is the answer not in the manual?
Questions and answers