Gaggenau 400 Series Use And Care Manual
Hide thumbs
Also See for 400 Series:
- Installation manual ,
- Installation instructions manual (72 pages) ,
- Use and care manual (52 pages)
Table of Contents
Advertisement
Quick Links
Advertisement
Table of Contents

Related Manuals for Gaggenau 400 Series


Summary of Contents for Gaggenau 400 Series
- Page 1 Gaggenau en-us Use and Care Manual DF481701F Dishwasher...
-
Page 2: Table Of Contents
en-us Table of contents 1 IMPORTANT SAFETY INSTRUCTIONS.... 4 11.2 Setting the amount of rinse aid ....... 24 1.1 Safety definitions............ 4 11.3 Switching the rinse aid system off ...... 24 1.2 General information........... 4 12 Detergent .............. 24 1.3 Intended use ............. - Page 3 en-us 19.3 Transporting the appliance........ 46 19.4 Disposal of your old appliance ...... 46 20 Customer Service .......... 46 20.1 Model number (E-Nr.), production number (FD) and consecutive numbering (Z-Nr.) ....... 47 20.2 AquaStop® Pledge .......... 47 21 Technical specifications........ 48 21.1 Information regarding Free and Open Source Software..............
-
Page 4: Important Safety Instructions
en-us IMPORTANT SAFETY INSTRUCTIONS READ AND SAVE THESE INSTRUCTIONS Read all instructions carefully before use. These Up to an altitude of 8200 ft (2500 m) above sea level. ¡ precautions will reduce the risk of electrical shock, fire and injury to persons. When using kitchen appliances, basic 1.4 Restrictive Use safety precautions must be followed including those in the This appliance is not intended for use by persons... -
Page 5: Risk To Children
en-us IMPORTANT SAFETY INSTRUCTIONS READ AND SAVE THESE INSTRUCTIONS WARNING Do not use harsh chemicals such as bleach-based ▶ Under certain conditions, hydrogen gas may be produced products to clean your dishwasher. Some bleach-based in a hot water system that has not been used for two products can damage your dishwasher and may weeks or more. -
Page 6: Safety Systems
en-us IMPORTANT SAFETY INSTRUCTIONS READ AND SAVE THESE INSTRUCTIONS 1.9 Safety systems Protect children from possible hazards resulting from the appliance. The appliance is equipped with a Childproof lock → Page 7 . -
Page 7: Preventing Material Damage
Preventing material damage en-us Preventing material damage 2 Preventing material damage Environmental protection and energy-saving 4 Environmental protection and energy-saving Preventing material damage NOTICE: Environmental protection and energy-saving Harsh chemicals such as bleach-based products can 4.1 Saving energy damage your dishwasher. Do not use harsh chemicals such as bleach-based ▶... -
Page 8: Sensors
en-us Environmental protection and energy-saving 4.4 Sensors The sensors adjust the cycle sequence and strength in the Auto cycles depending on the level and type of soiling. The sensor has different sensitivity levels that can be changed in the basic settings. → "Changing the basic settings", Page 31 Sensor setting Description Standard... -
Page 9: Familiarizing Yourself With Your Appliance
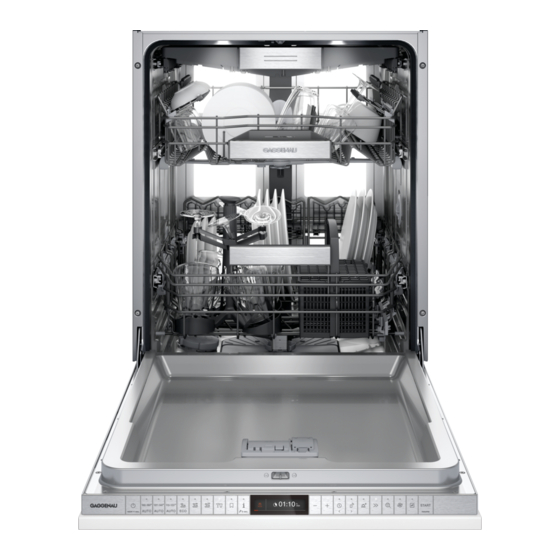
Familiarizing yourself with your appliance en-us Familiarizing yourself with your appliance 5 Familiarizing yourself with your appliance Familiarizing yourself with your appliance 5.1 Appliance Rating plate Rating plate with E number and FD number → Page 47 . You will need this data to contact Customer service → Page 46 . Detergent dispenser Add detergent to the detergent dispenser. -
Page 10: Controls
en-us Familiarizing yourself with your appliance Dispenser for special salt Add special salt to the dispenser for special salt. → "Water softening system", Page 22 Lower spray arm The lower spray arm washes the dishware in the lower rack. If the dishware has not been washed properly, clean the spray arms. - Page 11 Familiarizing yourself with your appliance en-us ON/OFF button and reset button Switching on the appliance Switching off the appliance Terminating the wash cycle → Page 29 Cycle buttons Cycles → Page 12 Info button If you press , the display shows information about selected cycles, basic settings and additional functions.
- Page 12 en-us Dishwasher Cycles Dishwasher Cycles 6 Dishwasher Cycles Below is an overview of the different cycles available on your dishwasher. Dishwasher Cycles The running time may vary depending on the cycle selected. The running time depends on the water temperature, the quantity of dishware, the level of dirt and the option selected. The running time will change if the rinse aid system is switched off or rinse aid needs to be added.
-
Page 13: Dishwasher Cycles
Dishwasher Cycles en-us Cycle Purpose Cycle sequence Usage 1) Hour/min. 2) Electrical/kWH 3) Water/gal Dishware: Time-optimized: 1) 1:00 ¡ Cleaning mixed dishware Cleaning 122 °F 2) 0.840 ¡ ¡ ¡ Wash and Dry and silverware. Intermediate rinse 3) 3.8 ¡ ¡ Level of soiling: Final rinse 147 °F ¡... -
Page 14: Personalization Function
en-us Options Third rack Option transform moisture into heat up to 176F/80C to get dishes, even plastics, 60% drier. Extends drying time. To ensure a higher hygiene status ¡ for the appliance and dishware, Sanitize the temperature is increased and maintained for an extra-long period. -
Page 15: Upper Rack
Features en-us Raise or lower the rack evenly to the right level. 8.1 Upper rack Arrange cups, glasses, and small tableware items in the top rack. Check that the rack is level on both sides. Release the levers. The rack clicks into position. Slide the rack in. -
Page 16: Lower Rack
en-us Features Installing the upper rack 8.2 Lower rack Pull the guide rails of the upper rack out of the Arrange pans and plates in the lower rack. appliance . Insert the upper rack . Silverware basket Note the position of the detent pins. Lift the rack slightly and guide the rear detent pins into the rear locking hooks of the guide rails ... -
Page 17: Silverware Basket
Features en-us Lift the rack out of the front holders and pull forward slightly. 8.4 Silverware drawer Lift the rack out of the rear holders. Arrange silverware in the silverware drawer. Slide the guide rails into the appliance. Installing the lower rack Pull the guide rails of the lower rack out of the appliance. - Page 18 en-us Features To fold down a side shelf, push the lever forward Lift the silverware drawer forward out of the catches . fold down the side shelf . Lower the silverware drawer and pull out. To fold down the front tines, push the lever forward and fold down the folding tines ...
-
Page 19: Cup Shelf
Features en-us Lower the silverware drawer and press the front detent 8.6 Flip tines pins into the notches . Use the flip tines to position dishware securely, e.g. plates. The silverware drawer clicks into position. Slide the silverware drawer into the appliance ... -
Page 20: Baking Sheet Spray Head
en-us Features 8.7 Baking sheet spray head 8.8 Stemware basket Use the baking sheet spray head to clean large items of Use the stemware basket to ensure perfect dishwashing dishware, e.g. trays, racks and plates. results for your stemware. Arrange max. 2 baking sheets and 2 racks as shown to Loading the stemware basket ensure that the spray jet can reach all parts. -
Page 21: Gastronorm Container Insert
Features en-us Turn the rotating fixing arm clockwise and push down Take the stemware out of the stemware basket . . The fixing arm clicks into position. 8.9 Gastronorm container insert The stemware is securely positioned in the stemware Use the standardized Gastronorm container insert to basket. -
Page 22: Before Using For The First Time
en-us Before using for the first time Note: If you select Home Connect® with the setting Before using for the first time 9 Before using for the first time Initial use , make further settings using the Home Connect® app on your mobile device. Before using for the first time You can change the settings for initial use and other 9.1 Initial use Basic settings on the appliance at any time or using the... -
Page 23: Special Dishwasher Salt
Rinse aid system en-us 10.3 Special Dishwasher Salt 10.4 Switching off the water softening system You can use special dishwasher salt to soften the water. If you do not need to use the water softening system, e.g. Adding dishwasher salt you already have a whole house water softening system, If the salt refill indicator lights up, add special dishwasher you can turn the system off. -
Page 24: Setting The Amount Of Rinse Aid
en-us Detergent Add rinse aid up to the max mark. Detergent 12 Detergent Find out which detergents are suitable for your appliance. Detergent 12.1 The correct detergents Only use detergents that are made for dishwashers, either basic or combination detergents. For the best washing and drying results, use a separate detergent, then add Special salt and Rinse aid → ... -
Page 25: Information On Detergent
Dishware en-us Close the lid of the detergent dispenser. 12.3 Information on Detergent Follow the instructions on detergents in everyday use. Detergents marked as "ecological" (environmentally ¡ friendly) generally contain lower levels of active agents or none at all. The cleaning effect may be reduced. Adjust the rinse aid and the water softening system ¡... -
Page 26: Loading Dishware
en-us Dishware For better washing and drying results, position items ¡ Cause Recommendation with curves or recesses at an angle so water can run Decorative glassware, ¡ off. antique dishes and artistic hand-made pottery Plastic parts that are not ¡ heat-resistant Dishes made from ¡... -
Page 27: Removing Dishware
Dishware en-us Third rack 13.3 Removing dishware CAUTION Dishes can be very hot immediately after the cycle ends. Open the door slightly and allow dishes to cool for a few ▶ minutes before unloading. To prevent water dripping onto dishware, unload it starting at the bottom and working up. -
Page 28: Basic Operation
en-us Basic Operation Third rack 14.4 Setting a cycle To adjust the wash cycle to the soiling level of the dishware, select a suitable program. Press the right cycle button. ▶ The cycle is set and the cycle button flashes. 14.5 Setting options You can set options to complete the chosen wash program. -
Page 29: Terminating The Wash Cycle
Basic Operation en-us 14.9 Terminating the wash cycle To end a cycle early or to switch from one that has already started, you will need to cancel it first. Open the appliance door. Press for approx. 4 seconds. Close the appliance door. The cycle is cancelled and ends after approx. 1 minute. 14.10 Displaying wash cycle information You can show information about cycles and options on the display. -
Page 30: Basic Settings
en-us Basic settings Basic settings 15 Basic settings You can configure the basic settings for your appliance to meet your needs. Basic settings 15.1 Overview of the basic settings The basic settings depend on the features of your appliance. Basic setting Selection Description Time setting 00:00 - 24:00 Set the current time. -
Page 31: Changing The Basic Settings
Home Connect® en-us Basic setting Selection Description WLAN Switch the wireless network connection on or off. The basic setting "WLAN" is not available until you have connected the appliance with the Home Connect® app. → "Home Connect® ", Page 31 Remote Start Activate or deactivate Manual → ... -
Page 32: Home Connect® Settings
en-us Cleaning and maintenance Setting up Home Connect® 16.4 Remote Diagnostics Requirements The Customer Service can access your appliance via The Home Connect® app is installed on your mobile ¡ Remote Diagnostics if you ask them to do so, if your device. appliance is connected to the Home Connect® server and The appliance receives signals from the WLAN home ¡... -
Page 33: Cleaning Agent
To avoid these Care and Machine Cleaner for Dishwashers online at problems and reduce odors, we recommend cleaning your https://www.gaggenau.com/global/store or from customer appliance at regular intervals. service. Machine Care combined with machine cleaning products Machine Care is a program which removes various will provide the right care for your appliance. -
Page 34: Filter System
en-us Cleaning and maintenance Pull down the micro filter to remove. 17.5 Filter system The filter system removes coarse soiling from the dishwashing cycle. Press the locking catches together and lift the coarse filter out Micro filter Fine filter Coarse filter Cleaning filters Debris in the dishwashing water may block the filters. -
Page 35: Cleaning Spray Arms
Cleaning and maintenance en-us The spray arm will automatically return to the correct Hold the spray arm in the center and lift straight up to position when starting, so it’s not necessary to remove. reposition the spray arm to the front. 17.6 Cleaning spray arms Limescale and debris in the dishwashing water may block the nozzles and bearings on the spray arms. -
Page 36: Troubleshooting
en-us Troubleshooting Troubleshooting 18 Troubleshooting You can eliminate minor issues on your appliance Troubleshooting yourself. Please read the information on eliminating issues before contacting Customer Service. This may avoid unnecessary repair costs. Issue Cause and troubleshooting Appliance door does not open. Childproof lock is activated. Press the top of the door in the middle twice in quick succession. - Page 37 Troubleshooting en-us Issue Cause and troubleshooting E:3200 or indicator for water Water faucet is clogged or calcified. supply lights up. Turn on the faucet. ▶ The flow rate must be at least 10 l/min when the water supply is open. Filters in the water connection of the supply or AquaStop hose are blocked. Switch off the appliance.
- Page 38 en-us Troubleshooting Issue Cause and troubleshooting E:6103 lights up. Water is not Secure the cover of the drain pump so it clicks into place or clean the drain ▶ draining. pump. Not an appliance error. High loop is missing and/or debris flushed back into drain hose and blocked it.
- Page 39 Troubleshooting en-us Issue Cause and troubleshooting A different error code appears in There is a technical issue. the display window. Press Pull out the power cord plug of the appliance or switch off the breaker. E:0100 to E:9010 Wait at least 2 minutes. Insert the power cord plug of the appliance in a power outlet or switch on the breaker.
- Page 40 en-us Troubleshooting Issue Cause and troubleshooting Food remnants on dishware. Dishware was placed too close together or rack is overfilled. Arrange dishware with sufficient space in between. The spray jets must reach the surfaces of the dishware. Avoid points of contact. Spray arm rotation of the lower spray arm is blocked.
- Page 41 Troubleshooting en-us Issue Cause and troubleshooting Detergent residue in the appliance The lid of the detergent dispenser is blocked by the tab and will not open. Position the tab in the detergent dispenser crosswise, not vertically. ▶ Tabs are used in the quick or short cycle. There is not enough time for the tab to dissolve.
- Page 42 en-us Troubleshooting Issue Cause and troubleshooting Tea residue or lipstick marks on Dishware has been precleaned too intensively. Then the sensors choose a lighter dishware. cycle. Stubborn remnants cannot be entirely removed. Only remove large remnants of food and do not pre-rinse dishware. ▶...
- Page 43 Troubleshooting en-us Issue Cause and troubleshooting There are removable streaks on Adjust the sensitivity of the sensors. ▶ glasses, glassware with a metallic → "Sensors", Page 8 appearance and silverware. Irreversible clouding of glassware. Glasses are not dishwasher-proof, only suitable for dishwashers. Use dishwasher-proof glasses.
- Page 44 en-us Troubleshooting Issue Cause and troubleshooting All LEDs light up or flash. Electronics have detected a fault. Press the main switch button for approx. 4 seconds. → "Controls", Page 10 The appliance is reset and restarted. If the problem occurs again: Switch off the appliance. ‒...
- Page 45 Troubleshooting en-us Issue Cause and troubleshooting Appliance door cannot be closed. Door cannot be closed due to installation method. Check whether the appliance has been installed properly. ▶ When closed, the appliance door, its decor or attached parts should not knock against adjacent cabinets or the worktop.
-
Page 46: Transportation, Storage And Disposal
USA: If your dishwasher will be unused for an extended ▶ 1-877-442-4436 period of time in a location that experiences freezing www.gaggenau.com temperatures (vacation home or through a vacation www.gaggenau.com/us/appliances/eshop period), have your dishwasher winterized by an authorized service provider. -
Page 47: Customer Service
Customer Service en-us 20.1 Model number (E-Nr.), production number (FD) and consecutive numbering (Z-Nr.) You can find the model number (E-Nr.), the production number (FD) and the consecutive numbering (Z-Nr.) on the appliance's rating plate. The rating plate is located inside the appliance door. Making a note of your appliance's details and the Customer Service telephone number will enable you to find them again quickly. -
Page 48: Technical Specifications
(Please search on the product website for your way for Gaggenau to notify you in the unlikely event of a appliance model and additional documents). Alternatively, safety notice or product recall. -
Page 49: Repair/Replace As Your Exclusive Remedy
BSH will repair or replace the stainless steel door if the ¡ door should rust through (excludes labor charges). 22.5 Out of warranty product Gaggenau is under no obligation, at law or otherwise, to 22.4 Repair/replace as your exclusive provide you with any concessions, including repairs, remedy prorates, or Product replacement, once this warranty has expired. -
Page 50: Obtaining Warranty Service
BSH. 22.7 Obtaining warranty service To obtain warranty service for your product, you should contact Gaggenau Customer Support at 1-877-442-4436 to schedule a repair. 22.8 Product information For handy reference, copy the information below from the rating plate. - Page 52 BSH Home Appliances Corporation 1901 Main Street, Suite 600 Irvine, CA 92614 www.gaggenau.com 1-877-442-4436 © 2023 BSH Home Appliances Corporation...
Need help?
Do you have a question about the 400 Series and is the answer not in the manual?
Questions and answers