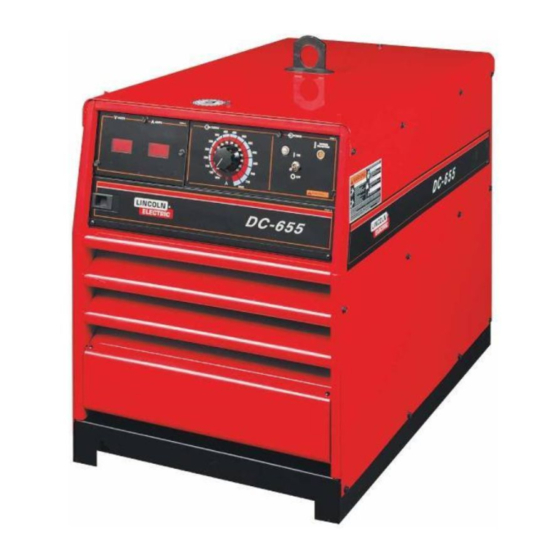
Lincoln Electric IDEALARC DC-655 Service Manual
Lincoln electric soldering gun user manual
Hide thumbs
Also See for IDEALARC DC-655:
- Operator's manual (50 pages) ,
- Technical specifications (4 pages) ,
- Specification sheet (168 pages)
Table of Contents
Advertisement
RETURN TO MAIN INDEX
SVM142-A
September, 2002
IDEALARC
™
DC-655
For use with machine code number 10501 thru 10510
Safety Depends on You
Lincoln arc welding and cutting
equipment is designed and built
with safety in mind. However,
your overall safety can be
increased by proper installation
. . . and thoughtful operation on
your part. DO NOT INSTALL,
OPERATE OR REPAIR THIS
EQUIPMENT WITHOUT READ-
ING THIS MANUAL AND THE
SAFETY PRECAUTIONS CON-
TAINED THROUGHOUT. And,
most importantly, think before
you act and be careful.
SERVICE MANUAL
Copyright © 2002 Lincoln Global Inc.
• World's Leader in Welding and Cutting Products •
• Sales and Service through Subsidiaries and Distributors Worldwide •
Cleveland, Ohio 44117-1199 U.S.A. TEL: 216.481.8100 FAX: 216.486.1751 WEB SITE: www.lincolnelectric.com
Advertisement
Chapters
Table of Contents
Troubleshooting

Related Manuals for Lincoln Electric IDEALARC DC-655


Summary of Contents for Lincoln Electric IDEALARC DC-655
- Page 1 RETURN TO MAIN INDEX SVM142-A September, 2002 IDEALARC ™ DC-655 For use with machine code number 10501 thru 10510 Safety Depends on You Lincoln arc welding and cutting equipment is designed and built with safety in mind. However, your overall safety can be increased by proper installation .
-
Page 2: Safety
Miami, Florida 33135 or CSA Standard W117.2-1974. A Free copy of “Arc Welding Safety” booklet E205 is available from the Lincoln Electric Company, 22801 St. Clair Avenue, Cleveland, Ohio 44117-1199. BE SURE THAT ALL INSTALLATION, OPERATION, MAINTENANCE AND REPAIR PROCEDURES ARE PERFORMED ONLY BY QUALIFIED INDIVIDUALS. - Page 3 (MSDS) and follow your employer’s safety practices. MSDS forms are available from your welding distributor or from the manufacturer. 5.e. Also see item 1.b. IDEALARC DC-655 which require special...
- Page 4 8.b. Install equipment in accordance with the U.S. National Electrical Code, all local codes and the manufacturer’s recommendations. 8.c. Ground the equipment in accordance with the U.S. National Electrical Code and the manufacturer’s recommendations. IDEALARC DC-655 compressed cylinders...
- Page 5 Autant que possible, l’installation et l’entretien du poste seront effectués par un électricien qualifié. Avant de faires des travaux à l’interieur de poste, la debrancher à l’interrupteur à la boite de fusibles. Garder tous les couvercles et dispostifis de sûreté à leur place. IDEALARC DC-655 Cela peut...
-
Page 6: Table Of Contents
Troubleshooting and Repair...Section F How to Use Troubleshooting Guide...F-2 PC Board Troubleshooting Procedures ...F-3 Troubleshooting Guide ...F-4 Test Procedures ...F-13 Oscilloscope Waveforms ...F-43 Replacement Procedures...F-49 Retest After Repair...F-57 Electrical Diagrams... Section G Parts Manual... P-317 RETURN TO MAIN INDEX IDEALARC DC-655 Page... - Page 7 Section A-1 - INSTALLATION SECTION - Installation ...Section E Technical Specifications - Idealarc DC-655 ...A-2 Graphic Symbols that Appear on Rating Plate ...A-3 Safety Precautions...A-4 Select Suitable Location...A-4 Stacking...A-4 Tilting ...A-4 Electrical Input Connections...A-4 Fuse and Wire Sizes...A-4 Ground Connection ...A-4 Input Power Supply Connections ...A-5...
-
Page 8: Installation
1 (43) 4 (21) 4 (21) 6 (14) 6 (14) 6 (14) PHYSICAL DIMENSIONS WIDTH DEPTH 22.2 in 38.0 in 564 mm 965 mm IDEALARC DC-655 Code Number 10501 10502 10503 10504 10505 10506 10507 10508 10509 10510 Volts at Rated Amperes... -
Page 9: Graphic Symbols That Appear On Rating Plate
Constant Current Output Characteristics SMAW INSTALLATION (Domestic, Electrotechnical NRTL/C NRTL IDEALARC DC-655 Constant Voltage Output Characteristics GMAW FCAW Designates welder can be used in environments with increased hazard electric shock. (European models) -
Page 10: Safety Precautions
• Do not touch electrically hot parts. • Always connect the Idealarc DC-655 grounding ter- minal (located on the welder near the reconnect panel) to a good electrical earth ground. -
Page 11: Reconnect Procedure
INPUT LINES CONTACTOR CONTROL TRANSF. LINKS THE LINCOLN ELECTRIC CO., CLEVELAND OHIO U.S.A. FIGURE A.2 - DUAL VOLTAGE MACHINE RECONNECTION PROCEDURE INSTALLATION RECONNECT PROCEDURE Multiple voltage machines are shipped connected to the highest input voltage listed on the machine’s rating plate. -
Page 12: Output Connections
5. Replace the terminal strip access cover panel. "). 14 PIN MS RECEPTACLE LOW INDUCTANCE NEGATIVE OUTPUT TERMINAL TERMINAL STRIP COVER PANEL FIGURE A.3 - OUTPUT CONNECTIONS IDEALARC DC-655 ") ") if using NR203Ni 1% electrode. HIGH INDUCTANCE NEGATIVE OUTPUT TERMINAL... -
Page 13: Vac Duplex Receptacle
“-21” on the terminal strip. This is the configuration for positive welding. If welding negative polarity, connect lead #21 to the “+21” connection point on the terminal strip. IDEALARC DC-655 K = 4 2 A = 3 2... -
Page 14: Terminal Strips
If connecting a feeder cable directly to the terminal strip, Lead #21 from the cable is connected to “-21” on the terminal strip for positive welding. If welding negative polarity, connect lead #21 to the “+21” connection point on the terminal strip. INSTALLATION See Auxiliary Function Function 42 VAC IDEALARC DC-655... - Page 15 Shorted Rectifier Fault Protection...B-7 Idle Shutdown Timer ...B-7 Welding Performance ...B-8 Low Inductance Terminal ...B-8 CV Mode Current Limiting...B-8 CC Mode Arc Force ...B-8 CC Mode Hot Start ...B-8 CC Mode Arc Gouging...B-8 TABLE OF CONTENTS IDEALARC DC-655 Section B-1...
-
Page 16: Operation
FUMES AND GASES can be dangerous. • Keep your head out of fumes. CUTTING SPARKS can cause fire or explosion. • Keep flammable material away. ARC RAYS can burn. • Wear eye, ear, and body protection. IDEALARC DC-655... -
Page 17: Operation
• Optional Dual Process Switch for two processes with polarity change and electrical isolation. WELDING CAPABILITY The DC-655 has the following Output and Duty Cycle based on operation for a 10 minute period: 650 Amps, 44 Volts at 100% 815 Amps, 44 Volts at 60% IDEALARC DC-655... -
Page 18: Controls And Settings
(no load) voltage will be about 68 volts in this mode. This mode is used for stick welding (SMAW) and CC air carbon-arc gouging, and employs a “Hot Start” feature and an Arc Force Control. IDEALARC DC-655 position, con- position, control is through a... -
Page 19: Vac Duplex Receptacle
115 VAC auxiliary circuits located in the duplex receptacle, terminal strip and MS- receptacle. Breaker is rated 20 amps on Domestic Models and 15 amps on all other models. IDEALARC DC-655 - If the When the machine - This breaker... -
Page 20: Case Back Connections
This fuse is located inside the DC-655 mounted on the fan motor bracket. MACHINE SHUTDOWN The DC-655 provides shutdown modes for thermal over-heating, excessive load currents and faults. It also provides an idle timer shutdown feature for addi- tional operating economy. IDEALARC DC-655... -
Page 21: Thermal Shutdown
Shutdown is reset by turning the DC-655 input power off, then on. Switch #1 Timer On/Off (UP=ON, Down=OFF) Switch #2 Time selection (UP=2 hours, Down=1/2 hour) Note: See Weld Performance section for use of switch #3 and #4. IDEALARC DC-655 DIP Switch... -
Page 22: Welding Performance
3/8” (10mm) diameter carbons. CC mode gouging is often preferred over CV mode for cutting control, but some Arc Force may be required to avoid carbon stub- bing. IDEALARC DC-655 Hot Start Max. Arc Force Min. Arc Force AMPS... - Page 23 Section C-1 Accessories...Section C Field Installed Options...C-2 Connection of Lincoln Electric Automatic or Semiautomatic Wire Feeders ...C-3 Automatic Wire Feeders...C-3 NA-3 or LT-7 (Terminal Strip) ...C-3 NA-5 or NA-5R (Terminal Strip) ...C-4 Semiautomatic Wire Feeders ...C-6 LN-7 (14-Pin MS Receptacle)...C-6 LN-7 (Terminal Strip) ...C-7...
-
Page 24: Field Installed Options
Individual protection circuits of both machines func- tion normally. (Installation instructions are included with the switch.) IDEALARC DC-655 C A B L E R E C E P T A C L E ( 6 S O C K E T ) T O :... -
Page 25: Connection Of Lincoln Electric Automatic Or Semiautomatic Wire Feeders
ACCESSORIES AUTOMATIC WIRE FEEDERS CONNECTING THE NA-3 OR LT-7 TO THE IDEALARC DC-655 (TERMINAL STRIP) 1. Set Idealarc DC-655 POWER toggle switch to the LN-9* OFF (0) position. LN-9 GMA* 2. Disconnect main AC input power to the Idealarc LN-23P DC-655. - Page 26 “Remote” position and the OUTPUT TERMINALS switch in the “Remote” position. CONNECTING THE NA-5/-5R TO THE IDEALARC DC-655 (TERMINAL STRIP) 1. Set the Idealarc DC-655 POWER toggle switch to the OFF (0) position. 2. Disconnect main AC input power to the Idealarc DC-655.
- Page 27 NOTE: The connection diagram shown in Figure C.2 shows the electrode connected for positive polarity. To change polarity: a. Set the Idealarc DC-655 POWER toggle switch to the OFF (0) position. b. Move the electrode cable to the negative (-) output terminal.
-
Page 28: 14-Pin Ms Receptacle
IDEALARC DC-655/LN-7 WITH K584 INPUT CABLE ASSEMBLY CONNECTION DIAGRAM SEMIAUTOMATIC WIRE FEEDERS CONNECTING THE LN-7 TO THE IDEALARC DC-655 (14-PIN MS RECEPTACLE) 1. Set the POWER toggle switch to the OFF (0) posi- tion. 2. Disconnect main AC input power to the Idealarc DC-655. -
Page 29: 655 Terminal Strip
CONNECTING THE LN-7 TO THE IDEALARC DC-655 (TERMINAL STRIP) 1. Set the Idealarc DC-655 POWER toggle switch to the OFF (0) position. 2. Disconnect main AC input power to the Idealarc DC 655. 3. Connect the wire feeder control cable leads to the Idealarc DC-655 terminal strip as shown in Figure C.3. - Page 30 FIGURE C.4 - LN-8 OR LN-9 WIRE FEEDER CONNECTION TO THE IDEALARC DC-655 CONNECTING THE LN-8 OR LN-9 TO THE IDEALARC DC-655 (TERMINAL STRIP) 1. Set the Idealarc DC-655 POWER toggle switch to the OFF (0) position. 2. Disconnect main AC input power to the Idealarc DC-655.
- Page 31 WIRE FEEDER VOLTAGE CONTROL. Place the OUTPUT CONTROL switch in the “Remote” position and the OUTPUT TERMINALS switch in the “Remote” position. FIGURE C.5 – IDEALARC DC-655 DH-10 CONNECTION LINCOLN CV-655 POWER SOURCE N.E. ELECTRODE CABLE...
- Page 32 NOTES IDEALARC DC-655...
- Page 33 Section D-1 Section D-1 TABLE OF CONTENTS -MAINTENANCE- Maintenance ...Section D Safety Precautions...D-2 General Maintenance...D-2 General Component Locations...D-3 IDEALARC DC-655...
-
Page 34: Safety Precautions
3. Periodically check the welding cables. Inspect for any slits or punctures. Also make sure that all connections are tight. MAINTENANCE IDEALARC DC-655... -
Page 35: General Component Locations
4. CASE TOP 5. RECONNECT PANEL (LOCATION) 6. INPUT CONTACTOR (LOCATION) 7. CONTROL TRANSFORMER (LOCATION) 8. CASE BACK 9. FAN ASSEMBLY 10. CONTROL PANEL 11. PC BOARDS (LOCATION) 12. CHOKE 13. MAIN TRANSFORMER 14. BASE 15. SCR RECTIFIER BRIDGE MAINTENANCE IDEALARC DC-655... - Page 36 NOTES IDEALARC DC-655...
-
Page 37: Theory Of Operation Section
Amphenol Receptacle Motor Thermal Sensor SNUBBER 115VAC BOARD GATE SIGNAL 42VAC MAIN TRANSFORMER SCR BRIDGE CHOKE TO OPTIONAL METER BOARD IDEALARC DC-655 Section E-1 OUTPUT ARC FORCE CONTROL CONTROL SIGNAL CONTROL BOARD MODE SWITCH POSITIVE TERMINAL SHUNT LATCHING RESISTOR HIGH... -
Page 38: Theory Of Operation
14-pin MS type connector. Three other isolated coils are used to power the optional digital meter PC board. One winding is rated at 42 VAC, and the other two are each rated at 10 VAC. IDEALARC DC-655 OUTPUT ARC FORCE CONTROL... - Page 39 The snubber/fan board furnishes protection to the SCR bridge from the transient voltages. It also moni- tors the thermal sensor and activates the fan motor when cooling is necessary. IDEALARC DC-655 OUTPUT ARC FORCE CONTROL CONTROL SIGNAL...
- Page 40 Also, the control board LED 3 input shutdown light will turn on. Welding and auxiliary output will not be pre- sent, but the pilot light and control board power will be present until the power switch is turned off. IDEALARC DC-655...
- Page 41 If the SCR is turned on early in the positive half cycle, the conduction time is longer, resulting in greater SCR output. occurs later in the cycle, the conduction time is less, resulting in lower SCR output. IDEALARC DC-655 If the gate firing...
- Page 42 NOTES IDEALARC DC-655...
- Page 43 Abnormal Open Circuit Voltage Waveform-Constant Voltage MIG ...F-48 Replacement Procedures Input Contactor (CR1) Cleaning/Replacement ...F-49 SCR Rectifier Bridge Removal and Replacement ...F-51 Main Transformer and Choke Removal and Replacement ...F-54 Retest After Repair ...F-57 TABLE OF CONTENTS IDEALARC DC-655 Section F-1...
-
Page 44: Troubleshooting And Repair
TROUBLESHOOTING & REPAIR HOW TO USE TROUBLESHOOTING GUIDE Service and repair should be performed by only Lincoln Electric Factory Trained Personnel. Unauthorized repairs performed on this equipment may result in danger to the technician and machine operator and will invalidate your factory warranty. For your safety and to avoid Electrical Shock, please observe all safety notes and precautions detailed throughout this manual. -
Page 45: Pc Board Troubleshooting Procedures
- If the PC board uses protective shorting jumpers, don’t remove them until installation is complete. - If you return a PC board to The Lincoln Electric Company for credit, it must be in the static-shielding bag. This will prevent further damage and allow prop- er failure analysis. -
Page 46: Troubleshooting Guide
If for any reason you do not understand the test procedures or are unable to perform the test/repairs safely, con- tact the Lincoln Electric Service Department for electrical troubleshooting assistance before you proceed. Call 1-800-833-9353. POSSIBLE AREAS OF... - Page 47 If for any reason you do not understand the test procedures or are unable to perform the test/repairs safely, con- tact the Lincoln Electric Service Department for electrical troubleshooting assistance before you proceed. Call 1-800-833-9353. POSSIBLE AREAS OF...
- Page 48 If for any reason you do not understand the test procedures or are unable to perform the test/repairs safely, con- tact the Lincoln Electric Service Department for electrical troubleshooting assistance before you proceed. Call 1-800-833-9353. detailed in the beginning of this manual.
- Page 49 If for any reason you do not understand the test procedures or are unable to perform the test/repairs safely, con- tact the Lincoln Electric Service Department for electrical troubleshooting assistance before you proceed. Call 1-800-833-9353.
- Page 50 If for any reason you do not understand the test procedures or are unable to perform the test/repairs safely, con- tact the Lincoln Electric Service Department for electrical troubleshooting assistance before you proceed. Call 1-800-833-9353. POSSIBLE AREAS OF...
- Page 51 If for any reason you do not understand the test procedures or are unable to perform the test/repairs safely, con- tact the Lincoln Electric Service Department for electrical troubleshooting assistance before you proceed. Call 1-800-833-9353. POSSIBLE AREAS OF...
- Page 52 The analog meters are not reading correctly. If for any reason you do not understand the test procedures or are unable to perform the test/repairs safely, con- tact the Lincoln Electric Service Department for electrical troubleshooting assistance before you proceed. Call 1-800-833-9353. POSSIBLE AREAS OF...
- Page 53 If for any reason you do not understand the test procedures or are unable to perform the test/repairs safely, con- tact the Lincoln Electric Service Department for electrical troubleshooting assistance before you proceed. Call 1-800-833-9353.
- Page 54 If for any reason you do not understand the test procedures or are unable to perform the test/repairs safely, con- tact the Lincoln Electric Service Department for electrical troubleshooting assistance before you proceed. Call 1-800-833-9353. POSSIBLE AREAS OF...
-
Page 55: Test Procedures
TROUBLESHOOTING & REPAIR INTERNAL TRIGGER CIRCUIT TEST Service and repair should be performed by only Lincoln Electric factory trained person- nel. Unauthorized repairs performed on this equipment may result in danger to the tech- nician or machine operator and will invalidate your factory warranty. For your safety and to avoid electrical shock, please observe all safety notes and precautions detailed throughout this manual. -
Page 56: Electric Shock
2. If LED 10 does not light when the trigger cir- cuit is activated, proceed with the following voltage and continuity checks. can kill. 3. Check the 10 Amp circuit breaker. It is the one closest to the 115V duplex receptacle. Reset if tripped. See the Simplified IDEALARC DC-655 F-14... - Page 57 J5-pin 9 at the firing board. See the Simplified Trigger Diagram and Figures F.1 and F.2. If a resistance of any value is indicated, check See the the associated wires and plugs. IDEALARC DC-655 F-15 K=42 A=32 J=31 I=41...
- Page 58 FIGURE F.3 – SIMPLIFIED TRIGGER DIAGRAM TO #42 AT MAIN TRANSFORMER OUTPUT TERMINAL SWITCH #273 N.C. N.C. CHOKE LEAD SECONDARY THERMOSTAT THERMOSTAT TO #41 AT MAIN TRANSFORMER IDEALARC DC-655 F-16 FIRING BOARD 11J5 #309 CONTROL BOARD LED10 10J5 #310 LATCHING RESISTOR ENABLE FIRING CIRCUIT...
-
Page 59: Firing Board Test
F-17 TROUBLESHOOTING & REPAIR Service and repair should be performed by only Lincoln Electric factory trained person- nel. Unauthorized repairs performed on this equipment may result in danger to the tech- nician or machine operator and will invalidate your factory warranty. For your safety and to avoid electrical shock, please observe all safety notes and precautions detailed throughout this manual. - Page 60 6. LEDs 7, 8 and 9 should be lit and equally bright. See Figure F.4 to locate the LEDs. Use Table F.1 to check operation of LEDs 7, 8, and 9. The three LEDs should be of equal intensity. IDEALARC DC-655 F-18 (205) 8 16 (204) (206) 7...
- Page 61 Check for loose or faulty connections. Perform the Main Transformer Test. This indicates the trigger circuit is activated at the 14-pin receptacle or the terminal strip or that the Output Terminal Switch (SW5) is closed. IDEALARC DC-655 F-19 THEN...
- Page 62 OK, the firing board may be faulty. If all of LEDs 1 through 6 do not glow or do not change in brightness equally as the output control is rotated, go to step 12. IDEALARC DC-655 F-20 H=21 G=75...
- Page 63 Rotate the Output Control (R1) clockwise and counter-clockwise. between leads #231 and #215 should be constant at approximately 5.5 VDC. This voltage should not vary when the output control is turned. The DC voltage See the Wiring IDEALARC DC-655 F-21 The DC voltage...
-
Page 64: Main Transformer (T1) Voltage Test
TROUBLESHOOTING & REPAIR MAIN TRANSFORMER (T1) VOLTAGE TEST Service and repair should be performed by only Lincoln Electric factory trained personnel. Unauthorized repairs performed on this equipment may result in danger to the technician or machine operator and will invalidate your factory warranty. For your safety and to avoid elec-... - Page 65 AC input voltages at the output side of the input contactor (CR1). Diagram. If the correct voltages are not present, perform the Input Contactor can kill. Test. a. T1 to T2 b. T2 to T3 c. T1 to T3 IDEALARC DC-655 F-23 See the Wiring...
-
Page 66: Main Transformer
If any one or more of the voltage checks are incorrect, check for loose or faulty connections. See the Wiring Diagram. If the leads and connections are OK, the main transformer may be faulty. IDEALARC DC-655 F-24 CHOKE MAIN TRANSFORMER... - Page 67 13. Remove the AC input power to the DC- 655. Remove the screws from the control box cover and carefully lower the cover. 14. Locate the firing board on the left side of the control box. IDEALARC DC-655 F-25 HIGH INDUCTANCE NEGATIVE OUTPUT TERMINAL...
- Page 68 NOTE: Always check the wiring between the transformer windings and the test points before replacing the transformer. IDEALARC DC-655 F-26 16 (204) 15 (203) 13 (231) 12 (215)
-
Page 69: Control Transformer (T2) Test
TROUBLESHOOTING & REPAIR CONTROL TRANSFORMER (T2) TEST Service and repair should be performed by only Lincoln Electric factory trained personnel. Unauthorized repairs performed on this equipment may result in danger to the technician or machine operator and will invalidate your factory warranty. For your safety and to avoid elec-... - Page 70 (facing the back of the machine). See Figure F.10. 4. Locate the control transformer primary leads (H1, H2, H3, etc.). See the Wiring Diagram. NOTE: Unused leads should be insulated and taped. Inspect for broken or incorrect connec- tions. IDEALARC DC-655 F-28...
-
Page 71: High Voltage
9. If the correct voltage is being applied to the primary of the control transformer and the secondary voltage is incorrect or not pre- sent, the control transformer may be defec- tive. IDEALARC DC-655 F-29... -
Page 72: Control Board Transformer (T3) Test
TROUBLESHOOTING & REPAIR CONTROL BOARD TRANSFORMER (T3) TEST Service and repair should be performed by only Lincoln Electric factory trained personnel. Unauthorized repairs performed on this equipment may result in danger to the technician or machine operator and will invalidate your factory warranty. For your safety and to avoid elec-... - Page 73 8. If the 115 VAC is NOT present at the prima- can kill. ry leads, check the associated switch (SW1) and wiring. See the Wiring Diagram. 9. Perform the Control Transformer (T2) Test. IDEALARC DC-655 F-31 CONTROL BOARD TRANSFORMER (T3)
-
Page 74: Input Contactor Test
F-32 TROUBLESHOOTING & REPAIR Service and repair should be performed by only Lincoln Electric factory trained personnel. Unauthorized repairs performed on this equipment may result in danger to the technician or machine operator and will invalidate your factory warranty. For your safety and to avoid elec-... - Page 75 Chart. Relay CR2 may be faulty. See the Wiring Diagram. Transformer (T2) Test. can kill. 8. If the 120 VAC IS present and the contactor does NOT activate, the input contactor is faulty. Replace the input contactor. IDEALARC DC-655 F-33 See the Wiring Perform the Control...
- Page 76 Replace the input contactor. 5. When the contactor is NOT activated, the resistance should be infinite or very high across the contacts. If the resistance is low, the input contactor is faulty. Replace the input contactor. can kill. IDEALARC DC-655 F-34...
-
Page 77: Oscilloscope Waveforms
F-35 TROUBLESHOOTING & REPAIR Service and repair should be performed by only Lincoln Electric factory trained personnel. Unauthorized repairs performed on this equipment may result in danger to the technician or machine operator and will invalidate your factory warranty. For your safety and to avoid elec-... - Page 78 SCR1. See Figure F.15. Use an analog ohmmeter (multimeter). 5. Test for high or infinite resistance from the cathode to the anode of SCR1 by reversing the meter leads. See Figure F.15. IDEALARC DC-655 F-36 PLUG J9...
- Page 79 SCR(s). See the Wiring Diagram. 8. Replace plug J9 into the thermal fan/snub- ber board and plug J5 into the firing board. NOTE: To further check the SCRs’ functions use an SCR tester and proceed to the Active SCR Test. IDEALARC DC-655 F-37...
-
Page 80: Active Scr Test
F-38 TROUBLESHOOTING & REPAIR Service and repair should be performed by only Lincoln Electric factory trained personnel. Unauthorized repairs performed on this equipment may result in danger to the technician or machine operator and will invalidate your factory warranty. For your safety and to avoid elec-... - Page 81 LED1 LED3 PLUG J20 LED8 LED9 LED2 G2699-[ ] LED10 LED4 LED6 FIRING BOARD 3. Remove the red insulating paint from the heat sink test points. See Figure F.17. DO NOT DISASSEMBLE THE HEAT SINKS. IDEALARC DC-655 F-39 PLUG J9...
- Page 82 14. Perform the Active Test Procedure outlined in Steps 5-13 for SCRs 2-6. 15. Replace all SCR assemblies that do not pass the above tests. 16. Plug J9 onto the thermal fan/snubber board and plug J5 into the firing board. IDEALARC DC-655 F-40 See Figure...
-
Page 83: Thermal Fan/Snubber Board Led Chart
The thermal protection light should also be illuminated. Indicates the fan motor should be running. LED 6 should be illuminated and the fan running when any of the following LEDs are lit: LED 2, LED 3, LED 4, or LED 5. IDEALARC DC-655 F-41... -
Page 84: Control Board Led Chart
T3 transformer. Indicates that feedback voltage is present. This informa- tion is used when the machine is in the CC mode. This LED should get brighter as the output voltage is increased. IDEALARC DC-655 F-42... -
Page 85: Normal Open Circuit Voltage Waveform-Constant Current Mode
2 milliseconds in time. Note: Scope probes connected at machine output terminals: (+) probe to positive terminal, (-) probe to neg- ative high inductance terminal. SCOPE SETTINGS Volts/Div...50V/Div. Horizontal Sweep...2 ms/Div. Coupling ...DC Trigger ...Internal IDEALARC DC-655 F-43 0 volts... -
Page 86: Normal Open Circuit Voltage Waveform-Constant Voltage Mig Maximum Output
2 milliseconds in time. Note: Scope probes connected at machine output terminals: (+) probe to positive terminal, (-) probe to neg- ative high inductance terminal. SCOPE SETTINGS Volts/Div...50V/Div. Horizontal Sweep...2 ms/Div. Coupling ...DC Trigger ...Internal IDEALARC DC-655 F-44 0 volts 2 ms... -
Page 87: Normal Open Circuit Voltage Waveform-Constant Voltage Mig Minimum Output
2 milliseconds in time. Note: Scope probes connected at machine output terminals: (+) probe to positive terminal, (-) probe to neg- ative high inductance terminal. SCOPE SETTINGS Volts/Div...20V/Div. Horizontal Sweep...2 ms/Div. Coupling ...DC Trigger ...Internal IDEALARC DC-655 F-45 0 volts 2 ms... - Page 88 Note: Scope probes connected at machine out- put terminals: (+) probe to positive terminal, (-) probe to negative high inductance terminal. 20 volts 2 ms SCOPE SETTINGS Volts/Div...20V/Div. Horizontal Sweep...2 ms/Div. Coupling ...DC Trigger ...Internal IDEALARC DC-655 F-46 0 volts...
-
Page 89: Typical Scr Gate Voltage Waveform-Constant Voltage Mig
Note: Scope probes connected at SCR gate and cathode: (+) probe to gate, (-) probe to cathode. CONSTANT VOLTAGE MIG 2 volts 5 ms SCOPE SETTINGS Volts/Div...2V/Div. Horizontal Sweep...5 ms/Div. Coupling ...DC Trigger ...Internal IDEALARC DC-655 F-47 0 volts... -
Page 90: Abnormal Open Circuit Voltage Waveform-Constant Voltage Mig
Note: Scope probes connected at machine out- put terminals: (+) probe to positive terminal, (-) probe to negative high inductance terminal. INSTALLATION CONSTANT VOLTAGE MIG 20 volts 2 ms SCOPE SETTINGS Volts/Div...20V/Div. Horizontal Sweep...2 ms/Div. Coupling ...DC Trigger ...Internal IDEALARC DC-655 F-48 0 volts... -
Page 91: Input Contactor (Cr1) Cleaning/Replacement
TROUBLESHOOTING & REPAIR INPUT CONTACTOR (CR1) CLEANING/REPLACEMENT Service and repair should be performed by only Lincoln Electric factory trained personnel. Unauthorized repairs performed on this equipment may result in danger to the technician or machine operator and will invalidate your factory warranty. For your safety and to avoid elec-... -
Page 92: Replacement Procedures
5/16” socket wrench. 8. Remove the input contactor. 9. Insert the replacement input contactor and install it following the procedures in reverse order. NOTE: Be sure to reconnect all leads cor- rectly. IDEALARC DC-655 F-50 See the Wiring... -
Page 93: Scr Rectifier Bridge Removal And Replacement
SCR RECTIFIER BRIDGE REMOVAL AND REPLACEMENT PROCEDURE Service and repair should be performed by only Lincoln Electric factory trained personnel. Unauthorized repairs performed on this equipment may result in danger to the technician or machine operator and will invalidate your factory warranty. For your safety and to avoid elec-... - Page 94 PLUG J20 PLUG J9 4. Disconnect lead #222 from the negative high inductance output terminal. This lead runs from plug J9 to the negative high inductance output terminal. Cut any necessary cable ties. See the Wiring Diagram. IDEALARC DC-655 F-52...
- Page 95 Diagram. 6. Connect lead #222 to the high inductance output terminal. 7. Install plugs J9 and J20 onto the thermal fan/snubber board. 8. Replace any cable ties cut at disassembly. 9. Install the case top and sides. IDEALARC DC-655 F-53...
-
Page 96: Main Transformer And Choke Removal And Replacement
MAIN TRANSFORMER AND CHOKE REMOVAL AND REPLACEMENT PROCEDURE Service and repair should be performed by only Lincoln Electric factory trained personnel. Unauthorized repairs performed on this equipment may result in danger to the technician or machine operator and will invalidate your factory warranty. For your safety and to avoid elec-... - Page 97 7. Support the choke with a crane or hoist. 8. Using the 9/16” wrench, remove the four bolts, washers and nuts mounting the choke assembly to the transformer frame assem- bly. 9. Carefully lift the choke from the DC-655 machine. IDEALARC DC-655 F-55 ROPE SLING...
- Page 98 8. Attach the #222A lead and flexible trans- former secondary lead to the top choke lead. 9. Attach leads #273 and 41A to the choke thermostat. 10. Replace any cable ties cut at disassembly. 11. Install the case top and sides. IDEALARC DC-655 F-56 thermostat...
-
Page 99: Retest After Repair
11.0 10.5 10.1 Input Hertz Control Settings Output Control at Maximum Arc Force Control at Minimum Output Control at Maximum IDEALARC DC-655 F-57 Maximum Idle KW Open Circuit Volts 66/70 44/47 122/128 VAC 44/48 VAC Load 815 Amps @ 44.0 Volts (Min) 815 Amps @ 44.0 Volts (Min) - Page 100 Your Company__________________________ Your Name_____________________________ Please give detailed description below: ___________________________________________________________________________ ___________________________________________________________________________ ___________________________________________________________________________ ___________________________________________________________________________ ___________________________________________________________________________ ___________________________________________________________________________ ___________________________________________________________________________ ___________________________________________________________________________ ___________________________________________________________________________ ___________________________________________________________________________ ___________________________________________________________________________ ___________________________________________________________________________ ___________________________________________________________________________ SD287 01/99 Thank You, Technical Services Group Lincoln Electric Co. 22801 ST. Clair Ave. Cleveland, Ohio 44117-1199 FAX 216-481-2309...
- Page 101 ELECTRICAL DIAGRAMS TABLE OF CONTENTS ELECTRICAL DIAGRAMS SECTION Electrical Diagrams Section...Section G Wiring Diagram (60 Hz Domestic) (G3348-1)...G-2 Control Board Schmatic (G3384) ...G-3 Firing Board Schmatic (G2792) ...G-4 Thermal Fan/Snubber P.C. Board Schematic (L10123)...G-5 Control Board Layout (G3385-1) ...G-6 Firing Board Layout (G2699-2) ...G-7 Thermal Fan/Snubber Board Layout (L10124-1) ...G-8 DC 655...
- Page 102 Wiring Diagram (G3348-1) DUAL (EXCEPT 380/500V & 230/400V) & SINGLE VOLTAGE UNDER 346 VOLTS (SHOWN CONNECTED FOR LOW VOLTAGE) N.D. RECONNECT SUPPLY PANEL LINES TO GROUND PER NATIONAL ELECTRICAL CODE CR 1 CONTACTOR FLEX TO PRIMARY LEAD 255A COILS SINGLE VOLTAGE OVER 345 VOLTS N.D.
- Page 103 NOTE: Lincoln Electric assumes no responsibility for liablilities resulting from board level troubleshooting. PC Board repairs will invalidate your factory warranty. Individual Printed Circuit Board Components are not avail- able from Lincoln Electric. This information is provided for reference only. Lincoln Electric discourages board level troubleshooting and repair since it may compromise the quality of the design and may result in danger to the Machine Operator or Technician.
- Page 104 NOTE: Lincoln Electric assumes no responsibility for liablilities resulting from board level troubleshooting. PC Board repairs will invalidate your factory warranty. Individual Printed Circuit Board Components are not avail- able from Lincoln Electric. This information is provided for reference only. Lincoln Electric discourages board level troubleshooting and repair since it may compromise the quality of the design and may result in danger to the Machine Operator or Technician.
- Page 105 NOTE: Lincoln Electric assumes no responsibility for liablilities resulting from board level troubleshooting. PC Board repairs will invalidate your factory warranty. Individual Printed Circuit Board Components are not avail- able from Lincoln Electric. This information is provided for reference only. Lincoln Electric discourages board level troubleshooting and repair since it may compromise the quality of the design and may result in danger to the Machine Operator or Technician.
- Page 106 ELECTRICAL DIAGRAMS Control Board Layout (G3385-1) CAPACITORS = MFD/VOLTS RESISTORS = OHMS/1/4 WATT UNLESS OTHERWISE SPECIFIED DC 655 C-RW G3385-1 G3385-1 C-RW...
- Page 107 ELECTRICAL DIAGRAMS Firing Board Layout (G2699-2) ITEM REQ'D PART NO. CAPACITORS = MFD/VOLTS RESISTORS = OHMS DC 655 DESCRIPTION 7-17-98A G2699-2 G2699-2 7-17-98A...
- Page 108 ELECTRICAL DIAGRAMS Thermal Fan/Snubber Board Layout (L10124-1) 8.75 9.00 4.50 OCI1 LED3 LED1 LED4 LED5 LED6 LED2 L10124-1 SNUBBER DC 655 OCI2 TRI1 5.75 THERMAL 6.00 ~.04 L10124-1 5-16-97A...
- Page 109 NOTES DC 655...
Need help?
Do you have a question about the IDEALARC DC-655 and is the answer not in the manual?
Questions and answers