Table of Contents
Advertisement
operator manual
Impinger Conveyor Oven
Model 3255
This document includes:
• Safety Notices
• Specifications
• Installation Instructions
• Operating Instructions
• Cleaning Instructions
• Warranty Statement
Revision: A
P/N: 20000095
Lincoln Foodservice Products, LLC
1111 North Hadley Road
Fort Wayne, Indiana 46804
United States of America
Technical Support Hotline: (800) 678-9511
Telephone: (260) 459-8200
www.lincolnfp.com
Advertisement
Table of Contents

Related Manuals for Lincoln Impinger Conveyorized Oven 3255


Summary of Contents for Lincoln Impinger Conveyorized Oven 3255
- Page 1 • Installation Instructions • Operating Instructions • Cleaning Instructions • Warranty Statement Revision: A P/N: 20000095 Lincoln Foodservice Products, LLC 1111 North Hadley Road Fort Wayne, Indiana 46804 United States of America Technical Support Hotline: (800) 678-9511 Telephone: (260) 459-8200...
-
Page 2: Important Warning And Safety Information
IMPORTANT WARNING AND SAFETY INFORMATION This manual contains important safety and installation-operation instructions. Require all operators to read this manual thoroughly before installing, NOTE: operating or servicing this equipment. Improper installation, adjustment, alteration, service or maintenance can cause property damage, injury or death. Read the installation, operating WARNING: and maintenance instructions thoroughly before installing or servicing this equipment. -
Page 3: Table Of Contents
Service Technician or a Lincoln Foodservice Products, LLC Service Representative. This service is required by Lincoln Foodservice Products, LLC in order to assist the purchaser in proper start-up of the oven on site. Please note the specific details on the Warranty and make certain connections are made to proper utility services. -
Page 4: Features And Options
FEATURES AND OPTIONS STANDARD FEATURES • Faster bake times improve time of service. • Advanced Air Impingement Technology enhances bake quality and uniformity. • Improved product flow during cooking reduces operation costs. • Research and Applications support for continued operational success. •... -
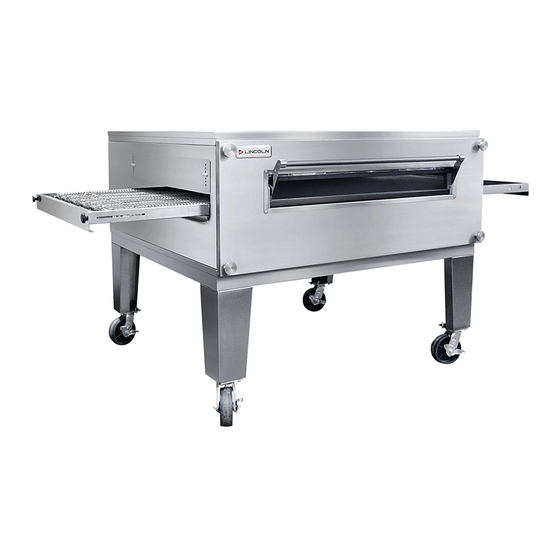
Page 5: Exterior Dimensions
EXTERIOR DIMENSIONS Impinger 3255 – Operator Manual... -
Page 6: Spacing Requirements
NOTE: Lincoln can provide oven spec sheets that show the dimensions of the oven, KW or BTU ratings and other information that will be useful to both the ventilation hood supplier and the HVAC contractor. -
Page 7: Canopy Ventilation Recommendations
3. The oven temperature must be set and operating at 550°F/288°C. TEST PROCEDURE: Note: Use Lincoln Smoke Candle #369361 (in Australia, an alternate method of coloring the air may be used). 1. Wear heat resistant gloves to prevent burns to your hands. -
Page 8: If There Is Apparent Damage
UNLOADING When the oven arrives it should consist of: 1. A crate containing oven body, conveyor, fingers, crumb pans, and pan stops. (Some models may have the conveyor packed separately.) 2. A package containing the stand and top. It is recommended that you have a material-handling device available to unload. DO NOT LIFT EXCESSIVE WEIGHT! IF THERE IS APPARENT DAMAGE: UNITED STATES AND CANADA: Arrangements should be made to file a claim against the carrier, as Interstate... -
Page 9: Code Reference
This appliance must be properly grounded at time of installation. Failure to ensure WARNING that this equipment is properly grounded can result in electrocution, dismemberment INT’L (CE): or fatal injury. CODE REFERENCE GAS CODE REFERENCE Safe and satisfactory operation of this oven depends to a great extent upon its proper installation, and it should be installed, as applicable in accordance with the National Fuel Gas Codes, ANSI Z223.1/NFPA 54, latest version, Manufacturers’... -
Page 10: Stand & Finger Assembly
STAND AND FINGER ASSEMBLY 1. The stand is a 55” (1397 mm) x 49” (1245 mm) rectangle. Set it in place with a 55” side facing out. This will be the front of the oven. Using a carpenter’s level, level all four (4) sides of the stand. - Page 11 Determine if more air (heat) is required at front or rear of oven then open or close off that air by bending the baffle in the proper direction. For additional information on how to adjust the Finger Housing Baffle Plate, contact the Lincoln Technical Service Department at (800) 678-9511. Impinger 3255 – Operator Manual 11.
-
Page 12: Programming & Operation
PROGRAMMING Temperature OVEN START-UP INSTRUCTIONS 1. Turn oven on. After the oven is turned on it is in cooking mode. To set the time and temperature you must be in programming mode. 2. To get to program mode, press and hold the time and temperature buttons for approximately 6 seconds. While pressing the buttons the display will say “Hold Key and Wait.”... -
Page 13: Information On Use Of Oven
You must discuss the need for preventive maintenance with your Authorized Service Agency to establish a proper program. If there are any questions that the service agency cannot answer, please contact Lincoln Foodservice Technical Service Department at (800) 678-9511. OPERATOR MAINTENANCE Disconnect power supply before servicing or cleaning this unit. -
Page 14: Cleaning Instructions
3. Clean the interior by sweeping up all loose particles, then wash with a mild detergent solution and rinse with clean water. 4. Clean the conveyor belt by wiping with a clean cloth or brushing with a soft wire brush. Lincoln catalog #369217. -
Page 15: Conveyor Disassembly For Cleaning
FINGER REMOVAL AND DISASSEMBLY FOR CLEANING 1. Open door and remove upper fingers. Note any particular placement of fingers that you may have, such as fully closed, half-closed, or fully open, columnating plates. 2. Remove conveyor and then remove bottom fingers. 3. -
Page 16: Impinger® Concepts
(START-UP CHECKOUT) by an Authorized Service Technician or a Lincoln Foodservice Products, LLC Service Representative. This service is required by Lincoln Foodservice Products, LLC in order to insure the oven(s) is properly installed and in working order. The warranty becomes effective upon verification of proper installation. -
Page 17: Appendix A - Label Definitions
APPENDIX A – LABEL DEFINITIONS CAUTION – HOT SURFACE CLOCK, TIME SWITCH, TIMER TRANSFORMER DANGEROUS VOLTAGE EQUIPOTENTIALITY GROUND PROTECTIVE EARTH GROUND EARTH GROUND CHANGE FUSES FUSE POWER OFF Impinger 3255 – Operator Manual POWER ON DISCONNECT POWER TEMPERATURE, HEAT CONVEYOR BRENNER HEAT CYCLE READY, TIMER INDICATOR... - Page 18 APPENDIX A – LABEL DEFINITIONS (CONT’D) AMPS VOLTS KILOWATTS / HR TYPE OF GAS ½ COOK TIME SERVICE ACCESSIBILITY, PROVIDE MINIMUM REAR AND SIDE CLEARANCE ORIFICE – MAIN ORIFICE – LOW FIRE Impinger 3255 – Operator Manual...
-
Page 19: Warranty
(ii) at Lincoln’s option, the refund of the amount paid for said equipment or services. Any breach by Lincoln with respect to any item or unit of equipment or services shall be deemed a breach with respect to that item or unit or service only... - Page 20 Impinger 3255 – Operator Manual...
Need help?
Do you have a question about the Impinger Conveyorized Oven 3255 and is the answer not in the manual?
Questions and answers