Table of Contents
Advertisement
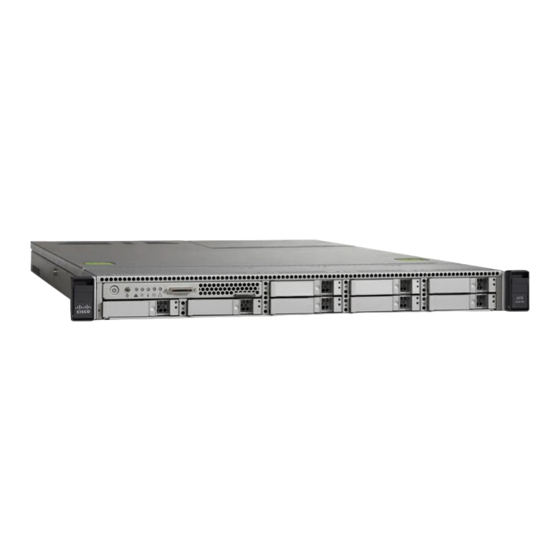
Installing the Cisco SNS 3415 and Cisco SNS 3495
Hardware Appliances
This chapter describes how to install your Cisco SNS-3415 or Cisco SNS-3495 appliance and connect it
to the network.
It contains:
•
•
•
•
•
Before you begin the installation, read the
3415 or 3495 Secure Access Control System.
Only trained and qualified personnel should be allowed to install, replace, or service this equipment.
Warning
Statement 1030
Warning
This unit is intended for installation in restricted access areas. A restricted access area can be
accessed only through the use of a special tool, lock and key, or other means of security.
Statement 1017
Installing the Cisco SNS-3415/3495 Appliance Rack
This section describes how to install the Cisco SNS-3415 or Cisco SNS-3495 appliance in a rack.
To prevent bodily injury when mounting or servicing this unit in a rack, you must take special
Warning
precautions to ensure that the system remains stable. The following guidelines are provided to ensure
your safety:
This unit should be mounted at the bottom of the rack if it is the only unit in the rack.
When mounting this unit in a partially filled rack, load the rack from the bottom to the top with the
heaviest component at the bottom of the rack.
Installing the Cisco SNS-3415/3495 Appliance Rack, page 8-1
Cisco Integrated Management Controller (CIMC), page 8-5
Configuring CIMC, page 8-5
Connecting Cables, page 8-8
Connecting and Powering On the Cisco SNS-3415/3495 Appliance, page 8-11
C H A P T E R
Regulatory Compliance and Safety Information for the Cisco
Installation and Upgrade Guide for Cisco Secure Access Control System 5.6
8
8-1
Advertisement
Table of Contents

Related Manuals for Cisco SNS 3415


Summary of Contents for Cisco SNS 3415
- Page 1 C H A P T E R Installing the Cisco SNS 3415 and Cisco SNS 3495 Hardware Appliances This chapter describes how to install your Cisco SNS-3415 or Cisco SNS-3495 appliance and connect it to the network. It contains: Installing the Cisco SNS-3415/3495 Appliance Rack, page 8-1 •...
- Page 2 Chapter 8 Installing the Cisco SNS 3415 and Cisco SNS 3495 Hardware Appliances Installing the Cisco SNS-3415/3495 Appliance Rack If the rack is provided with stabilizing devices, install the stabilizers before mounting or servicing the unit in the rack. Statement 1006...
- Page 3 Chapter 8 Installing the Cisco SNS 3415 and Cisco SNS 3495 Hardware Appliances Installing the Cisco SNS-3415/3495 Appliance Rack Install the slide rails onto the rack: Step 2 Position a slide-rail assembly inside the two left-side rack posts (see Figure 8-2).
- Page 4 Chapter 8 Installing the Cisco SNS 3415 and Cisco SNS 3495 Hardware Appliances Installing the Cisco SNS-3415/3495 Appliance Rack The inner rails are pre-attached to the sides of the server at the factory. You can order Note replacement inner rails if these are damaged or lost (Cisco PID UCSC-RAIL1-I).
-
Page 5: Cisco Integrated Management Controller (Cimc)
Step 5 Cisco Integrated Management Controller (CIMC) You can monitor the server inventory, health, and system event logs by using the built-in Cisco Integrated Management Controller 1.4.7a (CIMC) GUI or CLI interfaces. See the user documentation for your firmware release at the following URL: http://www.cisco.com/en/US/products/ps10739/products_installation_and_configuration_guides_list.html... - Page 6 Shared LOM (default)—The two 1-Gb Ethernet ports are used to access the CIMC. This is the – factory default setting, along with Active-active NIC redundancy and DHCP enabled. Cisco Card—The ports on an installed Cisco UCS P81E VIC are used to access the CIMC. You – must select a NIC redundancy and IP setting.
- Page 7 Chapter 8 Installing the Cisco SNS 3415 and Cisco SNS 3495 Hardware Appliances Configuring CIMC Before you enable DHCP, your DHCP server must be preconfigured with the range of MAC Note addresses for this server. The MAC address is printed on a label on the rear of the server. This server has a range of six MAC addresses assigned to the CIMC.
-
Page 8: Connecting Cables
Installing the Cisco SNS 3415 and Cisco SNS 3495 Hardware Appliances Connecting Cables Connecting Cables This section describes how to connect your Cisco SNS-3415 or Cisco SNS-3495 appliance to the network and the appliance console. This section includes: Connecting the Network Interface, page 8-8 •... -
Page 9: Connecting The Console
Do not work on the system or connect or disconnect cables during periods of lightning activity. Statement 1001 Your Cisco SNS-3415 or Cisco SNS-3495 appliance has a DCE-mode console port for connecting a console terminal to your appliance. The appliance uses a DB-9 serial connector for the console port. -
Page 10: Connecting The Keyboard And Video Monitor
The Cisco SNS-3415 or Cisco SNS-3495 appliance does not provide support for a mouse. The Cisco SNS-3415 or Cisco SNS-3495 provides USB ports on the rear of the appliance that can be used to connect a keyboard and video monitor. -
Page 11: Connecting And Powering On The Server (Standalone Mode)
Cisco Integrated Management Interface (CIMC). If you want to use the 1-Gb Ethernet dedicated management port, or a port on a Cisco UCS P81E Virtual Interface Card (VIC) to access the CIMC, you must first connect to the server and change the NIC mode as described in Step 3 of the following procedure. - Page 12 Step 3 (either a static address or the address assigned by your DHCP server). To manage the server, see the Cisco UCS C-Series Rack-Mount Server Configuration Guide or the Cisco UCS C-Series Rack-Mount Server CLI Configuration Guide for instructions on using those interfaces.
-
Page 13: System Bios And Cimc Firmware
See the Cisco Host Upgrade Utility Quick Reference Guide for your firmware level at the documentation roadmap link below. Your system firmware must be at minimum level 1.2 to use the Cisco Host Upgrade Utility. If Note your firmware is prior to level 1.2, you must use the methods below to update the BIOS and CIMC firmware individually. -
Page 14: Service Headers And Jumpers
Chapter 8 Installing the Cisco SNS 3415 and Cisco SNS 3495 Hardware Appliances Connecting and Powering On the Cisco SNS-3415/3495 Appliance Use the arrow keys to select the BIOS menu page. Step 2 Highlight the field to be modified by using the arrow keys. -
Page 15: Using The Bios Recovery Header J41
Chapter 8 Installing the Cisco SNS 3415 and Cisco SNS 3495 Hardware Appliances Connecting and Powering On the Cisco SNS-3415/3495 Appliance Figure 8-5 Service Header Locations FAN1 PCIe1 CPU1 FAN2 PCIe2 FAN3 PSU2 FAN4 FAN4 CPU2 FAN5 PSU1 J41 BIOS RCVR BOOT... - Page 16 Chapter 8 Installing the Cisco SNS 3415 and Cisco SNS 3495 Hardware Appliances Connecting and Powering On the Cisco SNS-3415/3495 Appliance As indicated by the message shown above, there are two procedures for recovering the BIOS. Try Note procedure 1 first, then if that does not recover the BIOS, use procedure 2.
- Page 17 Chapter 8 Installing the Cisco SNS 3415 and Cisco SNS 3495 Hardware Appliances Connecting and Powering On the Cisco SNS-3415/3495 Appliance Disconnect all power cords from the power supplies. Step 4 Slide the server out the front of the rack far enough so that you can remove the top cover. You might have Step 5 to detach cables from the rear panel to provide clearance.
- Page 18 Chapter 8 Installing the Cisco SNS 3415 and Cisco SNS 3495 Hardware Appliances Connecting and Powering On the Cisco SNS-3415/3495 Appliance Slide the server out the front of the rack far enough so that you can remove the top cover. You might have Step 3 to detach cables from the rear panel to provide clearance.
Need help?
Do you have a question about the SNS 3415 and is the answer not in the manual?
Questions and answers