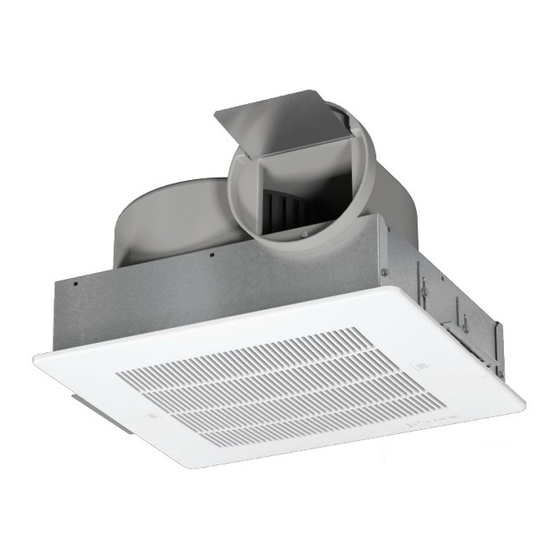
Advertisement
®
This publication contains the installation, operation and
maintenance procedures for standard units of the Gemini
- Ceiling and Cabinet Fans. Carefully read this publication
prior to installation.
Carefully read this publication and any
supplemental documents prior to any
installation or maintenance procedure.
Loren Cook Company's Gemini catalog provides
additional information describing the equipment, fan
performance, available accessories and specification
data.
For additional safety information, refer to AMCA
publication 410-96, Safety Practices for Users and
Installers of Industrial and Commercial Fans.
All of the publications listed above can be obtained
from Loren Cook Company by phoning (417) 869-6474,
extension 166; by FAX at (417) 832-9431; or by e-mail at
info@lorencook.com.
For information and instructions on special equipment,
contact Loren Cook Company at (417) 869-6474.
Rotating Parts & Electrical Shock Hazard:
Disconnect electric power before working on unit.
Follow proper lockout / tagout procedures to ensure
the unit cannot be energized while being installed or
serviced.
A disconnect switch should be placed near the fan
in order that the power can be swiftly cut off, in case
of an emergency and in order that maintenance
personnel are provided complete control of the
power source.
Grounding is required. All field-installed wiring
must be completed by qualified personnel. All field
installed wiring must comply with National Electric
Code (NFPA 70) and all applicable local codes.
Failure to follow these instructions could result in
death or serious injury.
Receiving and Inspection
Carefully inspect the fan and accessories for any
damage and shortage immediately upon receipt of fan.
•
Turn the wheel by hand to ensure it turns freely and
does not bind.
•
Inspect dampers (if included) for free operation of
all moving parts.
•
Remove mounting brackets from packing insert &
install mounting brackets (Gemini 100 only).
•
Remove shipping tape.
•
Record on the Delivery Receipt any visible sign of
damage.
INSTALLATION, OPERATION, AND MAINTENANCE MANUAL
Handling
Lift fan by the outside housing (box) or by the blower
mounting brace. Never lift by the shaft or motor.
Storage
If the fan is stored for any length of time prior to
installation, store it in its original shipping crate and
protect it from dust, debris and the weather.
Installation
Motor Installation
All Gemini units are shipped with motors mounted at
the factory.
Gemini 100 Inline to Ceiling Conversion
The Gemini 100 series can be converted from inline
to ceiling by ordering the Inline to Ceiling Conversion Kit
from Loren Cook Company (Part Number 797180). The
kit includes all parts required, plus detail instructions on
how to convert the Gemini 100.
Gemini 100 Ceiling to Inline Conversion
The Gemini 100 series can be field converted from
ceiling to inline by following these steps:
1. Remove and discard the inlet box end plate.
2. Install the inline cover panel with sheet metal
screws as shown on the following page.
Ceiling to Inline Conversion Kit can be ordered from
Loren Cook Company (Part Number 797181), or
fabricate the required part using the following sketch.
1
Gemini
Ceiling and cabinet fans
Gemini 100
Advertisement
Table of Contents

Summary of Contents for Loren Cook Gemini
-
Page 1: Motor Installation
Motor Installation For additional safety information, refer to AMCA publication 410-96, Safety Practices for Users and All Gemini units are shipped with motors mounted at Installers of Industrial and Commercial Fans. the factory. All of the publications listed above can be obtained... -
Page 2: Fan Installation
3. Fasten the housing to the bottom of the joists through the holes provided in the mounting bracket. Refer to figures 1 and 2. For Ceiling Radiation Damper Installation see separate document “Gemini/CRD Installation Supplement.”... -
Page 3: Wiring Installation
Gemini 200 - 300 and 600 - 700 Series: Notice! Do not install above or inside shaded area White Line Black (High) Line Red (Low) Electrical Shock & Fire Hazard: Cooking Equipment Insulate Unused Lead Floor Failure to follow these instructions could result in death or serious injury. -
Page 4: Final Installation Steps
Insulate Black Insulate Blue Final Installation Steps Gemini 2000: 1. Inspect fasteners and setscrews, particularly fan mounting fasteners, and tighten as required. 1 PH / 60 HZ / 115V 1 PH / 60 HZ / 208-230 V 2. Inspect for correct amperage and voltage with an MARATHON 10.8 AMPS... -
Page 5: Grille Installation
Inspection Gemini 200 - 700 series To inspect, clean, or repair, refer to figure 7 and follow Inspection of the fan should be conducted at the first these steps: 30 minute interval of satisfactory operation. During the 1. Remove grille. -
Page 6: Troubleshooting
When replacing the motor, make sure the motor and wheels are properly aligned with the blower housing. Notice! Ensure that the blower discharge flange is in slot of the cabinet on Gemini 200 - 700 secured series. Motor Bearings Motor bearings are pre-lubricated and sealed. - Page 7 Gemini 100 Parts List Gemini 200 - 900 Parts List Parts Parts Gemini 200 - Gemini 800 - Number Number Inlet Box End Plate Backdraft Backdraft (Ceiling only) Damper Dampers (2) Housing/Scroll Damper Frame Damper Frame Field Wiring Compartment Motor...
-
Page 8: Limited Warranty
If you are entitled to warranty relief, a warranty adjustment will be completed within sixty (60) business days of the receipt of your written complaint by Loren Cook Company. This warranty gives only the original purchaser placing the fan in service specifically the right.


Need help?
Do you have a question about the Gemini and is the answer not in the manual?
Questions and answers