Table of Contents
Advertisement
Quick Links
Advertisement
Table of Contents

Related Manuals for Jenn-Air 720-0513


Summary of Contents for Jenn-Air 720-0513
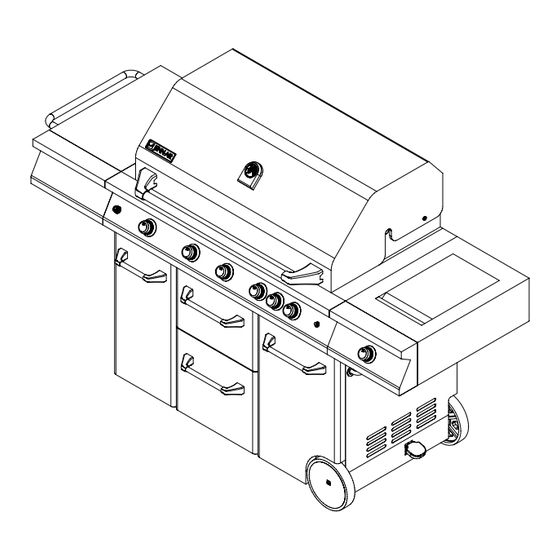
- Page 1 STAINLESS STEEL LP GAS GRILL MODEL NO.: 720-0513 ITEM NO: 242610 Jenn-Air is a Trademark of the Maytag Corporation and is used under license to Lowe’s Companies, Incorporated. ® FOR OUTDOOR USE ONLY PLEASE CONTACT 1-800-554-5799 FOR ASSISTANCE DO NOT RETURN TO PLACE OF PURCHASE...
-
Page 2: Table Of Contents
TABLE OF CONTENTS SECTION ONE SECTION FIVE Safety Instruction … … … … … … … … … … Grill Lights … … … … … … … … … … … … 21-22 Placement of the Grill … … … … … … ... … .. Using the Side Burner …... -
Page 3: Safety Instruction
SAFETY INSTRUCTIONS WARNING ELECTRICAL GROUNDING INSTRUCTIONS This appliance (light & rotisserie motor) is equipped with a plug and should be plugged directly into a properly grounded receptacle. When installed, must be electrically grounded in accordance with local codes or in the absence of local codes, with the National Electrical Code, ANSI/NFPA 70 or the Canadian Electrical Code, CSA C22.1 DO NOT cut or remove the grounding prong from this plug. - Page 4 SAFETY INSTRUCTIONS RECOGNIZED SAFETY SYMBOLS, WORDS AND LABELS WARNING WARNING Do not try lighting this appliance without first reading the “LIGHTING INSTRUCTIONS” section of this WARNING – Hazards unsafe manual. practices which COULD result in severe personal injury or death. WARNING Spiders and insects can nest inside the burners of the CAUTION...
- Page 5 SAFETY INSTRUCTIONS WARNING WARNING Do not use the grill if the odor of gas is present. Failure to properly place the burner over the Contact customer service at 1-800-554-5799. orifice could cause a fire to occur behind and beneath the valve panel, thereby damaging the grill and making it unsafe to operate.
- Page 6 SAFETY INSTRUCTIONS WARNING LP GAS CYLINDER WARNING The outdoor cooking gas appliance and Do not store or use gasoline or other its individual shutoff valve must be flammable vapors and liquids in the vicinity of disconnected from the gas supply piping this or any other appliance.
- Page 7 SAFETY INSTRUCTIONS TESTED IN ACCORDANCE WITH ANSI Z21.58 The grill is not intended to be installed in or on CSA 1.6-2007 STANDARD FOR OUTDOOR recreational vehicles and/or boats. COOKING GAS APPLIANCES. THIS GRILL IS FOR OUTDOOR USE ONLY. Children should not be left alone or unattended Grill Installation Codes in an area where the grill is being used.
-
Page 8: Placement Of The Grill
Do not use briquettes of any kind in the grill. The 720-0513 liquid propane gas grill is designed for Clean the grill with caution. To avoid steam burns, do optimum performance without the use of briquettes. -
Page 9: Side Shelf And Side Burner Assembly
SIDE SHELF AND SIDE BURNER ASSEMBLY Estimated Assembly Time: Approximately 10 minutes Required Tools: Phillips Screwdriver (not included) 1. Open the grill lid and remove the side shelf from the fire box. 2. The screws used to attach the side shelf are already screwed into the side of the grill cart. Remove the screws from the side panels. -
Page 10: Side Burner Hose Quick Disconnect Assembly
SIDE BURNER HOSE QUICK DISCONNECT ASSEMBLY Estimated Assembly Time: Approximately 5 minutes Required Tools: Phillips Screwdriver 1. Insert the side burner hose with female sleeve through side panel of cart (Top drawing). 2. Push the sleeve of the female socket back and insert the male end of the connector. Release the sleeve 3. -
Page 11: Side Shelf Handle Assembly
SIDE SHELF HANDLE ASSEMBLY Estimated Assembly Time: Approximately 5-7 minutes Required Tools: Phillips Screwdriver (not included) 1. Remove the four side shelf handle screws from the side of the shelf. 2. Align the holes in the side shelf handle with the holes in the shelf. 40 0 50 0 60 0... -
Page 12: The Placement Of The Tank Tray
THE PLACEMENT OF THE TANK TRAY Firstly, Open the door, and put the gas tank into the gas tank tray. Secondly, close the door. PROPANE REGULATOR HOOK-UP Mount the tabs on the spice tray into the holes on the left door of the grill. -
Page 13: Cooking Griddle Assembly
COOKING GRIDDLE ASSEMBLY Insert the cooking grid into the fire box... -
Page 14: Gas Hook Up
Make sure the grill gas hoses do not contact the grease tray or grill firebox when the Total gas consumption (per hour) of the 720-0513 liquid propane cylinder is pushed into the cart. liquid propane gas grill with all burners set on “HI”:... -
Page 15: Leak Testing
3. Detach the regulator assembly from the tank 4. Place dust cap on cylinder valve outlet whenever valve by turning the quick coupling nut the cylinder is not in use. Only install the type of dust counterclockwise. cap on the cylinder valve outlet that is provided with the cylinder valve. -
Page 16: Installer Final Check
INSTALLER FINAL CHECK Specified clearance maintained 24 inches from The unit has been tested and is free of leaks. combustible materials/construction. The gas supply shut off valve has been located. All internal packaging has been removed. All burners are factory installed. The hose and regulator are properly connected. -
Page 17: Operating Instructions
OPERATING INSTRUCTIONS GENERAL USE OF THE GRILL AND After its first use, the stainless steel adjacent to the ROTISSERIE rotisserie burner will most likely turn dark blue. This is a normal property of the non-rusting type stainless steel Each main burner is rated at 13,000 BTU/Hr. The used on the grill. -
Page 18: Lighting Instructions
NOTE Adjust the counter balance weight to It is normal for the skewer to flex when larger balance the heavier side of the meat cuts of meat are being cooked. and avoid lopsided rotation of the If the meat scrapes on the cooking grids during rotisserie motor. -
Page 19: Lighting Illustrations
LIGHTING ILLUSTRATIONS ROTISSERIE & SIDE BURNER MAIN & SEAR BURNER LIGHTING LIGHTING 1. Open lid during lighting Push and turn of Rear Burner knob slowly to IGNITE/ON, hold in until the burner is lit. Once it is lit, continue to press and hold for another 15 seconds to ensure the burner stays lit. -
Page 20: To Match Light The Grill
TO MATCH LIGHT THE GRILL If the burner will not light after several attempts using the control knobs, the burner may be lit with a match. If you have already attempted to light the burner with the igniter, allow 5 minutes for any accumulated gas to dissipate. -
Page 21: Grill Lights
GRILL LIGHTS Light Operation Instruction 1. Make sure light’s power switch on the control panel is in the “OFF” position. 2. Connect power plug to properly grounded outlet. 3. Turn the light’s power switch to “ON”. WARNING Keep any electrical supply cord away from any heated surface. - Page 22 5. Use a screwdriver to loosen the two screws locking the bulb. Pull out the light bulb and replace with a new bulb. 6. Reverse the instruction from steps 5-1 for installation. Cleaning Method Follow steps 1-4 above for glass cover removal. Use a damp towel to clean the surface of glass cover.
-
Page 23: Using The Side Burner
USING THE SIDE BURNER 4. If the smell of gas is detected and Inspect the gas supply hose prior to turning on the the igniter is not functioning, gas. If there is evidence of cuts, wear or abrasion, it immediately turn the control knob to the must be replaced prior to use. -
Page 24: Exploded View
EXPLODED VIEW... -
Page 25: Part List
PART LIST REF# DESCRIPTION DESCRIPTION Main Lid Screw Cover Grease Tray Main Lid Screw Cart Frame, Front Main Lid Door Magnet Temperature Gauge Tank Heat Shield Logo side shelf push bar, Left Main Lid Handle Heat Insulating side shelf, Left Spacer Main Lid Handle Seat, Left Side Shelf front panel, left... - Page 26 PART LIST Lamps Fix Bracket Ice box handle Plastic Bushing Front Door, Right Right Door Hinge Bracket, Bottom Cable Strainer Transformer supporting box Left Door Hinge Bracket, Top cover transformer box waterproof lighting Rod cover spacer Transformer supporting box Lighting Rod Transformer wheel Rear Baffle...
- Page 27 NOTICE Dear customers: Thank you for choosing our barbeque grill and hope that you enjoy our product. Our gas valves and components are preset at the factory to operate on Liquid Propane (LP). If you wish to convert your grill from LP to Natural Gas (NG), we strongly recommend that you hire a professionally trained technician to convert the unit.
- Page 28 NG Conversion Kit WARNING! FALURE TO HEED THESE WARNINGS COULD RESULT IN A FIRE OR EXPLOSION THAT COULD CAUSE SERIOUS BODILY INJURY, DEATH OR PROPERTY DAMAGE. Installation of this Natural Gas Conversion kit must be performed by a QUALIFIED GAS TECHNICIAN ONLY.
-
Page 29: Gas Conversion
GAS CONVERSION Tools required for converting from LP to NG Screwdriver + is used for removing the screws 8mm Nut Driver is used for changing the main tube burner orifice 10mm Wrench is used for changing the rear burner orifice Adjustable Wrench Searing Main Burner Orifice... - Page 30 GAS CONVERSION NG Hose and Regulator Conversion 1. Turn all knobs to OFF, and turn off LP supply, then take off the brass adapter of LP regulator from the manifold with a wrench. 2.Tight the NG regulator on the NG regulator bracket with two 5/32*10mm screws. And then attach the NG regulator hose to the manifold, and screw tightly with the wrench.
- Page 31 GAS CONVERSION Main Burner Conversion Only Steps: 1. Remove the rotisserie kit, warming rack, cooking grids, flame tamers and question mark burners from the firebox. 2. Locate the LP orifice at the end of valve and remove by turning counterclockwise with adjustable Nut Driver.
- Page 32 GAS CONVERSION Searing Burner Conversion Only In order to change the searing main burner from using LP gas to NG, the consumer will need to change the LP&NG orifices and the corresponding burner. Steps: 1. Remove the searing main burner 2.
- Page 33 GAS CONVERSION Side Burner Conversion Only Steps: 1. Remove the cooking grids and side burner from the firebox. 2. Locate the orifice at the end of valve and remove by turning counterclockwise with adjustable Nut Driver. (the NG orifice is preassembled on the valve, behind the LP orifice.) 3.
- Page 34 GAS CONVERSION Rear Burner Conversion Only Steps: 1. Remove the screws securing the rear baffle. Then take off the Rear Baffle. 2. Unscrew the LP orifice with wrench from the connector, then attach and screw in tightly the NG rotisserie orifice. 3.
- Page 35 GAS CONVERSION Warning!! Gas Valves are preset at the factory to operate on LP gas or NG gas. If you wish to convert, be sure to consult your gas supplier or trained technician for the conversion. If you want to convert LP to NG, please follow the following instructions. After the Nature Gas regulator has been installed.
-
Page 36: Care And Maintenance Of Side Burner
CARE & MAINTENANCE OF SIDE BURNER BURNER CLEANING STAINLESS STEEL Clean the exterior of the burner with a wire brush. There are many stainless steel cleaners available. Clear any clogged burner ports with a straightened Always use the mildest cleaning procedure first, paper clip. -
Page 37: Care And Maintenance Of The Grill
CARE & MAINTENANCE OF THE GRILL STAINLESS STEEL WARNING Grease specks can gather and bake onto the surfaces of the Failure to properly place the burner over the stainless steel, giving the appearance of rust. For removal, orifice could cause a fire to occur behind and use an abrasive pad with a stainless steel cleaner. -
Page 38: Troubleshooting
TROUBLESHOOTING WHEN TO LOOK FOR SPIDERS You should inspect the burners at least twice a WARNING year or immediately after any of the Spiders and insects can nest inside the burners following conditions occur: of the grill and disrupt gas flow. This very dangerous condition could cause a fire behind The smell of gas in conjunction with the valve panel, thereby damaging the grill and... -
Page 39: Grilling Hints
GRILLING HINTS This Jenn-Air grill has an infrared side burner – It is recommended that meat be defrosted overnight commonly referred to as a “searing” burner. This type in the refrigerator as opposed to a microwave. This of burner produces extreme heat that can be used to generally yields a juicier cut of meat. - Page 40 FOOD WEIGHT FLAME APPROXIMATE SPECIAL SIZE TIME INSTRUCTIONS THICKNESS AND TIPS MEATS BEEF 1/2 to 3/4 inch Medium 10 to 18 minutes Grill, turning once when juices rise Hamburgers to the surface. Do not leave hamburgers unattended. A flare-up could occur quickly. Tenderloin, High 8 to 15 minutes...
- Page 41 FOOD WEIGHT FLAME APPROXIMAT SPECIAL SIZE INSTRUCTIONS THICKNESS TIME AND TIPS Breasts Medium 30 to 45 Marinate with Italian dressing well-done minutes FISH AND SEAFOOD Grill, turning once. Brush with Steaks Medium Halibut 3/4 to 1 inch 8 to 15 minutes Melted butter, margarine or oil Salmon High...
-
Page 42: Grill Recipe Suggestions
GRILL RECIPE SUGGESTIONS BBQ SALMON 1tsp. Worcestershire sauce 2 large salmon steaks Half-hour before cooking, turn the 1tsp. Dry mustard 2 tbs. oil burner to the grill on high. Drain ¼ tsp. Thyme, crushed Salt & pepper seafood-reserving marinade. On 1 medium onion, sliced 2 oz. - Page 43 CHICKEN TANDOORI STYLE heat tortillas on grill. Slice meat across 8 large chicken thighs or 2 oz. lemon juice grain in thin slices. Place on hot platter. drumsticks 10 lbs. pork roast Squeeze lemon juice over. Wrap meat and 1 c. plain nonfat yogurt any of the following toppings in tortillas: ½...
-
Page 44: Limited Warranty
Limited Warranty...
Need help?
Do you have a question about the 720-0513 and is the answer not in the manual?
Questions and answers