Table of Contents
Advertisement
Advertisement
Table of Contents

Related Manuals for Jenn-Air 720-0150-LP


Summary of Contents for Jenn-Air 720-0150-LP
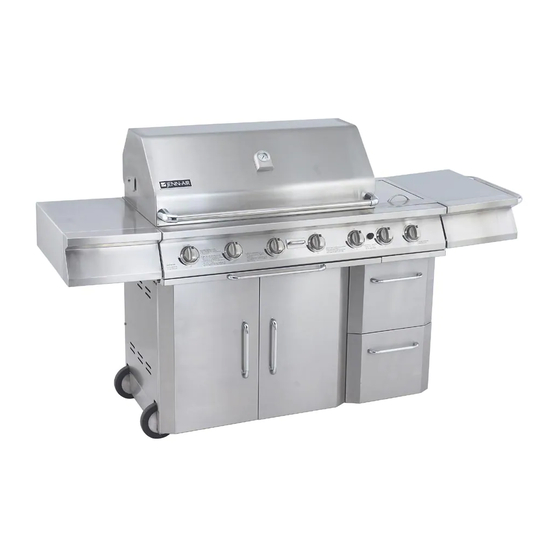
- Page 1 STAINLESS STEEL GAS GRILL MODEL NO.: 720-0150-LP ITEM NO: 168918 *Jenn-Air is a Trademark of the Maytag Corporation and is used under license to Lowe’s Companies, Incorporated. FOR OUTDOOR USE ONLY PLEASE CONTACT 1-800-554-5799 FOR ASSISTANCE DO NOT RETURN TO PLACE OF PURCHASE...
-
Page 2: Table Of Contents
TABLE OF CONTENTS SECTION ONE Safety Instructions…………………………. Placement of the Grill………………………. SECTION TWO Side Shelf Assembly……………………… Side Shelf Handle & Grease Tray Handle Assembly………………………………….. Battery, Grid, Brake & Spice Tray Assembly………………………………….. Gas Holder & Propane Tank Assembly… SECTION THREE Gas Hook Up……………………………… Leak Testing………………………………. -
Page 3: Safety Instructions
SAFETY INSTRUCTIONS WARNING Do not attempt to light the grill if gas odor is present. Contact customer service at 1-800- 554-5799. When lighting, keep your face and body as far away from the burner as possible. BEFORE LIGHTING Inspect the gas supply hose prior to turning the gas “ON”. - Page 4 SAFETY INSTRUCTIONS WARNING Do not try lighting this appliance without first reading the “LIGHTING INSTRUCTIONS” section of this manual. TESTED IN ACCORDANCE WITH ANSI Z21.58b LATEST STANDARD and CGA 1.6b LATEST STANDARD FOR OUTDOOR COOKING GAS APPLIANCES. Check your local building codes for the proper method of installation.
-
Page 5: Placement Of The Grill
Do not use briquettes of any kind in the grill. The 720-0150-LP grill is designed for optimum performance without the use of briquettes. Do not place briquettes on the flame tamers as this will block the vent to the grill burners. -
Page 6: Side Shelf Assembly
SIDE SHELF ASSEMBLY RIGHT ASSEMBLY 1. The screws to attach the side shelf are already screwed into the right side panel. 2. Remove the screws from the right side panel. 3. Align the holes in the side shelf with the screw holes in the right side panel. 4. -
Page 7: Side Shelf Handle Assembly
SIDE SHELF HANDLE ASSEMBLY 1. Remove the four handle screws from the side of the burner shelf. 2. Align the handle holes with the holes in the shelf. 3. Insert the screws and tighten. GREASE TRAY HANDLE ASSEMBLY 1. Remove the two screws from the grease tray handle. 2. -
Page 8: Battery Assembly
3. Replace the ignition button housing. GRID, BRAKE & SPICE TRAY ASSEMBLY Remove the cooking grids from the firebox and insert them into the cooking griddle. To lock the caster brake, lift the red handle upward. Mount the spice tray into the holes on the left door of the grill. -
Page 9: Gas Holder & Propane Tank Assembly
GAS HOLDER ASSEMBLY 1. Secure the gas tank on the slide tray with the retention kit screws. PROPANE TANK ASSEMBLY 1. Attach the regulator to the propane tank by turning the regulator handle clockwise. 2. Turn off the gas supply at the cylinder when the appliance is not in use. -
Page 10: Gas Hook Up
GAS HOOK-UP Only the pressure regulator and hose assembly supplied with the grill should be used. Any replacement pressure regulator and hose assembly must be specified by the grill manufacturer. This is a liquid propane configured grill. Do not attempt to use a natural gas supply unless the grill has been pre-configured for natural gas use. -
Page 11: Leak Testing
LEAK TESTING GENERAL Although gas connections on the grill are leak tested prior to shipment, a complete gas tightness check must be performed at the installation site. Periodically check the whole system for leaks following the procedures listed below. If the smell of gas is detected at anytime, you should immediately check the entire system for leaks. -
Page 12: Installer Final Check
Locking Nut Adjustment Bolt INSTALLER FINAL CHECK 1. Specified clearance maintained 24 in. from combustible materials/construction. 2. All internal packaging has been removed. 3. The hose and regulator are properly connected. WARNING 1. Do not store spare LP gas cylinders under or near this appliance. 2. -
Page 13: Operating Instructions
OPERATING INSTRUCTIONS GENERAL USE OF THE GRILL AND ROTISSERIE Each main burner is rated at 12,000 BTU/Hr. The main grill burners encompass the entire cooking area and are side ported to minimize blockage from falling grease and debris. Above the burners are stainless steel flame tamers. -
Page 14: Lighting Instructions
NOTE It is normal for the skewer to flex when larger cuts of meat are being cooked. If the meat scrapes on the cooking grids during any part of the rotation, the cooking grids must be removed. LIGHTING INSTRUCTIONS BEFORE LIGHTING… Inspect the gas supply hose prior to turning on the gas. -
Page 15: To Match Light The Grill
TO MATCH LIGHT THE GRILL If the burner will not light after several attempts using the control knobs, the burner may be lit with a match. 1. If you have already attempted to light the burner with the igniter, allow 5 minutes for any accumulated gas to dissipate. -
Page 16: Easy Lighting Illustrations
EASY LIGHTING ILLUSTRATIONS MAIN & SIDE BURNER LIGHTING 1. Open the top cover or lid. 2. Press and turn one of the main or side burner control knobs to the “HI” setting. 3. After the burner is lit, adjust the knob as desired. -
Page 17: Using The Side Burner
USING THE SIDE BURNER Inspect the gas supply hose prior to turning on the gas. If there is evidence of cuts, wear or abrasion, it must be replaced prior to use. Do not use the side burner if gas odor is present. WARNING Always keep your face and body as far away from the burner as possible when lighting. -
Page 18: Care And Maintenance Of Grill
CARE & MAINTENANCE OF THE GRILL STAINLESS STEEL The grill is made of non-rusting and non- magnetic stainless steel. There are many stainless steel cleaners available. Always use the mildest cleaning procedure first, scrubbing in the direction of the grain. To touch up noticeable scratches in the stainless steel, sand very lightly with dry 100 grit emery paper in the direction of the grain. -
Page 19: Troubleshooting
TROUBLESHOOTING WARNING Spiders and insects can nest inside the burners of the grill and disrupt gas flow. This very dangerous condition could cause a fire behind the valve panel, thereby damaging the grill and making it unsafe for operation. Inspect the grill at least twice a year. BEFORE CALLING FOR SERVICE If the grill does not function properly, use the following checklist before contacting your dealer for service. -
Page 20: Exploded View
EXPLODED VIEW... -
Page 21: Parts List
Bowl Assembly, Side Burner Lid, Side Burner Lid Handle, Side Burner Side Burner Body Side Burner Ring Side Burner Ring Cooking Grid, Side Burner Rear Barrel, Rear Burner Main Burner Flame Tamer Cooking Grid Cooking Grid With Hole Warming Rack Cooking Griddle... -
Page 22: Grilling Hints
GRILLING HINTS The preparation of meat, whether rare, medium, or well done, is affected to a large degree by the thickness of the cut. The cooking time is affected by the type of meat, the size and shape of the cut, the temperature of the meat when cooking begins, and the degree of preparation desired. - Page 23 FOOD WEIGHT OR THICKNESS MEATS BEEF Hamburgers 1/2 to 3/4 inch Tenderloin, Porterhouse, Rib eye Rare 1 inch Medium 1-1/2 inch 1 inch 1-1/2 inch Well-done 1 inch 1-1/2 inches Lamb Chops & Steaks Rare 1 inch 1-1/2 inch Medium 1 inch 1-1/2 inch Well-done...
- Page 24 FOOD WEIGHT OR THICKNESS Breasts well-done FISH AND SEAFOOD Steaks Halibut 3/4 to 1 inch Salmon Swordfish Whole Catfish 4 to 8 ounces Rainbow trout FLAME APPROXIMATE SIZE TIME Medium 30 to 45 minutes Marinate with Italian dressing Medium to 8 to 15 minutes High Medium to...
-
Page 25: Grill Recipe Suggestions
GRILL RECIPES BBQ SALMON 2 large salmon steaks 2 tbs. oil Salt & pepper 2 oz. thin bacon slices 2 tbs. butter 1 tbs. lemon juice Sprig of parsley Lemon wedges *You can substitute catfish, halibut or cod for salmon. Preheat the BBQ Brush the steaks with oil and season with salt and pepper. - Page 26 heat tortillas on grill. Slice meat across grain in thin slices. Place on hot platter. Squeeze lemon juice over. Wrap meat and any of the following toppings in tortillas: chopped tomatoes, guacamole, sour cream, and taco sauce. BEEF AND LAMB KABOBS Serve 4 ½...
-
Page 27: Limited Warranty
Saturday. Our telephone number is 1-800-554-5799, fax number 1-800-598-8829. Please direct all correspondence to: Nexgrill Industries, Inc. 145 Brea Canyon Road, Walnut, California, 91789, ATTN: Warranty Service Center. *Jenn-Air is a trademark of the Maytag Corporation and is used under license to Lowe’s Company Inc. Warranty Period: Lifetime...
Need help?
Do you have a question about the 720-0150-LP and is the answer not in the manual?
Questions and answers