Advertisement
Quick Links
Warranty
Each Steelcraft unit is thoroughly inspected in our Quality Assurance
department prior to delivery. In the unlikely case that you find any
material or workmanship that affects the units normal operation,
we will repair the unit free of charge within 12 months of purchase. You
are required to present your receipt as proof of purchase.
For all concerns with your product please contact our Customer Service
team.
CUSTOMER SERVICE
1300 303 330 - Australia
0508 688 822 - New Zealand
Please read all the information carefully before using this product.
This warranty does not apply to failure due to improper care,
or normal wear and tear caused by product use. We reserve the
right to inspect the unit. You may be charged for repairs if the product
has been damaged accidentally.
Distributed by:
AUSTRALIA
BRITAX CHILDCARE PTY.LTD.
A Britax International company.
(Incorporated in Victoria)
A.B.N. 55 006 773 600
99 Derby Road, Sunshine,
Victoria 3020, Australia
Phone: (03) 9288 7288
Fax: (03) 9311 5798
Due to our continuing program of development, Britax reserves the right to alter the specifications,
colour or design without any further notice.
The Steelcraft trademark is the property of Britax Childcare Pty. Ltd-Australia.
The Britax trademark is the property of Britax Excelsior Limited - UK.
Visit the Britax website at: http:/www.britax.com.au or email us at custserv@britax.com.au
Due to the variations in the style and design of our products the illustrations used in this
instruction booklet are generic.
12/06
2006 Copyright Britax Childcare Pty. Ltd. Australia.
c
16
NEW ZEALAND
BRITAX CHILDCARE NZ. Limited.
A Britax International company.
101 Diana Drive, Glenfield,
Auckland 9, New Zealand.
Phone: (09) 443 0102
Fax: (09) 443 0120
4000676
KEEP INSTRUCTIONS FOR FUTURE REFERENCE
series AX656
Advertisement

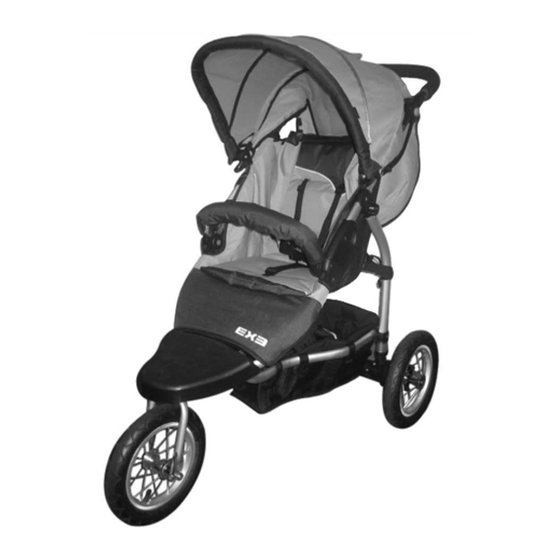
Summary of Contents for Steelcraft EX3
-
Page 1: Customer Service
Due to our continuing program of development, Britax reserves the right to alter the specifications, colour or design without any further notice. The Steelcraft trademark is the property of Britax Childcare Pty. Ltd-Australia. The Britax trademark is the property of Britax Excelsior Limited - UK. - Page 2 The weight of the child should not exceed 9kg. When using the toddler seat: Only use this toddler seat with the EX3 three wheel stroller. Always assist your child in/out of the seat; a climbing child might tip the unit.
-
Page 3: To Open The Stroller
RECOMMENDATION 1. TO OPEN THE STROLLER Some strollers have backrests adjustable between an upright and reclined position. The upright Lay the chassis down flat and release the frame lock positions are not suitable for use with children less than six months old. As a guide, the lowest recline catch. - Page 4 16. TO REMOVE THE TODDLER SEAT 2. TO INSTALL THE FRONT SWIVEL WHEEL WARNING: Always remove your child from the stroller/ Remove the plastic protector (where fitted) from the toddler seat prior to installation or removal. front forks. Push the front wheel axle fully into the wheel forks. To remove toddler seat, pull and hold the locking Place the securing washer on both sides, ensure knob on the upper mounting bracket 1, then push...
- Page 5 TO INSTALL THE REAR WHEELS 14. TO FOLD THE STROLLER WITH BASSINETTE Push each rear wheel into the chassis until they Store the bassinette handles inside the zipped lock into position. pockets and fold the bassinette canopy back towards the rear of the bassinette. (For a more Check the wheels are correctly fitted by trying to compact fold it is optional to release the bassinette pull them out.
- Page 6 13. TO INSERT THE BASSINETTE TO RELEASE/LOCK THE SWIVEL WHEEL (where supplied or purchased) Use only EX3 bassinet. To release the front swivel wheel allowing greater mobility, rotate the knob clockwise until the rivet in WARNING: When bassinette is in use, arm bar, stroller the knob faces forward.
-
Page 7: To Secure Your Child In The Harness
12. TO ASSEMBLE THE BASSINETTE (where supplied or purchased) TO SECURE YOUR CHILD IN THE HARNESS Extend the bassinette frame rods outwards until WARNING: Use this harness at all times. they lock into position. Push down lightly on the top edges of the bassinette to check that it does A five-point harness is provided to restrain your child. - Page 8 TO USE THE ARM BAR (where supplied) 11. TO ASSEMBLE THE SEAT INSERT The arm bar has locating slots on both ends. WARNING: The seat insert must be assembled as Rotate these slots until they are clear of the plastic below to ensure correct operation of the stroller.


Need help?
Do you have a question about the EX3 and is the answer not in the manual?
Questions and answers