Avision FL-1006S Getting Started
Sheet-fed duplex scanner
Hide thumbs
Also See for FL-1006S:
- User manual (109 pages) ,
- User manual (119 pages) ,
- User manual (127 pages)
Table of Contents
Advertisement
Quick Links
Advertisement
Table of Contents

Related Manuals for Avision FL-1006S


Summary of Contents for Avision FL-1006S
-
Page 1: Getting Started
Sheet-fed Duplex Scanner Getting Started Regulatory model: FL-1006S Avision Inc. - Page 2 Warranty The information contained in this document is subject to change without notice. Avision makes no warranty of any kind with regard to this material, including, but not limited to, the implied warranties of fitness for a particular purpose. Avision shall not be liable for errors contained herein or for incidental or consequential damages in connection with the furnishing, performance, or use of this material.
-
Page 3: Table Of Contents
Table of Contents Introduction..........1-1 Scanner Installation........2-1 Installing the Scanner Driver and Connecting the Cables..........2-1 Completing Your First Scan ....... 3-1 Loading Your Paper ........3-1 Verifying Your Scanner Installation ....3-5 ISIS Interface Operation......4-1 Using the Buttons........5-1 Installing Button Manager V2 ....... -
Page 4: Introduction
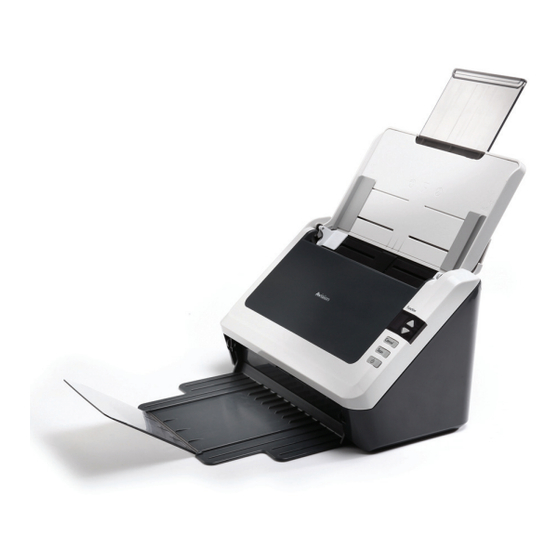
1. Introduction Congratulations on your purchase of the color sheet-fed image scanner. With this scanner, you can scan documents in duplex (double-sided) mode to increase productivity. Before you install and operate the new scanner, please take a few minutes to read through this manual. It provides proper instructions for you to unpack, install, operate and maintain the scanner. - Page 5 Scanner Main Unit Software CD USB Cable Power Adapter & Power Cord Note: 1. Only use the AC adapter included in the machine. Using other AC adapters may damage the machine and void the warranty. 2. Please unpack the packing carefully, and check the contents against the checklist.
-
Page 6: Scanner Installation
2. Scanner Installation 2.1 Installing the Scanner Driver and Connecting the Cables NOTE: 1). The Windows system CD may be required when installing on some PC’s. 2). To ensure your computer can identify the USB scanner, please install scanner driver first before connecting the scanner to your computer. - Page 7 2.1.2 Turning on the Power Press the Power Switch button on the front panel, the Power LED will be lit. To turn off the scanner, press the Power Switch button for about 3 seconds, the Power LED will be off. 2.1.3 Installing the Scanner Driver Place the supplied CD-ROM onto your CD-ROM drive.
- Page 8 Contents on the installation graphic: Install Button Manager V2: To use the buttons on the scanner, you need to install Button Manager V2. To ensure Button Manager V2 works properly, please FIRST install Button Manager V2 before installing the scanner driver. Install Scanner Driver: To communicate with ...
- Page 9 View Manual: Click “View Manual” to view or print the detailed user manual for the scanner and Button Manager V2 respectively. Click Install Button Manager V2 to install the Button Manager V2 software and then click Install Scanner Driver to install the scanner driver on your computer. 2.1.4 Connecting to Computer Connect the square end of the USB cable to the USB port of your scanner.
-
Page 10: Completing Your First Scan
Completing Your First Scan Loading Your Paper 3.1.1 Notice on Using the ADF Before using the ADF, please make sure that your paper meets the following specifications: Document(s) can range in size from 2.9 by 2 inches to 8.5 by 14 inches (Legal). ... - Page 11 3.1.2 Loading Your Document in the ADF Paper Tray Fanning Your Document Standard paper size should feed easily through the scanner. To avoid occasional paper jam when automatically feeding multiple documents, loosen the paper before loading. Document Feeding 1. Unfold the document feeder extension and the output tray extension.
- Page 12 2. Load the stack of document face down with the top of the pages pointing into the feeder. 3. Verify that the paper guides are aligned with the edges of the stack. Your Document (Face Down) Paper Guide...
- Page 13 3.1.3 Loading Your Cards in the ADF Paper Tray 1. Place the stack of cards face down with the long dimension parallel to the paper guide. 2. Adjust the paper guides to center the original. Make sure the paper guides touch the edges of the original.
-
Page 14: Verifying Your Scanner Installation
Verifying Your Scanner Installation To verify if your scanner installation is correct, Avision provides you a useful test program called Avision Capture Tool. With this tool, you can perform simple scans and view the captured images. In addition, it helps you complete your scan at a rated speed. - Page 15 Actual Page Size Save File Path File Format Scan Setup Choose your desired file format from the File Format drop down list box. (Default is BMP, other choice includes TIFF, MTIFF, PDF, MPDF, GIF, and JPEG.) The supported file formats vary depending on your scanner model. Place your document face down on the document glass or face up in the auto document feeder.
- Page 16 3.1.4 A Glance of the Scanner Properties Dialog Box 1. Tab Options Choice: Image, Compression, Color Dropout, Paper, Multi-Feed Detection, Preview, Options, Settings, Information. 2. Image Choose your image type and the side of Selection Box document you wish to scan. Options vary based on type of scanner.
-
Page 17: Isis Interface Operation
4. ISIS Interface Operation * Please refer to the preceding chapter, Scanner Installation, to install ISIS scanner driver. You may start the supplied QuickScan software application to scan via the ISIS user interface. The ISIS driver operation method is similar to the TWAIN’s. Every function on the ISIS interface screen is briefly described as below: Mode: Select one of scan modes, including B&W, gray, color... -
Page 18: Using The Buttons
Using the Buttons The following picture shows the 3 buttons and 1 function screen on the scanner. Function Screen Function-Select Button Cancel Button Scan Button 5.1 Installing Button Manager V2 Button Manager V2 provides you an easy way to scan your document and then link the scanned image to your designated software application. -
Page 19: Checking The Button Configurations Before Scanning
5.2 Checking the Button Configurations before Scanning Click the Scan button on the scanner. The Button Panel is displayed in the Windows System Tray at the bottom right corner of your computer screen. This indicates the scanner model The Function Icon (The number of function icons... - Page 20 The Button Panel shows the first five scanning buttons. Right-click the button (function) you wish to check. The Button Properties window appears. Name of the Selected Button Button Name Image Mode Selection Basic Scan Parameters Folder and file name for the scanned image Scan To...
-
Page 21: Scanning From One Touch Of The Buttons
V2, please refer to the user’s manual in the supplied CD. You may also use Button Manager V2 on your desktop by starting Button Manager V2 from All Programs or double clicking the Avision Scanner Utility from the Control Panel. -
Page 22: Maintenance
Maintenance Cleaning the ADF From time to time the pad assembly and feeding rollers may become contaminated with ink, toner particles or paper dust. In this case the scanner may not feed documents smoothly. If this occurs please follow the cleaning procedures to return your machine to its original state. -
Page 23: Cleaning The Calibration Area
6.2 Cleaning the Calibration Area Open the front cover to the left. Wet a clean cloth with some isopropyl alcohol. (95%) Wipe the glass and the white area as illustrated in below to rid the dust or dirt. -
Page 24: Troubleshooting
7. Troubleshooting 7.1 Clearing a Paper Jam In the event of a paper jam, follow the procedures below to remove the paper: Gently open the scanner ADF cover. Carefully pull the paper out of the ADF unit. Close the scanner ADF cover. Your Scanner is now ready to use.
Need help?
Do you have a question about the FL-1006S and is the answer not in the manual?
Questions and answers