Foscam FI8620 User Manual
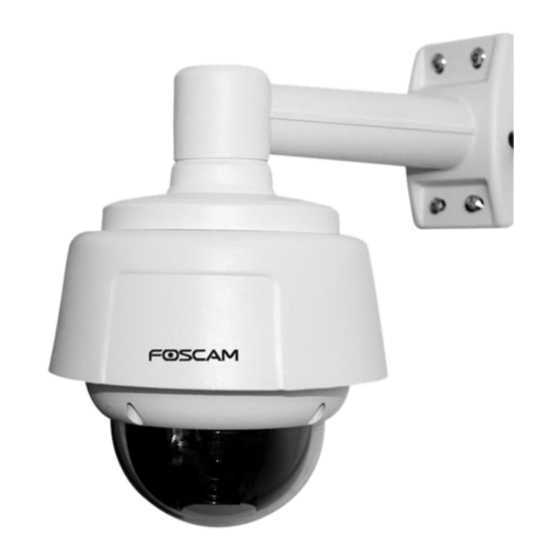
Outdoor dome network camera
10x optical zoom & remote
pan / tilt rotate
Hide thumbs
Also See for FI8620:
- User manual (47 pages) ,
- Quick installation manual (12 pages) ,
- Quick installation manual (17 pages)

Related Manuals for Foscam FI8620


Summary of Contents for Foscam FI8620
- Page 1 Model: FI8620 Outdoor Dome Network Camera 10X OPTICAL ZOOM & REMOTE PAN / TILT ROTATE...
-
Page 2: Table Of Contents
Table of Contents 1 Overviews ................................2 1.1 Key Features .............................. 3 1.2 Read Before Use ............................3 1.3 Packing Contents ............................3 1.4 Physical Description ........................... 4 2 Surveillance Software GUI ..........................6 2.1 Login Window ............................. 6 2.2 Surveillance Window ..........................9 3 Advanced Camera Settings .......................... -
Page 3: Overviews
FI8620 supports the industry-standard H.264 compression technology, drastically reducing file sizes and conserving valuable network bandwidth. With flexible 360-degree pan,90-degree tilt and 10X optical zoom, IPCAM gives users more comprehensive control over a monitored site. -
Page 4: Key Features
Supports mobile watch Supports dual-stream Supports RTSP port Embedded FOSCAM DDNS(dynamic domain name service) Service Supports remote viewing & record from anywhere anytime Supporting Third Party Domain name Multi-level users management with password protection ... -
Page 5: Physical Description
Front Panel Figure 1.1 The camera lens has variable optical zoom. The biggest optical zoom time is 10 times. With this function you can see farther and clearer. Interface Figure 1.2 1) Power Interface: Connect the external power adapter, request for 12V/2A power. 2)... - Page 6 There are up to two labels located on the body of the camera; this is an important feature of original Foscam cameras. If your camera does not have labels as shown in Figure 1.3 ,it may be a clone one. Cloned Foscam cameras can not use original firmware and are not eligible for warranty or technical services.
-
Page 7: Surveillance Software Gui
Please check the login window above, it was divided to 5 sections from no. 1 to 5. Section1 Select Language FOSCAM camera supports up to multi-languages, such as English, Spanish, Deutsch and so on. You can select the language you need via click on the select language bar to switch. Section2 Video View Login Button For PC, please select the login button under Video View. - Page 8 Section4 Download ActiveX For IE users, the ActiveX have been embedded in the IP Camera Tool, so if you have installed the IP Camera Tool, you need not download again. If you use Firefox, Google Chrome, Safari or others, you should download and install QuickTime Player as the ActiveX from other website. For remote IE users, first time you use the IPCAM, you may need download and install the ActiveX.
- Page 9 If you could not view living video after running the ActiveX, only a red cross in the center of the video or just a black screen. Please change another port number to try. Make sure all firewall or antivirus software on your computer does not block the active download and installation.
-
Page 10: Surveillance Window
2.2 Surveillance Window Select the PC login mode and you will enter the surveillance window. Figure 2.4 For Visitor / For Operator / For Administrator Camera supports three-level users management: admin, user and guest. The default “admin” username and password are all “admin”, the default “user” username and password are all “user”, and the default “guest”... - Page 11 Section1 View The resolution contains D1(720*576), CIF(352*288), QCIF(176*144) and Auto. You can choose First Stream or Second Stream to adjust the view window. Note: When the network bandwidth is bad, you’d better select Second Stream and the video will be more fluency. Section2 Capture/Record/Playback/Set Path Buttons Capture: Click this icon, the current living picture will be stored to a predetermined path.
- Page 12 Playback: Click the button, it will pop up a player. And you can see the videos you have stored in your computer. Figure 2.6 Set Path: Set the storage path of photos and videos. The default storage path is D disk. Note: These buttons are controlled by the ActiveX controller, therefore Firefox, Google Chrome and Safari cannot allow to these functions.
- Page 13 Zoom in/out. The lens has 10x optical zoom. The biggest optical zoom time is 10 times. Focus +/-. This function can help you see more clearly. Section4 Preset/ Go/ PTZ Speed 1) Preset----------Support 8 preset position, which is considered enough for DIY home & small business surveillance market 2) Set----------- Click Set to save the position you need the camera to remember 3) Go----------- Click Go to make the camera move the preset position...
- Page 14 Section5 For Administrator Path to Administrator Control Panel, Click it, and it will lead to Administrator Control Panel. Section6 If you have added time and camera name in the video, you can see it in the surveillance window. Go to For Administrator ---Video panel, and you can add camera name and time on the live window.
-
Page 15: Onscreen Mouse Control
Onscreen Mouse Control Put the mouse on the screen and you can see a arrow. Press the mouse and the camera’s len will move to the corresponding direction. For example, put the mouse on the upper-right corner of the screen and you can see a arrow, press the mouse, then the cameras lens will move toward the upper-right direction. - Page 16 Right click on the screen, you can see two graphic display modes: Direct Draw and GDI. The default mode is Direct Draw, and almost graphic card support this mode. But some old graphic card cannot display normally under Direct Draw, you can select GDI to try again. Figure 2.10 NOTE: Under GDI mode, you cannot see the...
-
Page 17: Advanced Camera Settings
Click the bar “For Administrator”, goes to Administrator Control Panel to make advanced camera settings. 3.1 Device Information Click For Administrator, you will see the Device Information. It contains Device ID, firmware version of the camera and other status of the camera. Device ID: It displays “IP Camera”. -
Page 18: Date & Time Settings
3.2 Date & Time Settings There are four models for you to adjust time: Manual setting, Sync with computer time, Network Time Protocol and Keep current time, choose one model and adjust the camera time. Then choose Time zone. Manual settings: The administrator can enter the date and time manually. Note that the date and time format is [yyyy/mm/dd] and [hh:mm:ss]. - Page 19 Figure 3.2 The camera will adjust the daylight saving time automatically if you select “Automatically adjust clock for daylight saving time changes”.
-
Page 20: User Settings
3.3 User Settings The camera has set up 3-level user permissions, user names are admin, user, guest, and the default passwords are admin, user, guest too. Different user has different permission. Only admin can do advanced settings under For Administrator page. User account can operate For Visitor and For Operator page. Guest account only can do settings under For Visitor. -
Page 21: Basic Network Settings
3.4 Basic Network Settings IP Configuration Type contains two types: Fixed IP Address and Dynamic IP Address. Set the appropriate type for you. Keep the camera in the same subnet of your router or computer. Fixed IP Address: Select this option to manually assign a static IP address to the Network Camera. - Page 22 Click here Figure 3.5 same subnet mask and gateway of your camera with your PC There are two DNS servers, you can set the same for your camera. Same with gateway is also OK. Figure 3.6...
- Page 23 If you don’t know the DNS server, you can use the same settings as the default Gateway. HTTP Port number:, The HTTP Port can be used to access the IPCAM on the LAN. Usually, it is 80. You can set any number between 1024 and 49151 too. After all settings, click Apply.
- Page 24 Figure 3.9 You need to enter the user name and password if you select on for RTSP Permission Checksum . Click OK and you can see the real-time preview. Figure 3.10...
- Page 25 Figure 3.11 NOTE: 1 You’d better not change the HTTP and RTSP port number at the same time, because you cannot submit successfully. 2 After changing the RTSP or HTTP port number, the camera will restart. 3 If you cannot play the video in the VLC player, please check the port mapping (Figure 3.16).
-
Page 26: Remote Access
3.5 Remote Access This section will tell you how to access the camera form WAN. Figure 3.12 Static IP user Users who have static IP addresses do not need to set DDNS service settings for remote access. When you have finished connecting the camera using the LAN IP address and port forwarding, you can access the camera directly from the Internet using the WAN IP address and port number. - Page 27 FOSCAM domain name Each Foscam camera has an embedded unique DDNS domain name, the format of this domain name is xxxxxx.myfoscam.org. On the camera body, you can see the domain name sticker. Here take camera.myfoscam.org for example. Go to option of DDNS Service Settings on the administrator panel, you can see the domain name(Figure 3.12).
- Page 28 Third Party Domain Name Settings User can also use third part DDNS, such as www.no-ip.com. ,www. dyndns.com Here take www.no-ip.com for example: ① Step 1, Go to the website www.no-ip.com to create a free hostname Firstly: Login on www.no-ip.com and click No-IP Free to register. Click here to register Figure 3.13 Please register an account step by step according to instructions on...
- Page 29 Figure 3.14 Figure 3.15 Please create the domain name step by step according to instructions on www.no-ip.com Step 2, DO DDNS Service Settings within the Camera Please set Remote Access within the camera by hostname, a user name and password you’ve got from www.no-ip.com...
- Page 30 Firstly, goes to option of Remote Access on the administrator panel. Secondly, select No-Ip as a server in the Third Party DDNS.. Thirdly, fill foscam as DDNS user, fill password foscam2012 as DDNS password, fill ycxgwp.no-ip.info as DDNS domain and server URL, Then click save to make effect. The camera will restart and to take the DDNS settings effective.
- Page 31 ③ Use domain name to access the camera via internet After the port forwarding is finished, you can use the domain name+ http no. to access the camera via internet. Take hostname ycxgwp.no-ip.info and http no. 88for example, the accessing link of the camera via internet would be http:// ycxgwp.no-ip.info:88 Upnp Port Forwarding: If you select Enable, that means you allow the IPCAM to open ports on the router automatically so that the video streams can be sent out form a LAN.
-
Page 32: Email Settings
3.6 Email Settings If you want the camera to send emails when motion has been activated, Email Settings will need to be configured. Figure 3.17 Make sure your mailbox for sender supports SMTP. Three recipients can be added to receive images. -
Page 33: Ftp Settings
3.7 FTP Settings If you want to upload images to your FTP server, you can set FTP Settings. Figure 3.18 Figure 3.19 FTP server: If your FTP server is set up in LAN, you can set as Figure 3.18 If you have a FTP server which you can access on the internet, you can set as Figure 3.19 FTP Port: Usually the port is 21 If the FTP server mode is passive, choose on, or else, choose off. -
Page 34: Auto Capture
3.8 Auto Capture The camera can capture pictures automatically at interval time if you have set auto capture. Figure 3.20 Snap interval: The interval time between two snapshot actions. The pictures will be stored to the disk you set (you can set the storage path under “For Visitor”). Send E-mail: Select it, the camera will send email to you with the picture it has captured when the camera alarmed. -
Page 35: Terminal
3.9 Terminal The camera has built-in cradle head, you’d better not change the default settings (Figure 3.21), or else you may not control the cradle head. Figure 3.21 3.10 Motion Detection IP Camera supports Motion Detection, when the motion has been detected, it will send emails or upload images to FTP. - Page 36 That means you choose window1 Figure 3.22 Move your mouse on the regional box, and you can see the arrow icon, then drag the regional box to any position in the video.
- Page 37 Figure 3.23 Move the mouse to the bottom right corner of the regional box .When the mouse pattern changes to “ ”, you can change the size of the detection area.
- Page 38 Drag it and change the size of the alarm area Figure 3.24 Move right or left and adjust the sensitivity.Click apply after all settings.The regional box will blink with red color when something moving in your detection area.
- Page 39 Figure 3.25 Note: 1 If you add the date&time to the video,don’t put the detection window on the time area or else the camera will alarm when the time change. 2 If you have not set the motion detection area,the camera will not alarm at any time. 3 Firefox, Google chrome and Safari doesn’t have this function because the activex doesn’t support it.
-
Page 40: Alarm
3.11 Alarm IP CAM will send email or upload images when motion has been detected. Figure 3.26 Email Alarm: Camera will send emails when motion is activated. Make sure you have set Email Settings first. Save Picture on the FTP Server: To upload images to an FTP server when motion is detected, you must set FTP Settings first. -
Page 41: Schedule
3.12 Schedule If you want the camera alarm during the time you wish, or all the time, please choose Schedule and set time range for motion alarm. Figure 3.27 There are two ways to set the alarm. 1) Alarm at any time when motion is detected. Select All times and apply you settings, the camera will alarm at any time when motion is detected. -
Page 42: Video
3.13 Video Figure 3.28 Video format: The format contains two kinds: NTSC and PAL. One camera only has one format and you cannot change it. Resolution: The camera supports First stream: D1(704*576),CIF(352*288),QCIF(176*144), Second stream: CIF(352*288),QCIF(176*144). The higher the resolution is, the clearer video will become. - Page 43 Maximum frame rate: When the video format is PAL, the maximum frame rate is 25 fps. When the video format is NTSC, the maximum frame rate is 30 fps. You should lower frame rate when the bandwidth is limited. Normally, when the frame rate above 15, you can achieve fluently video. Key Frame Interval: The time between last key frame and next key frame.
-
Page 44: Image Settings
3.14 Image Settings Adjust the quality of the video by setting the image parameters. Figure 3.31 Brightness, saturation, contrast and hue are used to adjust the quality of the video. Camera will save your settings if you click apply. If you want to quit settings you have done and restore the status before your setting, please click cancel. -
Page 45: Initialize
3.15 Initialize Reboot: Click reboot, the infection is the same as plug the power and re-plug it. Factory default: Click it, all parameters will return to factory settings. Backup setting data: If you don’t want to quit all parameters that you’ve set. You can click save and all the parameters you set will be stored as a parameters bin file. -
Page 46: Other Settings
4 Other Settings Use Mobile to login If the camera has been linked to Internet, set the parameters of the camera and router. Make sure the camera can be accessed by domain name and WAN IP. For example, the WAN IP is183.37.54.137, the domain name is ycxgwp.no-ip.info. Then open mobile enter following... -
Page 47: Appendix
5 APPENDIX 5.1 Frequently Asked Questions Any questions you would meet, please check Network connections firstly. Check the NOTE: working status revealed by the indicators on the network server, hub, exchange and network card. If abnormal, check the network connections. 5.1.1 I have forgotten the administrator password To reset the administrator password, you had better unplug the network cable firstly. - Page 48 Figure 5.1 Click next. Figure 5.2 Click Install.
- Page 49 Figure 5.3 Only click Finish and the computer restarts upon installation completion. Re-login the camera and you can see the surveillance window. 5.1.4 No Pictures Problems The video streaming is transmitted by the ActiveX controller. If ActiveX controller isn’t installed correctly you will see no video image.
- Page 50 Figure 5.4 If you allow the ActiveX running, but still could not see living video. Please change another port number to try. Don’t use port 80, use any port between 1024 and 49151. Figure5.5 NOTE: Make sure that your firewall or anti-virus software does not block the camera or ActiveX. If you could not see video, please shut down firewall or anti-virus software to try again.
- Page 51 5.1.5 I cannot see the video on Firefox or Safari or Google chrome? If you cannot see live video after login the camera, it may be the reason that the defaults transmit protocol of QuickTime streaming is not HTTP or the port is not 80. For Firefox, Safari and Google chrome, you should install Quick Time Player as the ActiveX controller, please configure the activex controller as the following picture: Select Preferences—QuickTime Preferences…...
- Page 52 I cannot see video on MAC OS 5.1.6 If you cannot see live video after login FOSCAM H.264 camera, it may be the reason that the defaults transmit protocol of QuickTime streaming is not HTTP or the port is not 80.
- Page 53 Figure 5.9 Figure 5.10 5.1.7 Can’t access IP camera in internet There are some reasons: 1 ActiveX controller is not installed correctly (Figure5.1-5.3) 2 The port which camera used is blocked by Firewall or Anti-virus software. Please change another port number and try again. (Figure5.5) 3 Port forwarding is not successful...
-
Page 54: Default Parameters
Figure5.11 5.2 Default Parameters Default network Parameters IP address: obtain dynamically Subnet mask: obtain dynamically Gateway: obtain dynamically DDNS: Embedded FOSCAM DDNS Service Username and password Default admin username: admin Default password: admin Default user username: user Default password: user... -
Page 55: Specifications
5.3 Specifications Specification FI8620 Image Sensor 480TVL 1/4" SONY Color CCD Sensor Optical variable times 10 times Image Sensor Lens F: 3.8-38mm , F:1.2 Mini. Illumination multicolour: 0.05Lux black and white:0.001Lux Video Formats Supports NTSC or PAL Formats Image Compression H.264... -
Page 56: Obtaining Technical Support
User’s Guide has not answered. If you have problem with FOSCAM IP camera, please first contact FOSCAM reseller for solving the problems. If our reseller cannot provide service, please contact our service department: tech@foscam.com...
Need help?
Do you have a question about the FI8620 and is the answer not in the manual?
Questions and answers