
Subscribe to Our Youtube Channel
Related Manuals for Medeli Sp5500S


Summary of Contents for Medeli Sp5500S
-
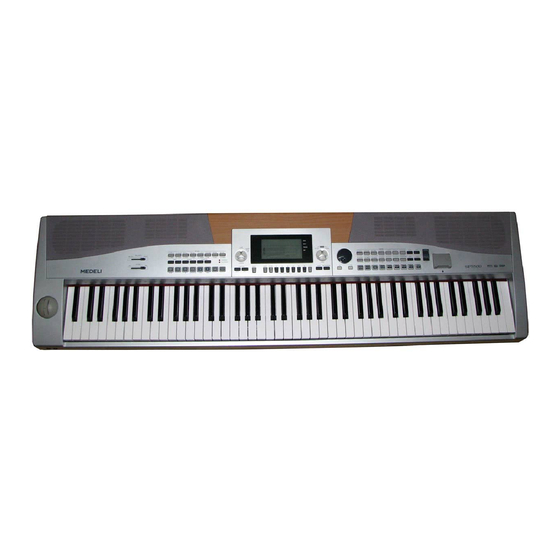
Page 1: Stage Piano
STAGE PIANO Owner's Manual aw_Sp5500S_Manual_G07_130124 2013 16:11:12... - Page 2 INFORMATION FOR YOUR SAFETY! THE FCC REGULATION WARNING (for USA) PRECAUTIONS This equipment has been tested and found to comply with PLEASE READ CAREFULLY BEFORE PROCEEDING the limits for a Class B digital device, pursuant to Part 15 of the FCC Rules. Please keep this manual in a safe place for future reference.
-
Page 3: Table Of Contents
Contents Pedal Type...............19 Panel & Display Description Harmony Type............20 Front Panel..............4 Harmony Switch............20 LCD................4 MIDI IN..............20 Rear Panel..............5 MIDI OUT..............21 DSP effect..............21 Connections Touch................21 Power Jack..............6 Language..............21 Setting Music Rest.............6 PowerOff..............21 Connecting a pair of Headphones......6 Connecting an Audio Equipment........6 Register Memory Connecting an MP3/CD Player........7 Registering the Panel Setting........22... -
Page 4: Panel & Display Description
Panel & Display Description Front Panel 1. [BRILLIANCE] Slider SONG MODE: STYLE MODE: Adjust voice brilliance 10. [START/STOP] button 10. [START/STOP] button Start or stop playing the Start or stop playing the style 2. [VOLUME] Slider song Adjust master volume 11. -
Page 5: Rear Panel
Panel & Display Description 18. Data dial When [SHIFT] button pressed When [SHIFT] button released Increase and decrease the value 21. [VOICE] button 21. Voice direct button Enter the voice mode Select a direct voice 19. [- / NO] button Decrease the value 28. -
Page 6: Power Jack
Power Jack Make sure that the piano is turned off . Before you switch your piano on, turn down the volume of piano and the connected audio equipment first. Connect the AC adaptor to the power supply jack of this piano. Plug the AC adaptor into an AC outlet. -
Page 7: Connecting An Mp3/Cd Player
Connections Connecting an MP3/CD Player Connect the audio output of an MP3/CD player or other audio source to the stereo AUX.IN jack on the rear panel. The input signal is mixed with the piano signal, allowing you to play along. Connecting a Unit Pedal After connecting a unit pedal to the unit pedal jack on the rear panel, the piano will have three pedals with different functions:... -
Page 8: Adjusting The Master Volume
Adjusting the Master Volume Slide the [VOLUME] slider to right, the volume increases and vice versa. Adjusting the Voice Brilliance Slide the [BRILLIANCE] slider to right, the voice sounds brighter and vice versa. You can change the piano brilliance as you wish. Playing the Demo Song The instrument features 5 wonderful demos. -
Page 9: Playing Voices
Playing Voices The instrument features 583 exceptionally realistic voices. 10 group of percussion voices. Please refer to Voices List. Playing Voices In idle mode, holding down [SHIFT] button, and then press one of the voice direct button to enter the voice mode. LCD will display the current voice name and number and highlights “R1”. -
Page 10: Pitch Bend/Modulation Effect
Playing Voices Pitch Bend/Modulation effect Use the pitch bend wheel to bend the pitch of notes up or down while playing the keyboard. The pitch bend wheel will automatically return to normal pitch when released. Roll the wheel right and left to make pitch bend effect, which increase the pitch when rolling right, and decrease the pitch when rolling left. -
Page 11: Twinova
Twinova The twinova mode can split the keyboard into two sections which have the same pitch and voice. It helps teaching and learning piano. In idle mode, press [TWINOVA] button to turn twinova function on. The LCD highlights “TWINOA”. In twinova mode, dual voice and lower voice are unavailable. -
Page 12: Play Auto Accompaniment(All Tracks)
Auto Accompaniment Play Auto Accompaniment(all tracks) In style mode, press [CHORD MODE] button to enter “auto bass chord” (A. B. C.) mode. The keyboard is split into two sections. Left hand section is chord detect section. The “FINGERED” LED on the panel will be lighted. -
Page 13: Playing Different Accompaniment Sections
Auto Accompaniment Playing Different Accompaniment Sections Press style direct button or use the data dial, [+/YES]/ [-/NO] button to select a style. Press [CHORD MODE] button to enter A. B. C. (auto bass chord) mode. Press [SYNC START] button. Press [FILL A] button. Press the [INTRO/ENDING] button. - Page 14 Auto Accompaniment The lowest interval in our root-position trial (between the root and the third) determines whether the triad is a major or minor chord, and we can shift the highest note up or down by a semitone to produce two additional chords, as shown.
-
Page 15: Tempo
Auto Accompaniment Tempo Each style of the instrument has been set with a default or standard tempo; however, this can be changed by using the [TEMPO+/-] buttons. Use the [TEMPO+/-] button to change the tempo. While the tempo data is flashing, use the data dial can also change the tempo. Press the [TEMPO+] and [TEMPO-] buttons simultaneously to restore the default tempo setting. -
Page 16: Mixer
Mixer Mixer function can control the volume of different tracks. Press the [MIXER] button. Now you have entered the menu of mixer. Press the [MIXER] button repeatedly, you can select a track and change its volume. To adjust the selected volume setting, please use the data dial or the [+/YES]/[-/NO] button. -
Page 17: Pedal Function
Pedal Function The assign pedal is a single pedal which can be configured to different pedal function. Please refer to the pedal setting menu for detail. Sustain Pedal If assign pedal is set as “Sustain”, step on the assign pedal, all notes played on the keyboard will have a longer sustain. -
Page 18: Other Functions
Other Functions Press [FUNCTION+/-] button to enter function menu. The default option of the menu is “Tune”. When you enter the menu next time, you will find the option is the same as last time. Use [FUNCTION+/-] button to select the option to set. Use [+/YES]/ [-/NO] or data dial to set parameter of the current menu. -
Page 19: Keysplit
Other Functions KeySplit This function sets the point which separates the entire keyboard to two sections. Press [FUNCTION+/-] button to select keysplit menu. LCD displays “SplitPt: xxx”. Use [+/YES]/ [-/NO] or data dial to change keysplit value. The range of keyspilit: 1~88. Press [+/YES] and [-/NO] simultaneously will set the keysplit value to its default setting: F#3(34). -
Page 20: Harmony Type
Other Functions Harmony Type You can add a variety of harmony notes to the keys you played in the right-hand section. Press [FUNCTION+/-] button to select harmony type menu. LCD displays “HarmonyTp: xxx”. Use [+/YES]/[-/NO] or data dial to change harmony type. The harmony types are as follows: Number LCD Display... -
Page 21: Midi Out
Other Functions MIDI OUT Press [FUNCTION+/-] button to select MIDI OUT menu. LCD displays “MidiOut: xxx”. Use [+/YES]/ [-/NO] or data dial to change MIDI OUT channel:1~16. Press [+/YES] and [-/NO] simultaneously will set MIDI OUT channel to default setting: 001. DSP effect Press [FUNCTION+/-] button to select DSP effect menu. -
Page 22: Register Memory
Register Memory The keyboard is an instrument with a variety of controls and functions, the Registration Memory feature can make your performance more easily and efficiently. It allows you to save virtually all panel settings to a Registration Memory setting, and you can instantly recall custom panel settings by pressing a single button. -
Page 23: Song Recording
Song Recording With the easy-to-use song recording features, you can record your own keyboard performances as a user song. 5 user songs can be recorded with 6 tracks (1 ACCOMP track, 5 MELODY tracks) each. Among them, the accompaniment track is used for recording style and this recorded track is user song's accomp. -
Page 24: Stop Recording
Song Recording Stop Recording When recording is in process, holding down [SHIFT] button then press the [RECORD] button to stop recording. When recording is in process, if the memory is full, the recording will stop and save automatically, and the LCD displays “RecFull”. 095 001 .. -
Page 25: Song
Song The piano has 125 songs in all, including 5 user songs. Listening to the songs Press the [SONG] button to enter the song mode and it will play all songs circularly. Use the data dial, [+/YES] or [-/NO] button to select a song. Once you start playing a song by pressing [START/STOP] button, it will play current song repeatedly. -
Page 26: Connecting An Sd Device
Connecting an SD Device This piano is compatible with 16M to 32G FAT 16 or FAT 32 SD card. We recommend use SD card after formatting on piano. If not necessary, please do not edit the data that the piano backs up on the SD card. -
Page 27: Load
Connecting an SD Device Load Press [SD DEVICE] button to enter SD card mode. Then use data dial to select “Load” menu. Press [+/YES] to enter “load” sub menu. Load sub menu are displayed on LCD, it includes “LoadSong”, “LoadSty” and “LoadMem”. -
Page 28: Delete
Connecting an SD Device Save user song: Select the menu “SaveSong” sub menu and press [+/YES] button, LCD displays the user song name and number. Use the data dial to select the file to save. After selected the user song, press [+/YES]. The LCD prompts to enter file name “SNG_”. -
Page 29: Midi
MIDI With the MIDI functions you can expand your musical possibilities. This section will let you know what MIDI is, and what it can do, as well as how you can use MIDI on your instrument. What's MIDI? MIDI is an acronym that stands for Musical Instrument Digital Interface, which allows electronic musical instruments to communicate with each other, by sending and receiving compatible Note, Control Change, Program Change and various other types of... -
Page 30: Troubleshooting
Troubleshooting Problem Possible Cause and Solution “ ” The speakers produce a sound This is normal and is no cause for alarm. whenever the power is turned ON or OFF. No sound when the keyboard is played. The R1/R2/L1 voice volume (Mixer) settings could be set too low. -
Page 31: Voice List
Voice List No. Name LCD Name No. Name LCD Name No. Name LCD Name Clavi (wide) 1 ClaviW1 Detuned Percussive Organ DePerOrg PIANO Clavi (wide) 2 ClaviW2 Stereo Grand Piano StGrdPno Stereo Rotary Organ StRotaOr Clavi Wah ClaviWa Rock Organ RockOrgn Acoustic Grand Piano (wide) 1 GrandPnW... - Page 32 Voice List No. Name LCD Name No. Name LCD Name No. Name LCD Name Velocity Clean Guitar CleGtVel Power Slap Bass PowSlap Synth Strings 2 SynStrs2 Electric Guitar (detuned clean) DetClnGt Lash Thumb Bass LashThm Synth Strings 3 SynStrs3 Electric Guitar (muted velo-sw) MutVelGt Resonant Slap Bass ResonSlp...
- Page 33 Voice List No. Name LCD Name No. Name LCD Name No. Name LCD Name Brass Section 1 Brass Dark Pan Flute DarPanFu Pad 5 (bowed) 1 BowedPad Brass Section 2 (octave mix) Brass2 Blown Bottle Bottle Pad 5 (bowed) 2 BowdPad2 Brass Section 3 Brass3...
- Page 34 Voice List No. Name LCD Name No. Name LCD Name E.Piano 2 & Strings Ep2&Str Guitar Fret Noise FretNoiz Harpsichord & Stereo Strings Harps&St Guitar Cutting Noise GtCtNoiz Music Box & Stereo Strings Mxb&Str Acoustic Bass String Slap BsStSlap Vibraphone & Stereo Strings Vib&Str Breath Noise BrthNoiz...
-
Page 35: Style List
Style List No. Name LCD Name No. Name LCD Name No. Name LCD Name Soft Beat SoftBeat 8 BEAT DANCE 8Beat Piano 8BtPiano 60's Pop 60'sPop Techno 1 Techno1 Sting Latin StigLatn 8Beat 1 8Beat1 Hip Hop 1 HipHop1 8Beat Shuffle 8BtShufl BALLAD... - Page 36 Style List No. Name LCD Name No. Name LCD Name Musette Musette Guitar Swing 2 GtSwing2 French Musette FMusette Ragtime Ragtime Mazurke Mazurke Modern Jazz Ballad MdJzBald WORLD Swing Ballad SwingBal Enka Ballad EnkaBald Orchestra Swing OrhSwing COUNT RY Laendler Laendler Hawaiian...
-
Page 37: Song List
Song List No. Name LCD Name No. Name LCD Name Carmen-Prelude Carmen2 FOLK & COUNTRY Red River Valley RedRiver L'Arlesienne L'Arlesi Uungarische Tanz Uungaris Troika Troika Susanna Susanna Mazurka Mazurka Pizzicato Polka Polka Wave of Danube Danube Long Long Ago LongAgo Menuett Menuett... -
Page 38: Song List
Song List Demo List No. Name LCD Name Italian Polka ItaPolka Moseta Dance MosetaDn Name LCD Name Bulie Dance BulieDn Funk Funk Fantasia Fantasia Ballad Ballad Wild Rose WildRose Dream of freedom Dream Away In A Manger AwayInAM Jazz Jazz Jack &... -
Page 39: Chord List
Chord List aw_Sp5500S_Manual_G07_130124 2013 16:11:31... -
Page 40: Midi Implementation Chart
SP5500S_G07 aw_Sp5500S_Manual_G07_130124 2013 16:11:32...
Need help?
Do you have a question about the Sp5500S and is the answer not in the manual?
Questions and answers