Table of Contents
Advertisement
Quick Links
Advertisement
Table of Contents

Related Manuals for Pride Celebrity DX Sport


Summary of Contents for Pride Celebrity DX Sport
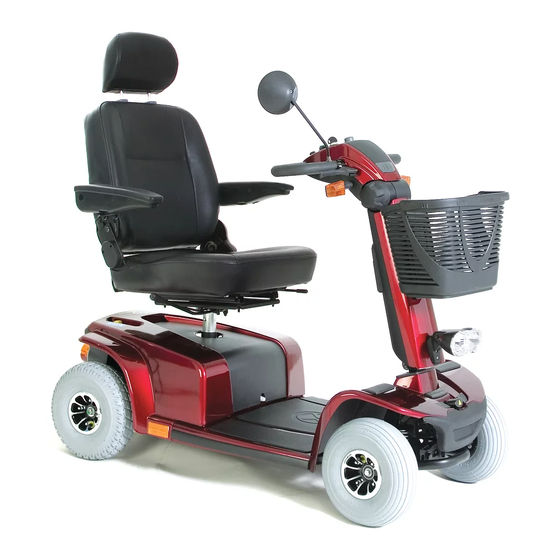
- Page 1 Celebrity DX Sport...
- Page 2 This product is manufactured by: Pride Mobility Products Corporation 182 Susquehanna Avenue Exeter, PA 18643-2694 Copyright © 2007 Pride Mobility Products Australia Pty. Ltd. 088 609 661 INFMANU3477/Rev A/January 2007...
- Page 3 IV. YOUR SCOOTER ........................18 BATTERIES AND CHARGING .................... 23 VI. OPERATION ..........................28 VII. COMFORT ADJUSTMENTS....................30 VIII. DISASSEMBLY AND ASSEMBLY ..................33 IX. BASIC TROUBLESHOOTING ..................... 36 CARE AND MAINTENANCE ....................38 XI. WARRANTY..........................41 Celebrity DX Sport www.pridemobility.com...
- Page 4 Pride to enhance or preserve the safe use of this product.
- Page 5 Unlocked and in freewheel mode. Place unit on level ground and stand behind or to one side when changing from drive mode to freewheel mode or freewheel mode to drive mode. Locked and in drive mode. Front-to-rear plug orientation. Celebrity DX Sport www.pridemobility.com...
- Page 6 Keep your hands away from the tyres when driving. Be aware that loose fitting clothing can become caught in the drive tyres. Disposal and recycling-Contact your authorised Pride Provider for information on proper disposal of your Pride product and its packaging.
- Page 7 The contents of this manual are based on the expectation that a mobility device expert has properly fitted the scooter to the user and has assisted the prescribing healthcare professional and/or the authorised Pride Provider in the instruction process for the use of the product.
- Page 8 S A F E T Y PRE-RIDE SAFETY CHECK Get to know the feel of your scooter and its capabilities. Pride recommends that you perform a safety check before each use to make sure your scooter operates smoothly and safely.
- Page 9 1 1 1 1 1 may put your scooter in an unstable position and cause it to tip. WARNING! Never carry an oxygen tank weighing more than 6 kg. Never fill the front or rear basket with contents exceeding 6 kg. Celebrity DX Sport www.pridemobility.com...
- Page 10 ! Regenerative: Uses electricity to rapidly slow the vehicle when the throttle control lever returns to the centre/ stop position. ! Disc Park Brake: Activates mechanically after regenerative braking slows the vehicle to near stop or when power is removed from the system for any reason. www.pridemobility.com Celebrity DX Sport...
- Page 11 Your scooter is designed to provide optimum stability under normal driving conditions—dry, level surfaces com- posed of concrete or tarmac. However, Pride recognises that there will be times when you will encounter other surface types. For this reason, your scooter is designed to perform admirably on packed soil, grass, and gravel.
- Page 12 ! Use your hand to turn the knob or push the handle or push-bar. ! Drive your scooter gently and slowly forward to push the door open. Or drive your scooter gently and slowly rearwards to pull the door open. www.pridemobility.com Celebrity DX Sport...
- Page 13 If you encounter a damaged or cracked battery, immediately enclose it in a plastic bag and call your authorised Pride Provider for instructions on disposal. Your authorised Pride Provider will also have the necessary information on battery recycling, which is our recommended course of action.
- Page 14 MOTOR VEHICLE TRANSPORT Pride recommends that you do not remain seated in your scooter while traveling in a motor vehicle. The scooter should be stowed in the boot of a car or in the back of a truck or van with the batteries removed and properly secured.
- Page 15 WARNING! Although the scooter seat has passed the necessary testing requirements for cigarette smoke, Pride recommends that you adhere to the following safety guidelines: Do not leave lit cigarettes unattended. Keep ashtrays a safe distance from the seat cushions.
- Page 16 8.26 cm 118.75 cm 45.72 cm 16" 45.72 cm Turning Radius 144.80 cm 61 cm Figure 4. Scooter Dimensions 8.89 cm 10.16 cm 25.40 cm 35.5 cm Figure 4A. Front Tyre Dimensions Figure 4B. Rear Tyre Dimensions www.pridemobility.com Celebrity DX Sport...
- Page 17 (1) Varies with user weight, terrain type, battery amp-hour (AH), battery charge, battery condition, and tyre condition. (2) Due to manufacturing tolerances and continual product improvement, this specification can be subject to a variance of (+ or – ) 3 %. NOTE: All specifications subject to change without notice. Celebrity DX Sport www.pridemobility.com...
- Page 18 ! Push the left button to activate the left turn indicator light and left turn indicator LED. ! Push the right button to activate the right turn indicator light right turn indicator LED. ! The indicators are timed to shut off automaticaly. www.pridemobility.com Celebrity DX Sport...
- Page 19 Speed Adjustment Dial This dial allows you to preselect and limit your scooter’s top speed. ! The image of the tortoise represents the slowest speed setting. ! The image of the hare represents the fastest speed setting. Celebrity DX Sport www.pridemobility.com...
- Page 20 They are bolted to the frame at the rearmost part of your scooter. See figure 8. PROHIBITED! Do not remove the anti-tip wheels or modify your scooter in any way that is not authorised by Pride. www.pridemobility.com Celebrity DX Sport...
- Page 21 1. Remove the cap from the top of the bracket. 2. Loosen the setscrew with the supplied “L” shaped hex key. 3. Insert the flag pole into the opening. 4. Tighten the setscrew to complete installation. Figure 8A. Safety Flag Bracket Celebrity DX Sport www.pridemobility.com...
- Page 22 See figures 10 and 10A. These should only be used with an unoccupied scooter and secured by an approved securement system in accordance with the manufacturer’s instructions. Pride makes no representation of suitability for use with specific securement systems nor can we anticipate the various situations that might arise in use of public transportation systems.
- Page 23 WARNING! Do not allow unsupervised children to play near the scooter while the batteries are charging. Pride recommends that you do not charge the batteries while the scooter is occupied. WARNING! If your off-board battery charger has not been tested and approved for outdoor use, then do not expose it to adverse or extreme weather conditions.
- Page 24 NOTE: There is a charger inhibit function on your scooter. The scooter will not run and the battery condition meter will not operate while the batteries are charging. www.pridemobility.com Celebrity DX Sport...
- Page 25 For the safest and most efficient charging of your scooter’s batteries, we recommend use of the charger supplied as original equipment with your Pride product only. Any charging method resulting in batteries being charged individually is especially prohibited.
- Page 26 9. Ensure the battery terminals are covered with the tiller boots. BATTERY NOTE: See figure 13B for correct hard- ware placement for battery terminal con- Figure 13B. Cable To Terminal Figure 13A. Battery Cable nections. Connection Orientation www.pridemobility.com Celebrity DX Sport...
- Page 27 12. Reinstall the rear shroud and seat. NOTE: If you encounter a damaged or cracked battery, immediately enclose it in a plastic bag and call your authorised Pride Provider for in- structions on disposal. Your authorised Pride Provider will also have the necessary informa- tion on battery recycling, which is our recom- Figure 13C.
- Page 28 Keep both hands on the tiller and your feet on the floorboard at all times while operating your scooter. This driving position gives you the most control over your vehicle. ! Set the speed adjustment dial to your desired speed. www.pridemobility.com Celebrity DX Sport...
- Page 29 If the power down timer feature takes effect, perform the following steps to resume normal operation. 1. Remove the key from the key switch. 2. Reinsert the key and power up your scooter. Celebrity DX Sport www.pridemobility.com...
- Page 30 SEATBACK ADJUSTMENT WARNING! Do not operate your SEATBACK scooter with the seatback in a ADJUSTMENT reclined position. LEVER WARNING! Always keep your back pressed firmly against the seatback while adjusting the angle. Figure 16. Seatback Adjustment www.pridemobility.com Celebrity DX Sport...
- Page 31 POST 7. Install the nut onto the bolt and tighten. 8. Tighten the clamp-action bolt. Figure 17. Seat Height Adjustment 9. Reinstall the rear shroud and the seat. Celebrity DX Sport www.pridemobility.com...
- Page 32 MANDATORY! Make sure the positioning belt is properly secured to the scooter and is adjusted for operator comfort. MANDATORY! Inspect the positioning belt for loose or damaged parts before each use of the scooter. If you discover a problem, contact your authorised Pride Provider for maintenance and repair. www.pridemobility.com...
- Page 33 4. Gently pull the rear shroud up and off of the rear section of the scooter. 5. Unplug the front-to-rear and rear lighting harnesses by squeezing the sides and pulling straight up. See figure 22. UNLOCKED POSITION LOCKED POSITION Figure 21. Tiller Lock Knob (Locked) Figure 21A. Tiller Lock Knob (Unlocked) Celebrity DX Sport www.pridemobility.com...
- Page 34 See figure 26. 4. Slowly separate the two sections. See figure 24. FRAME HOOK Figure 23. Frame Release LOWER FRAME TUBE UPPER FRAME TUBE FRAME HOOK Figure 24. Frame Separation www.pridemobility.com Celebrity DX Sport...
- Page 35 8. Reinstall the seat and rotate it securely into place. 9. Unlock the front wheel by turning the tiller lock knob 90° anticlockwise. See figure 21A. WARNING! After assembly, make absolutely certain the tiller lock knob is in the unlocked position before riding your scooter. Celebrity DX Sport www.pridemobility.com...
- Page 36 ! Push in the main circuit breaker reset button. See IV. “Your Scooter.” ! Make certain that both battery harnesses and the front-to-rear harness are firmly connected. See VIII. “Dis- assembly and Assembly.” ! Be sure the power down timer feature hasn’t been activated. See VI. “Operation.” www.pridemobility.com Celebrity DX Sport...
- Page 37 ! Charge the scooter’s batteries more frequently. See V. “Batteries and Charging.” ! If the problem continues, have both of your scooter’s batteries load tested by your authorised Pride Provider. ! If the main circuit breaker trips repeatedly, contact your authorised Pride Provider for service.
- Page 38 Your scooter requires a minimal amount of care and maintenance. If you do not feel confident in your ability to perform the maintenance listed below, you may schedule inspection and maintenance at your authorised Pride Provider. The following areas require periodic inspection and/or care and maintenance.
- Page 39 ! Regularly check all wiring connections. ! Regularly check all wiring insulation, including the charger power lead, for wear or damage. ! Have your authorised Pride Provider repair or replace any damaged connector, connection, or insulation that you find before using your scooter again.
- Page 40 DISPOSAL OF YOUR SCOOTER Your scooter must be disposed of according to applicable local and national statutory regulations. Contact your local waste disposal agency or authorised Pride Provider for information on proper disposal of packaging, metal frame components, plastic components, electronics, and batteries.
- Page 41 ONE-YEAR LIMITED WARRANTY Your Pride Scooter is fully guaranteed for twelve (12) months from the date of purchase against faults arising due to defects in manufacture or materials. This warranty does not detract from, but is in addition to your legal rights.
- Page 42 Mobility Products Australia Pty. Ltd. *INFMANU3477*...