Table of Contents
Advertisement
Quick Links
Advertisement
Table of Contents

Subscribe to Our Youtube Channel
Related Manuals for Prem-I-Air PD14DEN


Summary of Contents for Prem-I-Air PD14DEN
- Page 1 INSTRUCTION MANUAL INSTRUCTION MANUAL INSTRUCTION MANUAL INSTRUCTION MANUAL 14L/DAY DEHUMIDIFIER 14L/DAY DEHUMIDIFIER 14L/DAY DEHUMIDIFIER 14L/DAY DEHUMIDIFIER Model PD14DEN Please read this instruction manual carefully and keep in a safe place for future reference...
-
Page 2: Important Safety Instructions
A. IMPORTANT SAFETY INSTRUCTIONS 1. Do not operate the unit with a damaged cord or plug, after it malfunctions or has been dropped or damaged in any way. Return to an authorised service facility for examination and repair. 2. This unit should always be kept in an upright position to avoid any damage. 3. -
Page 3: Bs Plug Wiring
B. BS PLUG WIRING Wiring Instructions: Should it be necessary to change the plug please note the wires in the mains lead are coloured in accordance with the following code : BLUE - NEUTRAL BROWN - LIVE GREEN AND YELLOW - EARTH As the colours of the wires in the mains lead of this appliance may not correspond with the coloured markings identifying the terminals in your plug, proceed as follows:... -
Page 4: Product Description
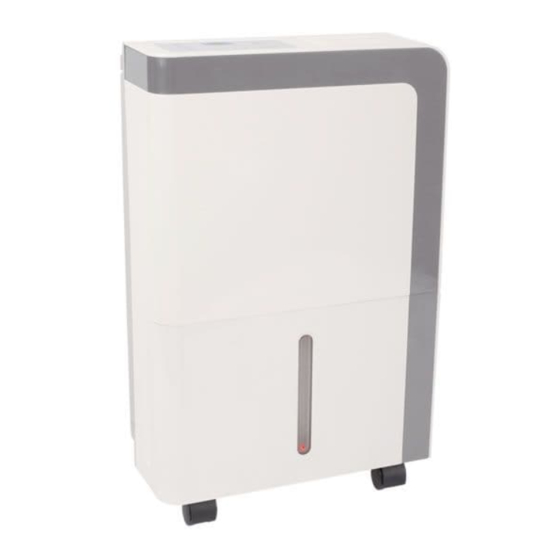
C. PRODUCT DESCRIPTION D. CONTROL PANEL 1. POWER ON/OFF switch. Press to turn the dehumidifier ON or OFF. 2. CONT DEHUM. Press to turn the continuous dehumidification ON or 3. Humidity Set Control. Press to select desired humidity setting. - 4 -... - Page 5 4. DISPLAY Shows the set % humidity level while setting and actual room % humidity level when running. Also shows the System fault codes: E1 – humidity sensor error E2 – temperature sensor P1 – unit is defrosting P2 – bucket is full NOTE: If any fault code occurs, refer to TROUBLE SHOOTING section (N) to resolve.
-
Page 6: Positioning The Dehumidifier
E. POSITIONING THE DEHUMIDIFIER Do not use outdoors • This dehumidifier is intended for • indoor use only. This dehumidifier should not be used for industrial applications. Place the dehumidifier on a flat • level surface, strong enough to support the unit with a full bucket of water. -
Page 7: Emptying The Water Tank
G. EMPTYING THE WATER TANK When the water bucket is full, the unit will automatically switch off and the Full • indicator light will illuminate. Slowly pull the bucket out, grip bucket from both sides and carefully pull • outwards so the water does not spill. The bottom of the bucket is uneven and care should be taken when placing down to avoid water spillage. - Page 8 I. OPTIONAL FILTER (HEPA or CARBON) This dehumidifier is supplied with a HEPA filter. You can alternatively install a carbon fibre filter. To purchase a carbon fibre filter or a new HEPA filter please contact the EHS Spares Department 0870 744 0161. This product can be operated without the HEPA or Carbon filter, but the washable nylon filter must be installed.
-
Page 9: Care And Cleaning Of The Dehumidifier
J. CARE AND CLEANING OF THE DEHUMIDIFIER Turn the dehumidifier off and remove the plug from wall outlet before cleaning. Clean the grille and case Use water and a mild detergent. Do not use • bleach or abrasives. Do not splash water directly onto the unit, •... -
Page 10: Storing The Dehumidifier
Wrap the cord and secure it with the • band. See image. Package unit in original packaging. • Store the unit upright in a dry place. • L. SPECIFICATION Model: PD14DEN Capacity: 14L/Day (30 C 80%RH) Voltage: 220-240 ~ 50Hz Wattage/ current: 270W / 1.2A Working temperature: 5ºC –... -
Page 11: Troubleshooting
N. TROUBLE SHOOTING Problem What to check Ensure the dehumidifier plug is pushed completely in to the power socket. Check the house fuse at the consumer board. Unit does not start Dehumidifier has reached its preset RH % level or bucket is full. Bucket is not in the correct position. -
Page 12: Service And Warranty
O. SERVICE & WARRANTY • For your convenience, record the complete model number and product (located on the Product Identification Plate), the date you purchased the product, and attach your purchase receipt as proof of purchase. • To ensure your product is covered by warranty, the complete faulty product together with your purchase receipt should be returned to your retailer.
Need help?
Do you have a question about the PD14DEN and is the answer not in the manual?
Questions and answers