Table of Contents
Advertisement
Advertisement
Table of Contents

Subscribe to Our Youtube Channel
Related Manuals for Pedego Boomerang


Summary of Contents for Pedego Boomerang
- Page 1 ASSEMBLY INSTRUCTIONS AND OWNER’S MANUAL...
-
Page 2: Table Of Contents
Table of Contents Carton Contents Warning Assembly Instructions: City Commuter Assembly Instructions: Boomerang, Boomerang Plus, Comfort Cruiser & Interceptor Assembly Instructions: Trail Tracker Safety Operating Procedures Battery Battery & Charger Care Fuse & Gears Brakes Kickstand, Bike Care, Keys, & Tires FAQ’s... - Page 3 First of all, we would like to thank you for choosing the Pedego electric bike. We believe this technology, with the benefits of electric propulsion, provides you with the perfect vehicle to increase your personal mobility. Our geared, brushless, electric hub motor allows you to run errands or commute to work while saving money on gas and reducing your environmental impact on our world.
- Page 4 YOUR INSURANCE POLICIES MAY NOT PROVIDE COVERAGE FOR ACCIDENTS INVOLVING THE USE OF THIS BICYCLE. TO DETERMINE IF COVERAGE IS PROVIDED YOU SHOULD CONTACT YOUR INSURANCE COMPANY OR AGENT. Pg. 4...
-
Page 5: Warning
For replacement parts, technical information and warranty assistance, please contact Pedego at 800-646-8604 or support@pedego.com DO NOT DISASSEMBLE, MODIFY OR REPLACE ELECTRICAL PARTS. -
Page 6: Assembly Instructions: City Commuter
Assembly Instructions For City Commuter Your bike has been pre-assembled and requires only a few simple steps to get it ready for you to ride: 1. Remove the outside carton after cutting the nylon bands and lift off the entire box from the tray at the bottom. - Page 7 Move the stem so that you can see directly down the hole (Figure 2). Insert the 6 mm allen wrench (supplied in the kit) into the hole and tighten the screw clockwise until the stem does not move separately from the front wheel (Figure 3). Make sure the handlebars are aligned with the front wheel before tightening, and the stem is not set above the maximum height...
-
Page 8: Comfort Cruiser & Interceptor
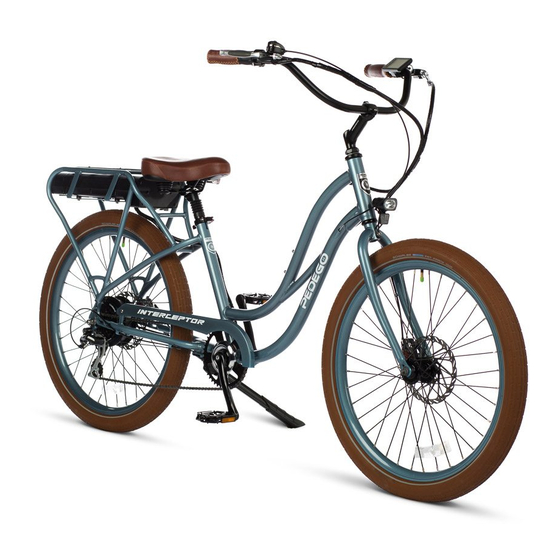
For Boomerang, Boomerang Plus, Comfort Cruiser, Interceptor, & Your bike has been pre-assembled and requires only a few simple steps to get it Tandem ready for you to ride: 1. Remove the outside carton after cutting the nylon bands and lift off the entire box from the tray at the bottom. -
Page 9: Assembly Instructions: Trail Tracker
For Trail Tracker Your bike has been pre-assembled and requires only a few simple steps to get it ready for you to ride: 1. Remove the outside carton after cutting the nylon bands and lift off the entire box from the tray at the bottom. Carefully remove your bike from the bottom tray and gently rest it in place. -
Page 10: Torque Specifications
For ALL Pedego Models 5. Make sure the seat is tight enough so that you can’t twist it out of alignment. Pull the seat clamp handle away from the seat post and slide the seat up or down to adjust it. -
Page 11: Safety
Always wear an approved helmet while riding your Pedego and follow the helmet manufacturer’s instructions for fit, use and care of your helmet. It is your respon- sibility to familiarize yourself with the laws of where you ride your Pedego and to comply with all applicable laws. -
Page 12: Operating Procedures
“|” position. Be sure to turn off the power when the Pedego is not in use or is recharging by clicking the battery switch to the off “O” position. - Page 13 To remove the battery, turn the key to the “UNLOCK” position and pull towards the rear of the Pedego. Be sure to turn the battery off when not in use so it does not drain the battery.
- Page 14 To turn the meter on, make sure the battery is fully inserted into the Pedego and the on/off switch is in the on “|” position. Press the power button (top button) on the four button selector located near the left grip on the handlebars to turn the meter on.
- Page 15 Press the power button (top button) once while the meter is on to turn on the backlight, as well as the integrated front and rear lights on the Pedego. Press it once more to turn the lights and backlight off.
- Page 16 The farther the throttle switch is from its resting position, the more power is delivered to the motor to accelerate the Pedego. When you want to slow down, you simply release the throttle and let it return to its resting position and simultaneous- ly apply the brakes.
-
Page 17: Battery
Battery For ALL Pedego Models Charger Included with your new Pedego is a lithium ion battery, along with a charger, which plugs into a standard household electric receptacle. Charging plug for 48 volt battery A lithium ion battery requires specially designed chargers. -
Page 18: Battery & Charger Care
If the battery will not be used for an extended period of time, charge it fully and recharge it every 2 months. Store it in a cool, dry place. Your Pedego battery is engi- neered with precision for high capacity and a long, useful life. Do not use it to power other electrical devices. -
Page 19: Fuse & Gears
(Figure 8). Gears Your Pedego is equipped with 7 speeds. The first gear is for easier and uphill pedaling, and the last gear is for maximum speed on level or downhill terrain. Change gears only while pedaling. -
Page 20: Brakes
The more hand pressure applied to the brake lever, the faster the Pedego will come to a stop. The rear brake should always be applied before and while the front brake is applied. Applying only the front brake to slow or stop at high speeds may result in the rider being ejected from the saddle and continuing forward over the handlebars. -
Page 21: Kickstand, Bike Care, Keys, & Tires
It is also recommended to apply chain lube (such as Tri-Flow or ProLink) to the drivetrain of your Pedego when you clean it or wipe it down to keep it in good run- ning condition. -
Page 22: Faq's
Q. Can I put a Pedego on a bike rack? A. Yes, just make sure that the bike rack can hold the weight of a Pedego. We advise taking the battery off to make it easier to lift and to keep the battery safe. -
Page 23: Troubleshooting
Troubleshooting If your Pedego is not working, check the Quick Disconnect fittings to make sure they did not come loose or unplugged. There are a total of 5 colored Quick Disconnect fittings to check: 1. Throttle - Black (Comfort Cruiser, & Boomerang) or Yellow (Interceptor, City Commuter, Trail Tracker &... -
Page 24: Warranty
Replacement will be honored only by PEDEGO ELECTRIC BIKES. You are responsible for paying all of the following costs asso- ciated with the replacement: labor for removal or installation; applicable taxes; and any shipping or transportation costs incurred in returning the battery to PEDEGO ELECTRIC BIKES for evaluation. - Page 25 Your Pedego authorized service provider can provide you with details. Pedego will not alter form, fit, or function of this Pedego product to make it operate in a country for which it was never intended to function for legal or regulatory reasons.
-
Page 26: Serial Number
BICYCLE SERIAL NUMBER IS ENGRAVED UNDERNEATH THE CRANK OF YOUR PEDEGO BATTERY SERIAL NUMBER IS ON THE BOTTOM OF THE BATTERY OR NEXT TO THE KEY SLOT BELOW THE BARCODE Pg. 26... -
Page 27: Recording Pedego Information
DEALER’S NAME:_____________________________________________________ DEALER’S PH#:______________________________________________________ DEALER’S EMAIL:____________________________________________________ PL EA SE R EGIS TER YOUR PEDEGO AT WWW.PE DEG OELECTR ICBIKES .COM/REGIS TER-YOUR-P EDEGO YOU MUST REGI STER YOU R P E D EG O W I TH I N 3 0 DAYS OF PURCHA SE FOR WA R R AN T Y TO BE VA LI D Pg. - Page 28 PEDEGO USA WWW.PEDEGO.COM...
Need help?
Do you have a question about the Boomerang and is the answer not in the manual?
Questions and answers