Table of Contents
Advertisement
Advertisement
Table of Contents

Related Manuals for Platinum Access Systems ACTP715


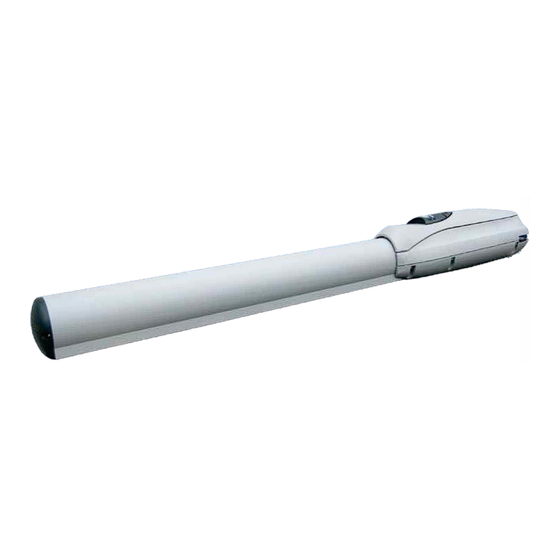
Summary of Contents for Platinum Access Systems ACTP715
- Page 1 ACTP715 Manual_Layout 1 11/4/2014 3:53 PM Page 1 ACTP7 5...
-
Page 2: Table Of Contents
ACTP715 Manual_Layout 1 11/4/2014 3:53 PM Page 3 Installation Instructions & Safety Information Manual ACTP715 Vehicular Gate Operator Class I, Class II, Class III, and Class IV TA BLE OF CONTENTS Gate Operator Class Categories & Example ............2 Protection Against Entrapment ............3... -
Page 3: Gate Operator Class Categories & Example
ACTP715 Manual_Layout 1 11/4/2014 3:53 PM Page 4 Gate operator class categories and examples READ AND FOLLOW ALL INSTRUCTIONS MANUAL BEFORE ATTEMPTING ANY INSTALLATION Residential Vehicular Gate Operator Commercial/General Access Class I Vehicular Gate Operator Class II A vehicular gate operator (or system) intended... -
Page 4: Protection Against Entrapment
ACTP715 Manual_Layout 1 11/4/2014 3:53 PM Page 5 PROTECTION AGAINST ENTRAPMENT Usage Class Gate Operator Category Horizontal Slide, Vertical lift, and Vertical Pivot Swing and Vertical Barrier (arm) Primary Type* Secondary Type* Primary Type* Secondary Type* B1, B2, or D... -
Page 5: Use & Application
ACTP715 Manual_Layout 1 11/4/2014 3:53 PM Page 6 Use and Application The model ACTP715 is intended for Class I, II, III and IV usage on a vehicular slide gate application. a) Install the gate operator only when: 1) The operator is appropriate for the construction of the gate and the usage Class of the gate, 2) All openings of a horizontal slide gate are guarded or screened from the bottom of the gate to a minimum of 4 feet (1.22 m) above the ground to prevent a 2-1/4 inch (57.2 mm) diameter sphere from passing... -
Page 6: Important Safety Instructions
ACTP715 Manual_Layout 1 11/4/2014 3:53 PM Page 7 Important Safety Instructions WARNING – To reduce the risk of injury or death: 1. READ AND FOLLOW ALL INSTRUCTIONS. 2. Never let children operate or play with gate controls. Keep the remote control away from children. -
Page 7: Maintenance Instructions
• Test the manual release feature on the operator. Maintenance instructions of ACT715 performed by the end user/home owner Although all Platinum Access Systems’ gate operators are virtually maintenance free to an end user/home ow minimal maintenance is recommended to ensure a smooth operation of this unit. -
Page 8: Intended Use
ACTP715 Manual_Layout 1 11/4/2014 3:53 PM Page 9 Intended Use The operator is intended for installation on a vehicular swing gate only. The operator IS NOT intended to be used for any pedestrian gate. The operator IS NOT intended to be used for any uphill gate. -
Page 9: Types Of Installations
ACTP715 Manual_Layout 1 11/4/2014 3:53 PM Page 10 Types of Installations OPEN INSIDE INSTALLATION: Outside To obtain desired dimension B, cut the Back Mounting Bracket. D: 90°/120° Travel time: 21 to 25 sec Inside OPEN INSIDE INSTALLATION IN inches (mm) ”... -
Page 10: Types Of Installations
ACTP715 Manual_Layout 1 11/4/2014 3:53 PM Page 11 Types of Installations OPEN OUTSIDE INSTALLATION: To reduce the risk of entrapment leave enough clearance in between the gate and adjacent structures during opening. Outside D: 90°/105° Travel time: 21 to 24 sec Don’t install the Swing gate... -
Page 11: Mounting Instructions
ACTP715 Manual_Layout 1 11/4/2014 3:53 PM Page 12 Mounting Instructions CAUTION Check that the structure is sufficiently rugged and that the hinge pivots are properly lubricated. STEP 1 Position Back bracket on to the pilar, check installation measurements and secure it. The... -
Page 12: Manual Release
ACTP715 Manual_Layout 1 11/4/2014 3:53 PM Page 13 Mounting Instructions STEP 4 Mount the piston on Front and Back brackets tightly screwing down the self-locking nut and lubricate the turning points Note: Pay special attention to the correct assembly of the washer on Front bracket. - Page 13 ACTP715 Manual_Layout 1 11/4/2014 3:53 PM Page 14 Mounting Instructions Note: This type of installation DOES NOT reverse the gate all the way back to its limits when the sensors are obstructed. This is only to protect against entrapment and to comply with UL325.
-
Page 14: Entrapment Protection
ACTP715 Manual_Layout 1 11/4/2014 3:53 PM Page 15 Installation: entrapment protection WARNING – Consult the installation instructions from the loop detector manufacturer. The following statements are provided as a guide but different requirements may be required by the vehicular loop detector manufacturer. -
Page 15: Inductive Loops
ACTP715 Manual_Layout 1 11/4/2014 3:53 PM Page 16 Installation: Inductive Loops WARNING – Always read and follow the manufacturer’s instructions for the products used before connecting them. Comply with all applicable codes and safety regulations. Failure to do so may result in damage, injury or death. -
Page 16: Warning Placards
ACTP715 Manual_Layout 1 11/4/2014 3:53 PM Page 17 Installation: inductive loops WARNING – To reduce the risk of severe injury or death to person, please follow these instructions: ALARM RESET SWITCH INSTALLATION: (UL 325 standard requirement) is either a Type A or B2 device and the second activation is a Type A device. The alarm shall signal for a minimum of 5 min or until a renewed manual input from an integral control or a permanently mounted control (such as a Stop button) located in the line-of-sight of the gate has been entered. -
Page 17: Alarm Reset Switch
ACTP715 Manual_Layout 1 11/4/2014 3:53 PM Page 18 Installation: Alarm Reset Switch & Warning Placards The control box MUST be mounted within 5 feet of the gate operator. Mount the control box as high as possible for best radio reception. Make sure the control box is level. -
Page 18: Electrical
ACTP715 Manual_Layout 1 11/4/2014 3:53 PM Page 19 Installation: ElecTrical power cable to the board. USE MIN. 14 AWG WIRE. FOLLOW ALL LOCAL ELECTRICAL CODES. To help protect the equipment from lightning and power Black surges and to protect persons from shock hazard the Green Operator must be grounded. - Page 19 ACTP715 Manual_Layout 1 11/4/2014 3:53 PM Page 20 Installation: Primary Unit SINGLE UNIT CONNECTION: Connect the wire harness to the PRIMARY “IN” Black Lg. connector if the gate Red Lg. opens inside. Green Sm. White Sm. Red Sm. Black Sm.
- Page 20 ACTP715 Manual_Layout 1 11/4/2014 3:53 PM Page 21 Installation: LIMIT SWITCH SET-UP LIMIT SWITCH SET-UP: STEP 5 Remove the screw and take the cover off by sliding out the cover. STEP 6 Limit Switches Adjust the limit switches by loosening the screws on the limit switch holder, then position the limit switches to the desired positions.
-
Page 21: Wiring Diagram
ACTP715 Manual_Layout 1 11/4/2014 3:53 PM Page 22 Installation: LIMIT SWITCH SET-UP LIMIT SWITCH SET-UP (continued): WIRING DIAGRAM 6 ft cable for Primary Arm (Pre-wired) (part# 7CC6FT) 40 ft cable for Secondary Arm (part# 7CC40FT) Ground Shield Terminal Green-Yellow Wire Lead to... -
Page 22: Primary Unit
ACTP715 Manual_Layout 1 11/4/2014 3:53 PM Page 23 Installation: Primary/Secondary Connections The control board provides a connector for the secondary actuator unit and automatically synchronizes the secondary unit with the primary unit. Outside Inside Secondary Unit Primary Unit Simply connect the Secondary arm to its applicable position, IN for open inside or OUT for open outside. -
Page 23: Loop Rack
ACTP715 Manual_Layout 1 11/4/2014 3:53 PM Page 24 Installation: Loop Rack Outside Twist Wire Outside the Loop 6 Twists/Foot Outside Safety Loop Rack (#GOC-LDR) Loop Until Its Connection to the Loop Rack Center Exit Safety Safety Safety Inside Safety Exit... -
Page 24: Accessory Connections
ACTP715 Manual_Layout 1 11/4/2014 3:53 PM Page 25 Installation: Accessory Connections ACCESSORY CONNECTIONS: To decrease the possibility of vehicle entrapment on the gate, vehicle loop detectors need to be installed. The edge sensor and the photo-electric beam can be used for secondary entrapment protection on every installation to prevent pedestrian or animal entrapment. -
Page 25: Radio Receiver
ACTP715 Manual_Layout 1 11/4/2014 3:53 PM Page 26 Installation: Accessory Connections ACCESSORY CONNECTIONS (continued): Radio Receiver Need to verify the proper connections before connecting the Radio Receiver. The maximum voltage that the control board / battery can provide is about 28V for external accessories. - Page 26 ACTP715 Manual_Layout 1 11/4/2014 3:53 PM Page 27 Installation: Accessory Connections ACCESSORY CONNECTIONS (continued): Solenoid Connection The solenoid power connection must be provided an external power source. This will prevent damage to the battery in the event of a line power failure.
- Page 27 ACTP715 Manual_Layout 1 11/4/2014 3:53 PM Page 28 Installation: Accessory Connections ACCESSORY CONNECTIONS (continued): Locks Magnetic Lock (#PA-MAG13) (Supplied with Lock Kit) (Supplied with Lock Kit) Green Black 24VDC White The Magnetic Lock power connection must be provided an external power source. This will prevent damaging the battery in the event of line power failure.
-
Page 28: Selectable Features
Select the DIP switch to ADV MLOK position. OPEN ON POWER FAIL: The Auto-Open feature in Platinum Access Systems Gate Operators enables the following functionality in the event of power failure: a. Open the gate in case of power failure (120 or 220 VAC). - Page 29 ACTP715 Manual_Layout 1 11/4/2014 3:53 PM Page 30 Installation: Selectable Features CLOSE TIMER: Close Timer The Close Timer will close the gate a set time after the vehicle clears the gate area. This is adjustable from 3 to 60 seconds.
-
Page 30: Solar Installation
ACTP715 Manual_Layout 1 11/4/2014 3:53 PM Page 31 Installation: Selectable Features & Solar Installation FAIL SAFE/SECURE: Fail Safe/Secure On = Fail Safe Off = Fail Secure Fail/Safety Battery Output (Input) Detection Detection Normal Normal Secure Normal Fail Safe Low/OFF Normal... -
Page 31: Parts Diagram
ACTP715 Manual_Layout 1 11/4/2014 3:53 PM Page 32 Parts Diagram ACTP715 1. ECU Box (Industrial) 17. Holder, Cable 2. ECU Cylinder & Access 18. Limit Switch (2) 3. Loop Detector Board 19. Limit Switch Bracket 4. Alarm 20. End Cap, Drive Screw Cover 5. - Page 32 ACTP715 Manual_Layout 1 11/4/2014 3:53 PM Page 33 Batteries and Power Supply - (Green) + (White) White Outlet & Receptacle White Reset Switch Black Solar Regulator (Black) Neutral “Out” (White) Earth Ground (Green/Yellow) Green Black Batteries Power Harness Plug ACTP715...
- Page 33 ACTP715 Manual_Layout 1 11/4/2014 3:53 PM Page 36 PLATINUM ACCESS SYSTEMS ™ 1725 E. Grevillea Court, Ontario, CA 91761 Phone: (855) 466-8686 I Fax: (909) 923-7890 www.PlatinumASI.com © 2013 Platinum Access Systems, Inc. All Rights Reserved.
Need help?
Do you have a question about the ACTP715 and is the answer not in the manual?
Questions and answers