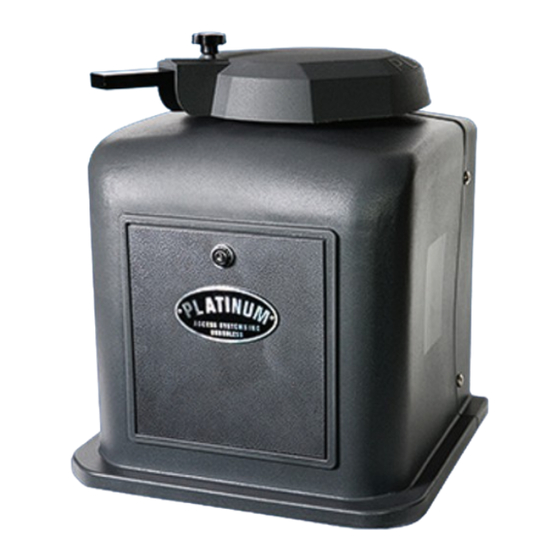
Platinum Access Systems BLSW1016 Installation Instruction And Owenrs Manual
Hide thumbs
Also See for BLSW1016:
- Installation instruction and owenrs manual (32 pages) ,
- Installation instructions & owner's manual (34 pages)
Table of Contents
Advertisement
Quick Links
Advertisement
Table of Contents
Troubleshooting

Related Manuals for Platinum Access Systems BLSW1016


Summary of Contents for Platinum Access Systems BLSW1016
- Page 1 BLSW1 16...
-
Page 2: Table Of Contents
BLSW1016 Manual_Layout 1 5/8/2015 5:06 PM Page 3 Installation Instructions & Safety Information Manual BLSW1016 Installation Instructions and Safety Information Manual: Vehicular Gate Operator Class I, Class II, Class III, and Class IV Safety Information ..........4-8 Installation ..........9-10 Inductive Loops ...........11-12... -
Page 3: Safety Information
BLSW1016 Manual_Layout 1 5/8/2015 5:06 PM Page 4 SAFETY INFORMATION WARNING – To reduce the risk of severe injury or death to person, please to follow these instructions: 1. READ AND FOLLOW ALL INSTRUCTIONS MANUAL BEFORE ATTEMPTING ANY INSTALLA- TION. - Page 4 BLSW1016 Manual_Layout 1 5/8/2015 5:06 PM Page 5 SAFETY INFORMATION WARNING – To reduce the risk of severe injury or death to person, please to follow these instructions: GENERAL SAFETY PRECAUTIONS WITH THE END-USER: 1. Instruct the end-user on how to safely operate all functions of the operator.
- Page 5 BLSW1016 Manual_Layout 1 5/8/2015 5:06 PM Page 6 SAFETY INFORMATION WARNING – To reduce the risk of severe injury or death to person, please to follow these instructions: IMPORTANT INSTALLATION INSTRUCTIONS BY UL STANDARDS: (CONTINUED FROM PREVIOUS PAGE) 4. The gate must be properly installed and work freely in both directions prior to the installation of the gate operator.
- Page 6 BLSW1016 Manual_Layout 1 5/8/2015 5:06 PM Page 7 gate operator class categories and examples WARNING – To reduce the risk of severe injury or death to person, please to follow these instructions: CAUTION: To Reduce the Risk of Fire or Injury to Persons Use only the type and size of batteries provided on an AC powered system: OUTDO-OT7-12 disposal instructions.
-
Page 7: Safety Information
BLSW1016 Manual_Layout 1 5/8/2015 5:06 PM Page 8 SAFETY INFORMATION WARNING – To reduce the risk of severe injury or death to person, please to follow these instructions: 16'-0" FOR USE WITH GATES OF A MAXIMUM OF 16 FT IN LENGTH 1000 lb. -
Page 8: Installation
BLSW1016 Manual_Layout 1 5/8/2015 5:06 PM Page 9 INSTALLATION WARNING – To reduce the risk of severe injury or death to person, please to follow these instructions: Note: This type of installation DOES NOT reverse the gate all the way back to its limits when the photo- beam is obstructed. - Page 9 BLSW1016 Manual_Layout 1 5/8/2015 5:06 PM Page 10 INSTALLATION WARNING – To reduce the risk of severe injury or death to person, please to follow these instructions: Note: This type of installation DOES NOT reverse the gate all the way back to its limits when the photo- beam is obstructed.
-
Page 10: Inductive Loops
BLSW1016 Manual_Layout 1 5/8/2015 5:06 PM Page 11 Installation: Inductive Loops WARNING – Consult the installation instructions from the loop detector manufacturer. The following statements are provided as a guide but different requirements may be required by the vehicular loop detector manufacturer. -
Page 11: Inductive Loops
BLSW1016 Manual_Layout 1 5/8/2015 5:06 PM Page 12 Installation: inductive loops WARNING – This product is an accessory or part of a system. Always read and follow the manufactur- er’s instructions for the equipment before connecting this product. Comply with all applicable codes and safety regulations. -
Page 12: Alarm Reset Switch
BLSW1016 Manual_Layout 1 5/8/2015 5:06 PM Page 13 Installation: Alarm Reset Switch & Warning Placards WARNING – To reduce the risk of severe injury or death to person, please to follow these instructions: Alarm Reset Switch Installation: (UL 325 standard requires) An audible alarm to go off after two consecutive events detected by the primary entrapment protection of the gate operator. -
Page 13: Plan Of Installation
BLSW1016 Manual_Layout 1 5/8/2015 5:06 PM Page 14 PLAN OF INSTALLATION Plan of Installation: The gate must be installed in a location so that enough clearance is supplied between the gate and adjacent structures when opening and closing to reduce the risk of entrapment. -
Page 14: Concrete Pad
BLSW1016 Manual_Layout 1 5/8/2015 5:06 PM Page 15 PLAN OF INSTALLATION Plan of Installation (continued): Concrete Pad 10" 3-1/4" 2-7/16" Operator Cover 23-1/4" 7-5/8" Operator Center of Output Shaft Chassis Gate Operator Concrete Pad Drill for a 1/2" x 3-1/2"... - Page 15 BLSW1016 Manual_Layout 1 5/8/2015 5:06 PM Page 16 PLAN OF INSTALLATION Plan of Installation (continued): CAUTION Do not weld the bar or backing plate to only a few gate posts. Mounting bar must be welded to a frame segment that runs the full length of the gate to prevent damage to the gate operator.
- Page 16 BLSW1016 Manual_Layout 1 5/8/2015 5:06 PM Page 17 PLAN OF INSTALLATION Plan of Installation (continued): STEP 4 Once satisfied with the arrangement of the articulated arm and bracket, weld all pieces securely. Paint the arm to preserve it from rusting.
-
Page 17: Electrical
BLSW1016 Manual_Layout 1 5/8/2015 5:06 PM Page 18 Installation: ElecTrical power cable to the board. USE MIN. 14 AWG WIRE. FOLLOW ALL LOCAL ELECTRICAL CODES. Black To help protect the equipment from lightning and power Green surges and to protect persons from shock hazard the Operator must be grounded. - Page 18 BLSW1016 Manual_Layout 1 5/8/2015 5:06 PM Page 19 INSTALLATION Connecting Power: Connect the LIMIT harness to J14, and MOTOR CTL harness to J4. On the OPEN DIR switch: Select “RIGHT” to open right. Select “LEFT” to open left. OPEN LEFT...
-
Page 19: Limit Switches
BLSW1016 Manual_Layout 1 5/8/2015 5:06 PM Page 20 Installation: LIMIT SWITCH SET-UP Limit Switch Set-Up: STEP 7 Cam Wheel A. Loosen the screws on the Limit Switch Cams. B. Remount the articulated arm, making sure the cam wheel pin is engaged with the clutch. -
Page 20: Limit Switch Connections
BLSW1016 Manual_Layout 1 5/8/2015 5:06 PM Page 21 Installation: LIMIT SWITCH SET-UP Limit Switch Set-Up (continued): OPENING/CLOSING SETUP Slow 1. Setup the limit switches manually at the desired open and close position. 2. Allow the gate operator to run a full open... -
Page 21: Primary/Secondary Connections
BLSW1016 Manual_Layout 1 5/8/2015 5:06 PM Page 22 Installation: Primary/Secondary Connections Electrical Installation - Primary/Secondary: Outside Secondary Primary Interconnecting Conduit Inside Caution – Do not run Primary/Secondary communication cable (Model #PA-PSC100) in the same conduit as the power supply (120-220V) cable. -
Page 22: Loop Rack
BLSW1016 Manual_Layout 1 5/8/2015 5:06 PM Page 23 Installation: Loop Rack Loop Rack Installation: Outside Twist Wire Outside the Outside Safety Loop 6 Twists/Foot Loop Rack (#GOC-LDR) Loop Until Its Connection to the Loop Rack Center Exit Safety Safety Safety... -
Page 23: Accessory Connections
BLSW1016 Manual_Layout 1 5/8/2015 5:06 PM Page 24 Installation: Accessory Connections Accessory Connections: To decrease the possibility of vehicle entrapment on the gate, vehicle loop detectors need to be installed. The edge sensor and the photo- electric beam can be used for secondary entrapment protection on every installation to prevent pedestrian or animal entrapment. -
Page 24: Radio Receiver
BLSW1016 Manual_Layout 1 5/8/2015 5:06 PM Page 25 Installation: Accessory Connections ACCESSORY CONNECTIONS (continued): Radio Receiver Need to verify the proper connections before connecting the Radio Receiver. The maximum voltage that the control board / battery can provide is about 28V for external accessories. - Page 25 BLSW1016 Manual_Layout 1 5/8/2015 5:06 PM Page 26 Installation: Accessory Connections Accessory Connections (continued): Solenoid Connection The solenoid power connection must be provided an external power source. This will prevent damage to the battery in the event of a line power failure.
-
Page 26: Accessory Connections
BLSW1016 Manual_Layout 1 5/8/2015 5:06 PM Page 27 Installation: Accessory Connections ACCESSORY CONNECTIONS (continued): Locks Magnetic Lock (#PA-MAG13) (Supplied with Lock Kit) (Supplied with Lock Kit) Green Black 24VDC White The Magnetic Lock power connection must be provided an external power source. This will prevent damaging the battery in the event of line power failure. -
Page 27: Selectable Features
Select the DIP switch to ADV MLOK position. OPEN ON POWER FAIL: The Auto-Open feature in Platinum Access Systems Gate Operators enables the following functionality in the event of power failure: a. Open the gate in case of power failure (120 or 220 VAC). - Page 28 BLSW1016 Manual_Layout 1 5/8/2015 5:06 PM Page 29 Installation: Selectable Features CLOSE TIMER: Close Timer The Close Timer will close the gate a set time after the vehicle clears the gate area. This is adjustable from 3 to 60 seconds.
-
Page 29: Selectable Features
BLSW1016 Manual_Layout 1 5/8/2015 5:06 PM Page 30 Installation: Selectable Features FAIL SAFE/SECURE: Fail Safe/Secure On = Fail Safe Off = Fail Secure Fail/Safety Battery Output (Input) Detection Detection Normal Normal Secure Normal Fail Safe Low/OFF Normal Fail Safe Low/OFF... -
Page 30: Maintenance
BLSW1016 Manual_Layout 1 5/8/2015 5:06 PM Page 31 MAINTENANCE system if any unusual behavior is observed or suspected. Severe or high cycle usage will require more frequent maintenance checks. Remove the Power Harness from the Control Board. Keep the gate area clean to insure proper operation. -
Page 31: Gate Operator Trouble Shooting Procedure
BLSW1016 Manual_Layout 1 5/8/2015 5:06 PM Page 32 Gate Operator Trouble Shooting Procedure otor Does Not Run 1. M a. AC/SOL LED is OFF: -- Check battery breaker switch to make sure it is ON. -- Check the motor breaker to make sure it is turned to ON position. -
Page 32: Gate Operator Trouble Shooting Procedure
BLSW1016 Manual_Layout 1 5/8/2015 5:06 PM Page 33 Gate Operator Trouble Shooting Procedure c. Does Not Close Automatically: -- Check TIMER pot to make sure the setting is correct, or not. Normally set to 12 O’clock. -- Check other external safe devices like Loop Detector, Photo Beam sensor, Edge Sensor, Radio to make sure none of them are activated. -
Page 33: Part
BLSW1016 Manual_Layout 1 5/8/2015 5:07 PM Page 34 Part... - Page 34 BLSW1016 Manual_Layout 1 5/8/2015 5:07 PM Page 36 PLATINUM ACCESS SYSTEMS ™ © 2013 Platinum Access Systems, Inc. All Rights Reserved.
Need help?
Do you have a question about the BLSW1016 and is the answer not in the manual?
Questions and answers