Table of Contents
Advertisement
Quick Links
- 1 Introduction
- 2 Beolab Transmitter 1 Connection Panel (Rear Side)
- 3 How to Use this Installation Guide
- 4 Connecting Source System to Beolab Transmitter 1
- 5 Associating Wireless Speakers
- 6 Setting up and Connecting Beolab Transmitter 1
- 7 Use of Servicetool
- 8 Ir-Eye - 3 Rd Party Product Remote Control
- Download this manual
Advertisement
Table of Contents

Related Manuals for Bang & Olufsen Beolab transmitter 1


Summary of Contents for Bang & Olufsen Beolab transmitter 1
- Page 1 BeoLab Transmitter 1 Type 1505 - 1513 Installation Guide 31.0 English - version 1.1 16.7...
-
Page 2: Introduction
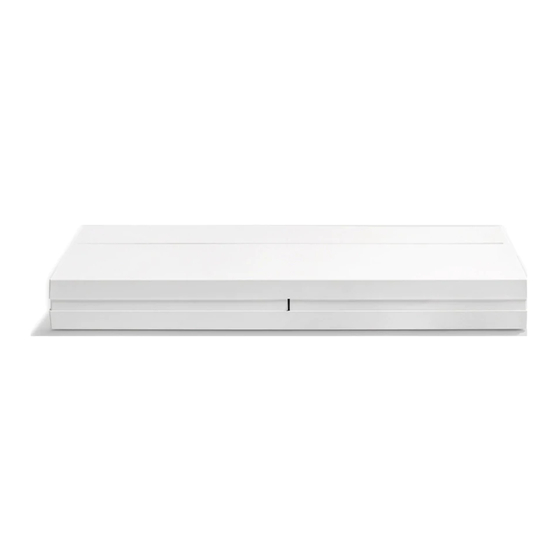
Introduction Introduction BeoLab Transmitter 1 is a stand-alone box, that enables existing music systems and TVs to connect wirelessly - within one room - to any Bang & Olufsen wireless speaker and BeoLab Receiver 1. BeoLab Transmitter 1 works in the wireless 5 GHz U-NII band frequency spectrum. It is compliant with and will only work with all new Bang &... -
Page 3: How To Use This Installation Guide
- Mount the product, - Understand placement rules, BeoLab Transmitter 1 front - Connecting and setting up BeoLab Transmitter 1 with products and speakers, BeoLab Transmitter 1 connection panel (rear side) - Use push buttons and understand LED indications, - Use the ServiceTool and make SW update, Mounting - Understand channel patterns and use worldwide. - Page 4 BeoLab Transmitter 1. It is recommended to place the BeoLab Transmitter 1, so it is not hidden, and it must never be placed behind the TV as the metal parts will prevent the wireless signals to reach the speakers.
- Page 5 See example in the below illustrations. (The holes for mounting shown are placed on the back side of the BeoLab Transmitter 1). Demount from wall mounting The BeoLab Transmitter 1 is demounted from the cable cover by releasing the two snap-locks , followed by moving the transmitter away from the cable cover .
-
Page 6: Placement Of Beolab Transmitter 1
Placement of the Beolab Transmitter 1 Placement of BeoLab Transmitter 1 The BeoLab Transmitter 1 has an 9 m / 30 ft omnidirectional transmission characteristic, although this can not be an ideal sphere. The transmitter and the receivers of the loudspeakers must have line-of- sight. -
Page 7: Connecting Source System To Beolab Transmitter 1
(PL 2 L). The cut-off frequency for the Bass management is 120 Hz. See the guide for BeoLab Transmitter 1 for variety in connections depending on type of BeoVision and setting the SUB 2.1 switch with the various speaker combinations. - Page 8 BeoLab Transmitter 1 provides the subwoofer signal to a wireless subwoofer indicated as the third sound channel (PL 2 L). The cut-off frequency for the Bass management is 120 Hz. See the guide for BeoLab Transmitter 1 for variety in speaker combinations.
- Page 9 100 - 240V 50/60Hz Connect 3 party products to the BeoLab Transmitter 1 using a TOSLINK cable. The volume of the signal must be adjusted from the audio system. B&O INPUT Remember to set the B&O INPUT switch to NO.
- Page 10 100 - 240V 50/60Hz Connect 3 party products to the BeoLab Transmitter 1 using Line-in (RCA) cables. The volume of the signal must be adjusted from the audio system. B&O INPUT Remember to set the B&O INPUT switch to NO.
-
Page 11: Audio Input Using Power Link
8. SUB 2.1 set to OFF. This provides sound channels according to the Power Link input. Note: Observe that the distance between the BeoLab Transmitter 1 and any speaker must not exceed 12 m / 40 ft. > continues... -
Page 12: Associating Wireless Speakers
Noise will now be emitted from another speaker and the LED for the left sound channel is flashing. Continue at the step above. - If all speakers are configured for the left sound channel, make a short press on STORE, and the WIRELESS LED on the BeoLab Transmitter 1 turns solid green, to confirm that the speaker configuration is stored for the left sound channel. - Page 13 Noise will now be emitted from another speaker and the LED for the right sound channel is flashing. Continue at the step above. - If all speakers are configured for the right sound channel, make a short press on STORE, and the WIRELESS LED on the BeoLab Transmitter 1 turns solid green, to confirm that the speaker configuration is stored for the right sound channel.
-
Page 14: Setting Up And Connecting Beolab Transmitter 1
BeoLab Transmitter 1 is providing the signal to a wireless subwoofer in the third sound channel PL2 L. REAR FRONT - Connect mains to all speakers and the BeoLab Transmitter 1. The WIRELESS LED will start flashing white during the configuration process. - Page 15 - Make a long press ≥ 1.5 s (and ≤ 10 s) on the SELECT button, by which the BeoLab Transmitter 1 goes into manual configuration mode. The Power Link LEDs will start flashing one-by-one starting from left to right, indicating the Power Link sound channel is ready to be configured with at speaker.
- Page 16 (Power Link channels are dedicated according to the output from the source). - Noise is generated by the BeoLab Transmitter 1 and the noise is emitted from a (random) speaker that may not be the correct one matching the Power Link (sound) channel indicated by the flashing LED. Make a short press ≤ 1.5 s on the SELECT button once or repeatedly until the noise is emitted from the speaker position desired.
-
Page 17: Push Button Functions
Push button functions Push button functions State SELECT STORE Time Comment Scan X (short) ≤1.5 s In non-configuration mode: Scans for wireless speakers In configuration mode: Lit Power Link LEDs to show the number of speakers found Store default X (short) ≤1.5 s Scanning completed: store default. -
Page 18: Led Indications
Product behaves normally Mains On and (solid) Off after 10 s time-out * Lit when power is applied to the BeoLab Transmitter 1, to indicate that it is switched On and becomes Restart after Reset ready for operation Also lit when reset either by the user (external) or by the BeoLab Transmitter 1 (internal) -
Page 19: Use Of Servicetool
SW update - BeoLab Transmitter 1 Note: A standard USB A to USB Mini-B cable is used for connection between the PC hosting the ServiceTool and the BeoLab Transmitter 1 (Part No.: 6270848) and also a the CDC/ACM driver must be installed. (In ServiceTool, see Connections > USB Driver). -
Page 20: Use Of Usb Memory Stick
- Connect the BeoLab Transmitter 1 to the mains. The BeoLab Transmitter 1 may restart (LED is solid red) and will continue to search for any SW builds and if a newer is found the SW for the BeoLab Transmitter 1 will be updated automatically. - Page 21 To mend the SW update error - do the following: - Disconnect the BeoLab Transmitter 1 and disconnect all wireless speakers where the LED is quickly flashing green from the mains for at least 60 s - Reconnect all wireless speakers to the mains - Reconnect the BeoLab Transmitter 1 to the mains - Re-do the SW update of the speakers.
-
Page 22: Ir-Eye - 3 Rd Party Product Remote Control
When returning from muted state, the volume level will be as before muting - however never higher than 2/3 of the maximum volume. When the IR-eye is removed from the BeoLab Transmitter 1 the BeoLab Transmitter 1 must be powered Off and then On as it will first then behave as having no IR-eye connected. -
Page 23: Always On
If desired it is possible to set the BeoLab Transmitter 1 to “Always On” by which the delay is reduced to about 2 s when it is desired to hear sound from the speakers almost instantly. -
Page 24: Line-In Setting And Log Files
Via USB memory stick The line-in settings can be changed on BeoLab Transmitter 1 by the content of a file called WPLSETUP.TXT placed on a USB memory stick. At the same time log files can be dumped to the USB memory stick. -
Page 25: Combination Of Channel Pattern And Product Type No
Combination of Channel pattern and product type No. Combination of Channel pattern and product type No. The below table show combinations of 5 GHz channels used in the BeoLab Transmitter 1 with respect to countries. Channel Product pattern type No. Countries Channel number ... -
Page 26: Distance Between 5 Ghz Transmitters
A Bang & Olufsen stereo system setup or surround sound system setup is regarded as one transmission system and consists of a BeoLab Transmitter 1 or a TV with internal WPL transmitter and all associated speakers. Similarly a 5 GHz Access Point and all associated computers is regarded a transmission system. - Page 27 Site survey (Wi-Spy) Usually wireless speaker connections should not lead to problems. The BeoLab Transmitter 1 is able to find unused channels in the 5 GHz band, and makes a map of unused channels in case the present channel in use becomes occupied by another transmission system. In such case moving to an alternative channel happens seamlessly.
- Page 28 Site survey (Wi-Spy) Colouring by Density Full 5GHz band Wi-Fi- Channels Display selected networks Channel No.s set check mark...
-
Page 29: Connection Specifications
Connection specifications Connection specifications ~ 100 - 240 V, 50/60Hz C8 socket - Mains inlet - To see the different types of mains leads, see exploded view in the Retail Ordering System Live Neutral USB-B USB Mini-B - used for Service Pin 1 +5VDC(in) Pin 2... -
Page 30: Table Of Contents
Placement of BeoLab Transmitter 1 ............ 6 Connecting source system to BeoLab Transmitter 1 Connecting source system to BeoLab Transmitter 1......7 Setting up and connecting BeoLab Transmitter 1 ......14 Setting up and connecting BeoLab Transmitter 1 Push button functions ................ 17 Push button functions LED indications ...................
Need help?
Do you have a question about the Beolab transmitter 1 and is the answer not in the manual?
Questions and answers