Table of Contents
Advertisement
Quick Links
Advertisement
Table of Contents

Related Manuals for AEE MD10


Summary of Contents for AEE MD10
- Page 1 MD10...
-
Page 3: Table Of Contents
Contents Precautions ............1 Preface............2 Warranty ............3 Overview............3 Main functions and features ......4 List of accessories ........6 Component guideline ........8 Description of indicators ............9 LCD segment display .............10 Preparations before use ......11 Charging ................. 11 Insert and remove the memory card........11 Startup ..................12 Voice-activated Power-on ............13 Language................13... - Page 4 > Timed Recording ............18 > Shoot-in-recording ............18 Photo Shooting ...............19 > Single Shot ..............19 > Fast Shot ................19 > Continuous Shooting ............19 > Timed Shooting ..............20 Parameter settings ........21 Recording Parameters............21 > Time Lapse ..............22 > Timed Recording ............22 > Shoot-in-recording ............22 >...
- Page 5 > On screen display ............28 > Auto to standby ..............28 > TV output format ............28 > Format ................28 > Recover factory setting ..........28 Playback ................29 Upload audio/video/photo files to PC ........29 View video / Photo on HDTV ..........29 Wi-Fi .............30 >...
- Page 6 Precautions for the use of 3M double-sided foam tape..51 Specifications ..........52 Power Supply ..........53 Precautions for the Waterproof housing ...54 Tips ...............55 FCC Notices ..........56...
-
Page 7: Precautions
Precautions When using the MD10 video camera, adhere to the following precautions: 1. Do not drop, knock or shake the video camera. 2. Do not put the video camera close to an object that generates strong magnetic field, such as a magnet or a motor. -
Page 8: Preface
● Superior recording performance thanks to dynamic HD shooting technologies, providing you with exciting video shooting experience This manual describes how to install and use the MD10 video camera. It also provides information about use, operations, installation precautions, and technical specifications of the MD10 video camera. -
Page 9: Warranty
(optional), Wi-Fi wireless transmission, high-speed mini USB data transmission and mini USB charging. Equipped with professional accessories, MD10 allows you to record whatever you like anytime anywhere. MD10 carries several patents for invention and technology. Dispose of properly. Recycle it for a greener earth! -
Page 10: Main Functions And Features
Main functions and features ● Provides a special-purpose HD lens, which supports 1080P and 720P HD video recording. ● Takes 8M pixels pictures in 3200x2400 resolution. ● Long time voice recording; ● Performs 4X digital zooming. ● LCD screen;... - Page 11 ● Provide high color fidelity to present more clear and natural video pictures. ● Small size, suitable for various applications; ● Provides HDMI for easy connecting to HD monitor or TV set to view record files. ● Records video programs in MP4 format to facilitate playback on a PC and uploading to video-sharing websites.
-
Page 12: List Of Accessories
List of accessories MD10 main unit Water-proof housing * Remote Control * Camera Body Tray * Back Shell for Back Waterproof Back Clip * Shell with Strap * Camera Body Clip Power Adapter * Shoulder Clip * Mount... - Page 13 Flat sticker * Convex sticker * Quick Release Buckle * Extended adjusting Moisture-proof foam * Hand strap * bolt unit * Cloth bag * TF card * USB data cable User manual CD-ROM The accessories you've received may be slightly different from above.
-
Page 14: Component Guideline
Component guideline 1. Recording status indicator 8. LCD screen 2. Record key 9. TF card slot 3. Shoot key 10. Strap hole 4. Wi-Fi key 11. Power indicator 5. Power key 12. USB port 6. Lens 13. Mini HDMI port... -
Page 15: Description Of Indicators
Description of indicators Recording Indicator Power Power/Work status Indicator State Indicator Indicator Function Green Red and Green Blink once and Powering on Blink once in red remain on Video Blink slowly in Blink slowly recording green Discontinuous Blink slowly in... -
Page 16: Lcd Segment Display
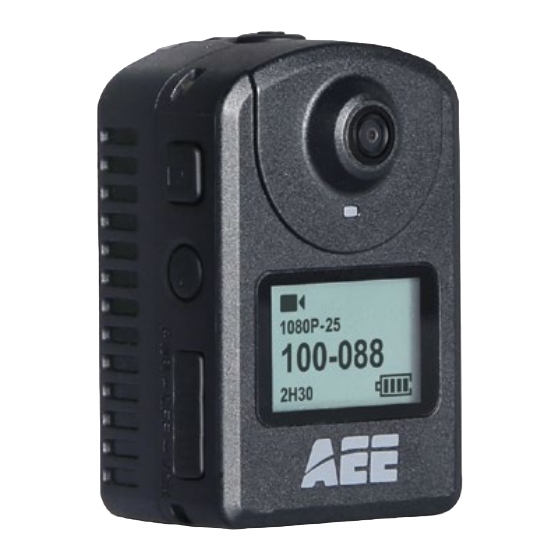
LCD segment display Explanations for Icons on LCD Screen: 1080P- 25 100-0088 2H30 Icon Functions Recording mode Shooting mode 1080P-25 Recording resolution 8M 5M 3M Shooting resolution 100-088 Number of recorded files 00:00:01 Recording timer 2H30 Remaining recordable time... -
Page 17: Preparations Before Use
MD10: USB Port PC USB interface Power Adapter When MD10 is charged in power-off state, the red indicator will flash slowly. After the battery is fully charged, the red indicator will stay on. Insert and remove the memory card MD10 supports external TF card up to 64G. Though all SD cards above Class 6 can be used on MD10, high-speed card is recommended to perform high-definition shooting. -
Page 18: Startup
• Insert the memory card Ensure that MD10 is switched off, Insert SD card into the memory card slot in the arrow direction flatly to the end. A "click" can be heard to indicate the card has been well inserted. -
Page 19: Voice-Activated Power-On
Voice-activated Power-on Slide the Power key to "VOX", and MD10 will enter the voice- activated mode. When the ambient decibel reaches 75db, MD10 will auto start recording. It may auto stop recording 3min later if the ambient decibel becomes lower than 75db. In the recording process, you can press the Record key to stop recording without influencing any other function. -
Page 20: Date & Time
Record key to enter the following interface: 6. Press the Shoot key or Wi-Fi key to adjust each value and then press the Record key to confirm the adjustment. MD10 will auto exit from the above interface when all adjustments have been finished. -
Page 21: Video Mode Selection And Application
2. Press the Shoot key or Wi-Fi key to select a menu mode; 3. If no operation is performed within 3s, MD10 will auto enter the selected menu mode (you can also enter such mode directly by pressing the Record key). See the following... -
Page 22: Video Recording
Icon Functions Icon Functions Video recording Video-only Voice recording Time Lapse Timed recording mode Shoot-in-recording Single shot Fast shot Continuous shooting Timed shooting Other basic setting In the shooting mode, you can press the Record key to switch to the last used recording mode. -
Page 23: Voice Recording
1. Press the Record key to start the video recording and enter the following interface: 1080P- 25 00:00:01 2H30 2. Press the Record key again to stop the video recording. > Voice Recording 1. Press the Record key to start the voice recording and enter... -
Page 24: Timed Recording
> Timed Recording You can set a time interval for timed recording. Then when you press the Record key, MD10 will start to count down and will auto start the video recording when the preset time is up. 1. Press the Record key, and MD10 will auto start the video... -
Page 25: Photo Shooting
Photo Shooting > Single Shot 1. Press the Shoot key to shoot one photo and enter the following interface: 100-0081 1888 > Fast Shot In this mode, you can shoot several photos in one second; 1. Press the Shoot key to shoot a group of photos and enter... -
Page 26: Timed Shooting
> Timed Shooting You can set a time interval for timed shooting. Then when you press the Shoot key, MD10 will start to count down and will automatically take photos when the preset time is up. 1. Press the Shoot key and the system will shoot one photo... -
Page 27: Parameter Settings
Parameter settings Recording Parameters Please follow the steps below to set the recording parameters: 1. Long press the Record key for 3s to enter the full screen mode; 2. Press the Shoot key or Wi-Fi key to adjust the menu mode to "... -
Page 28: Time Lapse
6. Press the Shoot key to exit. > Time Lapse 1sec: Record a picture as a frame of the video every 1s; 2sec: Record a picture as a frame of the video every 2s; 5sec: Record a picture as a frame of the video every 5s;... -
Page 29: Resolution Setting
> Resolution setting You can select from the following recording resolutions: PAL System NTSC System 1920×1080P 25f 16:9 1920×1080P 30f 16:9 1280×720P 50f 16:9 1280×720P 60f 16:9 WVGA 100f 16:9 WVGA 120f 16:9 > View Angle You can set the view angle to Wide, Medium, Narrow and... -
Page 30: Video Content Loop
If OFF, video file will be stored in segment of 15 minutes. > 180° Image Rollover When this function is activated, upright video file can be obtained when using MD10 to shoot video upside down. This function is not available in WVGA mode. > Display Time You can choose to display or not display the video recording time at the bottom right corner of the photo. -
Page 31: Fast Shot
Shooting Mode Shooting Resolution Display Time You can enter "Shooting Mode" to set such parameters as Fast shot, Continuous shooting and Timed shooting. 4. Press the Wi-Fi key to select the required functional icon and then press the Record key;... -
Page 32: Timed Shooting
Shoot key; 10sec: shoot a photo at 10s intervals after you press the Shoot key; 20sec: shoot a photo at 20s intervals after you press the Shoot key; > Timed Shooting 3sec: shoot a photo 3s after you press the Shoot key;... -
Page 33: Basic Settings
Basic Settings 1. Long press the Record key for 3s to enter the full screen mode; 2. Press the Shoot key or Wi-Fi key to adjust the menu mode to " " and then press the Record key; 3. Press the Wi-Fi key to move the cursor to "... -
Page 34: Warning Tone
MD10 will auto enter the standby mode. If any operation is performed in the timing process, the timer will be reset. You can press the Record key or shoot key to awaken MD10 from the standby mode. > TV output format This function controls the video recording frame rate and the TV system for video playing. -
Page 35: Playback
Ensure that your camera is properly configured to NTSC (North America) or PAL (Non-North America) video format; otherwise, the video and images on MD10 cannot be properly displayed on TV. Use HDMI cable to connect MD10 to the TV set: This function is not available when opening Wi-Fi. -
Page 36: Wi-Fi
Wi-Fi With integrated Wi-Fi module, MD10 can be connected with Wi-Fi remote control, smartphone or tablet PC to achieve remote control function. First please install appropriate APP software provided by AEE to your device. > Download a Wi-Fi APP By now, the Wi-Fi APP is already upload to iphone APP store and google play store, customers can freely download it. - Page 37 2. Turn on your camera,wait until the blue Wi-Fi indicator flashes slowly. Search for Wi-Fi hot spot on a mobile receiving device,select "AEE Magicam" network and connect it (default password: AEE12345). Then the camera and the mobile device are connected.
- Page 38 Fig. 1 Wi-Fi Connection Interface Fig. 2 Wi-Fi Control Interface...
- Page 39 Display the remaining number of shots in photo shooting mode. The mobile device must be used within a distance of max. 100 meters from the MD10 in an obstacle-free and horizontal angle. The real-time preview is unavailable for video recording...
-
Page 40: Operating Instructions For Wi-Fi Control Interface
Operating Instructions for Wi-Fi Control Interface 1. Video Recording Click the Video recording mode icon " ". The current state icon will dispaly as " ", click it to start / stop video recording. Click the icon " " to maximize the preview (See Fig. 3). - Page 41 2. Single shot Click the Single shot mode icon " " ,it will turn blue " ". The current state icon will dispaly as " ", click it to take one picture. Click the icon " " to maximize the preview (See Fig. 4).
- Page 42 3. Fast Shot Click the Fast shot mode icon " " ,it will turn blue " ". The current state icon will dispaly as " ", click it to take pictures within one second. Click the icon " " to maximize the preview (See Fig. 5).
- Page 43 4. Playback Click the icon " " to enter the interface shown in Fig. 6 to remotely play videos and photos. Slide the icon " ". If you select "Camera Storage", you can replay the files stored on the camera. If you select "Mobile Device Storage", you can replay the files downloaded...
- Page 44 Click on the thumbnail to view it in large preview. You could slide left and right to select the desired file. Photo preview Video Preview Click the icon " " to return to the thumbnail preview interface. Click the icon "...
-
Page 45: Download Files To Mobile Device
Download Files to Mobile Device Return to the thumbnail preview interface and click the icon " " to enter the Download interface. Click the desired files to download them to your mobile device. Files downloaded Files in waiting Files in downloading... - Page 46 Click on the thumbnail to view it in large preview. You could slide left and right to select the desired file. Photo preview Video Preview Click the icon " " to view the current file information. Click the icon "...
-
Page 47: Trim Videos
Trim Videos When viewing the downloaded files on the mobile device, you can click the icon " " at the bottom of the screen to enter the video trimming interface shown in the figure below: Menu Current frame Storyboard... -
Page 48: Change Wi-Fi Connection Name And Password
(It supports 8-digit password only.) In case of synchronous operation of the camera and the Wi-Fi based remote control, MD10 will give priority to the operation command from the camera. Above images for reference only, subject to our available... -
Page 49: Wi-Fi Based Remote
Wi-Fi Based Remote Guide for Components 1. Power Indicator 7. USB Port 2. Screen 8. Wi-Fi Indicator 3. Wide view Button 9. Power/Record Button 4. Medium view Button 10. Shutter Button 5. Narrow view Button 11. Stop Button 12. Strap hole... - Page 50 Buttons Functions Long press it for about 5s to turn on/off the Wi-Fi based remote control. Under the photographing mode, press it once to switch the current mode to the video recording mode. Under the video recording mode, press it once to start video recording.
-
Page 51: Startup
Before using the Wi-Fi remote control, code pairing should be done between it and MD10: 1. Turn on MD10 and enable its Wi-Fi function; 2. Press and hold the stop key and then long press the power/ record key for 5s to turn on the remote control. The red indicator will be lit and the battery icon "... - Page 52 "WAIT HOST PBC" as shown below: WAIT HOST PBC 4. Long press the Wi-Fi key on MD10 for 10s until the remote control enters the following interface: PRESS CONNECT 5. Press the stop key on the remote control to start the...
-
Page 53: Specifications
Specifications Description Specification Charging Time via USB 2h (max.) Service time of fully charged battery 5h (max.) Battery capacity 500mAh Power consumption 0.30W-0.35W IP rating IP66 Remote control distance 120M Specification of USB USB 2.0 Overall dimension 77×46×19mm Weight 59g Working temperature -10°C~+50°C... -
Page 54: Precautions
Precautions 1. This remote control is a sophisticated product; dropping or physical impact on this product is not allowed. 2. The remote control should not get close to objects with high-intensity magnetic field such as magnet and electric motor, or to objects that send out strong radio waves such as antenna. -
Page 55: Accessory Application
Accessory application MD10 is suitable for handhold use or hand-free use at most places by using appropriate accessories. MD10 fitted with water-proof housing can be used to record videos underwater. Water-proof housing and Moisture-proof foam MD10 water-proof housing up to IP68 can protect the camera 20 meters underwater. -
Page 56: Installation Of Back Clip
The plug bracket can fix MD10 water-proof housing firmly onto the sticky seat, as below: Installation of Back Clip The back clip should be installed as shown in the figure below:... -
Page 57: Use Convex Sticker And Flat Sticker
Use convex sticker and flat sticker MD10 comes with sticker fitting and flat sticker for installation on different surfaces. You can easily attach the camera onto helmet, vehicles or the surface of other devices. M08 convex sticker M15 flat sticker... -
Page 58: Specifications
Specifications Description Specifications Visual angle 136° Aperture f/2.6 Pixel 8 million Video recording format MP4 Audio recording format WAV Photo format JPG (JPEG) Wi-Fi transmission distance About 100 meter (MAX) Standard battery capacity 1000mAh Power consumption 550mA USB Cable: About 2.0 hours Recharging duration Power Adapter: About 2.0 hours... -
Page 59: Power Supply
Power Supply The MD10 video camera uses a power unit certified by the following authorities. UL mark C-TICK mark CE mark GS mark U.S. Power Australia Power E.U. Power Germany Power Certificatation Certification Certification Certification CCC mark PSE mark... -
Page 60: Precautions For The Waterproof Housing
3. Do not put the waterproof housing in a place where temperature is high (50°C) or low (-10°C) for a long time to avoid deformation. 4. Do not expose the MD10 video camera to sunshine for a long time to avoid deterioration of the waterproof performance. -
Page 61: Tips
Tips 1. When the unit is in used for long period, it is natural that its surface temperature will rise. 2. If you will not use the unit for long period, it is suggested that you charge it once every 6th month to maintain the performance of battery. -
Page 62: Fcc Notices
FCC Notices 1. The manufacturer is not responsible for any radio or TV interference caused by unauthorized modifications to this equipment. Such modifications could void the user's authority to operate the equipment. 2. This device complies with Part 15 of the FCC Rules. (1) - Page 63 Harmful interference to radio or television reception, which can be determined by turning the equipment off and on, the user is encouraged to try to correct the interference by one or more of the following measures: Reorient or relocate the receiving antenna.
Need help?
Do you have a question about the MD10 and is the answer not in the manual?
Questions and answers