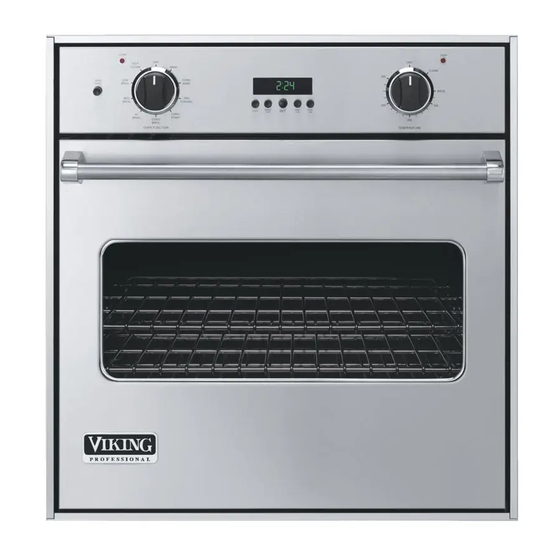
Viking VESO127 Installation Manual

Viking VESO127 Installation Manual

Professional & designer series built-in electric single and double ovens
Hide thumbs Also See for VESO127:

Advertisement

Viking Installation Guide
Professional & Designer Series
Built-In Electric Single and Double Ovens
111 Front Street
Greenwood, Mississippi 38930 USA

Advertisement

Table of Contents
loading

Summary of Contents for Viking VESO127

  • Page 1 Viking Installation Guide Professional & Designer Series Built-In Electric Single and Double Ovens 111 Front Street Greenwood, Mississippi 38930 USA...
  • Page 2: Table Of Contents

    Table of Contents Important Information _________________________________________________ 3 Warnings ____________________________________________________________ 3 Dimensions–Professional Single ________________________________________ 4 Specifications & Electrical Requirements–Professional Single________________ 5 Dimensions–Designer Single ___________________________________________ 6 Specifications & Electrical Requirements–Designer Single __________________ 7 Cutout Dimensions–Professional Single Built-In ___________________________ 8 Cutout Dimensions–Professional Single Undercounter _____________________ 8 Cutout Dimensions–Designer Single Built-In _____________________________ 9 Cutout Dimensions–Designer Single Undercounter _______________________ 9 Dimensions–Professional Double _______________________________________ 10...
  • Page 3: Important Information

    IMPORTANT–Please Read and Follow! • Before beginning, read these instructions W A R N I N G thoroughly and carefully. • Do not remove permanently affixed labels, ELECTRICAL GROUNDING warnings or plates from the INSTRUCTIONS – product as this may void the warranty. This oven must be electrically grounded •...
  • Page 4: Dimensions-Professional Single

    Dimensions–Single Oven (Professional Series) 27” Wide 30” Wide...
  • Page 5: Specifications & Electrical Requirements-Professional Single

    Specifications & Electrical Requirements Professional Single Oven Description VESO127/527–27” Wide VESO130/530–30” Wide Overall Width 26 1/2” (67.3 cm) 29 1/2” (74.9 cm) Overall Height 28 3/4” (73.0 cm) Overall Depth to edge of door—25 9/16” (64.9 cm) with door open—45 3/4” (116.2 cm) Cutout Width 25 1/2”...
  • Page 6: Dimensions-Designer Single

    Dimensions–Single Oven (Designer Series–Mechanical and Touch Control Models) 27” Wide 30” Wide...
  • Page 7: Specifications & Electrical Requirements-Designer Single

    Specifications & Electrical Requirements Designer Single Oven Description DESO127(T)/527(T)–27” Wide DESO130(T)/530(T)–30” Wide Overall Width 26 1/2” (67.3 cm) 29 1/2” (74.9 cm) Overall Height 29 1/4” (74.3 cm) Overall Depth to edge of door—25 11/16” (65.2 cm) with door open—46” (116.8 cm) Cutout Width 25 1/2”...
  • Page 8: Cutout Dimensions-Professional Single Built-In

    Cutout Dimensions–Single Oven (Professional Series) 27” Wide Built-In 30” Wide Built-In 27” Wide Undercounter 30” Wide Undercounter...
  • Page 9: Cutout Dimensions-Designer Single Built-In

    Cutout Dimensions–Single Oven (Designer Series–Mechanical and Touch Control Models) 27” Wide Built-In 30” Wide Built-In 27” Wide Undercounter 30” Wide Undercounter...
  • Page 10: Dimensions-Professional Double

    Dimensions–Double Oven (Professional Series) 27” Wide 30” Wide...
  • Page 11: Specifications & Electrical Requirements-Professional Double

    Specifications & Electrical Requirements Professional Double Oven Description VEDO127/527–27” Wide VEDO130/530–30” Wide Overall Width 26 1/2” (67.3 cm) 29 1/2” (74.9 cm) Overall Height 51 1/4” (130.2 cm) Overall Depth to edge of door—25 9/16” (64.9 cm) with door open—45 3/4” (116.2 cm) Cutout Width 25 1/2”...
  • Page 12: Dimensions-Designer Double

    Dimensions–Double Oven (Designer Series–Mechanical and Touch Control Models) 27” Wide 30” Wide...
  • Page 13: Specifications & Electrical Requirements-Designer Double

    Specifications & Electrical Requirements Designer Double Oven Description DEDO127(T)/527(T)–27” Wide DEDO130(T)/530(T)–30” Wide Overall Width 26 1/2” (67.3 cm) 29 1/2” (74.9 cm) Overall Height 51 3/4” (131.4 cm) Overall Depth to edge of door—25 11/16” (65.2 cm) with door open—46” (116.8 cm) Cutout Width 25 1/2”...
  • Page 14: Cutout Dimensions-Professional Double Built-In

    Cutout Dimensions–Double Oven (Professional Series) 27” Wide Built-In 30” Wide Built-In...
  • Page 15: Cutout Dimensions-Designer Double Built-In

    Cutout Dimensions–Double Oven (Designer Series–Mechanical and Touch Control Models) 27” Wide Built-In 30” Wide Built-In...
  • Page 16: General Information

    General Information • All openings in the wall behind the • To remove the packaging, first remove the appliance or in the floor under the staples located at the bottom perimeter of appliance should be sealed. the corrugated cover. • Keep appliance area clear and free from •...
  • Page 17: Site Preparation

    Installation Site Preparation • BE SURE that support for this appliance is perpendicular to the front facing of the Note: It is recommended that a thorough wall or cabinet before you perform the site inspection be conducted PRIOR to installation. unpacking and moving this appliance.
  • Page 18 Remove hinge trim screws. Take off hinge trim. Close until pins stop door. Lift door up and out. Repeat for all doors. Remove racks. White Neutral Green Black Wiring option 1* Unscrew pallet screws from side of oven. (connect the white and green to the incoming neutral) *Note: Check local code to see which wiring option should be used when grounding the unit.
  • Page 19 Green White White Neutral Neutral Green Black Black Wiring option 2* Wiring option 3* (connect the white to the incoming neutral, (connect the white to the incoming neutral, attach green to grounded junction box) attach green to suitable ground) Lift oven into position. Push oven straight in.
  • Page 20 Replace door. Open door completely. Put hinge trim plates back on. Note: Screw holes may need to be re-aligned. Take out pins. Close door. Note: To adjust door turn adjustment screw clockwise (up) or counterclockwise (down).
  • Page 21: Performance Checklist

    Performance Checklist A qualified installer should carry out the 6. Check self-clean function–Door will lock in following checks: approximately 30 seconds, the center and outside broil elements will turn on and the 1. Check oven bake function–bake element on bake element will turn on at partial power. full power, center and outside broil elements Check broil elements through window to at partial power.
  • Page 22 Performance Checklist (continued) Self-Clean Electronic Temperature Off/On Indicator light Timing Center Control Indicator light CLEAN OVEN CLEAN OVEN SELF SELF CLEAN BAKE CLEAN BAKE CLEAN CLEAN OVEN CONVEC CONVEC LIGHT BROIL BROIL BROIL BROIL CONV. CONV. BROIL BROIL BAKE BAKE CLOCK/ BAKE MIN/SEC...
  • Page 23: Final Preparation

    Final Preparation 1. Some stainless steel parts may have a Record the following information indicated plastic protective wrap, which must be below. You will need it if service is ever peeled off. All stainless steel body parts required. The serial number and model should be wiped with hot soapy water number for your oven are located on the and with liquid cleaner designed for this...
  • Page 24: Wiring Diagrams

    Professional Premiere Single Oven Wiring Diagram (VESO527/530) THERMOSTAT SELECTOR BLK 14 GA YEL 14 GA TERMAL CUT-OUT CYCLE LIGHT GREY CLEAN LIGHT CONVECTION OVEN LIGHTS VOLTS VOLTS 20 W CAPACITOR CAPACITOR LIGHT OUTTER BROIL GREY TRANSFORMER BLUE GREY INNER BROIL CONVECTION MOTOR OUTTER BAKE BLUE...
  • Page 25 Professional Premiere Double Oven Wiring Diagram (VEDO527/530) L L 1 1 L L 2 2 N N SELECTOR THERMOSTAT BLK 14 GA YEL 14 GA TERMAL CUT-OUT CYCLE LIGHT GREY CLEAN LIGHT CONVECTION OVEN LIGHTS VOLTS VOLTS 20 W CAPACITOR CAPACITOR LIGHT OUTTER BROIL...
  • Page 26 Designer Premiere Single Oven Wiring Diagram (DESO527/530) THERMOSTAT SELECTOR BLK 14 GA YEL 14 GA TERMAL CUT-OUT CYCLE LIGHT GREY CLEAN LIGHT CONVECTION OVEN LIGHTS VOLTS VOLTS 20 W CAPACITOR CAPACITOR LIGHT OUTTER BROIL TRANSFORMER GREY BLUE GREY INNER BROIL CONVECTION MOTOR OUTTER BAKE BLUE...
  • Page 27 Designer Premiere Double Oven Wiring Diagram (DEDO527/530) L L 1 1 L L 2 2 N N THERMOSTAT SELECTOR BLK 14 GA YEL14 GA TERMAL CUT-OUT CYCLE LIGHT GREY CLEAN LIGHT CONVECTION OVEN LIGHTS VOLTS VOLTS 20 W CAPACITOR CAPACITOR LIGHT OUTTER BROIL BLUE...
  • Page 28 Professional Select Single Oven Wiring Diagram (VESO127/130) THERMOSTAT BLK 14 GA YEL 14 GA TERMAL CUT-OUT SELECTOR CYCLE LIGHT GREY CLEAN LIGHT CONVECTION VOLTS VOLTS 20 W OVEN LIGHT CAPACITOR CAPACITOR LIGHT OUTTER BROIL TRANSFORMER GREY BLUE GREY INNER BROIL...
  • Page 29 Professional Select Double Oven Wiring Diagram (VEDO127/130) L L 1 1 L L 2 2 N N THERMOSTAT SELECTOR BLK 14 GA YEL 14 GA TERMAL CUT-OUT CYCLE LIGHT GREY CLEAN LIGHT CONVECTION OVEN LIGHT VOLTS VOLTS 20 W CAPACITOR CAPACITOR LIGHT OUTTER BROIL...
  • Page 30 Designer Select Single Oven Wiring Diagram (DESO127/130) THERMOSTAT SELECTOR BLK 14 GA YEL 14 GA TERMAL CUT-OUT CYCLE LIGHT GREY CLEAN LIGHT CONVECTION VOLTS VOLTS 20 W OVEN LIGHT CAPACITOR CAPACITOR LIGHT OUTTER BROIL TRANSFORMER GREY BLUE GREY INNER BROIL CONVECTION MOTOR OUTTER BAKE BLUE...
  • Page 31 Designer Select Double Oven Wiring Diagram (DEDO127/130) THERMOSTAT SELECTOR BLK 14 GA YEL 14 GA TERMAL CUT-OUT CYCLE LIGHT GREY CLEAN LIGHT CONVECTION OVEN LIGHT VOLTS VOLTS 20 W CAPACITOR CAPACITOR LIGHT OUTTER BROIL BLUE TRANSFORMER GREY GREY INNER BROIL CONVECTION MOTOR OUTTER BAKE BLUE...
  • Page 32 Viking Range Corporation 111 Front Street Greenwood, Mississippi 38930 USA (662) 455-1200 For product information, call 1-888-VIKING1 (845-4641) or visit the Viking Web site at http://www.vikingrange.com F20363 (PS0106)

Table of Contents