Panasonic SH-ALL1C Owner's Manual
Panasonic sh-all1c network audio connector, audio streamer
Hide thumbs
Also See for SH-ALL1C:
- Owner's manual (4 pages) ,
- Owner's manual (2 pages) ,
- Owner's manual (34 pages)
Table of Contents
Advertisement
Advertisement
Table of Contents

Related Manuals for Panasonic SH-ALL1C


Summary of Contents for Panasonic SH-ALL1C
- Page 1 Owner’s Manual <Full version> Network Audio Connector Model No. SH-ALL1C Thank you for purchasing this product. Please read these instructions carefully before using this product, and save this manual for future use. Register online at www.panasonic.com/register (U.S. customers only) SQT0184...
-
Page 2: Table Of Contents
Table of contents Accessories ..................3 Unit care ..................... 4 Control reference guide..............5 Indicator illumination ................6 Connections ..................8 Network settings................12 Enjoying music ................. 19 Firmware updates ................23 Others ....................24 Troubleshooting................27 Specifications ................... 30 How to use this manual Click/Tap this icon to jump to “Table of contents”. -
Page 3: Accessories
Accessories 1 AC power supply cord (AC mains lead) (K2CB2CB00022) For the United Kingdom and Ireland (K2CT2YY00097) For Continental Europe (K2CQ2YY00119) For Australia and New Zealand (K2CJ2YY00101) 1 Audio cable (K2KYYYY00242) 2 Stands (RYQ1443-K1) ≥ Do not use AC power supply cord (AC mains lead) with other equipment. ≥... -
Page 4: Unit Care
Unit care Clean this unit with a soft, dry cloth. ≥ Never use alcohol, paint thinner or benzine to clean this unit. ≥ Before using chemically treated cloth, carefully read the cloth’s instructions. ∫ To dispose or transfer this unit The unit may keep the user settings information in the unit. -
Page 5: Control Reference Guide
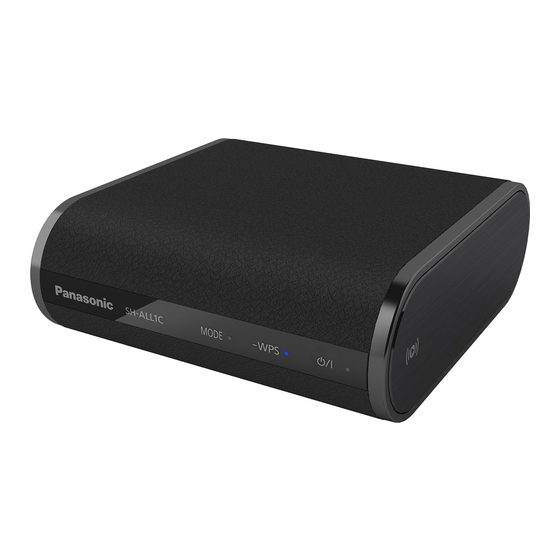
Control reference guide : Touch area MODE –WPS Mode switch [MODE] Set the downsampling setting (l 24)/ Turn the beep sound on/off (l 25) WPS pairing switch [-WPS] Enter WPS pairing mode (l 16) / firmware update mode (l 23) Standby/on switch [Í/I] Touch to switch the unit from on to standby mode or vice versa. -
Page 6: Indicator Illumination
Indicator illumination The indicator patterns illustrated below are displayed during normal operational conditions. Indicator Description Operation indicator (amber) Blinks once ≥ The unit detects the switch touched. Blinks twice ≥ The unit detects a valid operation –WPS MODE performed by touching and holding the switch. - Page 7 Indicator Description Network indicator (blue/red) Blinks alternately ≥ The unit is carrying out an internal process. – Wait for maximum of approximately –WPS –WPS MODE MODE 60 seconds before the blinking stops. – Do not disconnect the AC power supply cord (AC mains lead). Doing so may cause malfunction or damage.
-
Page 8: Connections
Connections You can enjoy music from a device on the network by using this unit. At first, you must connect an audio system, amplifier or receiver, etc. to this unit. Ex. Connecting to an audio system STEP1: Installation This unit can be installed either vertically or horizontally. ∫... - Page 9 ∫ Vertical Place the stands and fit the unit into them. Install the unit with the AllPlay icon side up. Rubber feet Stands (supplied) Stands (supplied) When placing the stands, align them with the rubber feet. - 9 -...
- Page 10 STEP2: Connecting to an audio system, etc. Connect an audio system, amplifier or receiver, etc. to this unit using an audio cable (supplied) or an optical cable (not supplied). ∫ Using an audio cable (supplied) Audio cable (supplied) AUDIO IN AUDIO OUT L AUDIO OUT ∫...
- Page 11 STEP3: Connecting to an AC outlet AC power supply cord (AC mains lead) (supplied) To an AC outlet ≥ It takes some time until the unit connects to a network and becomes ready for use after it is connected to an AC outlet and turned on. Once connected to a network, the unit can be used at all times unless the AC outlet is turned off.
-
Page 12: Network Settings
Network settings You can stream music from a device on the network by using the Qualcomm AllPlay smart media platform or DLNA feature. To use these ® features, this unit must join the same network as the device. Choose a network setting method from the following. “Using an Internet browser”... - Page 13 Using an Internet browser ≥ The following steps are based on a smartphone. ≥ Do not connect a LAN cable. Doing so will disable the Wi-Fi function. ® Turn this unit on. Go to Wi-Fi settings on the device. ® ≥...
- Page 14 Start the Internet browser on the device to display the settings page. : The settings page will be automatically displayed. ≥ [iOS] : Once you open the Internet browser, the settings page will be ≥ [Except_iOS] displayed – If the settings page is not displayed, type “http://172.19.42.1/” into the URL address field.
- Page 15 Select your network name (SSID) and type the password. ≥ Check the wireless router for the network name (SSID) and the password. ≥ A list of network names (SSIDs) will be appeared when you select the “Network Name” box. ≥ To show the characters typed in the “Password” box, select “Show Password”.
- Page 16 Using WPS (Wi-Fi Protected Setup ≥ Do not connect a LAN cable. Doing so will disable the Wi-Fi function. e.g., A compatible wireless router may have the WPS identifier mark. Turn this unit on. ≥ Proceed to the next step after the network indicator changes from blinking in blue and red to blinking in blue.
- Page 17 Using a LAN cable Disconnect the AC power supply cord (AC mains lead). Connect this unit to a broadband router, etc. using a LAN cable. e.g., Broadband router, etc. LAN cable (not supplied) Connect the AC power supply cord (AC mains lead) to this unit, and turn the unit on.
- Page 18 To make network-related settings You can change this unit’s name on the network, and use specific IP address, subnet mask, default gateway, primary DNS, etc. Preparation ≥ Complete the network settings. Check this unit’s IP address (l 26), and note it down. Connect your device to the same network as this unit.
-
Page 19: Enjoying Music
You can enjoy music on your home network and online music services. Home network To stream music from the device on the network to this unit as AllPlay/ DLNA speakers, you need to download the app “Panasonic Music Streaming” (free of charge), etc. : App Store ≥... - Page 20 – The unit may not turn on even when selected as the output speakers. In that case, start playback. ≥ This unit will be displayed as “Panasonic ALL1C” if the device name is not set. – DLNA speakers ( ) may not display the device name you have set. In that case, turn the unit off, and then disconnect and reconnect the AC power supply cord (AC mains lead).
- Page 21 From “ ”, select this unit as the output speakers. ≥ To enjoy synchronized sound from the multiple AllPlay speakers, you need to group the speakers using the app “Panasonic Music Streaming”. (l 19) - 21 -...
- Page 22 – The unit may not turn on even when selected as the output speakers. In that case, start playback. ≥ This unit will be displayed as “Panasonic ALL1C” if the device name is not set. ≥ Registration/subscription is required. ≥ Fees may apply.
-
Page 23: Firmware Updates
Firmware updates Occasionally, Panasonic may release updated firmware for this unit that may add or improve the way a feature operates. These updates are available free of charge. Preparation ≥ Connect this unit to the network. (l 12) – Make sure that the network is connected to the Internet. -
Page 24: Others
Others Downsampling Set whether the high quality audio output from the optical terminal will be output as is (“off”) or not (“on”). ≥ When this unit is connected to a device that does not support a sampling frequency of 88.2 kHz or higher, change the setting to “on”. - Page 25 Operation sound setting You can turn the beep sound on/off. Touch [MODE]. ≥ The mode indicator (amber) blinks. – Blinks once: on (default) – Blinks twice: off ≥ If the network indicator is blinking in blue and red, wait until the blinking stops. Wi-Fi signal strength To check the Wi-Fi signal strength where the unit is located.
- Page 26 MAC address IP address ≥ This unit will be displayed as “Panasonic ALL1C” if the device name is not set. ≥ If the network indicator is blinking in blue and red, wait until the blinking stops. - 26 -...
-
Page 27: Troubleshooting
If the problem remains unresolved, consult your dealer for instructions. Refer to the limited warranty on the “Owner’s Manual <Setup>”. Do you have the latest firmware installed? ≥ Panasonic is constantly improving the unit’s firmware to ensure that our customers are enjoying the latest technology. (l 23) General To return all settings to the factory defaults 1 Turn this unit on. - Page 28 The network indicator does not stop blinking in blue and red. ≥ The unit needs to be repaired. Consult your dealer. This unit has stopped producing operation sounds. ≥ Set the operation sound setting to on. (l 25) Firmware updates The mode indicator (amber) keeps blinking twice.
- Page 29 The device name is not changed. ≥ Turn the unit off, and then disconnect and reconnect the AC power supply cord (AC mains lead). Cannot select this unit as the output speakers. ≥ Make sure that the devices are connected to the same network as this unit.
-
Page 30: Specifications
Specifications ∫ GENERAL Power supply AC 120 V, 60 Hz For the United Kingdom and Ireland For Continental Europe AC 220 V to 240 V, 50 Hz For Australia and New Zealand Power consumption Power consumption in standby mode Approx. 2.5 W Dimensions (WkHkD) Horizontal installation 135 mmk51 mmk142 mm... - Page 31 ∫ AUDIO SECTION ANALOG AUDIO OUTPUT Stereo Pin jack Output Level (1 kHz, 0 dB) 2 Vrms Frequency Response (fs 192 kHz) 4 Hz to 80 kHz, -3dB Signal to Noise Ratio (IHF-A) (1 kHz, 0 dB, fs 192 kHz) 102 dB or more Total Harmonic Distortion Plus Noise (1 kHz, 0 dB, fs 192 kHz)
- Page 32 ≥ Specifications are subject to change without notice. ≥ Mass and dimensions are approximate. ≥ Uncompressed FLAC files may not operate correctly. Qualcomm AllPlay smart media platform is a product of Qualcomm Connected ® Experiences, Inc. Qualcomm is a trademark of Qualcomm Incorporated, registered in the United States, and other countries and used with permission.
- Page 33 (Excluding public holidays). ≥ For further support on your product, please visit our website: www.panasonic.co.uk Direct Sales at Panasonic UK ≥ Order accessory and consumable items for your product with ease and confidence by phoning our Customer Communications Centre Monday–Friday 9:00 am – 5:00 pm (Excluding public holidays).
- Page 34 Manufactured by: Panasonic Corporation Kadoma, Osaka, Japan Importer for Europe: Panasonic Marketing Europe GmbH Panasonic Testing Centre Winsbergring 15, 22525 Hamburg, Germany Panasonic Corporation of North America Two Riverfront Plaza, Newark, NJ Panasonic Corporation 07102-5490 http://www.panasonic.com Web Site: http://panasonic.net Panasonic Canada Inc.
Need help?
Do you have a question about the SH-ALL1C and is the answer not in the manual?
Questions and answers