Sign In
Upload
Download
Table of Contents
Contents
Add to my manuals
Delete from my manuals
Share
URL of this page:
HTML Link:
Bookmark this page
Add
Manual will be automatically added to "My Manuals"
Print this page
×
Bookmark added
×
Added to my manuals
Manuals
Brands
Motorola Manuals
Cordless Telephone
H101
User manual
Motorola H101 User Manual
Dect 6.0
Hide thumbs
1
2
3
Table Of Contents
4
5
6
7
8
9
10
11
12
13
14
15
16
17
18
19
20
21
22
23
24
25
26
page
of
26
Go
/
26
Contents
Table of Contents
Bookmarks
Table of Contents
Table of Contents
1 Getting Started
Connecting the Base
Installing and Charging the Handset Battery Pack
Setting the Display Language
Setting Date and Time
2 Getting to Know Your Phone
3 Using the Phone
Making a Call
Speed Dial Calling
Answering a Call
Ending a Call
Adjusting Volume
Muting a Call
Dialing from the Redial List
Dialing from the Calls List
Adding an Entry to the Phonebook
Storing a Phonebook Entry as a One Touch Number
Dialing from the Phonebook
Caller ID
Calls List
Viewing the Calls List
Saving a Number from the Calls List to the Phonebook
Deleting a Calls List Entry
Deleting Entire Calls List
Personal Settings
Intercom
Calling Another Handset
Transferring an External Call to Another Handset
Three-Party Conference Call
Setting the Dial Mode
Setting the Flash Time
Setting the Area Code
Registration
To Reset All Settings
Paging/Find Handset
4 Help
5 General Information
Important Safety Instructions
Installation Guidelines
Battery Safety Instructions
Advertisement
Quick Links
1
Installing and Charging the Handset Battery Pack
2
General Information
Download this manual
User's Guide
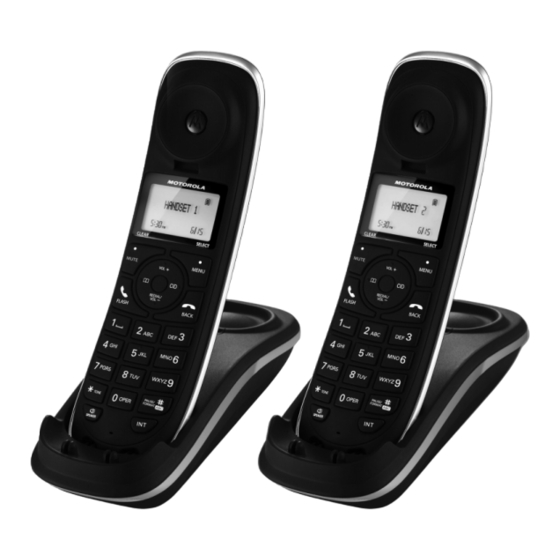
H101 / H102 / H103 / H104 / H105
DECT 6.0 Digital Cordless Phone
Warning
Use only the adapter and telephone line cord provided
in the box.
Table of
Contents
Previous
Page
Next
Page
1
2
3
4
5
Advertisement
Table of Contents
Need help?
Do you have a question about the H101 and is the answer not in the manual?
Ask a question
Questions and answers
Related Manuals for Motorola H101
Cordless Telephone Motorola MD4150 Series User Manual
2.4 ghz digital cordless telephone (75 pages)
Cordless Telephone Motorola H201 User Manual
Motorola h201; h202; h203; h204; h205 digital cordless telephone with answering system (31 pages)
Cordless Telephone Motorola H201 User Manual
Dect 6.0 digital cordless phone; dect 6.0 digital cordless phone with answering system (30 pages)
Cordless Telephone Motorola H103 User Manual
Dect 6.0 (26 pages)
Cordless Telephone Motorola Motorola O201 User Manual
(52 pages)
Cordless Telephone Motorola C401 Manual
(42 pages)
Cordless Telephone Motorola T725 EDGE Instruction Manual
(242 pages)
Cordless Telephone Motorola C6A User Manual
Digital cordless phone (39 pages)
Cordless Telephone Motorola MA580 Series User Manual
Digital 5.8ghz (53 pages)
Cordless Telephone Motorola edge 20 FUSION User Manual
(331 pages)
Cordless Telephone Motorola T720 Service Manual
Digital wireless telephone (123 pages)
Cordless Telephone Motorola one FUSION User Manual
(327 pages)
Cordless Telephone Motorola moto g 5G PLUS User Manual
(332 pages)
Cordless Telephone Motorola T201 User Manual
(38 pages)
Cordless Telephone Motorola D10 SERIES User Manual
(50 pages)
Cordless Telephone Motorola IT.5.1XI Manual
(48 pages)
This manual is also suitable for:
H103
H104
H102
H105
Table of Contents
Print
Rename the bookmark
Delete bookmark?
Delete from my manuals?
Login
Sign In
OR
Sign in with Facebook
Sign in with Google
Upload manual
Upload from disk
Upload from URL


Need help?
Do you have a question about the H101 and is the answer not in the manual?
Questions and answers