Table of Contents
Advertisement
Quick Links
Download this manual
See also:
User Manual
Advertisement
Table of Contents

Related Manuals for Motorola T725 EDGE


Summary of Contents for Motorola T725 EDGE
- Page 1 APPLICANT: MOTOROLA, INC. FCC ID: IHDT56DW1 INSTRUCTION MANUAL A preliminary draft copy of the Users Manual follows: EXHIBIT 8...
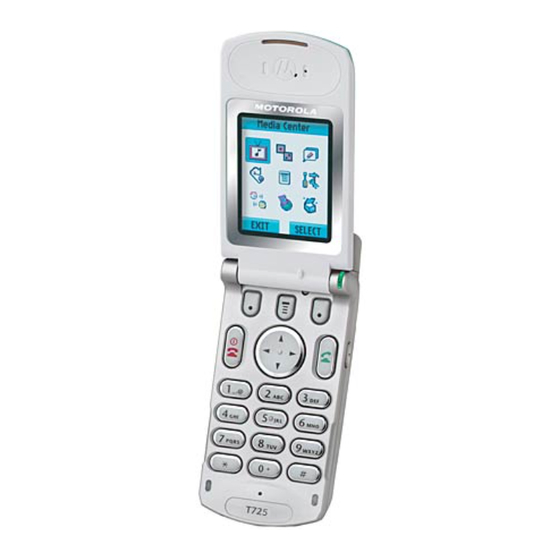
- Page 3 Welcome Welcome to the world of Motorola digital wireless communications! We are pleased that you have chosen the Motorola T725 EDGE wireless phone. Left Soft Key Menu Key Perform functions Status Light identified by left See incoming call display prompt.
- Page 4 Check It Out! Feature Description Send Send a multimedia message Multimedia with pictures, animations, and Message sounds: > Messages > Create Message > New MMS Read Message Read a new text or multimedia message that you have received: Press READ ( Store Message Go to a multimedia message Objects...
- Page 5 (United States) www.motorola.ca (Canada) MOTOROLA and the Stylized M Logo are registered in the US Patent & Trademark Office. Java and all other Java-based marks are trademarks or registered trademarks of Sun Microsystems, Inc. in the U.S. and other countries.
-
Page 6: Menu Map
Menu Map Main Menu á Phonebook Web Access • mMode Recent Calls • Web Shortcuts • Received Calls • Stored Pages • Dialed Calls • History • Notepad • Go To URL • Call Times • Browser Setup • Data Times •... - Page 7 Settings Menu Personalize Phone Status • Home Screen • My Tel. Numbers • Main Menu • Active Line * • Color Style • Battery Meter • Greeting Headset • Wallpaper • Screen Saver Car Settings Ring Styles Network • Style •...
-
Page 8: Table Of Contents
Contents Menu Map ........4 Safety and General Information . - Page 9 Using the External Display ..... . 56 Changing a Code, PIN, or Password....57 Locking and Unlocking Your Phone.
- Page 10 Transferring a Call......75 Messages ........77 Setting Up the Message Inbox .
- Page 11 Editing a Phonebook Entry ..... 113 Deleting a Phonebook Entry ....114 Sorting the Phonebook List .
- Page 12 Monitoring Phone Use ......140 Using Handsfree Features ..... . 147 Making Data and Fax Calls.
- Page 13 Index........225 Wireless Phone Safety Tips .
-
Page 14: Safety And General Information
RF energy. When you communicate with your phone, the system handling your call controls the power level at which your phone transmits. Your Motorola phone is designed to comply with local regulatory requirements in your country concerning exposure of human beings to RF energy. - Page 15 Motorola-supplied or approved clip, holder, holster, case, or body harness for this phone, if available. Use of accessories not approved by Motorola may exceed RF energy exposure guidelines. If you do not use one of the...
- Page 16 Aircraft When instructed to do so, turn off your phone when on board an aircraft. Any use of a phone must be in accordance with applicable regulations per airline crew instructions. Medical Devices Pacemakers Pacemaker manufacturers recommend that a minimum separation of 6 inches (15 centimeters) be maintained between a handheld wireless phone and a pacemaker.
- Page 17 • Pull off the road and park before making or answering a call if driving conditions so require. Responsible driving best practices may be found in the “Wireless Phone Safety Tips” at the end of this manual and at the Motorola website: www.Motorola.com/callsmart. Operational Warnings...
- Page 18 (short circuit) and become quite hot. Exercise care in handling any charged battery, particularly when placing it inside a pocket, purse, or other container with metal objects. Use only Motorola original batteries and chargers. Your battery or phone may contain symbols, defined as follows:...
- Page 19 Parents should monitor their children's use of video game or other features that incorporate flashing lights on the phones. All persons should discontinue use and consult a doctor if any of the following symptoms occur: convulsion, eye or muscle twitching, loss of awareness, involuntary movements, or disorientation.
-
Page 20: Getting Started
This label identifies an optional network, SIM card, or subscription-dependent feature that may not be offered by all service providers in all geographical areas. Contact your service provider for more information. Optional Accessories This label identifies a feature that requires an optional Motorola Original™ accessory. -
Page 21: Installing The Sim Card
Caution: Do not bend or scratch your SIM card. Avoid exposing your SIM card to static electricity, water, or dirt. Installing the Battery Your phone is designed to use only Motorola Original batteries and accessories. We recommend that you store batteries in their... -
Page 22: Charging The Battery
Charging the Battery New batteries are shipped partially charged. Before you can use your phone, you need to install and charge the battery as described below. Some batteries perform best after several full charge/discharge cycles. -
Page 23: Battery Use
Caution: To prevent injuries or burns, do not allow metal objects to contact or short-circuit the battery terminals. To maximize your battery’s performance: • Always use Motorola Original batteries and battery chargers. The phone warranty does not cover damage... - Page 24 • New batteries or batteries that have been stored for a long time may require a longer charge time. • Maintain the battery at or near room temperature when charging. • Do not expose batteries to temperatures below -10°C (14°F) or above 45°C (113°F).
-
Page 25: Attaching The Camera
Attaching the Camera Insert the optional Motorola Original™ Digital Camera into the accessory connector port at the bottom of your phone as shown. For instructions on how to take and send photos, see page 33. Turning Your Phone On Action... -
Page 26: Adjusting Volume
> Settings > Personalize. For settings details, see the chapter that starts on page 123. Adjusting Volume Volume keys Press the up or down volume keys to: • increase or decrease earpiece volume during a call • increase or decrease the ringer volume setting when the home screen is visible (flip must be open) Tip: At the lowest volume setting, press the down volume key once to switch to vibrate alert. -
Page 27: Answering A Call
Answering a Call When you receive a call, your phone rings and/or vibrates and displays an incoming call message. Press answer the call or ANSWER ( end the call and “hang up” the or close the phone when you are finished phone flip Tip: When the phone flip is active, open the phone to >... -
Page 28: Highlight Features
Highlight Features You can do much more with your phone than make and receive calls! This section describes some of your phone’s highlight features. Sending a Multimedia Message A Multimedia Messaging Service (MMS) multimedia message contains one or more slides with text and embedded media objects (including photos, pictures, animations, sounds, and/or voice records). - Page 29 Press 8 SELECT ( insert the file Tip: To insert another slide, > Insert > New Page. select Repeat steps 1 to 8 to enter contents for the new slide 9 OK ( open the recipient list Scroll to [One Time Entry] and press SELECT ( ) to enter a recipient phone number.
-
Page 30: Receiving A Multimedia Message
Receiving a Multimedia Message When you receive a multimedia message or letter, your phone displays the (message waiting) indicator and a New Message notification, and sounds an alert. Press READ ( open the message Multimedia messages that you receive can contain different media objects: •... - Page 31 When you manually enter email addresses, you must insert a comma, semicolon, or colon between each address. > Messages Find the Feature > Create Message > New Email Press 1 keypad keys enter text for the message Tip: To insert a quick note, picture, sound, or voice >...
- Page 32 Press scroll to Picture or Sounds 12 SELECT ( select the file type select the file you want 14 SELECT ( attach the file 15 BACK ( return to the email form Tip: To add more attachments, select [New Attachment] scroll to Priority scroll to Normal or Urgent (left or right)
-
Page 33: Using Photos And Pictures
Press 3 SELECT ( display a list of items you can insert scroll to Quick Note, Picture, Sounds, Voice Record, or Contact Info 5 SELECT ( select the file type select the file you want 7 SELECT ( insert the file Using Photos and Pictures You can send your photos to other wireless phone users or email addresses, assign photos to specific phonebook... - Page 34 To view a photo, picture, or animation stored on your phone: > Multimedia > Pictures Find the Feature Press scroll to the picture 2 VIEW ( view the picture view the next/previous picture up or down DETAILS ( view picture information open the Pictures Menu to perform other procedures The Pictures Menu can include the following options:...
-
Page 35: Taking And Sending A Photo
63 and page 64. Taking and Sending a Photo You can take photos with your phone using the optional Motorola Original™ Digital Camera accessory, and use them as wallpaper or screen saver images. You can also send your camera photos to others... - Page 36 picture messages. Attach the camera as described on page 23 and follow these steps: > Multimedia > Camera Find the Feature The active viewfinder image appears on your display. IMAGE Photo storage AREA memory space currently in use. Photo Viewfinder Press left or Memory Used:72%...
- Page 37 Point the camera lens at the photo subject, then: Press 1 CAPTURE ( take a photo 2 STORE ( view storage options DISCARD ( delete the photo and return to active viewfinder If you choose to store the photo, continue to step 3. scroll to Send in Message, Send to Photo Alb., Store Only, Apply as Wallpaper,...
-
Page 38: Making A Conference Call
Option Description Pictures Setup Open the setup menu to adjust picture settings. View Free Space See how much memory remains for storing pictures. Making a Conference Call Connect an active call and a call on hold so that all parties can speak to each other. Press 1 keypad keys dial the first party’s number... - Page 39 Mobile PhoneTools software, included with your phone. See the Mobile PhoneTools user’s guide for more information. Note: BVRP Mobile PhoneTools software is designed to synchronize with basic features of many popular Personal Information Management (PIM) software and hardware products.
-
Page 40: Learning To Use Your Phone
Learning to Use Your Phone See page 1 for a basic phone diagram. Using the Display The home screen is displayed when you are not on a call or using the menu. You must be in the home screen to dial a phone number. Ñ... - Page 41 Notes: • Your service provider may customize the home screen so that it looks different than the display shown above. For example, your service provider may hide the home screen menu icons to allow a better view of the wallpaper image. You can still select the menu icons when they are hidden from view.
- Page 42 The following status indicators can display: 5. Active 6. Message 4. Roam Line 3. Signal +49@ Ñ yÉ Strength 7. Battery Service Provider Level 10/15/04 2. GPRS 8. Ring Alert 1. Data Transmission 9. Location 10:08am STYLES mMode 1. Data Transmission Indicator Shows connection and data transmission status.
- Page 43 Service (GPRS) network connection. GPRS allows faster data transfer speeds. Other indicators can include: = GPRS PDP = GPRS packet context active data available 3. Signal Strength Indicator Vertical bars show the strength of the network connection. You cannot make or receive calls when the (no signal) indicator or transmit) indicator is displayed.
-
Page 44: Using The 5-Way Navigation Key
6. Message Indicator Displays when you receive a new message. Indicators can include: = text message = voicemail message = voicemail and = answering text message machine When you enter a multimedia message, a number in this location indicates the size of the message. 7. -
Page 45: Using Menus
• highlight menu items • change feature settings • play games Press the center select button to select a highlighted menu item. The center select button usually performs the same function as the right soft key ( Using Menus From the home screen, press to enter the main menu. - Page 46 Press to scroll to and highlight a menu feature icon in the main menu. The following icons represent features that may appear in the main menu, depending on your service provider and service subscription options. Menu Menu Icon Feature Icon Feature Games &...
- Page 47 Selecting a Feature Option Some features require you to select an option from a list: yÉ Dialed Calls 10) John Smith Highlighted 9) Lisa Owens Option 8) Adda Thomas 7) Jack Bradshaw Press BACK ( Press VIEW ( 6) Dave Thompson to go back to to view details 5) John Smith...
-
Page 48: Entering Text
Entering Text Some features require you to enter information. yÉ Entry Details Name: John Smith Highlighted Press Category: General Option scroll down to No.: 2125551212 other options. Type: Work Press Store To: Phone CHANGE ( ) to Voice Name: enter or edit Speed No.: 2 #(P) information. - Page 49 Choosing a Text Entry Method Multiple text entry methods make it easy for you to enter names, numbers, and messages. The method you select remains active until you select another method. Press in any text entry screen to change to 1 of the following entry methods: Primary The primary text entry method (see...
- Page 50 Using Capitalization Press in any text entry screen to change text case. The following indicators show capitalization status: = no capital letters = capitalize next letter only = all capital letters Setting Up a Text Entry Method > Entry Setup from any text entry screen. Select Press Primary Setup or Secondary Setup, and choose: iTAP...
- Page 51 7 7 6 4 For example, if you press , letter combinations that match your keypresses display: Press up to yÉ accept Program. Prog Press right to highlight Press DELETE ( another to delete last combination. letter. Press Prog Proh Spoi enter Prog and a DELETE SELECT...
- Page 52 Press highlight the combination you left or right want 3 SELECT ( lock a highlighted combination You can press keypad keys to add more letters to the end of the combination. enter the highlighted combination when it spells a word A space is automatically inserted after the word.
- Page 53 through additional symbols as shown in the “Character Chart” on page 52. Press 1 A keypad key 1 select a letter, number, or or more times symbol 2 Keypad keys enter remaining characters Tip: Press right to accept a word completion, or insert a space.
- Page 54 When you enter 3 or more characters in a row, your phone may guess the rest of the word. For example, if you enter prog you might see: Press right yÉ to accept This is a prog Program, or press reject it and enter a space after prog.
- Page 55 change text case, for capital letters enter a space (hold to enter a return) change text entry method (hold for default) Note: This chart may not reflect the exact character set available on your phone. In an email address or URL editor, first shows the common characters for that editor.
- Page 56 Using the Symbol Method In a text entry screen, press to switch entry methods until the (symbol) indicator displays. Press 1 Keypad keys show possible symbol (1 press per combinations at the bottom of symbol) the display highlight the combination you left or right want 3 SELECT (...
- Page 57 ( ) [ ] { } ¿ ¡ ~ < > = $ £ ¥ # % * + - x * / \ [ ] = > < # § enter a space (hold to enter a return) change text entry method (hold for default) Note: This chart may not reflect the exact character set available on your phone.
-
Page 58: Using The Status Light
Using the Status Light Status light The status light shows when you have an incoming call or message, or when your phone is roaming (using a non-home system). Indication State alternating red/green incoming call flashing green in service, home system flashing yellow roaming, non-home system flashing red... -
Page 59: Changing A Code, Pin, Or Password
Changing a Code, PIN, or Password Your phone’s 4-digit unlock code is originally set to 1234, and the 6-digit security code is originally set to 000000. We recommend that you change them to prevent others from accessing your personal information. The unlock code must contain 4 digits, and the security code must contain 6 digits. -
Page 60: If You Forget A Code, Pin, Or Password
Press 1 keypad keys enter your unlock code 2 OK ( lock the phone Unlocking Your Phone Tip: Your phone’s unlock code is originally set to 1234. At the Enter Unlock Code prompt: Press 1 keypad keys enter your unlock code 2 OK ( unlock your phone Setting Your Phone to Lock Automatically... -
Page 61: Using The Phonebook
3 OK ( submit your security code If you forget your security code, take your phone to a Motorola Authorized Service Center to have the code read. If you forget your SIM card PIN code or PIN2 code, contact your service provider. - Page 62 the entry’s name (within 2 seconds). When prompted, press and release the voice key and repeat the name. Press DONE ( ) to store the voice name. Note: This option is not available for entries stored on the SIM card. Dialing a Number >...
-
Page 63: Setting Up Your Phone
Setting Up Your Phone Storing Your Name and Phone Number To store or edit your name and phone number information on your SIM card: > Settings > Phone Status Find the Feature > My Tel. Numbers Shortcut: Press from the home screen to edit your name and phone number. -
Page 64: Setting Answer Options
To set an alert style: > Settings > Ring Styles Find the Feature > Style Press scroll to the alert style 2 SELECT ( select the alert style Each alert style contains settings for specific event alerts, ringer ID, and ringer and keypad volume. To change these >... -
Page 65: Setting A Wallpaper Image
Setting a Wallpaper Image You can set a photo, picture, or animation as a wallpaper (background) image in your phone’s home screen. > Settings > Personalize Find the Feature > Wallpaper Press scroll to Picture 2 CHANGE ( open the picture viewer scroll to a picture/animation up or down Scroll to (None) to turn off the... -
Page 66: Setting A Screen Saver Image
Setting a Screen Saver Image You can set a photo, picture, or animation as a screen saver image. The screen saver image displays when the flip is open and no activity is detected for a period of time. The image shrinks to fill the display, if necessary. -
Page 67: Setting Display Brightness
Setting Display Brightness > Settings > Initial Setup Find the Feature > Brightness Setting Display Color Style You can select the color palette that your phone uses to display indicators, highlights, and soft key labels. > Settings > Personalize Find the Feature >... -
Page 68: Calling Features
Calling Features For basic instructions on how to make and answer calls, see page 24. Changing the Active Line Change the active phone line to make and receive calls from your other phone number. Note: This feature is available only for dual-line-enabled SIM cards. -
Page 69: Using Caller Id
Using Caller ID Incoming Calls Calling line identification (caller ID) displays the phone number for incoming calls in your phone’s external and internal displays. The phone displays the caller’s name (and picture, if available) when the name is stored in your phonebook, or Incoming Call when caller ID information is not available. -
Page 70: Turning Off A Call Alert
Turning Off a Call Alert You can turn off your phone’s incoming call alert before answering the call. Press either volume key turn off the alert Calling an Emergency Number Your service provider programs 1 or more emergency phone numbers, such as 911, that you can call under any circumstances, even when your phone is locked or the SIM card is not inserted. -
Page 71: Viewing Recent Calls
Viewing Recent Calls Your phone keeps lists of the calls you recently received and dialed, even if the calls did not connect. The lists are sorted from newest to oldest entries. The oldest entries are deleted as new entries are added. Shortcut: Press from the home screen to view the dialed calls list. -
Page 72: Returning An Unanswered Call
The Last Calls Menu can include the following options: Option Description Store Create a phonebook entry with the number in the No. field. Delete Delete the entry. Delete All Delete all entries in the list. Hide ID/Show ID Hide or show your caller ID for the next call. -
Page 73: Using The Notepad
• X Missed Calls, where X is the number of missed calls Press 1 VIEW ( see the received calls list select a call to return make the call Using the Notepad The most recent set of digits entered on the keypad are stored in your phone’s notepad memory. -
Page 74: Attaching A Number
Attaching a Number While dialing (with digits visible in the display): Press > Attach Number attach a number from the phonebook or recent calls lists Calling With Speed Dial Each entry you store in your phonebook is assigned a unique speed dial number. Tip: To see an entry’s speed dial number, press >... -
Page 75: Using Voicemail
Using Voicemail Voicemail messages that you receive are stored on the network. To listen to your messages, you must call your voicemail phone number. Note: Your service provider may include additional information about using this feature. Listening to Voicemail Messages >... -
Page 76: Using Call Waiting
Storing Your Voicemail Number If necessary, use the following procedure to store your voicemail phone number on your phone. Usually, your service provider has already done this for you. > Messages Find the Feature > VoiceMail Setup Press 1 keypad keys enter your voicemail number 2 OK ( store the number... -
Page 77: Putting A Call On Hold
Press answer the new call 2 SWITCH ( switch between calls LINK ( connect the 2 calls > End Call On Hold end the call on hold You must turn on call waiting to use the feature. To turn call waiting on or off: >... - Page 78 Press 1 keypad keys dial the number where you are transferring the call call the number and speak to the person who answers open the menu scroll to Transfer 5 SELECT ( select Transfer 6 OK ( confirm the transfer Do Not Announce the Call Transfer >...
-
Page 79: Messages
Messages You can send and receive messages containing a variety of media objects, including text, photos, pictures, animations, sounds, and voice records. Setting Up the Message Inbox You must set up your message inbox before you can send and receive messages. Note: Usually, your service provider has already set up the message inbox for you. - Page 80 Option Description • Download: Download messages automatically, download only selected messages (see page 85), or download only when on your home network. • Filter: Reject incoming multimedia messages and letters from specific senders. • Expire After: Number of days your network should attempt to send undelivered multimedia messages and letters.
-
Page 81: Sending A Text Message
Option Description Email Gateway Port number for the email gateway that handles your outgoing email messages (required to send a text message to an email address). SMS Alert Activate or deactivate reminders and alerts for Short Message Service (SMS) text messages that you receive during a call. -
Page 82: Sending A Quick Note Text Message
Press Scroll to [One Time Entry] and press SELECT ( ) to enter a recipient phone number. After you enter the number, press OK ( ) to store it. Scroll to phonebook entries and press ADD ( ) to select them. -
Page 83: Sending A Multimedia Message
Press scroll to the quick note 2 READ ( read the quick note open the Quick Note Menu to perform other procedures The Quick Note Menu can include the following options: Option Description Create a new quick note. Edit Edit the quick note. Delete Delete the quick note. - Page 84 picture above the text. Place the cursor in the second half of the slide text to insert a picture below the text. > Messages Find the Feature > Create Message > New MMS Press 1 keypad keys enter slide text open the menu scroll to Insert 4 SELECT (...
- Page 85 Press Scroll to [One Time Entry] and press SELECT ( ) to enter a recipient phone number. After you enter the number, press OK ( ) to store it. Scroll to phonebook entries and press ADD ( ) to select them.
-
Page 86: Viewing The Status Of Sent Messages
Option Description Set Page Timing Set the number of seconds each slide is displayed. Next Page Advance to next slide. Previous Page Go back to previous slide. Entry Mode Select the text entry method. Entry Setup Set primary and secondary text entry methods. -
Page 87: Receiving A Message
Receiving a Message When you receive a message, your phone displays the (message waiting) indicator and a New Message notification, and sounds an alert. Note: DETAILS appears for MMS messages if Download is set to Defer (see page 77) Press READ ( open the message DETAILS (... -
Page 88: Reading, Locking, Or Deleting A Message
• A sound file begins playing when its slide is displayed. Use the volume keys to adjust the volume as the sound file plays. Note: In a multimedia letter, you may have to highlight an indicator embedded in the text to play a sound file. •... - Page 89 Press scroll to the message 2 READ ( open the message open the Message Menu to perform other procedures The Message Menu can include the following options: Option Description Call Back Call the number in the message header or embedded in the message.
-
Page 90: Storing An Object From A Message
Option Description Store Display a list of storable items, including inserted and attached files, and the sender’s number or email address. Delete Delete the message. Delete All Delete all inbox messages. Create Message Open a new message. Setup Open the message inbox setup menu. -
Page 91: Reading Browser Messages
Press highlight the object filename, if necessary 7 STORE ( view storage options scroll to Store Only, Apply as Wallpaper, Apply as Screen Saver, Apply as Ring Tone, or Apply as Power Up Animation (only options appropriate to the file type are listed) 9 SELECT ( perform the storage option of... - Page 92 To view your browser messages at any time: > Messages Find the Feature > Browser Msgs Press scroll to a message 2 SELECT ( open the message...
-
Page 93: Email
Email You can send and receive email messages with your wireless phone. Setting Up the Email Inbox You must set up your email inbox before you can send and receive email messages. Note: Usually, your service provider has already set up the email inbox for you. - Page 94 provider. Some settings may not be available for all phone models. Setting Description ISP settings Connection type: Select CSD or GPRS. Dial-Up Number: Phone number for a CSD connection. APN address: Access point name for a GPRS connection. User name: User name for specified connection.
- Page 95 Setting Description Receiving port Port number for receiving host. Return address Your email address. Name Name to be inserted before the return address, if desired. Cleanup Number of days you want to keep messages in the inbox, or number of messages you want to keep.
-
Page 96: Sending An Email Message
Setting Description Auto signature Signature to be appended to your outgoing email messages. Security Use SSL for sending: Select Yes to setup SSL connection with sending host. Warnings in Background: Select to proceed or break connection if SSL warning displays when receiving messages in background. - Page 97 When you manually enter email addresses, you must insert a comma, semicolon, or colon between each address. > Messages Find the Feature > Create Message > New Email Press 1 keypad keys enter text for the message Tip: To insert a quick note, picture, sound, or voice >...
- Page 98 Press scroll to Picture or Sounds 12 SELECT ( select the file type select the file you want 14 SELECT ( attach the file 15 BACK ( return to the email form Tip: To add more attachments, select [New Attachment] scroll to Priority scroll to Normal or Urgent (left or right)
-
Page 99: Receiving An Email Message
Press 3 SELECT ( display a list of items you can insert scroll to Quick Note, Picture, Sounds, Voice Record, or Contact Info 5 SELECT ( select the file type select the file you want 7 SELECT ( insert the file Receiving an Email Message Email messages that you receive are stored on your service provider’s email server until you download them to... -
Page 100: Reading, Locking, Or Deleting An Email Message
Tip: New email messages are completely downloaded to your phone. With the IMAP4 protocol, if message size is greater than the Size restriction setting, the email message header is downloaded instead. While downloading a series of messages, you can press END ( ) to end the connection with the email server when downloading of currently transferred message is complete. - Page 101 Press scroll to the message 2 READ ( open the message 3 BACK ( close the message REPLY ( compose and send a reply open the Email Msg Menu to perform other procedures The Email Msg Menu can include the following options: Option Description Reply...
-
Page 102: Manually Sending And Receiving Email
Option Description Store Display a list of items that can be stored, including the sender’s number or email address. Delete Delete the message. Delete All Delete all email inbox messages. Create Email Open a new email message. Send/Receive Mail Connect to your email service provider to send and receive new email. -
Page 103: Calling A Phone Number In An Email Message
Calling a Phone Number in an Email Message Press highlight the phone number in the message 2 CALL ( call the number Sending Email to an Embedded Email Address Press highlight the address in the message 2 MAIL TO ( open a new email message, with the email address in the To field... -
Page 104: Creating Personal Folders
Creating Personal Folders You can create up to 5 personal folders to help organize your email. The email inbox lists the inbox folder first, followed by your personal folders in alphabetical order. > Messages > Email Msgs Find the Feature >... -
Page 105: Deleting A Personal Folder
Press scroll to the folder 2 SELECT ( select the folder 3 YES ( confirm that you want to rename the folder 4 keypad keys enter the new folder name 5 OK ( save the folder Deleting a Personal Folder >... -
Page 106: Setting Up Your Phonebook
Setting Up Your Phonebook You can store a list of names and phone numbers or email addresses in your phone’s electronic phonebook. > Phonebook To see the names in your phonebook, press from the home screen. Scroll to a name and press VIEW ( to view the following details for the phonebook entry. -
Page 107: Creating A Phonebook Entry
Creating a Phonebook Entry To store a phone number or email address in the phonebook: > Phonebook Find the Feature > New > Phone Number or Email Address Shortcut: Enter a phone number in the home screen, then press STORE ( ) to create a phonebook entry with the number in the No. - Page 108 Option Description No. or Email Specify the entry’s phone number or email address (maximum 32 characters). Type Set the entry type. Note: The Type option is not available for email entries, or for entries stored on the SIM card. Store To Set the entry’s physical storage location (Phone or SIM).
-
Page 109: Creating A Group Mailing List
Option Description Picture Assign a picture caller ID photo or picture to the entry. Your phone displays the picture when you receive a call from this phone number. Note: The Picture option is not available for entries stored on the SIM card. - Page 110 A name is required for a mailing list entry. The mailing list must contain at least 1 member. You can enter the following information for a mailing list entry. Option Description Name Specify the mailing list name. Tip: Press to select a text entry method.
-
Page 111: Storing A Pin Code With A Phone Number
Storing a PIN Code With a Phone Number You can store a PIN code with the phone number for calls that require additional digits (for example, to make a calling card call, or to retrieve voicemail or answering machine messages). Insert 1 or more of the following characters in the dialing sequence to ensure that the number dials and connects properly: Press... -
Page 112: Recording A Voice Name For A Phonebook Entry
Press > Insert Wait insert a w (wait) character Your phone dials the preceding digits, waits for the call to connect, then prompts you for confirmation before it dials the remaining digit(s). > Insert 'n' insert an n (number) character Your phone prompts you for a number before dialing the call. -
Page 113: Dialing A Phonebook Entry
Note: You cannot record a voice name for an entry stored on the SIM card. Tip: Make your recording in a quiet location. Hold the phone about 4 inches (10 centimeters) from your mouth, and speak directly into the phone in a normal tone. -
Page 114: Storing Longer Numbers
Press 1 keypad key letter jump to entries that begin with that letter (optional) scroll to the entry make the call Voice Dial Press and release the voice key and say the entry’s voice name (within 2 seconds). Storing Longer Numbers A phonebook number can contain a maximum of 32 digits and characters. -
Page 115: Editing A Phonebook Entry
Action 2 Create a second phonebook entry to store the next part of the dialing sequence (for example, the country code and phone number for an international call). 3 Repeat step 2 as necessary to store the entire dialing sequence. (For example, create a third phonebook entry to store your calling card number and PIN number.) To dial a dialing sequence stored as multiple phonebook... -
Page 116: Deleting A Phonebook Entry
Press scroll to the entry Tip: Press to open the Phonebook Menu to perform various procedures on the entry. 2 VIEW ( view entry details 3 EDIT ( edit the entry Deleting a Phonebook Entry > Phonebook Find the Feature Press scroll to the entry open the Phonebook Menu... - Page 117 Press open the Phonebook Menu scroll to Setup 3 SELECT ( select Setup scroll to Sort by 5 CHANGE ( select Sort by scroll to Name, Speed No., Voice Name, or Email 7 SELECT ( select the sort order If you select Speed No., Voice Name, or Email, the procedure is complete.
-
Page 118: Setting The Primary Number For A Phonebook Entry
Setting the Primary Number for a Phonebook Entry When you enter multiple phone numbers for the same name, you can specify the primary number. > Phonebook Find the Feature Press scroll to the entry open the Phonebook Menu scroll to Set Primary 4 SELECT ( select Set Primary scroll to the number you want... - Page 119 Press scroll to All, Business, Personal, General, VIPs, or another category that you created 2 SELECT ( select the category view 3 DONE ( set the category view Note: The phonebook category view is reset to All each time you turn the phone on. Creating a New Category Your phone includes several predefined phonebook categories.
- Page 120 Option Description Members Open the list of phonebook entries that you can add or remove from the category. Ringer ID Set a distinctive ringer alert for the category. Your phone uses the alert to notify you when you receive a call from an entry in this category.
- Page 121 Deleting a Category > Phonebook Find the Feature > Categories Press scroll to the category open the Category Details menu scroll to Delete 4 SELECT ( delete the category 5 YES ( confirm the deletion Notes: • You cannot delete the All or General categories. •...
-
Page 122: Copying Entries Between The Phone And Sim Card
Press 4 INSERT ( insert the category 5 DONE ( store the reordered category list Note: You cannot move the All category. All always remains the first entry in the category view list. Copying Entries Between the Phone and SIM Card Note: This does not delete the original entries. -
Page 123: Checking Phonebook Capacity
Checking Phonebook Capacity You can see how much memory space remains for storing phonebook and datebook entries on the phone, and how many more phonebook entries you can store on the SIM card. > Phonebook Find the Feature Press open the Phonebook Menu scroll to Phone Capacity or SIM Capacity 3 SELECT (... -
Page 124: Synchronizing Phonebook Entries
Synchronizing Phonebook Entries You can synchronize phonebook entries between your phone and computer or hand-held device with BVRP Mobile PhoneTools software, included with your phone. See the Mobile PhoneTools user’s guide for more information. Note: Mobile PhoneTools software is designed to synchronize with basic features of many popular Personal Information Management (PIM) software and hardware products. -
Page 125: Personalizing Your Phone
Personalizing Your Phone Personalizing an Alert Style You can change the alerts that notify you of the following events: incoming calls, text messages, voicemail messages, data calls, fax calls, alarms, and reminders. Any changes you make are applied to the current alert style. -
Page 126: Setting Ringer Or Keypad Volume
Note: To assign a ringer ID to a new or existing phonebook entry, see page 105. > Settings > Ring Styles Find the Feature > Style Detail > Ringer IDs Note: Style represents the current alert style. Press scroll to On or Off 2 SELECT ( select the option Setting Ringer or Keypad... -
Page 127: Setting Reminders
Setting Reminders A reminder is an alert that rings or vibrates at regular intervals to notify you about a message that you have received. > Settings > Ring Styles Find the Feature > Style Detail > Reminders Note: Style represents the current alert style. Press scroll to Beep or Vibrate to set the reminder alert type, or Off... -
Page 128: Selecting The Clock View
Press scroll to Left Justified or Centered 2 SELECT ( select the text layout Selecting the Clock View You can display an analog clock or a digital time readout in the home screen. > Settings > Personalize Find the Feature >... -
Page 129: Personalizing Soft Keys And Menu Icons
Personalizing Soft Keys and Menu Icons You can change the menu feature icons and soft key labels (left and right ) that display in the home screen, to access different main menu items from the home screen. > Settings > Personalize Find the Feature >... -
Page 130: Personalizing The Menu
Personalizing the Menu You can reorder the items in your phone’s main menu. > Settings > Personalize Find the Feature > Main Menu > Reorder Press scroll to a menu item 2 GRAB ( grab the menu item move the item to a new location in the menu 4 INSERT ( insert the menu item... -
Page 131: Resetting All Options
Resetting All Options Reset all options back to their original factory settings, except for the unlock code, security code, and lifetime timer. > Settings > Initial Setup Find the Feature > Master Reset Clearing All Stored Information Reset all options back to their original factory settings, except for the unlock code, security code, and lifetime timer, erase all downloaded pictures, animations and sound files, and clear all user settings and entries, except... - Page 132 Standard Shortcuts The following shortcuts are preprogrammed on your phone. You cannot edit or delete these shortcuts. Task Shortcut Change your phone’s Open the flip, then press ringer alert setting. the down volume key (at lowest volume setting) to switch to vibrate call alert.
- Page 133 Tip: Make your recording in a quiet location. Hold the phone about 4 inches (10 centimeters) from your mouth, and speak directly into the phone in a normal tone. Action 1 Press to enter the menu system. 2 Press to scroll to the menu item. 3 Press and hold to open the shortcut editor.
- Page 134 Using a Voice Shortcut Action 1 Press to open the menu. 2 Press and release the voice key and say the shortcut’s name (within 2 seconds) to go to the menu item with that shortcut name. Editing or Deleting a Shortcut The shortcut list is sorted by key.
- Page 135 Option Description Delete Delete the shortcut. Delete All Delete all shortcuts.
-
Page 136: Getting More Out Of Your Phone
Getting More Out Of Your Phone Forwarding Calls You can forward your phone’s incoming voice, fax, and/or data calls directly to another phone number. Setting Up or Canceling Call Forwarding The forwarding options for voice, fax, or data calls are: Option Description All Calls... - Page 137 Press scroll to the type of calls you want to forward Scroll to Cancel All to cancel all call forwarding. 2 SELECT ( view call forwarding details scroll to Forward 4 CHANGE ( select Forward scroll to a forwarding option 6 SELECT ( store the option scroll to To (for Detailed...
-
Page 138: Tty Operation
Checking Call Forwarding Status Your network may store call forwarding status for you. To confirm the network call forwarding settings: > Settings > Call Forward Find the Feature > Forward Status Press scroll to Voice, Fax, or Data 2 View ( confirm the network setting TTY Operation You can use an optional TTY device with your... - Page 139 Setting TTY Mode When you set your phone to a TTY mode, it operates in that mode whenever the TTY device is connected. > Settings > Initial Setup Find the Feature > TTY Setup Press scroll to the TTY mode 2 SELECT ( select the TTY mode The TTY Setup menu can include the following options:...
-
Page 140: Using Fixed Dialing
Using Fixed Dialing When you turn on fixed dialing, you can only call numbers stored in the fixed dial list. Use this feature to limit outgoing calls to a predefined list of numbers, country codes, area codes, or other prefixes. Turning Fixed Dialing On or Off >... -
Page 141: Using Service Dialing
Using Service Dialing Dial preprogrammed numbers stored on your SIM card. Your service provider may program your SIM card with numbers for services such as taxi companies, restaurants, and hospitals. > Office Tools Find the Feature > Dialing Services > Service Dial Using DTMF Tones You can send numbers to the network as Dual Tone Multi-Frequency (DTMF) tones during a call. -
Page 142: Monitoring Phone Use
Sending DTMF Tones Using the Keypad Press the number keys to send the numbers as DTMF tones during a call. Note: When sending long tones, you may have to enter a single short keypress first to put the phone in DTMF mode. Sending Stored Numbers During a call, highlight a number in the phonebook or recent calls lists, then:... - Page 143 To view a call timer: > Recent Calls > Call Times Find the Feature Select 1 of the following options: Option Description Last Call Approximate time spent on the last dialed or received call. You cannot reset this timer. Dialed Calls Approximate total time spent on dialed calls since the last time you reset this timer.
- Page 144 Using a Timer During a Call You can set a timer to beep at selected intervals during a call, and display different types of information during a call. > Settings > In-Call Setup Find the Feature > In-Call Timer Select 1 of the following Beep options: Option Description 60 Seconds...
- Page 145 mMode also may use a GPRS connection to upload and download data from the Internet. This is an example of an internal data session. Your phone tracks, in 1-minute increments, the approximate time spent and approximate volume of data transferred during these data sessions. The amount of data session time and data transfer volume you track on your resettable data timers and data volume meters may not equal the amount of data...
- Page 146 Option Description Internal Data Approximate time spent on the Session last internal data session. You cannot reset this timer. Total Time Approximate total time spent on the last external and internal data sessions. You cannot reset this timer. To view or reset cumulative timers for all data sessions: >...
- Page 147 Data Volume Meters You can view the volume of data transferred during the most recent data session, view the total amount of data transferred for all data sessions, and reset the All Data Sessions volume meters. To view volume meters for the last data session: >...
- Page 148 To view or reset cumulative volume meters for all data sessions: > Recent Calls Find the Feature > Data Volumes > All Data Sessions Select 1 of the following options: Option Description External Data View data sent, data received, Session and total volume of data sent and received for all external data sessions since the last time you...
-
Page 149: Using Handsfree Features
Using Handsfree Features You can purchase an optional Motorola Original™ handsfree car kit, speakerphone, or headset for your phone. These accessories provide alternative ways for you to use your phone without using your hands. Note: The use of wireless devices and their accessories may be prohibited or restricted in certain areas. - Page 150 Press scroll to On or Off 4 SELECT ( confirm the setting Voice Dial From Headset If your headset has a send/end key, this feature enables you to press the send/end key to voice dial a call from the headset. >...
- Page 151 Power-Off Delay When connected to a car kit, you can set your phone to stay on for a period of time after you switch off the ignition. This prevents the phone from draining your vehicle battery, but leaves the phone on long enough that you do not have to re-enter your unlock code when making short stops.
-
Page 152: Making Data And Fax Calls
PDA with BVRP Mobile PhoneTools software, included with your phone. Making a Cable Connection Installing the Software To transfer data between your phone and computer, you must install the software included with the Motorola... - Page 153 Original data kit. See the data kit user’s guide for more information. Attaching the Cable Use a Motorola Original serial cable or Motorola Original USB cable to connect your phone to the external device. Note: Not all devices are compatible with a cable connection.
- Page 154 USB Cable Action 1 Plug the end of the cable with the Motorola logo into the phone’s accessory connector port. Make sure that the logo and the phone are both facing you. 2 Plug the other end—the USB connection—into the USB port on the device.
- Page 155 Sending a Data or Fax Call Use this procedure to send data or a fax from a connected computer or hand-held device using a CSD or GPRS network connection. Action 1 Make sure that the phone is connected and powered on. 2 Open the application (such as dial-up-networking or fax) on your computer, and place the call through the application.
- Page 156 Ending the Data/Fax Connection When the data or fax transfer is complete, end the call from the connected device to close the connection. Making a Talk Then Fax Call You can place a call where you talk and then send a fax to the same phone number within the same call.
-
Page 157: Adjusting Network Settings
Adjusting Network Settings Your service provider registers your phone to its network. In some situations, such as using the phone as a modem or connecting it to a TTY device, you may need to change the network registration. Note: Some settings and/or options described in this section may not be available for all phone models. - Page 158 Press 2 VIEW ( view network details 3 REGISTER ( register with the network Changing Network Setup Values Set how your phone searches for a network connection. Note: Actual field names and values may vary depending on the technologies available to your service provider. >...
- Page 159 Network search Speed options: Option Description Slow Slowest network search and repeat rate. Medium Medium search/repeat. Fast Fast search/repeat. Continuous Continuous search until a network is found. Setting Preferred Networks You can create a preferred networks list, so that the phone searches for networks by your preference.
- Page 160 Adding an Entry to the Preferred Network List > Settings > Network Find the Feature > My Network List > Add Press 1 BROWSE ( browse available networks OK ( enter the network ID number 2 OK ( confirm the new entry Editing a Preferred Network List Entry >...
- Page 161 Press scroll to the entry open the network menu scroll to Delete 4 SELECT ( select Delete 5 YES ( confirm the deletion Adjusting Service Tones You can set your phone to beep each time the network registration status changes. >...
-
Page 162: Monitoring Battery Charge
Monitoring Battery Charge To view a detailed battery charge meter: > Settings > Phone Status Find the Feature > Battery Meter... -
Page 163: Personal Organizer
Personal Organizer Datebook The datebook is a calendar that you can use to schedule and organize events such as appointments and meetings. Note: You must set the correct time and date to use the datebook. To schedule or review datebook events: >... - Page 164 right corner of the date box indicates that 1 or more events are scheduled for the day. Month (press Days of the yÉ October 2003 Week select previous Dates of the month or next Month (press month) 10 11 to scroll to 12 13 14 15 17 18 and select day)
- Page 165 Day View Scroll to a day and press the center select key (S) to see the day’s events. Untimed Event Day of Week yÉ THU 20-NOV • Joe's Birthday Reminder Alarm 8:00A Marie, meeti... Events 9:00A Jim meeting 9:30A conference c... Scroll down for 11:00A status report more events.
- Page 166 Creating a Datebook Event A title is required for a datebook event. All other information is optional. Notes: • You must create an event to use the reminder alarm. • Your phone must be turned on for the reminder alarm to sound.
- Page 167 Changing Event Information > Datebook Find the Feature Press scroll to a day left, right, up, or down select a day center scroll to the event 4 VIEW ( display the event view 5 EDIT ( edit the event scroll to the information you want to change 7 CHANGE ( edit the information...
- Page 168 Press 7 YES ( confirm the copy Your phone assumes that you want to change the date, and displays the Date field. 8 keypad keys enter the date information move to month, day, and year ) or the right 10 DONE ( save the copy of the event scroll to and edit event information, if necessary...
- Page 169 Viewing and Dismissing an Event Reminder When you set a reminder alarm for an event, the phone displays an event reminder and sounds a reminder alarm. To view or dismiss an event reminder: Press VIEW ( view the event Press to scroll through the event details.
-
Page 170: Alarm Clock
Note: Mobile PhoneTools software is designed to synchronize with basic features of many popular Personal Information Management (PIM) software and hardware products. Alarm Clock Your phone has an alarm clock with 5 separate alarms that you can set and use when the phone is powered on. Each alarm can be configured with a name, time, and alert tone. - Page 171 Enabling/Disabling an Alarm Alarms that you set are listed by name on the Alarm Clock menu. An active alarm is identified by an ã (alarm) indicator. To enable or disable an alarm: > Office Tools > Alarm Clock Find the Feature Press scroll to the alarm 2 ENABLE (...
-
Page 172: Voice Records
The alarm rings for 3 minutes, then snoozes for 8 minutes. The alarm repeats this cycle for up to 90 minutes, or until you perform 1 of the following procedures. Press turn off the alarm DISABLE ( ) or SNOOZE ( turn off the alarm for 8 minutes The alarm is reactivated at... - Page 173 Tip: Make your recording in a quiet location. Hold the phone about 4 inches (10 centimeters) from your mouth, and speak directly into the phone in a normal tone. Action 1 Press and hold the voice key. The phone sounds an alert tone and begins recording.
- Page 174 2 PLAY ( play the recording When you connect an optional Motorola Original™ headset or FM Stereo Radio Headset accessory to your phone, playback is automatically routed to the headset. Tip: You can play a recording while taking a call. It will not be transmitted to the other party.
- Page 175 Voice Record Controls Stop playback & Stop playback, go to Voice view options to Records Menu. unlock or delete voice record. Stop playback & return to voice Press right to record list. fast forward 3 seconds. Press right and hold to Raise or lower fast forward to playback...
- Page 176 Press scroll to the recording open the Voice Records Menu scroll to Lock or Unlock 4 SELECT ( lock or unlock the recording To lock or unlock a recording during playback: Press open the Voice Records Menu scroll to Lock or Unlock 3 SELECT ( lock or unlock the recording Playback stops when you lock or unlock a recording.
-
Page 177: Calculator
Notes: • You cannot delete a locked recording. • You cannot recover a deleted recording. Calculator You can use your phone as a calculator and currency converter. Selected Entered yÉ Calculator Function Numbers Use keypad to Press enter number or select function. - Page 178 Press c to clear the calculation. Press ce (clear entry) to clear the last entry when performing a calculation. to open the Calculator Menu to perform the following Press functions: Function Description Change the entry’s sign (positive/negative). Store the value in memory (overwrites values already stored).
- Page 179 Press scroll to Convert Currency 6 SELECT ( perform the conversion...
-
Page 180: Security
Security Locking the SIM Card Your Personal Identification Number (PIN) code protects the information stored on your SIM card. When the SIM card is locked, you must enter your SIM card PIN code to unlock the SIM card each time you turn on the phone or insert the SIM card in the phone. - Page 181 Caution: If the unblocking attempt is tried unsuccessfully 10 times, the SIM card is permanently disabled and your phone displays SIM Disabled. Press * * 0 5 * open the PIN unblocking editor 2 keypad keys enter the PUK code 3 OK ( submit the PUK code 4 keypad keys...
-
Page 182: Locking And Unlocking Applications
unblocking key (PUK2) code, which you can obtain from your service provider. Press * * 0 5 2 open the PIN2 unblocking editor 2 keypad keys enter the PUK2 code 3 OK ( submit the PUK2 code 4 keypad keys enter a new SIM card PIN2 code Note: The SIM PIN2... - Page 183 Press 1 keypad keys enter your unlock code 2 OK ( open the lock application menu scroll to the application 4 CHANGE ( select the application scroll to Locked or Unlocked 6 SELECT ( select Locked or Unlocked...
-
Page 184: News And Entertainment
News and Entertainment mMode mMode lets you access Web pages and Web-based applications on your phone. Contact your service provider to set up access, if necessary. Note: Your phone may use a high-speed General Packet Radio Service (GPRS) network connection. This type of connection is identified by a (GPRS) indicator in the home screen that disappears when you start an mMode... - Page 185 Shortcut: Press mMode ( ) in the home screen to start an mMode session. If you are unable to establish a network connection with mMode, contact your service provider. Interacting With Web Pages Press scroll through text, or highlight a selectable item SELECT ( select the highlighted item keypad keys,...
- Page 186 Storing a Picture File Press 1 STORE ( view storage options scroll to Store Only, Apply as Wallpaper or Apply as Screen Saver 3 SELECT ( perform the storage option of your choice Storing a Sound File Press 1 STORE ( view storage options scroll to Store Only or Set As Ring Tone...
- Page 187 Selecting or Creating a Web Session Use this feature to select or create a Web session, or network connection profile. You can use different Web sessions to connect to the Internet in different ways. > Web Access Find the Feature >...
-
Page 188: Phone Themes
Option Description Password 1 Password for primary CSD number. Speed (Bps) 1 Connection speed for primary CSD number. Line Type 1 Line type (modem or ISDN) for primary CSD number. CSD No. 2 Secondary CSD dial-up phone number. User Name 2 User name for secondary CSD number. - Page 189 your phone. Phone themes typically include a wallpaper image, screen saver image, and ring tone. Your phone includes several preloaded themes. You can download and install additional themes on your phone. Downloading Themes To download a theme from mMode, see page 183. When you install the theme, you can instantly apply its screen saver, wallpaper, and ring tone when your phone prompts you to Apply Theme Now?
-
Page 190: Games And Applications
Games and Applications Your phone contains Java games that you can play between calls. Each game includes online playing instructions. Your phone may contain additional Java applications that add features and functionality to your phone. Java games and applications are stored in the Games &... - Page 191 Press scroll to the application 2 SELECT ( launch the application, or open the list of applications in a suite scroll to the application you want, if necessary 4 SELECT ( launch the application Using Control Keys Your phone’s keys perform the following functions in a Java application.
- Page 192 Press scroll to a menu option 4 SELECT ( select the option to perform procedures as described in the following list The application manager menu can include the following options: Option Description View Details Display the suite name, vendor, version, number of apps, flash usage, and memory requirements.
-
Page 193: Editing Sounds With Motomixer
Option Displays CLDC Version Your phone’s connected limited device configuration version. MIDP Version Your phone’s mobile information device profile version. Data Space Memory available for application (both Java and data (such as game scores or non-Java data application settings), and for space) downloaded graphics, ring tones, all photos and MMS messages. - Page 194 Creating or Editing a Mix File > Multimedia > MotoMixer Find the Feature > [New MotoMixer] or mix file name Press scroll to the base track 2 SELECT ( select the base track 3 CHANGE ( select Name 4 keypad keys enter a name for the mix file you are creating 5 OK (...
- Page 195 MotoMixer Editing Controls You can select which instruments you want to play and when you want to play them. The mix editor shows the current settings for each instrument (see following table for details). Press first column Second column Third column keypad keys ( keypad keys add keypad keys...
- Page 196 Effect Turn on/off second instrument (Bass above) Add effect to second instrument Set variant for second instrument Turn on/off third instrument (Drums above) Add effect to third instrument Set variant for third instrument Turn on/off fourth instrument (Guitar above) Add effect to fourth instrument Set variant for fourth instrument Use the following keys to perform additional mix functions: Effect...
-
Page 197: Creating Ring Tones
Press scroll to Edit, Delete, Play, or Set as Ring Tone 4 SELECT ( select the option Creating Ring Tones You can create and store custom ring tones on your phone. The ring tones display in the list of available alerts. Creating a Tone >... - Page 198 Press the keypad keys to set note length, enter rests, and enter or edit note information. If necessary, press a keypad key multiple times to cycle through its available options. > Play All at any time to play the notes you Tip: Press have entered.
- Page 199 You can enter 1 or more rest characters (r) in the note sequence. Set rest length the same way you set note length. Display Description sharp & flat note A note B note C note D note E note F note G rest Lengths and Modifiers...
- Page 200 Display Description dotted note (1 and 1/2 length note) double dotted note (1 and 3/4 length note) 2/3 length note Example Action to scroll up to *4c, then wait for the 1 Press cursor to move to the next position to scroll down to *3f 2 Press The phone adds a 2 after each note you enter to...
- Page 201 Editing a Tone You cannot edit the predefined ring tones included with your phone. To edit a ring tone that you created: > Multimedia > Sounds Find the Feature Press scroll to the tone open the Tone Menu scroll to Edit 4 SELECT ( select Edit scroll to Notes...
-
Page 202: Camera Settings
Camera Settings You can take photos with your phone when the optional Motorola Original™ Digital Camera accessory is plugged into the phone’s accessory connector port. For instructions on how to take and send photos, see page 33. -
Page 203: Sim Applications
Option Description Resolution Set the camera to capture photos at the following resolutions: MMS (160x120 pixels), Medium (320x240 pixels, or High (640x480 pixels) Shutter Tone Activate a tone that sounds when you take a photo. Can be set to None, Chimp, Quack, Flix, Boing, or Click. -
Page 204: Troubleshooting
Troubleshooting Check these questions first if you have problems with your phone. If you need additional help, contact the Motorola Customer Call Center at 1-800-331-6456 (USA) or 1-800-461-4575 (Canada). Question Answer Is your battery The battery level indicator should charged? Do have at least 1 segment showing Ä... - Page 205 Has the phone Dropping your phone, getting it been wet, or using a non-Motorola damaged, battery or battery charger can dropped, or damage the phone. The phone’s gotten wet?
- Page 206 Problem Solution I pressed the Be sure to press and hold power key, but (power key) until the display nothing appears and you hear an alert. happened. This could take several seconds. If nothing happens, check that a charged battery is installed (see page 19).
- Page 207 Problem Solution My phone asks The application you want is for an unlock locked. If you do not know the code when I unlock code, see page 58. try to open a feature. My phone If you see in the display, does not ring.
- Page 208 Problem Solution My phone has Make sure that your antenna is poor reception not bent or damaged. and drops Also, make sure you have a calls. phone signal (the signal strength indicator should have at least 1 segment showing). Stay clear of any obstructions such as bridges, parking garages, or tall buildings.
- Page 209 Problem Solution My phone will You must send PIN codes and not send passwords as DTMF tones while voicemail on a call. You can set your phone’s DTMF tones to be Long, commands, Short, or Off. If you have trouble passwords, or other codes.
- Page 210 Problem Solution I am unable to Try moving to a quieter location to record a voice make your voice recording. Hold note, voice the phone about 4 inches (10 name, or voice centimeters) from your mouth, shortcut and speak directly into the phone in a normal tone of voice.
- Page 211 Problem Solution My phone Some wireless networks may not beeped when I support data or fax transmission. attached the If you are roaming on an data cable, but unfamiliar network, this may be my data and the case. Also, remember that data and fax applications transmission usually requires a do not work.
- Page 212 Problem Solution I launched the You may be in an area without micro-browser service, or you may be connected but the display to a network that does not support says: Internet access. Network Not Available. I launched the Try again in a few minutes. The micro-browser servers may be temporarily busy.
-
Page 213: Specific Absorption Rate Data
Specific Absorption Rate Data Specific Absorption Rate Data The model wireless phone meets the government’s requirements for exposure to radio waves. Your wireless phone is a radio transmitter and receiver. It is designed and manufactured not to exceed limits for exposure to radio frequency (RF) energy set by the Federal Communications Commission (FCC) of the U.S. - Page 214 2. The SAR information includes the Motorola testing protocol, assessment procedure, and measurement uncertainty range for this product.
-
Page 215: Additional Health And Safety Information
Consumer Information Additional Health and Safety Information on Wireless Phones from the FDA The U.S. Food and Drug Administration (FDA) provides consumer information on wireless phones at: http://www.fda.gov/cellphones/qa.html Following are safety-related questions and answers discussed at this web site. Do wireless phones pose a health hazard? The available scientific evidence does not show that any health problems are associated with using wireless phones. - Page 216 case, FDA could require the manufacturers of wireless phones to notify users of the health hazard and to repair, replace or recall the phones so that the hazard no longer exists. Although the existing scientific data do not justify FDA regulatory actions, FDA has urged the wireless phone industry to take a number of steps, including the following: •...
- Page 217 FCC also regulates the base stations that the wireless phone networks rely upon. While these base stations operate at higher power than do the wireless phones themselves, the RF exposures that people get from these base stations are typically thousands of times lower than those they can get from wireless phones.
- Page 218 What steps can I take to reduce my exposure to radio frequency energy from my wireless phone? If there is a risk from these products--and at this point we do not know that there is--it is probably very small. But if you are concerned about avoiding even potential risks, you can take a few simple steps to minimize your exposure to radio frequency energy (RF).
- Page 219 precautionary; it was not based on scientific evidence that any health hazard exists. Do handsfree kits for wireless phones reduce risks from exposure to RF emissions? Since there are no known risks from exposure to RF emissions from wireless phones, there is no reason to believe that handsfree kits reduce risks.
-
Page 220: Warranty
This limited warranty is a consumer's exclusive remedy, and applies as follows to new Motorola Products, Accessories and Software purchased by consumers in the... - Page 221 Accessories, Software or other peripheral equipment are excluded from coverage. Unauthorized Service or Modification. Defects or damages resulting from service, testing, adjustment, installation, maintenance, alteration, or modification in any way by someone other than Motorola, or its authorized service centers, are excluded from coverage.
- Page 222 This warranty extends only to the first consumer purchaser, and is not transferable. What Will Motorola Do? Motorola, at its option, will at no charge repair, replace or refund the purchase price of any Products, Accessories or Software that does not conform to this warranty. We may use functionally equivalent...
- Page 223 You will receive instructions on how to ship the Products, Accessories or Software, at your expense, to a Motorola Authorized Repair Center. To obtain service, you must include: (a) a copy of your receipt, bill of sale or other comparable proof of purchase;...
- Page 224 Laws in the United States and other countries preserve for Motorola certain exclusive rights for copyrighted Motorola software such as the exclusive rights to reproduce and distribute copies of the Motorola software.
-
Page 225: Product Registration
Product registration is an important step toward enjoying your new Motorola phone. Registering helps us facilitate warranty service, and permits us to contact you should your phone require an update or other service. Registration is for U.S. residents only and is not required for warranty coverage. -
Page 226: Wireless: The New Recyclable
Wireless: The New Recyclable Wireless: The New Recyclable Your wireless phone can be recycled. Recycling your wireless phone reduces the amount of waste disposed in landfills and allows recycled materials to be incorporated into new products. The Cellular Telecommunications Industry Association (CTIA) and its members encourage consumers to recycle their phones and have taken steps to promote the collection and environmentally sound recycling of end-of-life wireless devices. - Page 227 Index extending battery life 21, 56, 64, 65 accessories 18, 136, 147, installing 19 150, 172 level indicator 40, 42 accessory connector port 1 meter 160 active line indicator 40, 41 browser messages 89 active line, changing 66 browser. See mMode alarm clock 168 alert creating 195...
- Page 228 international access code default 57, 58 forgetting 58 making 24 color, setting 65 received calls list 69 computer receiving 25 connecting to phone 150 recent calls 69 synchronizing data 122, speakerphone 147 152, 167 storing 69 conference call 36 talk then fax 70 contrast, setting 65 timing 140, 142 currency converter 176...
- Page 229 description 38 end key 1, 24, 25, 43 greeting 125 ending a call 24, 25 home screen 38 Enter Unlock Code language 128 message 58, 59 menu icons, showing or event alert 123 hiding 126 exchange rate, calculating personalizing 127 drafts folder 30, 80, 85, 96, external device connecting to phone 150...
- Page 230 message waiting 28, 40, 42, 85, 89, 97 handsfree use 147 missed call 70 headset phonebook number type accessory, using 147 headset jack 1 ring alert 40, 42 Hide ID feature 70 roam 40, 41 hold a call 75 signal strength 40, 41 home keys, personalizing silent alert 42 soft ring alert 42...
- Page 231 left soft key 1, 39, 43, 127 Memory is Full! message menu 1, 43, 44 85, 97 power 1, 23 menu right soft key 1, 39, 43, entering text 46 icons, changing in idle send 1, 24, 25, 69 display 127 voice 1, 170 icons, converting to text volume control 1, 24...
- Page 232 picture 88 multimedia message quick note 80 receiving 28, 85 reading 2, 86 sending 26, 81 receiving 85 multimedia messaging reminders 85, 125 service. See ring tone 88 message sending 79 my telephone number 5, status 84 25, 61 text 2 my tones 195 message waiting indicator 28, 40, 42, 85, 89, 97...
- Page 233 attaching 2 numbers 70, passwords. See codes international access code pause character 109, 110 phone long numbers, storing active line indicator 41 active line, changing 66 redialing 66 alert, setting 24, 61, 123 storing in phonebook 2, alert, turning off 24, 68 answer options 62 storing your number 61 clear stored information...
- Page 234 number, storing 105 entering 178 1-touch dial 72 storing with phonebook picture caller ID 107 entry 109 primary number, setting unblocking 178 PIN2 code ringer ID 106, 118, 123 changing 57 sorting entries 60, 114 entering 138 speed dial number 72, unblocking 179 104, 106, 108 power key 1, 23...
- Page 235 ring alert short message service. See creating 195 message setting 24, 61, 123, 184 shortcuts 5, 129 turning off 24, 68 Show ID feature 70 ring alert indicators 40, 42 signal strength indicator 40, ring tone creating 195 silent alert indicator 42 downloading 2, 88, 183 silent alert, setting 24, 61, editing with MotoMixer...
- Page 236 changing 57 synchronizing data 122, defined 178 152, 167 entering 178 unblocking 178 SIM PIN2 code talk then fax call 70 changing 57 tap method text entry 50 entering 138 telephone number unblocking 179 storing in phonebook 105 SMS. See message storing your number 61 soft keys viewing your number 5,...
- Page 237 timers 140, 142 recording voice name transfer a call 75 transmission indicator 40 recording your voice 170 travel charger 21 voice name TTY device 136 dialing 112 indicator 104 recording 110 voice record unblocking the SIM card playing 171 recording 170 unlock voice shortcut 130 application 180...
- Page 239 1 Get to know your Motorola wireless phone and its features such as speed dial and redial. If available, these features help you to place your call without taking your attention off the road.
- Page 240 Motorola Original™ handsfree accessories available today. 3 Position your wireless phone within easy reach. Be able to access your wireless phone without removing your eyes from the road. If you receive an incoming call at an inconvenient time, if possible, let your voice mail answer it for you.
- Page 241 9 Use your wireless phone to help others in emergencies. If you see an auto accident, crime in progress or other serious emergency where lives are in danger, call 9-1-1 or other local emergency number, as you would want others to do for you.* 10 Call roadside assistance or a special non-emergency wireless assistance number when necessary.
- Page 242 Check the laws and regulations on the use of wireless telephones and their accessories in the areas where you drive. Always obey them. The use of these devices may be prohibited or restricted in certain areas. For more information, please call 1-888-901-SAFE or visit the CTIA Web site at...
Need help?
Do you have a question about the T725 EDGE and is the answer not in the manual?
Questions and answers