Table of Contents
Advertisement
Available languages
Available languages
IMPORTANT: Thoroughly read and follow all instructions before
installing this child seat. Store this user guide in the pocket behind
the cover (See features pages for reference).
IMPORTANT: Lire attentivement et suivre toutes les instructions avant d'installer
ce siege pour enfant. Garder ce guide dans la pochette sous la housse (voir les
pages des caractéristiques pour réferénce).
FRONTIER™ CT
User Guide
Guide d'utilisation canadien
Advertisement
Chapters
Table of Contents

Related Manuals for Britax FRONTIER CT


Summary of Contents for Britax FRONTIER CT
- Page 1 FRONTIER™ CT User Guide Guide d'utilisation canadien IMPORTANT: Thoroughly read and follow all instructions before installing this child seat. Store this user guide in the pocket behind the cover (See features pages for reference). IMPORTANT: Lire attentivement et suivre toutes les instructions avant d’installer ce siege pour enfant.
-
Page 2: Table Of Contents
Britax Child Safety, Inc. and registered in ® the U.S.A. and other countries. All Rights Reserved. ©2013 Britax Child Safety, Inc. This product and its components are subject to change without notice. Printed in the U.S.A. P556100_R1:05.13... -
Page 3: Warnings
Send your name, address, and the child • Never use the harness or adjuster strap to lift or carry this child seat. seat’s model number and manufacturing date to Britax Child Safety, Ltd., Doing so could damage the harness adjuster and webbing. Always P .O Box 7289 RPO Brunswick Square, Saint John NB E2L 4S6, or call... -
Page 4: Child Seat Fit Requirements
5 the harness straps ears must be below the must be in the closest top of the head restraint position at or above the when seated and child’s shoulders when seated. NOTE: Britax recommends booster mode only after the child outgrows harness mode. -
Page 5: Installing The Child Seat
11.3 and 29.5 kg (25 and 65 lbs) and who stand between 76.2 and 147.3 cm The vehicle belt fits properly (30 and 58 in.) in height. Britax when the lap part sits low across recommends using harness the child’s upper thighs (b) and mode until your child outgrows its fit requirements. -
Page 6: Lap-Shoulder Belt With Clicktight
Installing the Child Seat: Harness Mode Installing the Child Seat: Harness Mode Pull the vehicle belt out and Lap-Shoulder Belt with CLICKTIGHT route along the green belt path. Verify that the belt is not twisted and then buckle. Before you begin: •... - Page 7 Installing the Child Seat: Harness Mode Installing the Child Seat: Harness Mode Route the lower connector LUAS with CLICKTIGHT strap along the green belt path and firmly press the lower connectors onto their adjacent Before you begin: lower anchors. • Check that your vehicle has lower anchors. * A click confirms attachment.
- Page 8 Installing the Child Seat: Harness Mode Installing the Child Seat: Harness Mode Lap Belt with CLICKTIGHT Pull the vehicle belt out and route along the green belt path. Verify that the belt is not twisted and then buckle. Before you begin: •...
-
Page 9: Positioning The Childseat
Positioning the Child Seat: Booster Mode Positioning the Child Seat: Booster Mode Close the CLICKTIGHT. LUAS with CLICKTIGHT * A click confirms the CLICKTIGHT is secure. Before you begin: IMPORTANT: Positioning this child restraint with LUAS in booster mode can ensure proper belt placement every time the seat is used, however it is not required. -
Page 10: Securing Your Child
Securing Your Child Securing Your Child Place the child in the child Harness Mode seat and position the harness straps around the child. WARNING! Fasten the harness buckle. • Never route the vehicle belt over the child when using this * Proper connection is confirmed child seat in harness mode. -
Page 11: Booster Mode
Securing Your Child Securing Your Child Remove slack from the vehicle Booster Mode belt. * The shoulder part must lie across the center of the child’s WARNING! chest, at or above the child’s • Only use a lap-shoulder belt to secure the child in booster shoulder. -
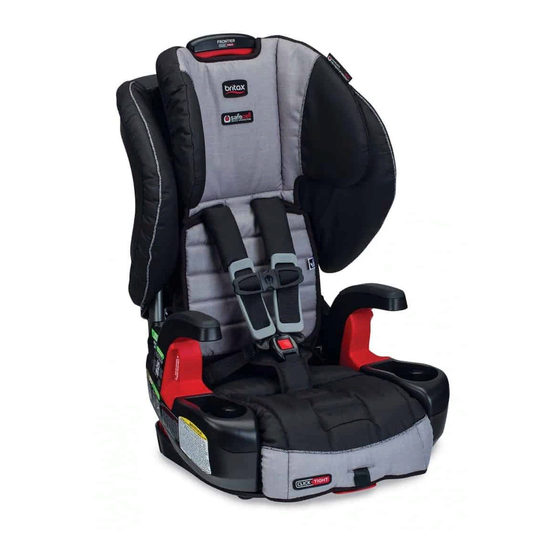
Page 12: Child Seat Features
Child Seat Features Child Seat Features Cover 19 Serial Number and Manufactured Date Label Shell 20 Versa-Tether Adjuster Arm Rest 21 Versa-Tether Hook Booster Mode Belt Guide 22 Versa-Tether Webbing Cup Holder and Storage 23 Versa-Tether Storage Strap Harness and Head Restraint Height Adjuster 24 Harness Straps Head Restraint 25 National Safety Mark... -
Page 13: Child Seat Functions
Child Seat Functions Child Seat Functions Harness and Head Restraint Height Adjustment Adjusting Buckle Position Removing the Buckle IMPORTANT: Make all adjustments for the fit of your child before Unbuckle the harness by using the child seat. Place the child seat on the floor and have your child sit in the seat. -
Page 14: Fastening The Buckle
Child Seat Functions Child Seat Functions Upright Position Fastening the Buckle Releasing the Buckle Insert one tongue at a time into Press the release button and the buckle. pull the tongues from the Recline Position buckle. NOTE: Proper connection is confirmed with an audible click NOTE: Periodically clean after inserting each buckle... -
Page 15: Using The Lower Connectors
Child Seat Functions Child Seat Functions Using the Lower Connectors Using the Versa-Tether The lower connectors are located under the CLICKTIGHT in the WARNING! lower connector storage area. • Attach the Versa-Tether only to tether anchors identified by your vehicle manufacturer as tether anchorage points. Store the lower connectors when not in use. -
Page 16: Switching Between Modes
Child Seat Functions Switching Between Modes Energy-Absorbing Versa-Tether The Versa-Tether can indicate when the child seat has been in a Before you begin: moderate or severe crash and replacement of the child seat is IMPORTANT: It is not necessary to remove the harness to use this necessary. -
Page 17: Booster To Harness Mode: Restoring The Harness And Buckle
Switching Between Modes Switching Between Modes Lay the EZ-Buckle belly pad Booster to Harness Mode: Restoring the Harness and Buckle forward and position on top of the harness adjuster release Open the CLICKTIGHT. lever. * Locate the two slots in the CLICKTIGHT cover. -
Page 18: Harness To Booster Mode: Removing The Harness And Buckle
Switching Between Modes Switching Between Modes Fasten the chest clip. Open the CLICKTIGHT. * Push together until a click is * Locate the two slots in the heard. CLICKTIGHT cover. * Squeeze the CLICKTIGHT release levers. Fasten the harness buckle. Unhook the harness straps from the CLICKTIGHT hip anchors. -
Page 19: Booster To Harness Mode: Replacing The Harness And Buckle
Switching Between Modes Switching Between Modes Remove the harness yoke Booster to Harness Mode: Replacing the Harness and Buckle from storage underneath the Open the CLICKTIGHT. seat shell and slide the nested * Locate the two slots in the harness straps completely onto CLICKTIGHT cover. -
Page 20: Vehicle Compatibility
Vehicle Compatibility Vehicle Compatibility Switchable Retractor in ALR Mode with Sliding Latch Plate Compatible Vehicle Seat Belts Has a latch plate that freely Vehicle seats and seat belts differ from vehicle to vehicle. Refer to slides along the vehicle belt your vehicle owner’s manual for specific information about your webbing. -
Page 21: Incompatible Vehicle Seat Belts
Vehicle Compatibility Vehicle Compatibility Vehicle Seating Positions Incompatible Vehicle Seat Belts WARNING! The following types of vehicle seat belts are NOT Some vehicles have no seating positions WARNING! compatible with this child seat. If any of the belt types listed below are which are compatible with this child seat or any other child seat. -
Page 22: Care And Maintenance
Care and Maintenance Care and Maintenance Unhook the elastic bands, Cover Removal then remove the side wing covers from each side of the WARNING! child seat shell. • Never remove the buckle tongues from the harness. * Be careful not to damage the •... -
Page 23: Cleaning The Cover
Care and Maintenance Care and Maintenance Fit the cover over the Cleaning the Cover CLICKTIGHT and pull the • HAND WASH the cover using cold water and mild soap. elastic band over the hook on • LINE DRY to prevent the cover from shrinking. the bottom of the CLICKTIGHT. - Page 24 Care and Maintenance Care and Maintenance To Clean: Cleaning the Buckle • THOROUGHLY RINSE the buckle using warm water. • TEST THE BUCKLE by fastening and unfastening until a positive If your child eats and drinks while in the child seat, you may need click is heard after inserting each buckle tongue.
-
Page 25: Tips And Troubleshooting
The warranty and remedies as set forth above are exclusive and in lieu of all others, Problem: The harness is hard to adjust. oral or written, express or implied. In no event will BRITAX, or the retailer selling this product, be liable to you for any damages, including incidental or consequential Possible Solution: The yoke may be caught on a strap or other damages, arising out of the use or inability to use this product. - Page 26 , et Versa- ® ® Tether sont des marques de commerce de Britax Child Safety, Inc. enregistrées aux ® États-Unis ou au Canada. Tous droits réservés. ©2013 Britax Child Safety, Inc. Ce produit et ses composants peuvent changer sans préavis.
-
Page 27: Information De Sécurité
• L’utilisation de housses, pièces rapportées, accessoires et 29,5 kg (25 et 65 lb) et qui mesurent entre 76,2 et 147,3 cm ou dispositifs d’attache non conçus par Britax n’est pas (30 et 58 po) et qui sont d’au moins 2 ans. -
Page 28: Enregistrement
Si l’enfant ne correspond pas au mode rehausseur parce enfant à Britax Child Safety, Ltd., Case postale 7289, RPO Brunswick qu’il est trop petit, il se peut que vous ayez à utiliser ce siège en Square, Saint John NB E2L 4S6, ou bien composez le 1-888-427- mode harnais. -
Page 29: Installer Le Siège Pour Enfant
18,1 et 54,4 kg (40 et 120 lb) et mesurant entre 114,3 et • Ce siège pour enfant peut 157,5 cm (45 et 62 po). Britax être utilisé en position droit ou recommande d’utiliser le incliné lorsqu’il est installé en... -
Page 30: Ceinture Baudrier/Sous-Abdominale Avec Clicktight
Installer le siège pour enfant: Mode harnais Installer le siège pour enfant: Mode harnais Ceinture baudrier/sous-abdominale avec Déroulez la ceinture du véhicule et faites-la passer CLICKTIGHT le long de la ceinture verte. Vérifiez que la ceinture du véhicule n’est pas tordue, puis Avant de commencer bouclez-la. - Page 31 Installer le siège pour enfant: Mode harnais Installer le siège pour enfant: Mode harnais Faites passer la sangle DUA avec CLICKTIGHT d’attache inférieure le long du de la ceinture verte et appuyez fermement sur les attaches Avant de commencer inférieures lorsqu’elles se •...
- Page 32 Installer le siège pour enfant: Mode harnais Installer le siège pour enfant: Mode harnais Déroulez la ceinture du Ceinture sous-abdominale avec CLICKTIGHT véhicule et faites-la passer le long de la ceinture verte. Vérifiez que la ceinture du Avant de commencer: véhicule n’est pas tordue, puis bouclez-la.
-
Page 33: Positionner Le Siège Pour Enfant
Positionner le siège pour enfant: Mode rehausseur Positionner le siège pour enfant: Mode rehausseur Fermez le CLICKTIGHT. DUA avec CLICKTIGHT * Un clic confirme la fermeture en sécurité du CLICKTIGHT. Avant de commencer: IMPORTANT: Utiliser le DUA pour le positionnement de cette retenue d’enfant en mode rehausseur peut assurer le placement correcte de la ceinture de vehicule à... -
Page 34: Attacher Votre Enfant
Attacher votre enfant Attacher votre enfant Mode harnais Placez l’enfant dans le siège pour enfant et positionnez les sangles du harnais autour de MISE EN GARDE! l’enfant. • Ne jamais acheminer la ceinture de sécurité autour de l’enfant lorsque vous utilisez ce siège en mode harnais. Attachez la boucle du harnais. -
Page 35: Mode Rehausseur
Attacher votre enfant Attacher votre enfant Mode rehausseur Retirez le jeu de la ceinture de sécurité. MISE EN GARDE! * La partie baudrier de la ceinture • Utilisez seulement la ceinture baudrier/sous-abdominale doit être à travers la poitrine de pour attacher l’enfant en mode rehausseur. l’enfant, au niveau ou au dessus de l’epaule de l’enfant. -
Page 36: Caractéristiques Du Siège Pour Enfant
Caractéristiques du siège pour enfant Caractéristiques du siège pour enfant SYSTEME D’INSTALLATION Housse 18 Poignée d’ajustement pour inclinaison Coque 19 Étiquette portant le numéro de série et la date de fabrication Accoudoir 20 Ajusteur du Versa-Tether Guide de ceinture pour mode rehausseur 21 Crochet Versa-Tether Porte-gobelet et rangement 22 Sangles du Versa-Tether... -
Page 37: Fonctions Du Siège Pour Enfant
Fonctions du siège pour enfant Fonctions du siège pour enfant Réglage de la hauteur du harnais et de Réglage de la position de l’appuie-tête la boucle Retrait de la boucle IMPORTANT : Faire tous les ajustements du siège avec l’enfant avant d’utiliser le siège pour enfant. - Page 38 Fonctions du siège pour enfant Fonctions du siège pour enfant Position verticale Attacher la boucle Détacher la boucle Insérez une pattre à la fois Appuyer sur le bouton de Position inclinée dans la boucle. relâchement et tirer sur les pattes de la boucle. REMARqUE: Une bonne REMARqUE: Nettoyez connexion est confirmé...
- Page 39 Fonctions du siège pour enfant Fonctions du siège pour enfant Utilisation des attaches inférieures Utiliser la courroie d’attache Versa-Tether Les attaches inférieures sont situées sous le CLICKTIGHT MISE EN GARDE! dans la zone de rangement des • Attachez la courroie d’attache Versa-Tether seulement aux fixations inférieures.
-
Page 40: Changer De Mode
Fonctions du siège pour enfant Changer de mode Courroie amortissante Versa-Tether Le Versa-Tether peut indiquer lorsque le siège pour enfant a subit Avant de commencer un accident grave ou modéré et que le remplacement du siège IMPORTANT : Il n’est pas nécessaire d’enlever le harnais pour pour enfant est nécéssaire. -
Page 41: Du Mode Rehausseur Au Mode Harnais: Pour Restaurer Le Harnais Et La Boucle
Changer de mode Changer de mode Étalez le système de boucle Du mode rehausseur au mode harnais: facile avec coussinet Pour restaurer le harnais et la boucle abdominal et positionnez-le en Ouvrez le CLICKTIGHT. haut du levier de réglage de la sangle du harnais. -
Page 42: Du Mode Harnais Au Mode Rehausseur: Pour Enlever Le Harnais Et La Boucle
Changer de mode Changer de mode Ouvrez l’attache de poitrine. Ouvrez le CLICKTIGHT. * Poussez jusqu’à ce que vous * Trouvez les deux fentes dans entendiez un clic. la housse du CLICKTIGHT. * Pressez sur les leviers de déverrouillage du CLICKTIGHT. Attachez la boucle du harnais. -
Page 43: Du Mode Rehausseur Au Mode Harnais: Pour Remplacer Le Harnais Et La Boucle
Changer de mode Changer de mode Retirez la chape du harnais de Du mode rehausseur au mode harnais: son rangement sous la coque Pour remplacer le harnais et la boucle du siège et faites glisser Ouvrez le CLICKTIGHT. complètement les sangles du Trouvez les deux fentes dans harnais jointes sur la chape. -
Page 44: Compatibilité Du Véhicle
Compatibilité du véhicule Compatibilité du véhicule 3. Rétracteur variable en mode auto-bloquant avec patte Ceintures de sécurité du véhicule compatibles couilissante Les sièges et ceintures de sécurité du véhicule peuvent changer d’un véhicule à l’autre. Veuillez vous référer au manuel de Possède une boucle l’utilisateur du véhicule pour obtenir les informations spécifiques glissant librement au... - Page 45 Compatibilité du véhicule Compatibilité du véhicule Positions assises du véhicule Ceinture de sécurité du véhicule non compatibles Certains véhicules ne possède aucune MISE EN GARDE! MISE EN GARDE! Les types de ceinture de sécurité position assise compatible avec ce siège pour enfant ou tout suivants NE sont PAS compatibles avec ce siège pour enfant.
-
Page 46: Soins Et Entretien
Soin et entretien Soin et entretien Décrochez les bandes Retrait de la housse élastiques et retirez les housses des supports latéraux MISE EN GARDE! de chaque côté de la coque • Ne jamais retirer les pattes de la boucle du harnais. du siège pour enfant. -
Page 47: Nettoyer La Housse
Soin et entretien Soin et entretien Faites passer la housse au- Nettoyer la housse dessus du CLICKTIGHT et • LAVER LA HOUSSE À LA MAIN à l’aide d’eau froide et savon tirez sur la bande élastique doux. au-dessus du crochet en bas •... - Page 48 Soin et entretien Soin et entretien Pour nettoyer: Nettoyage de la boucle • RINSER ABONDAMMENT la boucle à l’aide d’eau tiède. • TESTER LA BOUCLE en bouclant et débouclant la boucle Si votre enfant se nourrit ou boit dans le siège pour enfant, vous jusqu’à...
-
Page 49: Conseils Et Dépannage
à cette guarantie est que BRITAX pourra, à sa discression, véhicule avec la boucle pour offrir une réparation ou un remplacement des pièces de ce produit. Britax se réserve un maximum de 3 rotations le droit de discontinuer ou de changer des matériaux, pièces, modèles ou produits complètes pour la raccourcir. - Page 50 Remarques...
- Page 51 Britax Child Safety, Inc. Tel. : 1-888-427-4829 4140 Pleasant Road 1-704-409-1700 Fort Mill, SC 29708 www.Britax.com A Britax Childcare Group Limited company...
Need help?
Do you have a question about the FRONTIER CT and is the answer not in the manual?
Questions and answers