Lexmark W812 User Reference Manual
Lexmark international user's reference printer w812
Hide thumbs
Also See for W812:
- Service manual (236 pages) ,
- Setup manual (54 pages) ,
- Clearing paper jams (2 pages)
Table of Contents
Advertisement
Quick Links
Advertisement
Table of Contents

Related Manuals for Lexmark W812


Summary of Contents for Lexmark W812
-
Page 1: Lexmark W812
Lexmark W812 User’s Reference July 2002 www.lexmark.com... -
Page 3: Table Of Contents
Chapter 2: Sending a job to print ... 10 Chapter 3: Canceling a print job ... 11 Canceling a job from the printer operator panel ... 11 Canceling a job from the Windows taskbar ... 11 Canceling a job from a Windows desktop ... 11 Canceling a job from a Macintosh computer ... - Page 4 Storing supplies ... 31 Avoiding jams ... 31 Chapter 11: Using the optional duplex unit ... 33 Chapter 12: Checking an unresponsive printer ... 34 Chapter 13: Solving print quality problems ... 35 Chapter 14: Solving paper feed problems ... 40 Chapter 15: Solving printing problems ...
- Page 5 Chapter 24: Replacing the fuser ... 61 Removing the old fuser ... 61 Installing a new fuser ... 63 Chapter 25: Understanding the printer operator panel ... 65 Operator panel buttons ... 65 Chapter 26: Configuring printer alerts ... 67 Chapter 27: Removing memory and option cards ...
- Page 6 Chapter 38: Job Menu ... 133 Chapter 39: Quality Menu ... 136 Chapter 40: Paper Menu ... 138 Chapter 41: PCL Emul Menu ... 144 Chapter 42: PPDS Menu ... 149 Chapter 43: Serial Menu ... 153 Chapter 44: Network Menu ... 159 Chapter 45: Parallel Menu ...
-
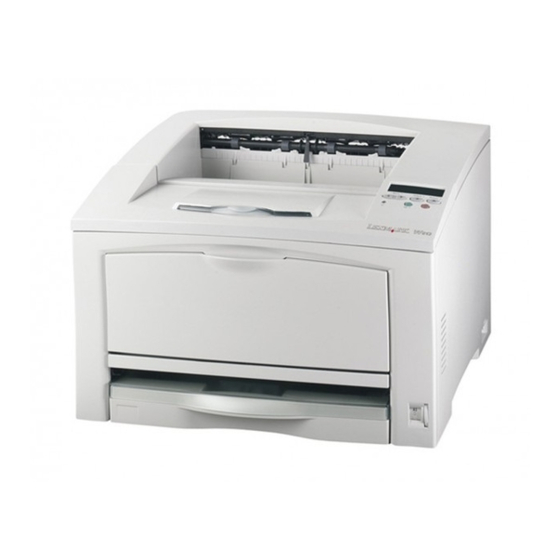
Page 7: Chapter 1: Printer Overview
Printer overview The following illustrations show the views of your Lexmark W812 printer. Output bin Paper support Operator panel On/Off switch Stamdard 250-sheet tray Paper size dial Multipurpose feeder... - Page 8 Fuser Network card connector Parallel port connector Power cord connector Print cartridge Release button Duplex connector...
- Page 9 To increase paper capacity, you can purchase additional 250-sheet and 500-sheet trays. The following illustration shows the printer configured with one optional 500-sheet tray and one optional 250-sheet tray that is extended for A3 size paper. 500-sheet tray 250-sheet tray The following illustration shows the printer configured with two optional 500-sheet trays.
-
Page 10: Chapter 2: Sending A Job To Print
From the File menu, select Print. Verify that the correct printer is selected in the dialog box. Modify the printer settings as appropriate (such as the pages you want to print or the number of copies). Note: Click Properties or Setup to adjust printer settings not available from the first screen, and then click OK. -
Page 11: Chapter 3: Canceling A Print Job
Select Canceling a job from the Windows taskbar When you send a job to print, a small printer icon appears in the right corner of the taskbar. Double-click the printer icon. A list of print jobs appears. Select the job you want to cancel. -
Page 12: Chapter 4: Conserving Supplies
Menu Duplex in the Finishing Menu Paper and Use your software specialty media application or printer driver to send a Verify Print job. Use Held Jobs in the Job Menu to access your Verify Print job. What the setting does Lets you adjust the amount of toner released on a sheet of paper. -
Page 13: Chapter 5: Holding A Job In The Printer
Holding a job in the printer When sending a job to the printer, you can specify in the driver that you want the printer to hold the job in memory. When you are ready to print the job, you must go to the printer and use the operator panel menus to identify which held job you want to print. -
Page 14: Accessing Held Jobs From The Operator Panel
Print the job. Be aware, however, that only part of the job may print. • Delete the job. You may want to free up additional printer memory by scrolling through the list of held jobs and deleting others you have sent to the printer. -
Page 15: Repeating Print Jobs
Repeating print jobs If you send a Repeat Print job, the printer prints all requested copies of the job and stores the job in memory so you can print additional copies later. You can print additional copies as long as the job remains stored in memory. -
Page 16: Printing Confidential Jobs
When you send a job to the printer, you can enter a personal identification number (PIN) from the driver. The PIN must be four digits using the numbers 1–6. The job is then held in printer memory until you enter the same four-digit PIN from the printer operator panel and choose to print or delete the job. -
Page 17: Chapter 6: Paper And Specialty Media Specifications
The following table lists supported paper and specialty media sizes and weights for the standard and optional trays, as well as for the multipurpose feeder. We recommend that you try a limited sample of any paper or specialty media you are considering using with the printer before purchasing large quantities. -
Page 18: Letterhead
Loading the multipurpose feeder, When printing on transparencies: • Be sure to set the Paper Type to Transparency from the printer driver. • Use transparencies designed specifically for laser printers. Transparencies must be able to withstand temperatures of 175°C (347°F) without melting, discoloring, or releasing hazardous emissions. -
Page 19: Labels
Labels Your printer can print on many labels designed for use with laser printers. These labels are supplied in letter size and A4 size sheets. Label adhesives, face sheet (printable stock), and topcoats must be able to withstand temperatures of 205°C (401°F) without melting or releasing hazardous emissions and pressure of 25 pounds per square inch (psi). -
Page 20: Chapter 7: Linking Trays
Linking trays • If you load the same size and type of paper or media in more than one tray, the printer automatically links the trays. This means that when one tray is empty, it feeds from the next linked tray. -
Page 21: Chapter 8: Loading The Trays
Loading the trays Loading 250-sheet trays Follow the instructions in this section to load paper and specialty media into any of the 250-sheet trays. To load paper longer than A4 or letter size, go to Note: Do not exceed the recommended capacity or media weights (see specialty media Letter, A4, A5, or JIS B5 size paper Remove the tray, and then set it on a flat surface. - Page 22 Flex the sheets back and forth to loosen them, and then fan them. Do not fold or crease the paper. Straighten the edges of the stack on a level surface. Place the paper or specialty media against the back of the tray. If loading letterhead, insert the letterhead face up, with the top of the page facing the right side guide.
- Page 23 Note: If you installed an optional 250-sheet paper tray but are unable to select it from your printer driver, select the printer configuration or installed options tab in your printer driver and highlight the 250-sheet tray option, which tells your computer an optional tray is installed.
- Page 24 A3, JIS B4, legal, 8.5x13, or 11x17 size paper Extend the paper tray to load paper longer than A4 or letter size. Remove the tray, and then set it on a flat surface. Remove the tray cover. Slide the locking mechanisms on the left and right sides of the tray inward to unlock the extension.
- Page 25 Note: If you installed an optional 250-sheet paper tray but are unable to select it from your printer driver, select the printer configuration or installed options tab in your printer driver and highlight the 250-sheet tray option, which tells your computer an optional tray is installed.
-
Page 26: Loading 500-Sheet Trays
Loading 500-sheet trays Follow these instructions to load paper into a 500-sheet tray. Note: Do not exceed the recommended capacity or media weights (see specialty media Remove the tray, and then set it on a flat surface. Remove the tray cover. Flex the sheets back and forth to loosen them, and then fan them. - Page 27 Note: If you installed an optional 500-sheet paper tray but are unable to select it from your printer driver, select the printer configuration or installed options tab in your printer driver and highlight the 500-sheet tray option, which tells your computer an optional tray is installed.
-
Page 28: Chapter 9: Loading The Multipurpose Feeder
Loading the multipurpose feeder Use the multipurpose feeder for paper, specialty media (transparencies and label sheets), envelopes, and Hagaki cards. Note: Do not exceed the recommended capacity or media weights (see specialty media Open the multipurpose feeder. Slide the side guides to the correct position for the size paper or specialty media you are loading. - Page 29 Flex the sheets back and forth to loosen them, and then fan them. Do not fold or crease the paper. Straighten the edges of the stack on a level surface. Insert the paper or specialty media, print side up, into the multipurpose feeder Note: To avoid jams when printing transparencies, we recommend you remove each one as it exits into the output bin.
-
Page 30: Printing Envelopes
Printing envelopes Insert the envelopes print side up, flap down, into the multipurpose feeder. Slide the side guides to fit the width of the envelopes. Select the paper size, paper type, and paper source from both the operator panel and your software application. -
Page 31: Chapter 10: Tips For Successful Printing
Do not place anything on top of paper packages. Storing supplies Choose a cool, clean storage area for your printer supplies. Store supplies right side up in their original packaging until you are ready to use them. Do not expose supplies to: •... - Page 32 The following hints can help you avoid paper jams: • Use only recommended paper. Refer to the Card Stock & Label Guide available on Lexmark’s Web site at www.lexmark.com for more information about which paper provides optimum results for your printing environment.
-
Page 33: Chapter 11: Using The Optional Duplex Unit
Front of sheet Note: If you installed the optional duplex unit but are unable to select it from your printer driver, select the printer configuration or installed options tab in your printer driver and highlight the duplex option, which tells your computer the duplex option is installed. -
Page 34: Chapter 12: Checking An Unresponsive Printer
The printer cable is securely attached to the printer and the host computer, print server, option, or other network device. Once you have checked each of these possibilities, turn the printer off and back on. This often fixes the problem. -
Page 35: Chapter 13: Solving Print Quality Problems
You can solve many print quality problems by replacing a supply or maintenance item that has reached the end of its intended life. Check the operator panel for a message about a printer consumable. See Determining the status of supplies need to be replaced. - Page 36 • Use recommended paper and specialty media. Refer to the Card Stock & Label Guide available on Lexmark’s Web site at www.lexmark.com for detailed specifications. • Load paper from a new package.
- Page 37 • Use recommended paper and specialty media. Avoid textured paper with rough finishes. Refer to the Card Stock & Label Guide available on Lexmark’s Web site for detailed specifications. • Replace the fuser. See fuser. 1 First, replace the print cartridge. See Replacing the print cartridge.
- Page 38 Symptom Cause Streaked vertical lines Toner is smeared before fusing to the paper. Toner specks • The print cartridge is defective. • The fuser is worn or defective. • Toner is in the paper path. Toner rubs off the paper The Type setting is wrong for easily when you handle the type of paper or specialty...
- Page 39 Symptom Cause Incorrect margins • Guides in the selected tray are set for a different size paper than what is loaded in the tray. • Auto size sensing is set to Off, but you loaded a different size paper in a tray. For example, you inserted A4 size paper into the selected tray but did not set...
-
Page 40: Chapter 14: Solving Paper Feed Problems
The paper pick rollers are worn and dirty. Solution Use recommended paper and specialty media. Refer to the Card Stock & Label Guide available on Lexmark’s Web site at www.lexmark.com for detailed specifications. Clearing jams Avoiding jams can help prevent jams from occurring. - Page 41 Symptom Cause Paper frequently The paper frequently jams in the optional jams (continued). 500-sheet tray. Paper jams when The Universal paper size selected is duplexing Universal outside the range for duplexed jobs. size paper. The Paper Jam There is still a jam in the paper path. message remains after you remove the jammed paper.
-
Page 42: Chapter 15: Solving Printing Problems
The output bin is full. The specified tray is empty. Solution Turn the printer off, wait about 10 seconds, and turn the printer back on. Performing Self Test appears on the display. When the test is completed, the Ready message is displayed. - Page 43 Windows Me, or Windows 2000 compatible printer driver. Verify that you have properly configured the printer for network printing. Refer to the drivers CD or to Lexmark’s Web site for information. Make sure you are using a recommended interface cable.
- Page 44 Add printer memory or an optional hard disk. Refer to the Setup Guide for information on selecting memory options to install.
-
Page 45: Chapter 16: Solving Other Option Problems
Check the cable connections. Refer to the Setup Guide for instructions. Your printer driver may not automatically recognize that an option is attached to your printer. Look at the driver settings and verify that all the printer configuration settings are correct. -
Page 46: Chapter 17: Calling For Service
You need to know your printer model type and serial number. Refer to the label on the back of the printer near the power cord for this information. -
Page 47: Chapter 18: Understanding Jam Messages
Understanding jam messages Paper jam messages Message 200 Paper Jam Open Top Cover 200 Paper Jam Check Trays 201 Paper Jam Open Top Cover 201 Paper Jam Check Trays 202 Paper Jam Open Top Cover 203 Paper Jam Open Top Cover 230 Paper Jam Check Duplex 231 Paper Jam... -
Page 48: Chapter 19: Clearing Jams
Duplex jam 200/201 Paper tray A 200 Paper Jam may occur when the printer is turned off while a job is printing. A 201 Paper Jam occurs when paper does not feed correctly from the tray or multipurpose feeder. 202 Print cartridge jam... - Page 49 Paper may get jammed in the tray or lodged behind the tray. To clear the jam: Pull out the tray the printer is using for the current job, and then remove the tray cover. If the paper jammed in the tray, remove it.
- Page 50 Clearing 200/201 jams from the multipurpose feeder Open the multipurpose feeder and remove any paper from the tray. If paper is jammed inside the multipurpose feeder, remove it. Open and close the top cover to clear the message. Clearing 203 jams from the fuser A 203 Paper Jam occurs when paper jams in the fuser.
- Page 51 Press the release button on the left side of the printer to open the top cover. CAUTION: The fuser may be hot. Let it cool before continuing. Raise the fuser paper guide and remove any jammed paper. Lower the fuser paper guide.
- Page 52 A 202 Paper Jam occurs after paper has left the paper tray but has not reached the fuser. To clear the jam: Remove any paper in the output tray. Press the release button on the left side of the printer to open the top cover. Remove the print cartridge, and then set it aside.
- Page 53 Open the print cartridge paper guide lever and remove any jammed paper. Close the print cartridge paper guide lever. Reinsert the print cartridge. Close the top cover to clear the message. Clearing 230/231/232 jams from the duplex unit A 230 Paper Jam occurs when paper jams at the top of the fuser before going through the duplex unit upper cover, or after it enters the duplex unit upper cover.
- Page 54 Check for any jammed paper and remove it. Close the duplex unit upper cover. Open the duplex unit lower cover. Check for any jammed paper and remove it. Close the duplex unit lower cover. Remove the print cartridge and remove any jammed paper. (See print cartridge for help.) Reinsert the print cartridge.
-
Page 55: Chapter 20: Ordering Supplies
Ordering a fuser Order a new fuser when the 80 Scheduled Maintenance message appears on the display. Use P/N 56P0884 to order a fuser for a 120 V printer. Use P/N 56P0885 to order a fuser for a 220 V printer. See Replacing the fuser for more information. -
Page 56: Chapter 21: Determining The Status Of Supplies
Determining the status of supplies To determine the status of all of the consumables installed in your printer, print the menu settings page. Printing a menu settings page for detailed instructions. One or two pages print depending on the number of menu settings you have. Look for “Consumable... -
Page 57: Chapter 22: Recycling Used Supplies
You can also recycle the fuser. If a prepaid shipping label is not available for your country/region, contact the place where you bought your printer for additional recycling information. Lexmark does not recommend refilling used print cartridges or purchasing refilled ARNING cartridges from a third party. -
Page 58: Chapter 23: Replacing The Print Cartridge
When the print fades or no longer prints satisfactorily, replace the print cartridge Toner Alarm is set to Single or Continuous, press to continue printing. Removing the old print cartridge Press the release button on the left side of the printer and open the top cover. -
Page 59: Installing The New Print Cartridge
Pull out the print cartridge and set it aside. Lexmark does not recommend refilling used print cartridges or purchasing refilled ARNING cartridges from a third party. Print quality and printer reliability cannot be guaranteed if you do. For best results, use genuine Lexmark supplies. - Page 60 Shake the cartridge in all directions to distribute the toner. Place the cartridge on a flat surface and remove the toner seal. Align the cartridge with the grooves in the printer, and insert it into the printer. Close the top cover.
-
Page 61: Chapter 24: Replacing The Fuser
Replacing the fuser Replace the fuser when an 80 Scheduled Maintenance message appears. Removing the old fuser Turn the printer off. Press the release button on the left side of the printer and open the top cover. - Page 62 Pull out the print cartridge. Pull up the fuser latches on each end to release the fuser.
-
Page 63: Installing A New Fuser
Grasping the handles on each end of the fuser, pull the fuser toward you, and then up out of the printer. Set the fuser aside. Installing a new fuser Unwrap the new fuser. Follow the recycling instructions in the box to dispose of the old fuser. - Page 64 Push down the fuser latches to lock the fuser into position. Align the print cartridge with the grooves in the printer and reinsert it into the printer. Close the cover. Reset the fuser page counter back to zero: Press and hold...
-
Page 65: Chapter 25: Understanding The Printer Operator Panel
Understanding the printer operator panel The operator panel has five buttons, a display, and a light that flashes when the printer is processing a job. Operator panel buttons Button Function Press • Return to the Ready state if the printer is offline (the Ready message does not appear on the display). - Page 66 Return Stop Press at the Ready, Busy, or Waiting message to temporarily take the printer offline. Stop The message changes to Not Ready. No data is lost. Press to return the printer to the Ready, Busy, or Waiting state.
-
Page 67: Chapter 26: Configuring Printer Alerts
Using MarkVision Professional MarkVision™ Professional, Lexmark’s network printer management utility, indicates when it is time to replace supplies and points out actual or potential problems. When a printer needs attention, it alerts the network administrator with a detailed graphic of the printer showing the cause for the alert (for example, an empty paper tray). -
Page 68: Chapter 27: Removing Memory And Option Cards
Memory and flash card connectors Removing the printer system board access panel Turn the printer off. Unplug the printer power cord. Disconnect all cables from the back of the printer. Firmware card connector Option card connector... - Page 69 Press the release button on the left side of the printer, and then open the top cover. Push the side release button as you slide the right cover toward the rear of the printer. Remove the right cover and set it aside.
-
Page 70: Removing Memory Cards
Loosen the screws on the access panel and remove it. Removing memory cards Complete the following steps to remove printer memory or flash memory cards. Printer memory and flash memory cards are easily damaged by static electricity. ARNING Touch something metal on the printer before you touch a memory card. -
Page 71: Removing An Option Card
Option cards are easily damaged by static electricity. Touch something metal on the ARNING printer before you touch an option card. Remove the access panel (see Remove the screw from the metal plate that covers the connector slot, and then lift off the plate. - Page 72 Locate the option card you want to remove. Gently pull the option card out of the connector slot on the system board. Place the card in its original packaging, or wrap the card in paper and store it in a box. If you do not plan to insert another card, reattach the metal plate that covers the connector slot.
-
Page 73: Removing A Firmware Card
Optional firmware cards are easily damaged by static electricity. Touch something ARNING metal on the printer before you touch an optional firmware card. Remove the access panel (see Gently pull the firmware card straight out in one motion. Do not pull one side and then the other. -
Page 74: Reinstalling The System Board Access Panel
Insert the metal tab on the access cover behind the printer frame, and then secure the cover with the two screws. Insert the two tabs at the front end of the right cover behind the printer frame, and then align the cover with the release button. -
Page 75: Chapter 28: Disabling The Operator Panel Menus
Disabling the operator panel menus A network administrator can lock the printer menus to keep others from changing default menu settings from the operator panel. To disable the menus: Turn the printer off. Press and hold the Select Release the buttons when Performing Self Test appears on the display. -
Page 76: Chapter 29: Disabling Power Saver
Ready message. Now you can select the Disabled value from the Power Saver menu item. Note: You can also disable Power Saver by issuing a Printer Job Language (PJL) command. For more information, refer to the Technical Reference available on Lexmark’s Web site at www.lexmark.com. -
Page 77: Chapter 30: Size Sensing
Size Sensing When size sensing is set to Auto, the default, the printer recognizes the size paper currently loaded in the 250-sheet or 500-sheet trays. When you switch to a different size paper, set the paper size dial to match the new size paper you loaded. Do not forget to select the paper type from both the operator panel and your printer driver. -
Page 78: Chapter 31: Printing A Menu Settings Page
Printing a menu settings page Print the menu settings page to review the printer settings and to verify that printer options are installed correctly. Note: See Understanding the printer operator panel operator panel buttons if you need help. Make sure the printer is on and the Ready message appears. -
Page 79: Chapter 32: Restoring Factory Default Settings
No other button actions are available on the operator panel while Restoring Factory Defaults appears. – All downloaded resources (fonts, macros, and symbol sets) in printer memory (RAM) are deleted. (Resources residing in flash memory or on the optional hard disk are unaffected.) –... -
Page 80: Chapter 33: Changing Menu Settings
Changing menu settings You can use the operator panel to change printer menu settings and customize your printer to meet your specific needs. Note: Changes to specific print jobs made from a software application override the settings made from the operator panel. -
Page 81: Chapter 34: Understanding Fonts
Understanding fonts Resident fonts Your printer is equipped with resident fonts stored permanently in printer memory. Different fonts are available in PCL 6, PostScript 3, and PPDS emulations. Some of the most popular typefaces, like Courier and Times New Roman, are available for all printer languages. - Page 82 PCL 6 emulation ITC Bookman Demi ITC Bookman Demi Italic Clarendon Condensed Bold Coronet CourierPS CourierPS Oblique CourierPS Bold CourierPS Bold Oblique CG Omega CG Omega Bold CG Omega Italic CG Omega Bold Italic Garamond Antiqua Garamond Halbfett Garamond Kursiv Garamond Kursiv Halbfett Helvetica Light Helvetica Light Oblique...
- Page 83 PCL 6 emulation Courier Italic Courier Bold Courier Bold Italic Letter Gothic Letter Gothic Italic Letter Gothic Bold Marigold Century Schoolbook Roman Century Schoolbook Italic Century Schoolbook Bold Century Schoolbook Bold Italic Palatino Roman Palatino Italic Palatino Bold Palatino Bold Italic SymbolPS Symbol Times Roman...
- Page 84 PCL 6 emulation Univers Condensed Bold Italic Wingdings ITC Zapf Chancery Medium Italic ITC Zapf Dingbats PostScript 3 emulation Univers-CondensedBoldOblique Wingdings-Regular ZapfChancery-MediumItalic ZapfDingbats Univers-Extended Univers-ExtendedObl Univers-BoldExt Univers-BoldExtObl Univers-Light Univers-LightOblique Clarendon Clarendon-Light Clarendon-Bold Helvetica-Condensed Helvetica-Condensed-Bold Helvetica-Condensed-BoldObl Helvetica-Condensed-Oblique StempelGaramond-Bold StempelGaramond-BoldItalic StempelGaramond-Italic StempelGaramond-Roman Apple-Chancery Chicago Geneva...
- Page 85 PCL 6 emulation PostScript 3 emulation PPDS emulation CooperBlack-Italic Copperplate-ThirtyTwoBC Copperplate-ThirtyThreeBC Eurostile Eurostile-Bold Eurostile-ExtendedTwo Eurostile-BoldExtendedTwo GillSans GillSans-Italic GillSans-Bold GillSans-BoldItalic GillSans-Condensed GillSans-BoldCondensed GillSans-Light GillSans-LightItalic GillSans-ExtraBold Goudy Goudy-Italic Goudy-Bold Goudy-BoldItalic Goudy-ExtraBold HoeflerText-Regular HoeflerText-Italic HoeflerText-Black HoeflerText-BlackItalic HoeflerText-Ornaments JoannaMT JoannaMT-Italic JoannaMT-Bold JoannaMT-BoldItalic LubalinGraph-Book LubalinGraph-BookOblique LubalinGraph-Demi LubalinGraph-DemiOblique...
-
Page 86: Symbol Sets
The symbol set encoding also defines which character will print for each key on the keyboard (or more specifically, for each code point). Some applications require different characters at some code points. To support multiple applications and languages, your printer has 83 symbol sets for the resident PCL 6 emulation fonts. - Page 87 FontVision Also included on the drivers CD is the FontVision™ Management utility and screen fonts to match the resident scalable fonts. An additional 48 TrueType fonts are available on the Lexmark Web site when you register the printer. ISO 16: Portuguese...
-
Page 88: Chapter 35: Printing Sample Fonts
Your printer has resident fonts stored permanently in memory. Different fonts may be available in PCL, PostScript, and PPDS emulations. To print samples of all the fonts currently available for your printer in PCL emulation or PostScript 3 emulation: Make sure the printer is on and Ready appears on the display. - Page 89 Ready message after the font sample list prints. Follow step 1–step 5 above, selecting Off to deactivate PPDS Emulation. Refer to the Technical Reference on Lexmark’s Web site for more information about font and symbol set support. Select Select...
-
Page 90: Chapter 36: Understanding Printer Messages
The printer operator panel displays messages describing the current state of the printer and indicates possible printer problems you must resolve. This topic provides a list of all printer messages, explains what they mean, and tells you how to clear the messages. - Page 91 Activating Demo Mode What this message means: The printer is activating files stored in the printer that demonstrate the printer features. In this mode, regular print jobs are ignored and only demonstration files listed on the operator panel can be printed.
- Page 92 Canceling a print job Change <x> What this message means: The printer is requesting that a different type of paper be loaded in one of the input sources. What you can do: Change the paper type in the specified source.
- Page 93 Reestablish communication by removing the specified device and reattaching it to the printer. • In the case of a hardware failure, turn the printer off and back on. If the error recurs, turn the printer off, remove the specified device, and call for service.
- Page 94 See also: Activating PPDS Defragmenting What this message means: The printer is defragmenting the flash memory to reclaim storage space occupied by deleted resources. What you can do: Wait for the message to clear. Do not turn the printer off while this message is displayed.
- Page 95 The printer is responding to a request to disable the menus. What you can do: Wait for the message to clear. Note: While the menus are disabled, you cannot change the printer settings from the operator panel. See also: Disabling the operator panel menus...
- Page 96 What this message means: The printer is attempting to recover the hard disk. Disk recovery takes place in five phases; the second line on the operator panel display shows the percent complete of the current phase. What you can do: Wait for the message to clear.
- Page 97 =___ What this message means: The printer is waiting for you to enter your four-digit personal identification number (PIN). What you can do: Use the operator panel buttons to enter the PIN you identified in the driver when you sent the confidential job to the printer.
- Page 98 Formatting Disk yyy% What this message means: The printer is formatting the hard disk. When formatting takes longer than usual, the second line of the display shows the percent complete. What you can do: Wait for the message to clear.
-
Page 99: Held Jobs May Be Lost
What you can do: • Press to clear the message and continue printing. The printer frees memory by deleting the oldest held job and continues deleting held jobs until there is enough printer memory to process the job. • Press to clear the message without deleting any held jobs. - Page 100 Invalid Network <x> Code What this message means: The code in an internal print server is not valid. The printer cannot receive and process jobs until valid code is programmed into the internal print server. What you can do: Download valid code to the printer internal print server.
-
Page 101: Load Manual
Select one of the input sources. If the printer finds a tray that has paper of the correct type and size, it feeds paper from that tray. If the printer cannot find a tray with the correct paper type and size, it prints on whatever paper is installed in the default input source. -
Page 102: Menus Disabled
You can still open the Job Menu to cancel a job that is printing or to select a confidential job or a held job that you want to print. If you need access to the printer menus, contact your network administrator. - Page 103 A parallel interface is the active communication link. Performing Self Test What this message means: The printer is running the series of start-up tests it performs after it is turned on. What you can do: Wait for the message to clear. Stop...
- Page 104 Ready message. Print Jobs on Disk What this message means: Jobs that were spooled to the hard disk before the printer was last turned off have not yet printed. What you can do: • Press to print the jobs.
- Page 105 Printing Directory List What this message means: The printer is processing or printing a directory of all files stored in flash memory or on a hard disk. What you can do: Wait for the message to clear. See also: Print Directory...
- Page 106 Printing Quality Test Pages What this message means: The printer is processing or printing three pages of text and graphics to help you isolate the cause of print quality problems. What you can do: Wait for the message to clear.
-
Page 107: Program Flash
An update file was used to program the printer, but the information did not fit within the space allocated in the Master Boot Record. P112 An upddle.fls file was used to update the DLE code on a printer with a firmware card installed, but the DLE was not found on the firmware card. P200... - Page 108 Queuing and Deleting Jobs What this message means: The printer is deleting one or more held jobs and sending one or more jobs to print. What you can do: Wait for the message to clear. See also: Printing and deleting held jobs...
-
Page 109: Ready Hex
What this message means: The printer is reducing the resolution of a page in the current job from 600 dots per inch (dpi) to 300 dpi to prevent a 38 Memory Full error. Res Reduced remains on the display while the job prints. -
Page 110: Resetting Maint Cnt Value
See also: Changing menu settings Restore Held Jobs. Go/Stop? What this message means: Someone reset the printer or turned it on, and the printer detects Print and Hold jobs stored on the hard disk. What you can do: • Press . -
Page 111: Restoring Factory Defaults
Restoring Factory Defaults What this message means: The printer is restoring the factory default printer settings. When factory default settings are restored: • All downloaded resources (fonts, macros, symbol sets) in the printer memory are deleted. • All menu settings return to the factory default setting except: –... -
Page 112: Std Bin Full
Std Bin Full What this message means: The standard bin is full. What you can do: Remove the stack of paper in the bin to clear the message. Toner Low What this message means: The print cartridge is low on toner. What you can do: •... - Page 113 See also: Loading the trays Tray <x> Missing What this message means: The specified tray is either missing or not fully inserted into the printer. What you can do: Insert the tray completely into the printer. See also: Loading the trays USB <x>...
- Page 114 Waiting What this message means: The printer has received a page of data to print but is waiting for an End of Job command, a Form Feed command, or additional data. What you can do: • Press to print the contents of the buffer.
- Page 115 34 Wrong Paper Size in Tray <x> What this message means: The printer was expecting to pick a different size paper from the specified tray than what it now detects is moving through the paper path. What you can do: •...
- Page 116 • Install additional memory. 37 Insufficient Collation Area What this message means: The printer memory (or hard disk, if installed) does not have the free space necessary to collate the print job. What you can do: • Press to print the portion of the job already stored and begin collating the rest of the job.
-
Page 117: Insufficient Memory
What you can do: • Press to clear the message and continue the current print job. The printer frees memory by deleting the oldest held job and continues deleting held jobs until there is enough printer memory to process the job. - Page 118 The printer detects an unsupported version of firmware on the installed firmware card. What you can do: • Turn the printer off, and then press and hold Go while turning it on. The printer reads the code on the system card and bypasses the code on the firmware card. •...
- Page 119 50 PPDS Font Error What this message means: The printer cannot find a selected PPDS font and the Best Fit setting is turned off. What you can do: • Press Go to clear the message and continue processing the job.
- Page 120 54 Serial Option <x> Error What this message means: The printer has detected a serial interface error on a serial port. What you can do: • Make sure the serial link is set up correctly and you are using the appropriate cable.
- Page 121 The printer erases any reference to the ENA and then resets. 56 Serial Port <x> Disabled What this message means: Data has been sent to the printer through a serial port, but the serial port is disabled. What you can do: • Press to clear the message.
- Page 122 56 USB Port <x> Disabled What this message means: Data has been sent to the printer through a USB port, but the USB port is disabled. What you can do: • Press to clear the message. The printer discards any data received through the USB port.
- Page 123 58 Too Many Disks Installed What this message means: Too many hard disks are installed on the printer. The printer only supports one hard disk at a time. What you can do: Turn off and unplug the printer. Remove the excess hard disks from the printer. Plug in the printer and turn it on.
-
Page 124: Defective Disk
See also: Setup Guide 62 Disk Full What this message means: There is not enough memory on the hard disk to store the data sent to the printer. What you can do: • Press to clear the message and continue processing. Any information not previously stored on the hard disk is deleted. - Page 125 88 Toner Low What this message means: The printer detects that the toner supply in the print cartridge is low. If you do not have a print cartridge, order one now. You can print approximately 250 more pages before the cartridge becomes empty.
- Page 126 Messages 900–999 relate to printer problems that may require service. What you can do: Turn the printer off and check all cable connections. Turn the printer back on. If the service message recurs, call for service and report the message number and description of the problem.
-
Page 127: Chapter 37: Finishing Menu
Finishing Menu Use the Finishing Menu to define how the printer delivers the printed output. Select a menu item for more details: • Blank Pages • Collation • Copies • Duplex • Duplex Bind • Multipage Border Note: Values marked by an asterisk (*) are the factory default settings. - Page 128 Prints entire job the number of times specified by the Copies menu item. For example, if you set Copies to 2 and send three pages to print, the printer prints page 1, page 2, page 3, page 1, page 2, page 3.
-
Page 129: Duplex Bind
Duplex Bind Purpose: To define the way duplexed pages will be bound, and how the printing on the back of the sheet (even- numbered pages) is oriented in relation to the printing on the front (odd-numbered pages). Values: Long Edge* Assumes binding along the long end of the page (left edge for portrait orientation and top edge for landscape orientation). - Page 130 Multipage Order Purpose: To determine the positioning of multiple page images when using Multipage Print. The positioning depends on the number of images and whether the images are portrait or landscape in orientation. For example, if you select 4 Up multipage printing and portrait orientation, the results differ depending on the Multipage Order value you select: Horizontal Order Vertical Order...
- Page 131 Purpose: To determine the orientation of a multipage sheet. Values: Auto* Lets the printer choose between portrait and landscape orientation. Long Edge Sets the long edge of the paper as the top of the page (landscape). Short Edge Sets the short edge of the paper as the top of the page (portrait).
-
Page 132: Separator Sheets
Separator Sheets Purpose: To insert blank separator sheets between jobs, between multiple copies of a job, or between each page of a job. Values: None* Does not insert separator sheets. Between Copies Inserts a blank sheet between each copy of a job. If Collation is Off, a blank page is inserted between each set of printed pages (all page 1’s, all page 2’s, and so on). -
Page 133: Chapter 38: Job Menu
Job Menu The Job Menu is available when the printer is idle, when the printer is busy processing or printing a job, when a printer message is displayed, or when the printer is in Hex Trace mode. Press the Job Menu. -
Page 134: Confidential Job
Confidential Job Purpose: To print confidential jobs stored in printer memory. (When the confidential job prints, it is automatically deleted from printer memory.) First select your user name and enter the personal identification number (PIN) associated with your confidential job:... -
Page 135: Reset Printer
ASCII job, such as a print screen command, is printing. Reset Printer Purpose: To reset the printer to the user default value for each menu item, delete all downloaded resources (fonts, macros, and symbol sets) stored in printer memory (RAM), and delete all data in the interface link buffer. -
Page 136: Chapter 39: Quality Menu
Quality Menu Use the Quality Menu to change printer settings affecting the quality of printed characters and images. Select a menu item for more details: • PictureGrade • Print Resolution • Toner Darkness Note: Values marked by an asterisk (*) are the factory default settings. -
Page 137: Toner Darkness
Toner Darkness Purpose: To lighten or darken text images, or conserve toner. Values: Select a lower value for finer line width, higher definition in graphics, and lighter grayscale images. Select a higher value for bolder line widths or darker grayscale images. Select 10 for very bold text. Select a value less than 7 to conserve toner. -
Page 138: Chapter 40: Paper Menu
Cassette* Printer treats the multipurpose feeder like any other paper tray. If a print job requests a paper size or type that is only loaded in the multipurpose feeder, the printer pulls paper from the multipurpose feeder for the job. -
Page 139: Custom Types
Then select a value: Duplex Notifies the printer that the specified paper type is loaded properly for duplex printing. If the printer receives a single-sided job using that paper type, the printer inserts blank pages as necessary to print the job properly on preprinted forms. This setting may slow single-sided printing. -
Page 140: Paper Size
Universal Select Universal when you load paper that does not match any of the other available sizes. The printer automatically formats the page for the maximum possible size. You can then set the actual page size from your application software. -
Page 141: Paper Source
Paper Source Purpose: To identify the default paper source. Values: Tray <x> (Tray 1*) MP Feeder Manual Paper Manual Env If you loaded the same size and type of paper in two paper sources (and the Paper Size and Paper Type menu items are correctly set), the trays are automatically linked. -
Page 142: Paper Type
Select paper sources through your software application by selecting type and size. • Automatically link paper sources. Any sources containing the same type and size of paper are automatically linked by the printer, if you have set the Paper Size and the Paper Type to the correct values. MP Feeder Type... -
Page 143: Substitute Size
Substitute Size Purpose: To have the printer substitute the specified paper size if the requested size is not loaded. Values: Printer prompts the user to load the requested paper size. Statement/A5 Prints A5 size jobs on statement size paper if only statement size paper is loaded, and prints statement size jobs on A5 paper if only A5 paper is loaded. -
Page 144: Chapter 41: Pcl Emul Menu
PCL Emul Menu Use the PCL Emul Menu to change printer settings that only affect jobs using the PCL emulation printer language. Select a menu item for more details: • A4 Width • Auto CR after LF • Auto LF after CR •... -
Page 145: Auto Cr After Lf
Auto CR after LF Purpose: To specify whether the printer automatically performs a carriage return after a line feed control command. Values: Off* Printer does not perform a carriage return after a line feed control command. Printer performs a carriage return after a line feed control command. -
Page 146: Font Source
60* (country/region-specific factory default values) 64* (country/region-specific factory default values) The printer sets the amount of space between each line (vertical line spacing) based on the Lines per Page, Paper Size, and Orientation menu items. Select the correct Paper Size and Orientation before changing Lines per Page. -
Page 147: Point Size
Orientation Purpose: To determine how text and graphics are oriented on the page. Values: Portrait* Prints text and graphics parallel to the short edge of the paper. Landscape Prints text and graphics parallel to the long edge of the paper. Pitch Purpose: To specify the font pitch for scalable monospaced fonts. -
Page 148: Symbol Set
See also: Font Name Tray Renumber Purpose: To configure your printer to work with printer drivers or applications that use different source assignments for the paper trays. First select a paper source: Assign Tray <x> Assign Man Env... -
Page 149: Chapter 42: Ppds Menu
PPDS Menu Use the PPDS Menu to change printer settings that only affect jobs using the PPDS emulation printer language. Select a menu item for more details: • Auto CR after LF • Auto LF after CR • Best Fit •... -
Page 150: Best Fit
Printer performs a line feed after a carriage return control command. Best Fit Purpose: To specify whether the printer substitutes the closest matching font when a requested font is not found. Values: Printer stops printing and displays a message indicating that the requested font cannot be found. -
Page 151: Lines Per Inch
60* (country/region-specific factory default values) 64* (country/region-specific factory default values) The printer sets the amount of space between each line (vertical line spacing) based on the Lines per Page, Paper Size, and Orientation menu items. Select the correct Paper Size and Orientation before changing Lines per Page. -
Page 152: Page Format
Landscape Prints text and graphics parallel to the long edge of the paper. Page Format Purpose: To determine where the printer positions the text on the page using the margins set from software applications. Values: Print* The left and top margin areas on the print job are equal to the software margin settings plus the unprintable area. -
Page 153: Chapter 43: Serial Menu
Serial Menu Use the Serial Menu to change printer settings affecting jobs sent to the printer through a serial port (Serial Opt <x>). Select a menu item for more details: • Baud • Data Bits • Honor DSR • Job Buffering •... -
Page 154: Data Bits
Baud Purpose: To specify the rate at which data can be received through the serial port. Values: 1200 57600 2400 115200 4800 9600* 19200 38400 See also: Technical Reference Data Bits Purpose: To specify the number of data bits that are sent in each transmission frame. Values: See also: Technical Reference... -
Page 155: Job Buffering
Honor DSR Purpose: To determine whether the printer uses the Data Set Ready (DSR) signal. DSR is one of the handshaking signals for most serial interface cables. Values: Off* All data received by the serial port is treated as valid data. - Page 156 Printer does not examine the incoming data. The printer uses PostScript emulation to process the job if PS SmartSwitch is On, or uses the default printer language specified in the Setup Menu if PS SmartSwitch is Off.
-
Page 157: Robust Xon
PS SmartSwitch Purpose: To configure the printer so it automatically switches to PostScript emulation when a print job received through the serial port requires it, regardless of the default printer language. Values: Printer examines data on the serial interface and selects PostScript emulation if the data indicates that is the required printer language. -
Page 158: Serial Protocol
User specifies the serial buffer size. The maximum size depends on the size allowed amount of memory in your printer, the size of the other link buffers, and whether Resource Save is set to On or Off. To maximize the range for the serial buffer size, disable or reduce the size of the parallel and USB buffers. -
Page 159: Chapter 44: Network Menu
Network Menu Use the Network Menu to change printer settings affecting jobs sent to the printer through a network port (either Standard Network or Network Opt <x>). Select a menu item for more details: • Job Buffering • MAC Binary PS •... -
Page 160: Network Buffer
User specifies the network buffer size. The maximum size depends on the size allowed amount of memory in your printer, the size of the other link buffers, and whether Resource Save is set to On or Off. To maximize the range for the network buffer size, disable or reduce the size of the parallel, serial, and USB buffers. - Page 161 Printer does not examine the incoming data. The printer uses PostScript emulation to process the job if PS SmartSwitch is On, or uses the default printer language specified in the Setup Menu if PS SmartSwitch is Off.
-
Page 162: Std Net Setup
PS SmartSwitch Purpose: To configure the printer so it automatically switches to PostScript emulation when a print job received through the network port requires it, regardless of the default printer language. Values: Printer examines data on the network interface connection and selects PostScript emulation if the data indicates that is the required printer language. -
Page 163: Chapter 45: Parallel Menu
Parallel Menu Use the Parallel Menu to change printer settings affecting jobs sent to the printer through a parallel port (either Std Parallel or Parallel Opt <x>). Select a menu item for more details: • Advanced Status • Honor Init •... -
Page 164: Honor Init
Does not buffer print jobs to the hard disk. Buffers print jobs to the hard disk. Auto Buffers print jobs only if the printer is busy processing data from another input port. Note: Changing the Job Buffering menu item automatically resets the printer. MAC Binary PS Purpose: To configure the printer to process Macintosh binary PostScript print jobs. -
Page 165: Parallel Buffer
To specify whether the printer performs the special processing required for bidirectional communication, following the conventions defined in the Network Printing Alliance (NPA) Protocol. Values: Printer performs NPA processing. If data is not in NPA format, it is rejected as bad data. Printer does not perform NPA processing. Auto* Printer examines data and determines the format and then processes it appropriately. -
Page 166: Parallel Mode 2
Printer does not examine the incoming data. The printer uses PostScript emulation to process the job if PS SmartSwitch is On, or uses the default printer language specified in the Setup Menu if PS SmartSwitch is Off. - Page 167 PS SmartSwitch Purpose: To configure the printer so it automatically switches to PostScript emulation when a print job received through the parallel port requires it, regardless of the default printer language. Values: Printer examines data on the parallel interface and selects PostScript emulation if the data indicates that is the required printer language.
-
Page 168: Chapter 46: Setup Menu
• Page Protect Note: Values marked by an asterisk (*) are the factory default settings. Alarm Control Purpose: To establish whether the printer sounds an alarm when the printer requires operator intervention. Values: Printer does not sound an alarm. Single* Printer sounds three quick beeps. -
Page 169: Auto Continue
Auto Continue Purpose: To define the amount of time (in seconds) the printer waits after displaying an operator intervention error message before it resumes printing. Values: Disabled* Printer does not resume printing until someone clears the error message. 5...255 Printer waits the specified amount of time, and then automatically resumes printing. -
Page 170: Jam Recovery
Values: Printer reprints jammed pages. Printer does not reprint jammed pages. Auto* Printer reprints a jammed page unless the memory required to hold the page is needed for other printer tasks. Job Accounting Purpose: To store statistical information about your most recent print jobs on the hard disk. The statistics include whether the job printed with or without errors, the print time, the job size (in bytes), the requested paper size and paper type, the total number of printed pages, and the number of copies requested. -
Page 171: Power Saver
Power Saver Purpose: To specify the amount of time (in minutes) the printer waits after a job is printed before it goes into a reduced power state. Values: 1...240 Specifies the amount of time after a print job before the printer goes into Power Saver mode. -
Page 172: Print Timeout
Purpose: To specify the amount of time (in seconds) the printer waits before printing the last page of a print job that does not end with a command to print the page. The print timeout counter does not start until Waiting is displayed. -
Page 173: Wait Timeout
Wait Timeout Purpose: To specify the amount of time (in seconds) the printer waits to receive additional bytes of data from the computer. When this timeout expires, the print job is canceled. Values: Disabled Disables Wait Timeout. -
Page 174: Chapter 47: Postscript Menu
PostScript Menu Use the PostScript Menu to change printer settings that only affect jobs using the PostScript emulation printer language. Select a menu item for more details: • Font Priority • Print PS Error Note: Values marked by an asterisk (*) are the factory default settings. -
Page 175: Chapter 48: Usb Menu
USB Menu Use the USB Menu to change printer settings affecting a Universal Serial Bus (USB) port. Select a menu item for more details: • Job Buffering • MAC Binary PS • NPA Mode Note: Values marked by an asterisk (*) are the factory default settings. - Page 176 To specify whether the printer performs the special processing required for bidirectional communication, following the conventions defined in the Network Printing Alliance (NPA) Protocol. Values: Printer performs NPA processing. If data is not in NPA format, it is rejected as bad data. Printer does not perform NPA processing. Auto* Printer examines the data to determine the format and then processes it appropriately.
-
Page 177: Usb Buffer
PS SmartSwitch Purpose: To configure the printer so it automatically switches to PostScript emulation when a print job received through the USB port requires it, regardless of the default printer language. Values: Printer examines data on the USB interface and selects PostScript emulation if the data indicates that is the required printer language. -
Page 178: Chapter 49: Utilities Menu
Utilities Menu Use the Utilities Menu to print a variety of listings relating to available printer resources, printer settings, and print jobs. Other menu items let you set up printer hardware and troubleshoot printer problems. Select a menu item for more details: •... -
Page 179: Factory Defaults
Deletes any data stored on the hard disk and prepares the device to receive new resources. Cancels the request to format the hard disk and leaves current resources stored on the disk. Do not turn off the printer while the hard disk is formatting. ARNING... -
Page 180: Hex Trace
Hex Trace Purpose: To help isolate the source of a print job problem. With Hex Trace selected, all data sent to the printer is printed in hexadecimal and character representation. Control codes are not executed. To exit Hex Trace, turn the printer off or reset the printer from the Job Menu. -
Page 181: Print Fonts
Prints a sample of all printer fonts available for PPDS emulation. Print Menus Purpose: To print a listing of the current user default values, the installed options, the amount of installed printer memory, and the status of printer supplies. Print Net <x> Setup... -
Page 182: Remove Held Jobs
Remove Held Jobs Purpose: To remove confidential and held jobs from the printer hard disk. Note: Remove Held Jobs is only available when confidential jobs or held jobs are stored on an installed hard disk. Values: Removes all confidential and held jobs stored on the hard disk. -
Page 183: Notices
Edition: July 2002 The following paragraph does not apply to any country where such provisions are inconsistent with local law: LEXMARK INTERNATIONAL, INC., PROVIDES THIS PUBLICATION “AS IS” WITHOUT WARRANTY OF ANY KIND, EITHER EXPRESS OR IMPLIED, INCLUDING, BUT NOT LIMITED TO, THE IMPLIED WARRANTIES OF MERCHANTABILITY OR FITNESS FOR A PARTICULAR PURPOSE. -
Page 184: Trademarks
Lexmark International Ltd., Marketing and Services Department, Westhorpe House, Westhorpe, Marlow Bucks SL7 3RQ. Lexmark may use or distribute any of the information you supply in any way it believes appropriate without incurring any obligation to you. You can purchase additional copies of publications related to this product by calling 1-800-553-9727. - Page 185 Candid Agfa Corporation CG Omega Product of Agfa Corporation CG Times Based on Times New Roman under license from The Monotype Corporation plc, is a product of Agfa Corporation Chicago Apple Computer, Inc. Clarendon Linotype-Hell AG and/or its subsidiaries Eurostile Nebiolo Geneva Apple Computer, Inc.
-
Page 186: Licensing Notice
BSD License and Warranty statements GNU General Public License The Lexmark modified GNU licensed software is free software; you can redistribute it and/or modify it under the terms of the licenses referenced above. These licenses do not provide you any rights to the Lexmark copyrighted software in this printer. -
Page 187: Cautions And Warnings
Federal Communications Commission (FCC) compliance information statement The Lexmark W812n network printer, Machine Type 4022-110 , has been tested and found to comply with the limits for a Class A digital device, pursuant to Part 15 of the FCC Rules. Operation is subject to the following two conditions: (1) this device may not cause harmful interference, and (2) this device must accept any interference received, including interference that may cause undesired operation. - Page 188 Federal Communications Commission (FCC) compliance information statement The Lexmark W812 laser printer, Machine Type 4022-100 , has been tested and found to comply with the limits for a Class B digital device, pursuant to Part 15 of the FCC Rules. Operation is subject to the following two conditions: (1) this device may not cause harmful interference, and (2) this device must accept any interference received, including interference that may cause undesired operation.
-
Page 189: The United Kingdom Telecommunications Act 1984
A declaration of conformity with the requirements of the directives has been signed by the Director of Manufacturing and Technical Support, Lexmark International, S.A., Boigny, France. This product satisfies the Class B limits of EN 55022 and safety requirements of EN 60950. -
Page 190: Energy Star
Companies participating in this program introduce products that power down when they are not being used. This feature will cut the energy used by up to 50 percent. Lexmark is proud to be a participant in this program. -
Page 191: Index
Index A4 Width (PCL Emul Menu) 144 Abort Restore (Job Menu) 133 aborting restoration of held jobs Advanced Status (Parallel Menu) Alarm Control (Setup Menu) 168 alarms error messages 169 setting 168 toner 173 Auto Continue (Setup Menu) 169 Auto CR after LF (PCL Emul Menu) Auto CR after LF (PPDS Menu) Auto LF after CR (PCL Emul Menu) Auto LF after CR (PPDS Menu) - Page 192 Job Buffering (USB Menu) 175 Job Menu 133 Abort Restore 133 Cancel Job 133 Confidential Job 134 Held Jobs 134 Print Buffer 135 Reset Printer 135 label sheets, printing 28 labels guidelines 19 laser notice 190 letterhead guidelines 18 loading 22...
- Page 193 Ready 108 Ready Hex 109 Remove Paper <specified bin> Res Reduced 109 Resetting Maint Cnt Value 110 Resetting the Printer 110 Restore Held Jobs. Go/Stop? Restoring Factory Defaults 111 Restoring Held Job xxx/yyy 111 Serial <x> 111 Std Bin Full 112 Toner Low 112 Tray <x>...
- Page 194 135 taking offline 65 with Menu button 65 with Stop button 66 Printer Language (Setup Menu) printer memory option, removing printer menu settings, changing 80 printer menus disabling 75 enabling 75 locking operator panel 75 printer messages Enter PIN 16 No Jobs Found.
- Page 195 PS SmartSwitch (Network Menu) PS SmartSwitch (Parallel Menu) PS SmartSwitch (Serial Menu) PS SmartSwitch (USB Menu) 177 PS SmartSwitch, setting See also printer language 172 network port 162 parallel port 167 serial port 157 USB port 177 Quality Menu 136...
- Page 196 66 with Menu button 65 with Stop button 66 test printing Hex Trace mode 180 menus page 181 timeout print 172 wait 173 toner alarm 173 Toner Alarm (Setup Menu) 173 Toner Darkness (Quality Menu) transparencies guidelines 18...
- Page 197 Lexmark and Lexmark with diamond design are trademarks of Lexmark International, Inc., registered in the United States and/or other countries. © 2002 Lexmark International, Inc. 740 West New Circle Road Lexington, Kentucky 40550...