Table of Contents
Advertisement
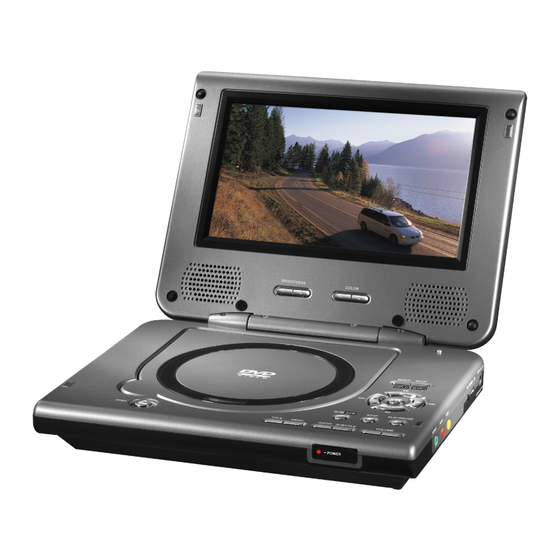
PORTABLE DVD PLAYER
•
Plays DVDs, Audio CDs, CD-R/RW, MP3 CDs and Picture CDs
•
Includes Rechargeable Battery for Portable Use Anywhere
•
Includes AC Adaptor
•
Includes Car Adaptor for Travel
•
Connects to Your Larger Screen Home TV (cable included)
IB-PDV702-WM-E-010807.pmd
INSTRUCTION MANUAL
PLEASE READ CAREFULLY BEFORE USE
1
MODEL PDV-702
IB-PDV702-WM-E-010807
1/30/2007, 7:12 PM
Advertisement
Table of Contents

Subscribe to Our Youtube Channel
Related Manuals for Durabrand PDV-702


Summary of Contents for Durabrand PDV-702
-
Page 1: Portable Dvd Player
• Includes Rechargeable Battery for Portable Use Anywhere • Includes AC Adaptor • Includes Car Adaptor for Travel • Connects to Your Larger Screen Home TV (cable included) PLEASE READ CAREFULLY BEFORE USE IB-PDV702-WM-E-010807.pmd MODEL PDV-702 IB-PDV702-WM-E-010807 1/30/2007, 7:12 PM... -
Page 2: Important Safety Instructions
SAFETY INSTRUCTIONS TO PREVENT FIRE OR SHOCK HAZARD, DO NOT USE THE PLUG WITH AN EXTENSION CORD, RECEPTACLE OR OTHER OUTLET UNLESS THE BLADES CAN BE FULLY INSERTED TO PREVENT BLADE EXPOSURE. TO REDUCE THE RISK OF FIRE OR ELECTRIC SHOCK, DO NOT EXPOSE THIS APPLIANCE TO RAIN OR MOISTURE. -
Page 3: Included Accessories
SAFETY INSTRUCTIONS Do not apply oil or petroleum products or solvents to any part of this set. This device complies with Part 15 of the FCC Rules. Operation is subject to the following two conditions: (1) This device may not cause harmful interference, and (2) This device must accept any interference received, including interference that may cause undesirable operation. -
Page 4: Table Of Contents
TABLE OF CONTENTS • Getting Started: Safety Instructions ---------------------------------------------------------------------------------------- 1 Controls Overview ---------------------------------------------------------------------------------------- 4 Power Supply ---------------------------------------------------------------------------------------------- 6 Notes on Discs -------------------------------------------------------------------------------------------- 8 • Basic Operation: 1. Playing a Disc -------------------------------------------------------------------------------------- 9 2. Using the Search Function --------------------------------------------------------------------- 10 3. Selecting Audio Mode -------------------------------------------------------------------------- 10 4. -
Page 5: Controls Overview
CONTROLS OVERVIEW Front View 1. TFT LCD SCREEN – Provides a high resolution picture. 2. SCREEN COLOR BUTTONS – Adjust the color of the LCD screen to your taste. 3. SCREEN BRIGHTNESS BUTTONS – Adjust the brightness of the LCD screen. 4. -
Page 6: Rechargeable Battery
CONTROLS OVERVIEW 17. ZOOM / SLOW BUTTON – Press to zoom (enlarge or reduce) the playing picture in DVD mode or hold more than 1 second to view slow motion playback. 18. PLAY/PAUSE BUTTON 19. STOP BUTTON – Stops playback, press twice for full stop. 20. -
Page 7: Power Supply
12V power system. Insert the car adaptor plug to the DC IN jack on the portable DVD player and connect the car adaptor to the vehicle’s 12V accessory / cigarette lighter socket, the car adaptor indicator will light CAUTION: 1. -
Page 8: Attaching The Battery
C. Using the rechargeable battery The rechargeable battery pack is suitable for portable use which allows you to enjoy the unique functions of this unit outdoors. Remember to charge the battery fully before initial use (about 5 hours). Attaching the Battery (refer to the diagram on the right) 1. -
Page 9: Notes On Discs
NOTES ON DISCS Discs that can be played DISC TYPE & LOGO MARK DVD Video (Region 1) DVD-R / DVD-RW JPEG disc Music CD CD-R disc CD-RW disc MP3 disc NOTE: A hand symbol “ ” may appear on the screen when pressing some buttons. A “ means that the operation is not permitted by the DVD player for the disc in that mode or at that time. -
Page 10: Playing A Disc
1. PLAYING A DISC Lift the LCD screen. Slide the DVD player’s POWER switch to the ON position, the DVD logo (start-up picture) will appear on the screen. Some discs will start playing automatically, and others will display the disc contents menu on the screen. -
Page 11: Using The Search Function
2. USING THE SEARCH FUNCTION During play, you can search quickly through a chapter or track. Search through a chapter or a track During play, press the FORWARD search speed changes as follows: FORWARD X2 FORWARD X4 PLAY During play, press the BACKWARD search speed changes as follows: BACKWARD X2 PLAY Y... -
Page 12: Displaying Disc Information
5. DISPLAYING DISC INFORMATION If you want to know disc information during play, press and hold the REPEAT/DISPLAY button. Every time you press and hold the REPEAT/DISPLAY button, the disc information will appear on the top of the screen as shown below: For DVD Play DVD TT 1/2 CH 6/12 o)) 1/3ENG... -
Page 13: Repeat Play
6. REPEAT PLAY The REPEAT function allows you to repeat the current track, chapter, title, a chosen section (A-B), or all of the disc. Each time you press the REPEAT/DISPLAY button repeatedly, the repeat mode changes as follows: For DVD REP: [CHAPTER] REP: [TITLE] WILL REPEAT THIS... -
Page 14: Zoom Play
8. ZOOM PLAY The ZOOM/SLOW button allows you to do a minimal zoom into a picture as well as shift the zoom point. Press the ZOOM/SLOW button repeatedly to enlarge or reduce a picture. The display will show as follows: ZOOM 2 ZOOM 3 ZOOM 4... -
Page 15: Mp3 Disc Operation
10. MP3 DISC OPERATION This allows you to play your MP3 audio recorded disc you made on this set. This set will not play WMA format songs. When recording your MP3 disc on your computer, please record the songs in MP3 format. Load your recorded MP3 disc into the player, a menu will show on the screen. -
Page 16: System Connections
SYSTEM CONNECTIONS This DVD player can also be used to view movies on your larger screen TV. When viewing on your TV, you may fold the screen down to shut off the TFT LCD display. Always ensure when connecting cables, the DVD player, TV and any other electrical equipment are turned off and not plugged into the AC outlet. - Page 17 SYSTEM CONNECTIONS For TV Connection Connecting to a digital home theater system Refer to your home theater system’s manual before connection. For Video, insert the 3.5mm plug of the video cable into the VIDEO OUT jack on your DVD player and the yellow plug into your TV’s VIDEO jack. For Audio, insert the 3.5mm plug of the audio cable into the AUDIO OUT jack on the DVD player and insert the RED and WHITE plugs to your home theater system’s AUDIO IN jacks.
-
Page 18: Watching A Dvd On Your Tv
WATCHING A DVD ON YOUR TV After all the connections have been done, please follow steps below to watch a DVD on your TV. Make sure all of the equipment is plugged back into the AC outlet. Lift the LCD screen. Slide the DVD player’s POWER switch to the ON position, the DVD logo (start-up picture) will appear on the screen. -
Page 19: Initial Setting
INITIAL SETTING When using the DVD player for the first time, you may need to set some of the settings and adjustments according to your TV and favorite preferences. You can get to the SETUP menu by following the below steps. Press the SETUP/SEARCH button, a SETUP menu will appear on the TV screen. -
Page 20: Selecting The Tv Type
INITIAL SETTING Selecting the TV TYPE Select the aspect ratio of the movie to match the LCD screen and your TV set. There are three types of screen sizes you may select. NOTE: If your DISC is not encoded to allow you to change the aspect ratio, the TV display cannot be changed. -
Page 21: Language Setup (Osd, Audio, Subtitle & Menu)
INITIAL SETTING LANGUAGE SETUP (On Screen Display, AUDIO, SUBTITLE & MENU) These items allow you to preset the OSD language (OSD = On Screen Display), audio language, subtitle language, and menu language that will always be used for every disc on this player (if the language selected is available). -
Page 22: Precautions
PRECAUTIONS Safety • As the laser beam used in the DVD player may be harmful to the eyes, do not attempt to disassemble the cabinet. Refer servicing to qualified personnel only (it is perfectly safe if you don’t unscrew and open the cabinet). -
Page 23: Trouble Shooting
TROUBLE SHOOTING Symptom No power. Battery is fully charged but does not work. Battery drains too fast in stop mode. • Play fails to start even when PLAY is pressed. • Play starts but then stops immediately. No picture on your external TV’s screen. - Page 24 TROUBLE SHOOTING Symptom No sound from your TV or speakers. The color buttons have no function or have less function. No rapid advance or rapid reverse play. Cabinet vibrates or hums. A specific disc does not play. The player’s controls don’t work or the player cannot work properly.
- Page 25 TROUBLE SHOOTING Symptom The LCD picture is not 16:9 widescreen even you have set the TV TYPE to 16:9. Audio soundtrack and/ or subtitle language is not at the initial settings. No subtitles. Alternative audio soundtrack (or subtitle) language does not show. Picture is frozen.
-
Page 26: Glossary
GLOSSARY TITLE The longest sections of a picture or a music piece on a DVD, or a movie, etc.. Each title is assigned a title number enabling you to locate the title you want. CHAPTER Sections of a picture or a music piece on a DVD that are smaller than titles. -
Page 27: Ib-Pdv702-Wm-E
SPECIFICATIONS General Description TFT LCD screen size: 7" Power source: AC adaptor: 100 - 240V, 50/60Hz, DC 9V, 1.5A output (included) Car adaptor: 12V input, 12V, 2A output (included), fuse 3A, 250V Power consumption: 13.5 Watts [normal household current] Signal system: NTSC TV system 1.0 Vp-p Video output level:... -
Page 28: Limited Warranty
During the initial 90 day period after original purchase, we will service or exchange, at no charge, the set that is returned to LENOXX ELECTRONICS CORP. After the initial 90 day period expires, and for a period of 12 months from original purchase, we will repair the unit covering any part(s) that need to be replaced at no charge, but will charge for the cost of labor, return postage paid by Lenoxx.
Need help?
Do you have a question about the PDV-702 and is the answer not in the manual?
Questions and answers