Planet WNRT-617G User Manual
150 mbps 802.11n wireless 3g router
Hide thumbs
Also See for WNRT-617G:
- User manual (168 pages) ,
- Quick installation manual (48 pages) ,
- Quick installation manual (48 pages)
Table of Contents
Advertisement
Quick Links
Download this manual
See also:
User Manual
Advertisement
Table of Contents

Related Manuals for Planet WNRT-617G


Summary of Contents for Planet WNRT-617G
- Page 1 ’ r ’ ’ s 150Mbps 802.11n Wireless 3G Router...
-
Page 2: Federal Communication Commission Interference Statement
Copyright Copyright © 2011 by PLANET Technology Corp. All rights reserved. No part of this publication may be reproduced, transmitted, transcribed, stored in a retrieval system, or translated into any language or computer language, in any form or by any means, electronic, mechanical, magnetic, optical, chemical, manual or otherwise, without the prior written permission of PLANET. -
Page 3: National Restrictions
Federal Communication Commission (FCC) Radiation Exposure Statement This equipment complies with FCC radiation exposure set forth for an uncontrolled environment. In order to avoid the possibility of exceeding the FCC radio frequency exposure limits, human proximity to the antenna shall not be less than 20 cm (8 inches) during normal operation. R&TTE Compliance Statement This equipment complies with all the requirements of DIRECTIVE 1999/5/CE OF THE EUROPEAN PARLIAMENT AND THE COUNCIL OF 9 March 1999 on radio equipment and telecommunication terminal... - Page 4 Revision User’s Manual for PLANET 802.11n Wireless 3G Router Model: WNRT-617G Rev: 1.0 (March, 2011) Part No. EM-WNRT617G_v1.0 (2081-E50210-000)
-
Page 5: Table Of Contents
CONTENTS Chapter 1. Product Introduction......................1 Package Contents......................... 1 Product Description....................... 1 Product Features........................2 Product Specification......................3 Chapter 2. Hardware Installation ......................6 Hardware Description......................6 2.1.1 The Front Panel ......................6 2.1.2 LED Indications......................7 Chapter 3. Connecting the Router......................9 System Requirements...................... - Page 6 DHCP ..........................67 5.7.1 DHCP Settings......................67 5.7.2 DHCP Clients List ....................68 5.7.3 Address Reservation ....................69 Forwarding ..........................71 5.8.1 Virtual Servers ......................72 5.8.2 Port Triggering ......................75 5.8.3 DMZ ........................77 5.8.4 UPnP........................78 Security ..........................79 5.9.1 Basic Security ......................79 5.9.2 Advanced Security....................81 5.9.3 Local Management ....................83 5.9.4 Remote Management .....................84 5.10 Parental Control ........................86...
- Page 7 5.16.4 Factory Defaults....................120 5.16.5 Backup & Restore....................121 5.16.6 Reboot ........................121 5.16.7 Password ......................122 5.16.8 System Log......................123 5.16.9 Statistics........................127 Chapter 6. Quick Connect to a Wireless Network ................129 Windows XP (Wireless Zero Configuration)..............129 Windows 7 (WLAN AutoConfig) ..................131 Mac OS X 10.x ........................134 iPhone / iPod Touch / iPad ....................136 Appendix A: FAQ ..........................139 Appendix B: Configuring the PCs ......................145...
-
Page 8: Chapter 1. Product Introduction
Office/Home Office (SOHO) networks and the users demanding higher networking performance. 3G/WAN Broadband Connection The Wireless 3G Router, WNRT-617G, provides 3G and WAN (xDSL, static IP, or dynamic IP) two kinds of broadband connection to get on the Internet. You can access the Internet no matter at home or outside on business. -
Page 9: Product Features
AP and wireless client will be built immediately. Advanced Firewall Security The WNRT-617G supports NAT function to allow multiple users to access Internet via a single legal IP. It also provides Virtual Server for LAN PC to act as an application server and offer certain service to the clients on Internet. -
Page 10: Product Specification
User’s Manual of WNRT-617G Easy Installation & Management Web-based UI for and Quick setup for easy configuration Remote Management allows configuration from a remote site System status monitoring includes DHCP Client, System Log 1.4 Product Specification WNRT-617G Product 150Mbps 802.11n Wireless 3G Router... - Page 11 User’s Manual of WNRT-617G Low: 12 dBm 130M: -68dBm@10% PER 108M: -68dBm@10% PER 54M: -68dBm@10% PER Receive Sensitivity 11M: -85dBm@8% PER 6M: -88dBm@10% PER 1M: -90dBm@8% PER Wireless Management Features Wireless Operation AP, WDS (AP+Bridge) Mode WEP (64/128/152-bit) encryption security...
-
Page 12: Mac Os X
User’s Manual of WNRT-617G Web-based (HTTP) management interface Remote management System Management SNTP time synchronize Easy firmware upgrade System Log supports auto mail and save to local host Windows 7(32-bit/64-bit) Windows Vista (32-bit/64-bit) OS Compatibility Windows XP Mac OS X 10.4 and higher Standards Conformance IEEE 802.11n (1T1R, up to 150Mbps) -
Page 13: Chapter 2. Hardware Installation
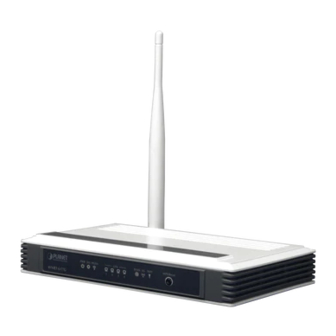
User’s Manual of WNRT-617G Chapter 2. Hardware Installation Please follow the instructions below to build the wireless network connection between WNRT-617G and your computers. 2.1 Hardware Description 2.1.1 The Front Panel The front panel provides a simple interface monitoring the router. -
Page 14: Led Indications
The LEDs on the front panel indicate instant status of port links, wireless data activity, system power; and help monitor and troubleshoot when needed. Figure 2-2 Table 2-1 show the LED indications of the Wireless Router. LED Definition Figure 2-2 WNRT-617G Front Panel Status Function Power is on. Power is off. The Router is initializing. Flashing The Router is working properly. - Page 15 Figure 2-3 Rear Panel Interface Function The Power socket is where you will connect the power adapter. POWER Please use the power adapter provided with WNRT-617G. ON/OFF The button of the power. Connect to the DSL/cable Modem, or Ethernet 1,2,3,4 (LAN) Connect to the user’s PC or network devices...
-
Page 16: Chapter 3. Connecting The Router
User’s Manual of WNRT-617G Chapter 3. Connecting the Router 3.1 System Requirements Broadband Internet Access Service (DSL/Cable/Ethernet connection) One DSL/Cable Modem that has an RJ-45 connector (not necessary if the Router is connected directly to the Ethernet.) PCs with a working Ethernet Adapter and an Ethernet cable with RJ-45 connectors PC of subscribers running Windows 98/ME, NT4.0, 2000/XP, Windows Vista / Win 7, MAC OS 9 or... - Page 17 Ethernet cable, shown in Figure 3-2. Figure 3-2 Hardware Installation of the WNRT-617G Wireless Router Step 5. Connect the power adapter to the power socket on the Router, and the other end into an electrical outlet. Then power on the Router.
-
Page 18: Chapter 4. Quick Installation Guide
4.1 Manual Network Setup - TCP/IP Configuration The default IP address of the WNRT-617G is 192.168.1.1. And the default Subnet Mask is 255.255.255.0. These values can be changed as you desire. In this guide, we use all the default values for description. - Page 19 User’s Manual of WNRT-617G Figure 4-1 In the prompt window shown below, double click on the Internet Protocol (TCP/IP). Figure 4-2 The following TCP/IP Properties window will display and the IP Address tab is open on this window by default.
-
Page 20: Configure The Ip Address Manually
User’s Manual of WNRT-617G Setting IP address automatically Select Obtain an IP address automatically, Choose Obtain DNS server automatically, as shown in the Figure below: Figure 4-3 Now click OK to save your settings. 4.1.2 Configure the IP Address Manually Summary: Set up the TCP/IP Protocol for your PC. - Page 21 User’s Manual of WNRT-617G Enter the Router’s LAN IP address (the default IP is 192.168.1.1) into the Default gateway field. Select Use the following DNS server addresses radio button. In the Preferred DNS Server field, you can enter the DNS server IP address which has been provided by your ISP Figure 4-4 Now click OK to save your settings.
- Page 22 User’s Manual of WNRT-617G Figure 4-5 In the run box type “cmd” and click OK. (Windows Vista users type “cmd” in the Start .Search box.)At the prompt. Figure 4-6 Open a command prompt, and type ping 192.168.1.1, and then press Enter.
- Page 23 User’s Manual of WNRT-617G Figure 4-7 Success result of Ping command If the result displayed is similar to Figure 4-8, it means the connection between your PC and the Router has failed. Figure 4-8 Failure result of Ping command If the address is 0.0.0.0, check your adapter installation, security settings, and the settings on your router.
- Page 24 User’s Manual of WNRT-617G The 1/2/3/4 LEDs of LAN ports which you link to on the Router and LEDs on your PC's adapter should be lit. If the Router's IP address is 192.168.1.1, your PC's IP address must be within the range of 192.168.1.2 ~ 192.168.1.254.
-
Page 25: Starting Setup In Web Ui
User’s Manual of WNRT-617G 4.2 Starting Setup in Web UI It is easy to configure and manage the WNRT-617G with web browser. Step 1. To access the configuration utility, open a web-browser and enter the default IP address http://192.168.1.1 in the address field of the browser. - Page 26 After entering the username and password, the main screen appears as Figure 4-11 Figure 4-11 WNRT-617G Web UI Screenshot Step 2. After successfully login in, you can click the Quick Setup to quickly configure your Router. Figure 4-12 Quick Setup...
- Page 27 User’s Manual of WNRT-617G Step 3. Select a desired Internet Access mode and then click Next. The configuration for each mode is similar. Here we take 3G Preferred mode for example. Please refer to the procedures below to configure the other modes.
- Page 28 User’s Manual of WNRT-617G Step 4. The next screen will appear as shown in Figure 4-16. After finishing the configuration on this page, click Next to continue, Please configure the PIN code of the 3G modem first and save the settings before insert your USB 3G Modem to the router.
- Page 29 User’s Manual of WNRT-617G Dial Number and APN manually and manually fill the Dial Number and APN blanks below. Set the Dial Number Check the box and fill the Dial Number and APN blanks below if your and APN manually ISP is not listed in the Mobile ISP list or the default values are not the latest ones.
- Page 30 User’s Manual of WNRT-617G If the connection type detected is PPPoE, the next screen will appear as shown in Figure 4-16. Enter the User Name and Password provided by your ISP. These fields are case-sensitive. If you have difficulty with this process, please contact your ISP.
- Page 31 (SSID: Service Set Identification) must be assigned to all wireless devices in your network. Considering your wireless network security, the default SSID is set to be default. This value is case-sensitive. For example, PLANET is NOT the same as planet.
- Page 32 User’s Manual of WNRT-617G Wireless Security Disable Security The wireless security function can be enabled or disabled. If disabled, the wireless stations will be able to connect to the Router without encryption. It is recommended strongly that you choose one of following options to enable security.
- Page 33 User’s Manual of WNRT-617G Figure 4-1 6 Quick Setup – Finish If there is something changed on the Wireless page, you will see the Finish page as shown in Figure 4-20. Click the Reboot button to make your wireless configuration to take effect and finish the Quick Setup.
-
Page 34: Chapter 5. Configuring The Router
User’s Manual of WNRT-617G Chapter 5. Configuring the Router This chapter will show each Web page's key functions and the configuration way. 5.1 Login After successfully login, you will see the fifteen main menus on the left of the Web-based utility. On the right, there are the corresponding explanations and instructions. -
Page 35: Quick Setup
User’s Manual of WNRT-617G Figure 5-2 Router Status 5.3 Quick Setup Please refer to Section 4.2: Starting Setup in Web UI. -28-... -
Page 36: Wps
User’s Manual of WNRT-617G 5.4 WPS This section will guide you to add a new wireless device quickly to an existing network by WPS (Wi-Fi Protected Setup) function. Step 1. Choose menu “WPS”, you will see the next screen (shown in... - Page 37 User’s Manual of WNRT-617G To build a successful connection by WPS, you should also do the corresponding configuration of the new device for WPS function meanwhile. By Push Button Configuration (PBC) If the wireless adapter supports Wi-Fi Protected Setup and the Push Button Configuration (PBC) method, you can add it to the network by PBC with the following two methods.
- Page 38 User’s Manual of WNRT-617G Step 3: Wait for a while until the next screen appears. Click Finish to complete the WPS configuration. II. By PIN If the new device supports Wi-Fi Protected Setup and the PIN method, you can add it to the network by PIN with the following two methods.
- Page 39 User’s Manual of WNRT-617G Step 2: For the configuration of the wireless adapter, please choose the option that you want to enter the PIN of the Router in the configuration utility of the Wireless adapter, and enter it into the field. Then click Next.
-
Page 40: Network
User’s Manual of WNRT-617G 5.5 Network 5-8): Internet Access, 3G, WAN, There are five submenus under the Network menu (shown in Figure MAC Clone, LAN. Click any of them, and you will be able to configure the corresponding function. Figure 5-8 The Network menu 5.5.1 Internet Access... - Page 41 User’s Manual of WNRT-617G 3G Only In this mode, the router will try 3G access only. WAN access is disabled. WAN Preferred In this mode, the router will try WAN access first; When the WAN access fails, and 3G access is valid, the router would switch to 3G access;...
- Page 42 User’s Manual of WNRT-617G 5.5.2 3G Choose menu “Network→3G”, you can configure parameters for 3G function on the screen below. Please do not insert the 3G USB Modem to the router before configure the settings. When the USB modem is unplugged, corresponding information will be shown as in Figure 5-10.
- Page 43 User’s Manual of WNRT-617G Figure 5-10 3G The page includes the following fields: Object Description Location Please select the location where you're enjoying the 3G Modem. Mobile ISP Please select the ISP (Internet Service Provider) you apply to for 3G service.
- Page 44 User’s Manual of WNRT-617G Connection Mode Connect on You can configure the Router to disconnect your Demand Internet connection after a specified period of the Internet connectivity (Max Idle Time). If your Internet connection has been terminated due to inactivity, Connect on Demand enables the...
- Page 45 User’s Manual of WNRT-617G Table 5-3 Click the Save button to save your settings. Click the Modem Settings button if your 3G USB Modem is not supported by the Router, and then you will see the screen as shown in Figure 5-11.
-
Page 46: Wan
User’s Manual of WNRT-617G 4. Click the Upload button to upload the configuration. Figure 5-12 Add or Modify a 3G USB Modem Entry 5.5.3 WAN Choose menu “Network→WAN”, you can configure the IP parameters of the WAN on the screen below. - Page 47 User’s Manual of WNRT-617G Figure 5-13 WAN - Dynamic IP This page displays the WAN IP parameters assigned dynamically by your ISP, including IP address, Subnet Mask, Default Gateway, etc. Click the Renew button to renew the IP parameters from your ISP.
- Page 48 User’s Manual of WNRT-617G DHCP is rarely required.) Table 5-4 If you get “Address not found” error when you access a Website, it is likely that your DNS servers are set up improperly. You should contact your ISP to get the correct DNS server address.
- Page 49 User’s Manual of WNRT-617G provided by your ISP. MTU Size The normal MTU (Maximum Transmission Unit) value for most Ethernet networks is 1500 Bytes. It is not recommended that you change the default MTU Size unless required by your ISP.
- Page 50 User’s Manual of WNRT-617G The page includes the following fields: Object Description User Name/Password Enter the User Name and Password provided by your ISP. These fields are case-sensitive. Secondary Connection Disabled The Secondary Connection is disabled by default, so there is PPPoE connection only.
- Page 51 User’s Manual of WNRT-617G If you want to do some advanced configurations, please click the Advanced button, and the page shown in Figure 5-16 will then appear: Figure 5-16 PPPoE Advanced Settings The page includes the following fields: Object Description MTU Size The default MTU size is “1480”...
- Page 52 User’s Manual of WNRT-617G Click the Save button to save your settings. BigPond Cable If your ISP provides BigPond Cable (or Heart Beat Signal) connection, please select BigPond Cable. And you should enter the following parameters (Figure 5-17): Figure 5-17...
- Page 53 User’s Manual of WNRT-617G QLD - qld.bigpond.net.au MTU Size The normal MTU (Maximum Transmission Unit) value for most Ethernet networks is 1500 Bytes. It is not recommended that you change the default MTU Size unless required by your ISP. Connect on Demand...
- Page 54 User’s Manual of WNRT-617G L2TP / Russia L2TP If your ISP provides L2TP / Russia L2TP connection, please select L2TP/Russia L2TP option. And enter the following parameters (Figure 5-18): Figure 5-18 L2TP Settings The page includes the following fields: Object...
- Page 55 User’s Manual of WNRT-617G wish to activate Connect on Demand, click the radio button. If you want your Internet connection to remain active at all times, enter 0 in the Max Idle Time field. Otherwise, enter the number of minutes you want to have elapsed before your Internet connection terminates.
- Page 56 User’s Manual of WNRT-617G PPTP / Russia PPTP If your ISP provid es PPTP / Russia PPTP connection, please select PPTP/Russia PPTP option. And enter the following parameters (Figure 5-19): Figure 5-19 PPTP Settings The page includes the following fields:...
- Page 57 User’s Manual of WNRT-617G Internet connection has been terminated due to inactivity, Connect on Demand enables the Router to automatically re-establish your connection as soon as you attempt to access the Internet again. If you wish to activate Connect on Demand, click the radio button.
-
Page 58: Lan
User’s Manual of WNRT-617G 5.5.4 LAN Choose menu “Network→LAN”, you can configure the IP parameters of the LAN on the screen as below. Figure 5-20 LAN The page includes the following fields: Object Description MAC Address The physical address of the Router, as seen from the LAN. The value can't be changed. -
Page 59: Mac Clone
User’s Manual of WNRT-617G 5.5.5 MAC Clone Choose m enu “Network→MAC Clone”, you can configure the MAC address of the WAN on the screen below, Figure 5-21 Figure 5-21 MAC Address Clone Some ISPs require that you register the MAC Address of your adapter. Changes are rarely needed here. -
Page 60: Wireless
User’s Manual of WNRT-617G 5.6 Wireless 5-22): Wireless Settings, There are five submenus under the Wireless menu (shown in Figure Wireless Security, Wireless MAC Filtering, Wireless Advanced and Wireless Statistics. Click any of them, and you will be able to configure the corresponding function. - Page 61 (SSID) Set Identification) must be assigned to all wireless devices in your network. Considering your wireless network security, the default SSID is set to be default. This value is case-sensitive. For example, PLANET is NOT the same as planet. Region Select your region from the pull-down list.
- Page 62 User’s Manual of WNRT-617G Max Tx Rate You can limit the maximum tx rate of the Router through this field. Enable Wireless Router The wireless radio of this Router can be enabled or disabled to allow Radio wireless stations access.
-
Page 63: Wireless Security
User’s Manual of WNRT-617G Object Description SSID(to be bridged) The SSID of the AP your Router is going to connect to as a client. You can also use the search function to select the SSID to join. BSSID(to be bridged) The BSSID of the AP your Router is going to connect to as a client. - Page 64 User’s Manual of WNRT-617G Figure 5-2 The page includes the following fields: Object Description Disable Security If you do not want to use wireless security, select this check box, but it’s strongly recommended to choose one of the following modes to enable security.
- Page 65 User’s Manual of WNRT-617G Figure 5-3 Object Description It is based on the IEEE 802.11 standard. If you select this check box, you will find a notice in red as show in Figure 5-3. Type you can choose the type for the WEP security on the pull-down list. The...
- Page 66 User’s Manual of WNRT-617G If you do not set the key, the wireless security function is still disabled even if you have selected Shared Key as Authentication Type. Figure 5-4 WPA/WPA2 Configuration Screenshot The page includes the following fields: Object...
- Page 67 User’s Manual of WNRT-617G Figure 5-5 The page includes the following fields: Object Description WPA-PSK/WPA2-PSK It’s the WPA/WPA2 authentication type based on pre-shared passphrase. Version you can choose the version of the WPA-PSK security on the drop-down list. The default setting is Automatic, which can select...
-
Page 68: Wireless Mac Filtering
User’s Manual of WNRT-617G 5.6.3 Wireless MAC Filtering Choose menu “Wireless→MAC Filtering”, you can control the wireless access by configuring the Wireless MAC Address Filtering function, shown in Figure 5-6. Figure 5-6 Wireless MAC address Filtering To filter wireless users by MAC Address, click Enable. The default setting is Disable. - Page 69 User’s Manual of WNRT-617G Figure 5 - 7 Add or Modify Wireless MAC Address Filtering entry To add or modify a MAC Address Filtering entry, follow these instructions: Step 1. Enter the appropriate MAC Address into the MAC Address field. The format of the MAC Address XX-XX-XX-XX-XX-XX (X is any hexadecimal digit).
- Page 70 User’s Manual of WNRT-617G For example: If you desire that the wireless station A with MAC address 00-30-4F-11-22-33 and the wireless station B with MAC address 00-30-4F-1A-2B-3C are able to access the Router, but all the other wireless stations cannot access the Router, you can configure the Wireless MAC Address Filtering list by following these steps: Step 1.
-
Page 71: Wireless Advanced
User’s Manual of WNRT-617G 5.6.4 Wireless Advanced Choose menu “Wireless→Wireless Advanced”, you can configure the advanced settings of your wireless network. Figure 5-8 Wireless Advanced The page includes the following fields: Object Description Transmit Power Here you can specify the transmit power of Router. You can select High, Middle or Low which you would like. - Page 72 User’s Manual of WNRT-617G setting and is recommended. DTIM Interval This value determines the interval of the Delivery Traffic Indication Message (DTIM). A DTIM field is a countdown field informing clients of the next window for listening to broadcast and multicast messages.
-
Page 73: Wireless Statistics
User’s Manual of WNRT-617G 5.6.5 Wireless Statistics Choose menu “Wireless→Wireless Statistics”, you can see the MAC Address, Current Status, Received Packets and Sent Packets for each connected wireless station. Figure 5-9 The Router attached wireless stations The page includes the following fields:... -
Page 74: Dhcp
User’s Manual of WNRT-617G 5.7 DHCP 5-10): DHCP Settings, DHCP There are three submenus under the DHCP menu (shown in Figure Clients List and Address Reservation. Click any of them, and you will be able to configure the corresponding function. -
Page 75: Dhcp Clients List
User’s Manual of WNRT-617G configure the computer manually. Start IP Address Specify an IP address for the DHCP Server to start with when assigning IP addresses. 192.168.1.100 is the default start address. End IP Address Specify an IP address for the DHCP Server to end with when assigning IP addresses. -
Page 76: Address Reservation
User’s Manual of WNRT-617G Figure 5-12 DHCP Clients List The page includes the following fields: Object Description The index of the DHCP Client Client Name The name of the DHCP client MAC Address The MAC address of the DHCP client Assigned IP The IP address that the Router has allocated to the DHCP client. - Page 77 User’s Manual of WNRT-617G Figure 5-13 Address Reservation The page includes the following fields: Object Description MAC Address The MAC address of the PC for which you want to reserve IP address. Assigned IP Address The IP address of the Router reserved.
-
Page 78: Forwarding
User’s Manual of WNRT-617G Figure 5 - 14 Add or Modify an Address Reservation Entry To modify or delete an existing entry: Step 1. Click the Modify in the entry you want to modify. If you want to delete the entry, click the Delete. -
Page 79: Virtual Servers
User’s Manual of WNRT-617G 5.8.1 Virtual Servers Choose menu “Forwarding→Virtual Servers”, you can view and add virtual servers in the next screen (shown in Figure 5-16). Virtual servers can be used for setting up public services on your LAN, such as DNS, Email and FTP. A virtual server is defined as a service port, and all requests from the Internet to this service port will be redirected to the computer specified by the server IP. - Page 80 User’s Manual of WNRT-617G Step 2. Select the service you want to use from the Common Service Port list. If the Common Service Port list does not have the service that you want to use, type the number of the service port or service port range in the Service Port box.
- Page 81 User’s Manual of WNRT-617G Click the Next button to go to the next page and click the Previous button to return the previous page. If you set the service port of the virtual server as 80, you must set the Web management port on System Tools –>...
-
Page 82: Port Triggering
User’s Manual of WNRT-617G 5.8.2 Port Triggering Choose menu “Forwarding→Port Triggering”, you can view and add port triggering in the next screen (shown in Figure 5-18). Some applications require multiple connections, like Internet games, video conferencing, Internet calling and so on. These applications cannot work with a pure NAT Router. - Page 83 User’s Manual of WNRT-617G Incoming Protocol The protocol used for Incoming Ports Range, either TCP or UDP, or ALL (all protocols supported by the Router). Status The status of this entry either Enabled or Disabled. Table 5-27 To add a new rule, follow the steps below.
-
Page 84: Dmz
User’s Manual of WNRT-617G To modify or delete an existing entry: Click the Modify in the entry you want to modify. If you want to delete the entry, click the Delete. Modify the information. Click the Save button. Click the Enable All button to make all entries enabled Click the Disabled All button to make all entries disabled. -
Page 85: Upnp
User’s Manual of WNRT-617G Step 2. Enter the local host IP Address in the DMZ Host IP Address field Step 3. Click the Save button. After you set the DMZ host, the firewall related to the host will not work. -
Page 86: Security
User’s Manual of WNRT-617G application. Protocol - Shows which type of protocol is opened. Internal Port - Internal port, which the router opened for local host. IP Address - The UPnP device that is currently accessing the router. Status - The port’s status displayed here. “Enabled” means that port is still active. - Page 87 User’s Manual of WNRT-617G Figure 5-23 Basic Security The page includes the following fields: Object Description Firewall A firewall protects your network from the outside world. Here you can enable or disable the Router’s firewall. SPI Firewall - SPI (Stateful Packet Inspection, also known as dynamic packet filtering) helps to prevent cyber attacks by tracking more state per session.
-
Page 88: Advanced Security
User’s Manual of WNRT-617G PPTP Passthrough - Point-to-Point Tunneling Protocol (PPTP) allows the Point-to-Point Protocol (PPP) to be tunneled through an IP network. To allow PPTP tunnels to pass through the Router, keep the default, Enabled. L2TP Passthrough - Layer 2 Tunneling Protocol (L2TP) is the method used to enable Point-to-Point sessions via the Internet on the Layer 2 level. - Page 89 User’s Manual of WNRT-617G Figure 5-24 Advanced Security The page includes the following fields: Object Description Packets Statistics The default value is 10. Select a value between 5 and 60 seconds from Interval (5~60) the drop-down list. The Packets Statistics Interval value indicates the time section of the packets statistics.
-
Page 90: Local Management
User’s Manual of WNRT-617G Threshold (5~3600) Router will startup the blocking function immediately. Enable UDP-FLOOD Enable or Disable the UDP-FLOOD Filtering. Filtering UDP-FLOOD Packets The default value is 500. Enter a value between 5 ~ 3600. When the Threshold (5~3600) current UPD-FLOOD Packets number is beyond the set value, the Router will startup the blocking function immediately. -
Page 91: Remote Management
User’s Manual of WNRT-617G Figure 5-25 Local Management By default, the radio button “All the PCs on the LAN are allowed to access the Router's Web-Based Utility” is checked. If you want to allow PCs with specific MAC Addresses to access the Setup page of the Router's Web-Based Utility locally from inside the network, check the radio button “Only the PCs listed can browse the built-in web pages to perform Administrator tasks”, and... - Page 92 User’s Manual of WNRT-617G Figure 5-26 Remote Management The page includes the following fields: Object Description Web Management Port Web browser access normally uses the standard HTTP service port 80. This Router's default remote management web port number is 80.
-
Page 93: Parental Control
User’s Manual of WNRT-617G 5.10 Parental Control Choose menu “Parental Control”, and you can configure the parental control in the screen as shown Figure 5-27. The Parental Control function can be used to control the internet activities of the child, limit the child to access certain websites and restrict the time of surfing. - Page 94 User’s Manual of WNRT-617G For detailed information, please go to “Access Control → Schedule”. Modify Here you can edit or delete an existing entry. Table 5-32 To add a new entry, please follow the steps below. Step 1. Click the Add New… button and the next screen will pop-up as shown in Figure 5-28.
- Page 95 User’s Manual of WNRT-617G Figure 5-28 Add or Modify Parental Control Entry For example: If you desire that the child PC with MAC address 00-11-22-33-44-AA can access www.google.com on Saturday only while the parent PC with MAC address 00-11-22-33-44-BB is without any restriction, you should follow the settings below.
- Page 96 User’s Manual of WNRT-617G Enter “www.google.com” in the Allowed Domain Name field. Select “Schedule_1” you create just now from the Effective Time drop-down list. In Status field, select Enable. Step 4. Click Save to complete the settings. Then you will go back to the Parental Control Settings page and see the following list, as shown in Figure 5-29.
-
Page 97: Access Control
User’s Manual of WNRT-617G 5.11 Access Control 5-30: Rule, Host, There are four submenus under the Access Control menu as shown in Figure Target and Schedule. Click any of them, and you will be able to configure the corresponding function. - Page 98 User’s Manual of WNRT-617G Object Description Enable Internet Access Select the check box to enable the Internet Access Control function, so Control the Default Filter Policy can take effect. Rule Name Here displays the name of the rule and this name is unique.
- Page 99 User’s Manual of WNRT-617G You can change the entry’s order as desired. Fore entries are before hind entries. Enter the ID number in the first box you want to move and another ID number in second box you want to move to, and then click the Move button to change the entry’s order.
- Page 100 User’s Manual of WNRT-617G In Host field, select Host_1. In Target field, select Target_1. In Schedule field, select Schedule_1. In Action field, select Allow. In Status field, select Enable. Click Save to complete the settings. Then you will go back to the Access Control Rule Management page and see the following list.
-
Page 101: Host
User’s Manual of WNRT-617G 5.11.2 Host Choose menu “Access Control → Host”, you can view and set a Host list in the screen as shown in Figure 5-33. The host list is necessary for the Access Control Rule. Figure 5-33 Host Settings... - Page 102 User’s Manual of WNRT-617G Click the Delete All button to delete all the entries in the table. Click the Next button to go to the next page, or click the Previous button return to the previous page. Figure 5-34 Add or Modify a Host Entry...
-
Page 103: Target
User’s Manual of WNRT-617G Figure 5-61 5.11.3 Target Choose menu “Access Control → Target”, you can view and set a Target list in the screen as shown Figure 5-36. The target list is necessary for the Access Control Rule. Figure 5-36 Target Settings... - Page 104 User’s Manual of WNRT-617G To add a new entry, please follow the steps below. Step 1. Click the Add New… button. Step 2. In Mode field, select IP Address or Domain Name. If you select IP Address, the screen shown is Figure 5-37.
- Page 105 User’s Manual of WNRT-617G Figure 5-37 Add or Modify an Access Target Entry Figure 5-38 Add or Modify an Access Target Entry For example: If you desire to restrict the internet activities of host with MAC address 00-11-22-33-44-AA in the LAN to access www.google.com...
-
Page 106: Schedule
User’s Manual of WNRT-617G Step 3. In Target Description field, create a unique description for the target (e.g. Target_1). Step 4. In Domain Name field, enter www.google.com. Step 5. Click Save to complete the settings. Then you will go back to the Target Settings page and see the following list. - Page 107 User’s Manual of WNRT-617G unique. Here displays the day(s) in a week. Time Here displays the time period in a day. Modify Here you can edit or delete an existing schedule. Table 5-36 To add a new schedule, follow the steps below.
- Page 108 User’s Manual of WNRT-617G Figure 5-40 Advanced Schedule Settings For example: If you desire to restrict the internet activities of host with MAC address only from 18:00 to 20:00 on Saturday and Sunday, 00-11-22-33-44-AA to access www.google.com you should first follow the settings below: Click Add New...
-
Page 109: Advanced Routing
User’s Manual of WNRT-617G Figure 5-68 5.12 Advanced Routing 5-30: Static Routing There are two submenus under the Advanced Routing menu as shown in Figure List, System Routing Table. Click any of them, and you will be able to configure the corresponding function. - Page 110 User’s Manual of WNRT-617G To add static routing entries: Step 1. Click Add New… shown in Figure 5-42, you will see the following screen. Figure 5-43 Add or Modify a Static Route Entry Step 2. Enter the following data: Object...
-
Page 111: System Routing Table
User’s Manual of WNRT-617G Click the Disable All button to disable all the entries. Click the Delete All button to delete all the entries. Click the Previous button to view the information in the previous screen, click the Next button to view the information in the next screen. -
Page 112: Control Settings
User’s Manual of WNRT-617G 5.13.1 Control Settings Choose menu “Bandwidth Control → Control Settings”, you can configure the Egress Bandwidth and Ingress Bandwidth in the next screen. Their values you configure should be less than 100000Kbps. For optimal control of the bandwidth, please select the right Line Type and ask your ISP for the total bandwidth of the egress and ingress. - Page 113 User’s Manual of WNRT-617G Figure 5-46 Bandwidth Control Rules List The page includes the following fields: Object Description Description This is the information about the rules such as address range. Egress bandwidth This field displays the max and mix upload bandwidth through the WAN port, the default is 0.
-
Page 114: Ip & Mac Binding
User’s Manual of WNRT-617G Figure 5-47 Bandwidth Control Rule Settings Step 3: Click the Save button. 5.14 IP & MAC Binding 5-48): Binding Settings There are two submenus under the IP &MAC Binding menu (shown in Figure and ARP List. Click any of them, and you will be able to scan or configure the corresponding function. - Page 115 User’s Manual of WNRT-617G Figure 5-49 Binding Setting The page includes the following fields: Object Description MAC Address The MAC address of the controlled computer in the LAN. IP Address The assigned IP address of the controlled computer in the LAN.
- Page 116 User’s Manual of WNRT-617G Figure 5-50 IP & MAC Binding Setting (Add & Modify) To add IP & MAC Binding entries, follow the steps below. Step 1. Click the Add New... button as shown in Figure 5-49. Step 2. Enter the MAC Address and IP Address.
-
Page 117: Arp List
User’s Manual of WNRT-617G Figure 5-51 Find IP & MAC Binding Entry Click the Enable All button to make all entries enabled. Click the Delete All button to delete all entries. 5.14.2 ARP List To manage the computer, you could observe the computers in the LAN by checking the relationship of MAC address and IP address on the ARP list, and you could configure the items on the ARP list also. - Page 118 User’s Manual of WNRT-617G MAC Address The MAC address of the controlled computer in the LAN. IP Address The assigned IP address of the controlled computer in the LAN. Status Indicates whether or not the MAC and IP addresses are bound.
-
Page 119: Dynamic Dns
User’s Manual of WNRT-617G 5.15 Dynamic DNS Choose menu “Dynamic DNS”, and you can configure the Dynamic DNS function. The Router offers the DDNS (Dynamic Domain Name System) feature, which allows the hosting of a website, FTP server, or e-mail server with a fixed domain name (named by yourself) and a dynamic IP address, and then your friends can connect to your server by entering your domain name no matter what your IP address is. -
Page 120: Dyndns.org Ddns
User’s Manual of WNRT-617G To set up for DDNS, follow these instructions: Step 1. Type the Domain Name received from your dynamic DNS service provider. Step 2. Type the User Name for your DDNS account. Step 3. Type the Password for your DDNS account. -
Page 121: No-Ip.com Ddns
User’s Manual of WNRT-617G Step 3. Type the Domain Name you received from dynamic DNS service provider here. Step 4. Click the Login button to log in to the DDNS service. Connection Status -The status of the DDNS service connection is displayed here. -
Page 122: System Tools
User’s Manual of WNRT-617G 5.16 System Tools Choose menu “System Tools”, and you can see the submenus under the main menu: Time Settings, Diagnostic, Firmware Upgrade, Factory Defaults, Backup & Restore, Reboot, Password, System Log and Statistics. Click any of them, and you will be able to configure the corresponding function. - Page 123 User’s Manual of WNRT-617G Object Description Time Zone Select your local time zone from this pull down list. Date Enter your local date in MM/DD/YY into the right blanks. Time Enter your local time in HH/MM/SS into the right blanks.
-
Page 124: Diagnostic
User’s Manual of WNRT-617G 5.16.2 Diagnostic Choose menu “System Tools → Diagnostic”, you can transact Ping or Traceroute function to check connectivity of your network in the following screen. Figure 5-58 Diagnostic Tools The page includes the following fields: Object... - Page 125 User’s Manual of WNRT-617G Pings Count The number of Ping packets for a Ping connection. Ping Packet Size The size of Ping packet. Ping Timeout Set the waiting time for the reply of each Ping packet. If there is no reply in the specified time, the connection is overtime.
-
Page 126: Firmware Upgrade
Click the Upgrade button. Step 3. New firmware versions posted at the website of PLANET Technology can be downloaded for free. There is no need to upgrade the firmware unless the new firmware has a new feature you want to use. However, when experiencing problems caused by the Router rather than the configuration, you can try to upgrade the firmware. -
Page 127: Factory Defaults
User’s Manual of WNRT-617G otherwise, the Router may be damaged. The Router will reboot after the upgrading has been finished. 5.16.4 Factory Defaults Choose menu “System Tools → Factory Defaults”, and you can restore the configurations of the Router to factory defaults on the following screen Figure 5-61 Restore Factory Default Click the Restore button to reset all configuration settings to their default values. -
Page 128: Backup & Restore
User’s Manual of WNRT-617G 5.16.5 Backup & Restore Choose menu “System Tools → Backup & Restore”, you can save the current configuration of the Router as a backup file and restore the configuration via a backup file as shown in Figure 5-62. -
Page 129: Password
User’s Manual of WNRT-617G Some settings of the Router will take effect only after rebooting, which include Change the LAN IP Address (system will reboot automatically). Change the DHCP Settings. Change the Wireless configurations. Change the Web Management Port. Upgrade the firmware of the Router (system will reboot automatically). -
Page 130: System Log
User’s Manual of WNRT-617G Click the Save button when finished. Click the Clear All button to clear all. 5.16.8 System Log Choose menu “System Tools → System Log”, you can view the logs of the Router. Figure 5-65 System Log... - Page 131 User’s Manual of WNRT-617G Figure 5-66 Mail Account Settings The page includes the following fields: Object Description From Your mail box address. The Router would connect it to send logs. Recipient’s address. The destination mailbox where the logs would be received.
- Page 132 User’s Manual of WNRT-617G Click Save to keep your settings. Click Back to return to the previous page. Only when you select Authentication, do you have to enter the User Name and Password in the following fields. Figure 5-96 Object...
- Page 133 User’s Manual of WNRT-617G Clear Log All the logs will be deleted from the Router permanently, not just from the page. Table 5-47 Click the Next button to go to the next page, or click the Previous button return to the previous page.
-
Page 134: Statistics
User’s Manual of WNRT-617G 5.16.9 Statistics Choose menu “System Tools → Statistics”, you can view the statistics of the Router, including total traffic and current traffic of the last Packets Statistic Interval. Figure 5-67 Statistics The page includes the following fields:... - Page 135 User’s Manual of WNRT-617G Statistics Table: IP/MAC Address The IP and MAC address are displayed with related statistics. Packets The total number of packets received and transmitted by the Router. Total Bytes The total number of bytes received and transmitted by the Router.
-
Page 136: Chapter 6. Quick Connect To A Wireless Network
User’s Manual of WNRT-617G Chapter 6. Quick Connect to a Wireless Network Windows XP (Wireless Zero Configuration) Step 1: Right-Click on the wireless network icon displayed in the system tray Figure 6-1 Step 2: Select [View Available Wireless Networks] Step 3: Highlight and select the wireless network (SSID) to connect... - Page 137 User’s Manual of WNRT-617G Step 4: Enter the encryption key of the Wireless Router (1) The Wireless Network Connection box will appear (2) Enter the encryption key that configured in section 5.6.2 (3) Click the [Connect] button Figure 6-3 Step 5: Check if “Connected” is displayed...
-
Page 138: Windows 7 (Wlan Autoconfig)
User’s Manual of WNRT-617G Some laptops are equipped with an “Wireless ON/OFF” switch for the internal wireless LAN, make sure the hardware wireless switch is switch to “ON” position. 6.2 Windows 7 (WLAN AutoConfig) WLAN AutoConfig service is built-in in Windows 7 that can be used to detect and connect to wireless network. - Page 139 User’s Manual of WNRT-617G If you will be connecting to this Wireless Router in the future, checking [Connect automatically]. Step 4: Enter the encryption key of the Wireless Router (1) The Connect to a Network box will appear (2) Enter the encryption key that configured in section 5.6.2...
- Page 140 User’s Manual of WNRT-617G Figure 6-9 -133-...
-
Page 141: Mac Os X 10.X
User’s Manual of WNRT-617G 6.3 Mac OS X 10.x .3 Mac OS X 10.x Step 1: Right-Click on the network icon displayed in the system tray The AirPort Network Connection menu will appear Figure 6-10 Step 2: Highlight and select the wireless network (SSID) to connect... -
Page 142: Figure
User’s Manual of WNRT-617G Figure 6-12 If you will connect this Wireless Router in the future, check [Remember this network]. Step 5: Check if the AirPort is connect to the selected wireless network. If “Yes”, then there will be a “check” symbol in the front of the SSID. -
Page 143: Iphone / Ipod Touch / Ipad
User’s Manual of WNRT-617G 6.4 iPhone / iPod Touch / iPad .4 iPhone / iPod Touch / iPad Step 1: Tap the [Settings] icon displayed in the home screen Figure 6-14 Step 2: Check Wi-Fi setting and select the available wireless network... -
Page 144: Step 4: Enter The Encryption Key Of The Wireless Router
User’s Manual of WNRT-617G Figure 6-16 Step 3: Tap the target wireless network (SSID) in “Choose a Network…” (1) Turn on Wi-Fi by tapping “Wi-Fi” (2) Select SSID [PLANET] Figure 6-17 Step 4: Enter the encryption key of the Wireless Router... - Page 145 User’s Manual of WNRT-617G Figure 6-18 Step 5: Check if the iDevice is connect to the selected wireless network. If “Yes”, then there will be a “check” symbol in the front of the SSID. Figure 6-19 -138-...
-
Page 146: Appendix A: Faq
User’s Manual of WNRT-617G Appendix A: FAQ How do I configure the Router to access Internet by ADSL users? First, configure the ADSL Modem configured in RFC1483 bridge model. Connect the Ethernet cable from your ADSL Modem to the WAN port on the Router. The telephone cord plugs into the Line port of the ADSL Modem. - Page 147 User’s Manual of WNRT-617G Sometimes the connection cannot be disconnected although you specify a time to Max Idle Time, since some applications is visiting the Internet continually in the background. If you are a Cable user, please configure the Router following the above steps.
- Page 148 User’s Manual of WNRT-617G an example, remember to Enable and Save. Figure A-3 Virtual Servers Figure A-4 Add or Modify a Virtual server Entry Your opposite side should call your WAN IP, which is displayed on the “Status” page. How to enable DMZ Host: Log in to the Router, click the “Forwarding” menu on the left of your browser, and click "DMZ"...
- Page 149 User’s Manual of WNRT-617G Figure A-5 DMZ How to enable H323 ALG: Log in to the Router, click the “Security” menu on the left of your browser, and click “Basic Security” submenu. On the “Basic Security” page, check the Enable radio button next to H323 ALG. Remember to click the Save button.
- Page 150 User’s Manual of WNRT-617G I want to build a WEB Server on the LAN, what should I do? Because the WEB Server port 80 will interfere with the WEB management port 80 on the Router, you must change the WEB management port number to avoid interference.
- Page 151 User’s Manual of WNRT-617G Figure A-8 Virtual Servers Figure A-9 Add or Modify a Virtual server Entry The wireless stations cannot connect to the Router. Make sure the "Wireless Router Radio" is enabled. Make sure that the wireless stations' SSID accord with the Router's SSID.
-
Page 152: Appendix B: Configuring The Pcs
User’s Manual of WNRT-617G Appendix B: Configuring the PCs In this section, we’ll introduce how to install and configure the TCP/IP correctly in Windows XP. First make sure your Ethernet Adapter is working, refer to the adapter’s manual if needed. - Page 153 User’s Manual of WNRT-617G Figure B-2 The following TCP/IP Properties window will display and the IP Address tab is open on this window by default. Now you have two ways to configure the TCP/IP protocol below: Setting IP address automatically...
- Page 154 User’s Manual of WNRT-617G Figure B-3 Setting IP address manually Select Use the following IP address radio button. If the Router's LAN IP address is 192.168.1.1, type in IP address 192.168.1.x (x is from 2 to 254), and Subnet mask 255.255.255.0.
- Page 155 User’s Manual of WNRT-617G Figure B-4 Now click OK to keep your settings. -148-...
-
Page 156: Appendix C: Specifications
User’s Manual of WNRT-617G Appendix C: Specifications WNRT-617G Product 150Mbps 802.11n Wireless 3G Router Hardware Specification WAN Port: 1 x 10/100Mbps Auto MDI/MDI-X RJ45 port Interface LAN Port: 4 x 10/100Mbps Auto MDI/MDI-X RJ45 ports 1 x USB 2.0 port... - Page 157 User’s Manual of WNRT-617G 1M: -90dBm@8% PER Wireless Management Features Wireless Operation AP, WDS (AP+Bridge) Mode WEP (64/128/152-bit) encryption security WPA-PSK / WPA2-PSK (TKIP/AES) Encryption Security WPA / WPA2 (TKIP/AES) WPA / WPA2 enterprise mode (802.1x authentication) Provide wireless LAN ACL (Access Control List) filtering...
- Page 158 User’s Manual of WNRT-617G Windows 7(32-bit/64-bit) Windows Vista (32-bit/64-bit) OS Compatibility Windows XP Mac OS X 10.4 and higher Standards Conformance IEEE 802.11n (1T1R, up to 150Mbps) IEEE 802.11g IEEE 802.11b IEEE Standards IEEE 802.11i IEEE 802.3 10Base-T IEEE 802.3u 100Base-TX IEEE 802.3x Flow Control...
-
Page 159: Appendix D: Glossary
User’s Manual of WNRT-617G Appendix D: Glossary 802.11n - 802.11n builds upon previous 802.11 standards by adding MIMO (multiple-input multiple-output). MIMO uses multiple transmitter and receiver antennas to allow for increased data throughput via spatial multiplexing and increased range by exploiting the spatial diversity, perhaps through coding schemes like Alamouti coding. - Page 160 User’s Manual of WNRT-617G SSID - A Service Set Identification is a thirty-two character (maximum) alphanumeric key identifying a wireless local area network. For the wireless devices in a network to communicate with each other, all devices must be configured with the same SSID. This is typically the configuration parameter for a wireless PC card.
- Page 161 *Model Number: WNRT-617G * Produced by: Manufacturer‘s Name : Planet Technology Corp. Manufacturer‘s Address: 10F., No.96, Minquan Rd., Xindian Dist., New Taipei City 231, Taiwan (R.O.C.) is herewith confirmed to comply with the requirements set out in the Council Directive on the 1999/5/EC R&TTE.
Need help?
Do you have a question about the WNRT-617G and is the answer not in the manual?
Questions and answers