Table of Contents
Advertisement
Owner's
Booklet
24/7 Customer Care
English or Spanish 1-800-803-6025
www.niprodiagnostics.com
Manufactured by:
Fort Lauderdale, FL 33309 U.S.A.
© 2014 Nipro Diagnostics, Inc.
TRUEtrack and the Nipro Diagnostics logo
are trademarks of Nipro Diagnostics, Inc.
A4NPD03 Rev. 25
Scan this code with your smart phone
for additional TRUEtrack information.
Always refer to the Owner's Booklet
for detailed product information.
Advertisement
Table of Contents

Related Manuals for NIPRO Diagnostics TRUEtrack


Summary of Contents for NIPRO Diagnostics TRUEtrack
- Page 1 Manufactured by: Fort Lauderdale, FL 33309 U.S.A. © 2014 Nipro Diagnostics, Inc. Scan this code with your smart phone TRUEtrack and the Nipro Diagnostics logo for additional TRUEtrack information. are trademarks of Nipro Diagnostics, Inc. Always refer to the Owner’s Booklet for detailed product information.
- Page 2 simple steps INSERT TEST STRIP APPLY BLOOD SAMPLE For quick reference only, not intended as a substitute for complete instructions. Please read entire Owner’s Booklet and product Instructions for Use before testing.
-
Page 3: Introductory Information
Welcome to the TRUEtrack® Blood Glucose Monitoring System Congratulations on your purchase of the TRUEtrack Blood Glucose Monitoring System. You now have a very simple and accurate way to test your blood glucose (sugar) level, anytime, anywhere. Our Commitment to You Our goal is to provide you with quality healthcare products and dedicated customer service. - Page 4 NEVER change your treatment plan without consulting with your Doctor or Diabetes Healthcare Professional. Use of the TRUEtrack in a manner not specified in this Owner’s Booklet is not recommended and may affect your ability to determine your blood glucose.
- Page 5 • NEVER add a second drop of sample to Strip. Adding more sample gives an error message. The TRUEtrack Blood Glucose Monitoring System is for one person use ONLY. DO NOT share your Meter or your Lancing Device with anyone, including family members.
-
Page 6: Important Information
IMPORTANT INFORMATION: Health Related Information DO NOT perform capillary blood glucose testing on critically ill patients. Capillary blood glucose levels in critically ill patients with reduced peripheral blood flow may not reflect the true physiological state. Reduced peripheral blood flow may result from the following conditions (for example): •... - Page 7 (bedside) testing of human whole blood only. • Check Codes. Code in Meter Display must match Code on vial of TRUEtrack Test Strips being used and Code Number printed on Code Chip. • Meter displays results as plasma values.
- Page 8 Results from TRUEtrack are considered accurate if within +/– 20% of lab results. If patient has recently eaten, fingerstick results from TRUEtrack can be up to 70 mg/dL higher than venous lab results. Do not use venous blood with TRUEtrack.
-
Page 9: Table Of Contents
Set Up (Time, Date) .............. 27-28 Memory Morning Averages (14 and 30 Day) ........29 Viewing Results in Memory ...........30 Care, Cleaning/Disinfection and Troubleshooting Caring for TRUEtrack ............31-32 Changing Battery ..............33 Troubleshooting ................34 Display Messages ............35-37 System Specifications ..............38 Chemical Composition ..............39... -
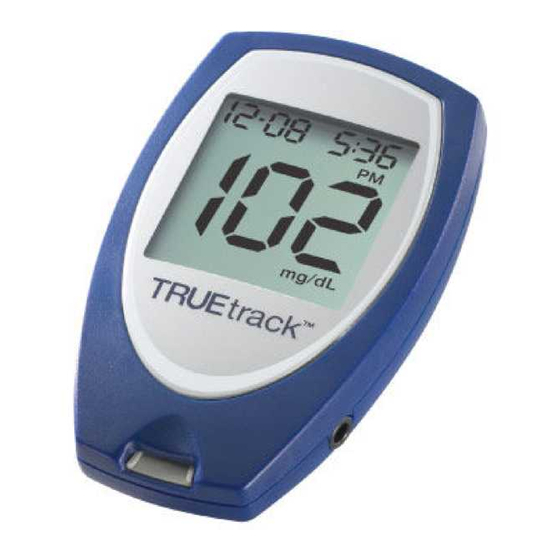
Page 10: Know Your System Meter
Button - Increase numbers in Set Up; add ➂ Control Symbol; move forward by time/date when viewing results in Memory. ➃ Display - Shows test results, messages, user prompts, and other information. ➄ Test Port - Insert TRUEtrack Test Strip here. - Page 11 Back of Meter Right Side of Meter Left Side of Meter 1027 ➅ Data Port - Contact Customer Care at the number located on cover for more information. ➆ Code Chip Port - Insert the Code Chip here. ➇ Battery Compartment - Use one non-rechargeable 3V lithium battery (#CR2032), positive (“+”) side up.
- Page 12 Display 1. Time, Date, 14/30 Day Average, Code. 2. Result in Memory. 3. 14- or 30-Day Morning Average. 4. Test result. 5. Battery Symbol (see Display Messages). 6. Temperature Symbol (see Display Messages). 7. Drop Symbol - Apply blood or Glucose Control.
-
Page 13: Test Strip
Test Strip Front of Test Strip ➀ Contact End - Insert into Meter with Contacts (metallic blocks) facing up before adding sample. ➁ Sample Tip - Touch sample (blood or Glucose Control) to edge of Tip. Placement of Sample to Test Strip Correct Incorrect •... -
Page 14: Test Strip Vial Label
Test Strip Vial Label May 30, 2012 ➀ Code - Match Code in Meter Display with Code on Code Chip and Code on Test Strip vial label before testing. All Codes MUST match for accurate results. ➁ Lot Number (LoT) - Used for identification when calling for assistance. -
Page 15: Control Bottle Label
Glucose Control Control Bottle Label ➀ Lot Number (LoT) - Used for identification when calling for assistance. ➁ Expiration Dates (EXP) - Write date first opened on bottle label. Discard bottle if either 3 months after opening or date printed next to EXP on bottle label has passed, whichever comes first. -
Page 16: Getting Started
Getting Started The Meter turns on automatically when a Test Strip Contact End is inserted into the Test Port or is pressed (see Set Up and Memory). when The Meter turns off automatically after the Test Strip is removed from the Test Port or after 2 minutes of non-use. -
Page 17: Coding
Coding Code Chip is packaged with each box of Test Strips. Note: After all Test Strips are used from box, remove Code Chip from Meter and discard. Open new box of Test Strips and insert new Code Chip into Meter before testing. 1. - Page 18 3. Insert Test Strip into Test Port. Meter turns on. “Code” and number appear in Display. 4. Match to Code number on vial label. If Codes match, begin testing. Caution! If “Code ----” shows in Display, reinsert Code Chip and then reinsert Test Strip.
-
Page 19: Quality Control Testing
Quality Control Testing To assure you are getting accurate and reliable results, TRUEtrack offers two kinds of quality control tests. These tests let you know that your TRUEtrack System is working properly and your testing technique is good. Automatic Self-Test... -
Page 20: Control Test
Control Test We recommend performing Control Tests for practice before using your Meter for the first time to test your blood. Control Tests should be performed: • For practice to ensure your testing technique is good, • Occasionally as you use the vial of Strips, •... - Page 21 How to Test Glucose Control Use ONLY TRUEcontrol Glucose Control Solution with the TRUEtrack Meter 1. Wash hands with soap and water, dry thoroughly. Allow Control, vial of Test Strips and Meter to adjust to room temperature (68-77°F). Write date first opened on Control Label and/or Test Strip vial label.
- Page 22 6. Match Code in Display with Code on Test Strip vial label being used. If Codes do not match, see Coding. 7. Press . Control Symbol appears in Meter Display. Note: If you decide not to perform a Control Test, press remove Control Symbol.
-
Page 23: Control Test
Note: If Meter does not beep or begin countdown soon after placing Sample Tip to Control drop, discard Test Strip. Repeat test with new Test Strip. If problem persists, see Troubleshooting. 11. Compare result to Control range printed on Test Strip vial label. If result is in range, System can be used for testing blood. -
Page 24: Testing Your Blood How To Obtain A Blood Sample
Obtaining a Blood Sample Refer to Lancing Device “Instructions for Use” for detailed instructions. Caution! The Lancing Device is for single patient use ONLY. For cleaning/disinfecting your Lancing Device see Lancing Device Care in the Lancing Device Instructions for Use. Wash your hands thoroughly with soap and warm water after handling the Meter Lancing Device, or Test Strips. - Page 25 From Forearm 1. Select area to be lanced. Wash with soap and warm water, rinse and dry thoroughly. 2. Rub area vigorously or apply a warm compress to increase blood flow. 3. Place end of Lancing Device firmly against forearm. Press trigger button. Apply firm pressure on lancing device for 10 seconds.
-
Page 26: How To Test Blood Glucose
How to Test Blood Glucose Check supplies. Always check your supplies before using. Check Meter for damage (damaged or cracked Display, missing or damaged buttons). If any damage is seen, do not use Meter. Call for assistance. Check Test Strip vials for damage. Discard any vials that appear cracked or broken. - Page 27 5. Match Code in Display to Code on Test Strip vial being used. If Codes do not match, see Coding. 6. Drop Symbol appears in Display. 7. Lance fingertip or forearm. Allow drop to form. 8. With Test Strip still in Meter, touch edge of Sample Tip to blood drop and allow blood to be drawn into Strip.
-
Page 28: System Out Of Range Warning Messages
System Out of Range Warning Messages CAUTION! TRUEtrack measures blood glucose results from 20-600 mg/dL. If blood glucose result is less than 20 mg/dL, “Lo” appears in Meter Display. If blood glucose result is greater than 600 mg/dL, “Hi” appears in Meter Display. -
Page 29: Set Up (Time/Date)
Set Up (Time/Date) 1. Start with Meter off. Do not insert Test Strip. Press and hold . Date/Time appears in display. Release after full Display appears and Meter beeps. Set Time Full Display 2. The hour flashes. To change, press on top of Meter to select the hour. - Page 30 Set Date 4. The month (number) flashes. To change, press select the month. Press to set. 5. The day (number) flashes. To change, press select the day. Press to set. 6. The year flashes Year To change, press Month select the year. Press to set.
-
Page 31: Memory
Memory Morning Averages (14 and 30 Day) For Morning Average values, only the earliest blood test result performed between 4:00 am - 9:59 am (according to Meter clock) is used. Meter clock must be set correctly (see Set Up) for accurate Morning Average values. -
Page 32: Viewing Results In Memory
Viewing Results in Memory Memory stores 365 results, which are displayed from most recent to oldest. The oldest result is removed from Memory when Memory is full and a new result is added. 1. Start with Meter off. Press and release . -
Page 33: Caring For Truetrack
Caring for TRUEtrack • Store System (Meter, Glucose Control, Test Strips) in Carrying Case to protect from liquids, dust and dirt. • Store in a dry place at room temperature (36-86°F). DO NOT REFRIGERATE OR FREEZE. Meter Care, Cleaning/Disinfection To Clean the Meter (removing blood or soil): Cleaning removes blood and soil, disinfecting removes infectious agents. - Page 34 Glucose Control Care • Write date opened on Control label. Discard 3 months after opening or after date printed next to EXP, whichever comes first. • After use, wipe bottle tip clean and recap tightly. • Store at room temperature (36°-86°F). DO NOT REFRIGERATE OR FREEZE.
-
Page 35: Changing Battery
Changing Battery Replace battery when Low or Dead Battery Symbols appear in Display or Meter does not turn on. Dead 1. Lift tab on Battery Cover. 2. Turn Meter over, tap gently to loosen and remove battery. 3. Insert new battery, positive (“+”) side up. -
Page 36: Troubleshooting
Troubleshooting 1) After inserting Test Strip, Meter does not turn on. Reason Action Test Strip inserted upside Remove Test Strip. down or backwards Re-insert correctly. Test Strip not fully Remove Test Strip. Re-insert inserted Strip fully into Meter. Test Strip Error Repeat with new Test Strip. -
Page 37: Display Messages
Messages Display Reason Action Wait 10 minutes Temperature for Meter and Test Error Strips to reach Temperature room temperature change too quick before testing. Temperature Move Meter and Too Cold Test Strips to area Meter temperature between less than 50°F 50°-104°F before testing. - Page 38 Messages (continued) Display Reason Action Meter Error Call for assistance. Test Strip Error, Retest with new Strip. If error persists, call for assistance. Very high blood If you have symptoms such glucose result as fatigue, excess urination, (higher than thirst, or blurry vision, follow 600 mg/dL) your healthcare professional’s advice for high blood glucose.
- Page 39 Messages (continued) Display Reason Action Turn Meter off Communication and on again. If Error error persists, call for assistance. About 50 tests can be done Low Battery before battery must be replaced. Dead Battery Replace battery. Remove Code Chip and Code Chip re-insert.
-
Page 40: System Specifications
System Specifications Result Range: 20-600 mg/dL Sample Size: Minimum 1 microliter (1 µL) Sample: Human capillary whole blood or TRUEcontrol Glucose Control Solution Test Time: 10 seconds Result Value: Plasma values Assay Method: Electrochemical Reference Method: Yellow Springs Instrument (YSI) Power Supply: One 3V lithium battery #CR2032 (non-rechargable) Battery Life: Approximately 1,100 tests or 1 year... -
Page 41: Chemical Composition
Chemical Composition TRUEtrack Test Strips: Glucose Oxidase (Aspergillus sp.) 2.5 Units, Mediators, Buffers and Stabilizers. TRUEcontrol Glucose Control: Contents: Volume: 3 mL. Water - 73%, D-glucose - 0.09 - 0.20%, Viscosity Enhancing Agent - 25%, Inorganic Salts - 1.8%, Amaranth - 0.08%, and Preservatives - 0.03%. -
Page 42: Meter Warranty
Nipro Diagnostics, Inc. provides the following Warranty to the original retail purchaser of the TRUEtrack Meter: 1) Nipro Diagnostics, Inc. warrants this Meter to be free of defects in materials and workmanship at the time of purchase. If the meter is ever inoperative, Nipro Diagnostics, Inc.
Need help?
Do you have a question about the TRUEtrack and is the answer not in the manual?
Questions and answers
Getting Code 3923
Code 3923 refers to the code number on the code chip that must match the code number on the test strip vial label for the NIPRO TRUEtrack meter. It ensures the meter is calibrated correctly for that specific batch of test strips. If the code on the meter display does not match the vial code, the test results may be inaccurate.
This answer is automatically generated