Table of Contents
Advertisement
Quick Links
RF5108-433 v1.0 Installation Manual
Thank you
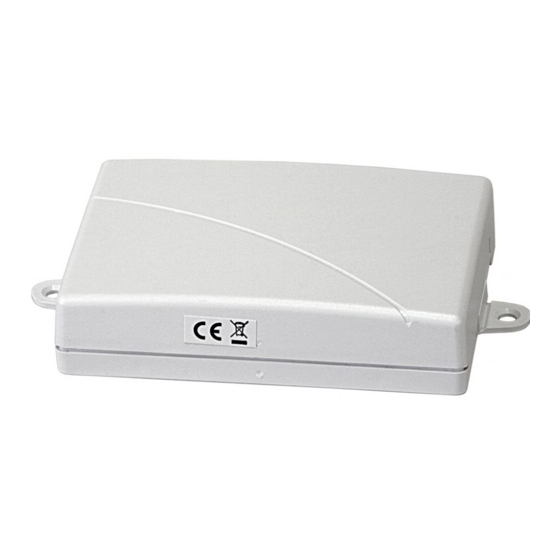
for purchasing the RF5108-433 Wireless Receiver. This product
is the result of several years of development and will allow you to connect
up to 8 wireless detection devices to the PC580, PC585, PC1555, PC1565, and the Power
Series control panels.
The RF5108-433 operates at 433 MHz. It provides several advantages:
• supervisory transmissions are sent every 64 minutes at fixed time intervals for NA
version, 12 minutes for the EU version.
• programmable supervisory window can be as long as 24 hours
• diversity antenna arrangement for better RF reception
• 2 PGM Outputs
In addition, the RF5108-433 features:
• 6 digit serial numbers for all wireless devices: These new serial numbers include
hexadecimal digits. Please read Section 3.1 "A note on Electronic Serial Numbers (ESN)"
for more information on enrolling 6-digit devices.
We are confident you will find the RF5108-433 Wireless Receiver a unique and useful
control panel enhancement.
Section 1: Introduction
This manual describes how to install, program and maintain the RF5108-433.
It covers both North American (NA) and European (EU) market versions.
Before you install the RF5108-433 module, you should have completed the following
steps in your system installation:
1. Plan the installation and wiring of the security system (see the system Installation Manual ).
2. Install the control panel, and install and enroll at least one keypad to use for programming.
3. Install and enroll any hardwired zone expander modules (PC5108) you plan to use.
CAUTION!: This RF5108-433 EU equipment shall be installed by SERVICE PERSON-
NEL ONLY.
NOTE: PowerSeries panels v2.x and lower that support the PC5108 zone expander
modules occupy zones in 2 groups of 4 (e.g. zones 9-12 and zones 13-16). PowerSeries
panels v3.x and higher that support the PC5108 Zone Expander modules occupy zones
in groups of 8 (e.g. zones 9-16 and zones 17-24). None of the zones assigned to a
PC5108 module may be used for wireless devices.
Program the RF5108-433 from a system keypad or using downloading software on a remote
computer (e.g., DLS2002). Read your system Installation Manual for more information.
1.1 How to use this Manual
Read this manual before you begin installing the RF5108-433. To install and set up the
RF5108-433 and wireless devices, follow these steps. Refer to the sections listed below.
1. Temporarily mount and wire the RF5108-433 module (see Section 2 )
2. Enroll and program wireless devices (see Section 3 )
3. Complete zone and other programming on the system (see Section 4 )
4. Test the placement of all the wireless devices (see Section 5)
5. Permanently mount the RF5108-433 receiver and wireless devices (see Section 5)
For additional information on trouble conditions, RF jamming signal detection and battery
replacement, see Section 6. For help with troubleshooting, see Section 7.
WARNING:
product use and function and information on the limitations as to liability
of the manufacturer.
This manual contains information on limitations regarding
Advertisement
Table of Contents

Related Manuals for DSC RF5108-433


Summary of Contents for DSC RF5108-433
-
Page 1: Section 1: Introduction
(e.g., DLS2002). Read your system Installation Manual for more information. 1.1 How to use this Manual Read this manual before you begin installing the RF5108-433. To install and set up the RF5108-433 and wireless devices, follow these steps. Refer to the sections listed below. -
Page 2: Specifications And Features
1.4 DLS Compatibility The RF5108-433 can support up to 8 wireless devices that can be assigned to any of zones 1 to 32 or RF Jam Zone. If the DLS user enters valid serial numbers for more than 8 wireless... - Page 3 Ensure the electrical wires will not run over the antenna(s) of the module when it is mounted. NOTE: When mounting the RF5108-433 in a basement, place the module as high and as close to the underside of the first floor as possible. The range of the module will be reduced if the unit is mounted below ground level.
-
Page 4: Connecting X-10 Powerflash Module
PGM 1 and/or PGM 2 on the RF5108-433 can be set up to open a garage door (refer to Section 3.5). NOTE: Not to be used in UL Listed installations. -
Page 5: Section 3: Enrolling Wireless Devices
& Please refer to the control panel Installation Manual for a listing of available output types and their function. PGM 1 and/or PGM 2 on the RF5108-433 can be set up for this operation (see Section 3.5). After you have completed the wiring, reconnect the power to the security system. -
Page 6: Enroll & Program Wireless Keys
3.3 Enroll & Program Wireless Keys For wireless keys to work on the system, you need to enroll them and then program the function buttons. Wireless keys are not assigned to zones and require no zone programming. You can enroll up to 8 wireless keys on the system. Enroll Wireless keys 1. -
Page 7: Identified Wireless Keys
• Enable the PGM output attribute Requires Access Code for each PGM output programmed as [✱][7][1-4] in sections [141] to [154]. 3.5 RF5108-433 PGM Outputs The RF5108-433 has two on-board open collector PGM outputs. Each of these can be individually programmed to: 1. Follow main panel PGM outputs 1 to 14. -
Page 8: Deleting Wireless Devices
4.2 Enable RF5108-433 Supervision The control panel will supervise the RF5108-433 receiver via the Keybus after at least one device has been enrolled on the module (see section 3.2 “Enrolling Wireless Devices”). The RF5108-433 is supervised as a PC5132. -
Page 9: Enable Supervision Of Wireless Zones
‘PC5132’ appears on the display. 3. To exit press [#]. If the RF5108-433 module does not show on the keypad, one of the following conditions may be present: • the module is not connected properly to the Keybus •... -
Page 10: Jamming Signal Detection
3. Enter section [93]. Enter the 2-digit number of the RF Jam Detect zone ([09] to [32]) in the programming section. NOTE: The RF5108-433 counts the RF jam zone as one of the 8 supported zones. If section [93] is programmed, only 7 wireless devices may be programmed. If 8 wireless devices are already programmed, section [93] will not be accessible. -
Page 11: Section 5: Testing & Mounting
Now that you have completed all RF5108-433 related programming, you can test and install the receiver and devices. See section 5 for more information. Section 5: Testing & Mounting 5.1 Test the Reception of Wireless Devices It is very important to test the proposed placement of each wireless device before it is mounted. -
Page 12: Test Wireless Key Reception
RF5108-433 receiver. Moving the RF5108-433 higher will usually improve the reception. If you move the RF5108-433, repeat the tests described in sections 5.1 and 5.2 on all the wireless devices. Continue to test the devices until you have found satisfactory locations for the RF5108-433 and the devices, and there is good reception between the RF5108-433 and the Wireless Keys. -
Page 13: Section 6: Additional Notes
Wireless Supervisory Window, it will generate a zone fault. Tamper Switches For the European (EU) version, there are 2 tamper switches on the RF5108-433 board. Removing the plastic cover and/or the RF5108-433 from its mounting location causes a general system tamper. -
Page 14: Section 7: Troubleshooting
• Verify that you are testing the correct zone • Verify that the correct ESN was entered when the device was enrolled • Verify that the device is in range of the RF5108-433. Try testing the device in the same room as the receiver. -
Page 15: Section 8: Programming Worksheets
1 to 32 or RF Jam Zone. Once 8 wireless devices have been programmed the RF5108-433 will not allow further programming. An error tone will be heard at the keypad if further programming is attempted. - Page 16 Wireless Key Function Key Options *Please refer to your System Installation Manual for feature availability. Partition 1 Wireless Key Options [61] Function Key 1 Function Key 3 l _ ___ l _ ___ l l _ ___ l ____ l Function Key 2 Function Key 4 l _ ___ l _ ___ l...
- Page 17 Partition 7 Wireless Key Options [67] Function Key 1 Function Key 3 l _ ___ l ____ l l _ ___ l _ ___ l Function Key 2 Function Key 4 l _ ___ l ____ l l _ ___ l _ ___ l Partition 8 Wireless Key Options [68] Function Key 1...
- Page 18 Supervision [81] Wireless Supervisory Window Default: NA = 96, EU=10 l____l____l The window is programmed in 15 minute increments. • The default programming for NA is 96 (x15 minutes), which is equal to 24 hours. Valid entries for NA are (16) - (96), equal to 4 - 24 hours. •...
- Page 19 Option 3 Zone 19 Supervision enabled Disabled l _ _______ l Option 4 Zone 20 Supervision enabled Disabled l _ _______ l Option 5 Zone 21 Supervision enabled Disabled l _ _______ l Option 6 Zone 22 Supervision enabled Disabled l _ _______ l Option 7 Zone 23 Supervision enabled...
-
Page 20: Guidelines For Locating Smoke Detectors
Guidelines for Locating Smoke Detectors Experience has shown that all hostile fires in family living units generate smoke to a greater or lesser extent. Experiments using typical fires in family living units indicate that detectable quantities of smoke precede detectable levels of heat in most cases. In existing homes, NFPA Standard 72 requires that a smoke detector be installed outside each sleeping area and on each additional story of the family unit. - Page 21 WARNING Please Read Carefully Note to Installers positioned. Smoke may not be able to reach the smoke detectors, This warning contains vital information. As the only individual in such as when the fire is in a chimney, walls or roofs, or on the other contact with system users, it is your responsibility to bring each item side of closed doors.
-
Page 22: Limited Warranty
If the laws of such a jurisdiction tion that Digital Security Controls Ltd. shall not be responsible apply to any claim by or against DSC, the limitations and for any customs fees, taxes, or VAT that may be due. - Page 23 FCC COMPLIANCE STATEMENT CAUTION: Changes or modifications not expressly approved by Digital Security Controls Ltd. could void your authority to use this equipment. This equipment generates and uses radio frequency energy and if not installed and used properly, in strict accordance with the manufacturer’s instructions, may cause interference to radio and television reception.
- Page 24 CLASS 1.7 2 9 0 3 4 6 3 4 R0 0 4 ©2004 Digital Security Controls Ltd. Toronto, Canada • www.dsc.com Tech. Support: 1-800-387-3630 (Canada & U.S.) or 905-760-3036 Printed in Canada Direct all comments concerning this publication to pubs@dscltd.com...
Need help?
Do you have a question about the RF5108-433 and is the answer not in the manual?
Questions and answers