PRESONUS StudioLive RM32AI Owner's Manual
Presonus studiolive rm-series mixers with uc surface control
Hide thumbs
Also See for StudioLive RM32AI:
- Owner's manual (72 pages) ,
- Visual quickstart manual (16 pages) ,
- Reference manual (19 pages)

Subscribe to Our Youtube Channel
Related Manuals for PRESONUS StudioLive RM32AI


Summary of Contents for PRESONUS StudioLive RM32AI
- Page 1 StudioLive RM-Series Mixers ™ with UC Surface Control Touch-Software-Controlled, Rack-Mount Digital Mixers Owner’s Manual ® www.presonus.com...
-
Page 2: Table Of Contents
Separate Touch Screen Command and About This Manual — 2 Recording – Wired — 22 Meet the StudioLive RM32AI and RM16AI — 2 3.6.10 UC Surface iPad and QMix-AI iPhone Connections for Any of What’s In the Box — 3 These Hookups —... - Page 3 Resources — 50 Stereo Microphone Placement — 50 Compression Setting Suggestions — 53 EQ Frequency Guides — 55 EQ Setting Suggestions — 56 7.0 Technical Specifications — 59 Computer system requirements: — 59 RM16 AI and RM32 AI Technical Specifications — 60 8.0 Warranty —...
-
Page 5: Overview
RM32AI and RM16AI utilizing high-grade components to ensure optimum performance that will last a lifetime. The powerful, scalable, and compact, StudioLive RM32AI and RM16AI 32x16x3 rack-mount mixers combine the all new, battle-ready UC Surface touch-control software for Windows®, Mac®, and iOS®, with 32 or 16 remote, fully recallable XMAX™... -
Page 6: About This Manual
Throughout this manual you’ll find Power User Tips, providing mixing tricks, some of which are unique to the StudioLive RM32AI and RM16AI, as well as explanations of various audio terms. Additionally, to help you get the most from your mixer, you’ll find an assortment of audio tutorials at the back of this manual that cover everything from microphone placement to equalizer and compression-setting suggestions. -
Page 7: What's In The Box
Apple App Store. What’s In the Box Your StudioLive RM-Seres package contains the following: • PreSonus StudioLive RM32AI or RM16AI digital recording and performance mixer • 5-foot (1.5 meter), 9-pin-to-9-pin FireWire s800 cable • Ethernet cable •... -
Page 8: Hookup
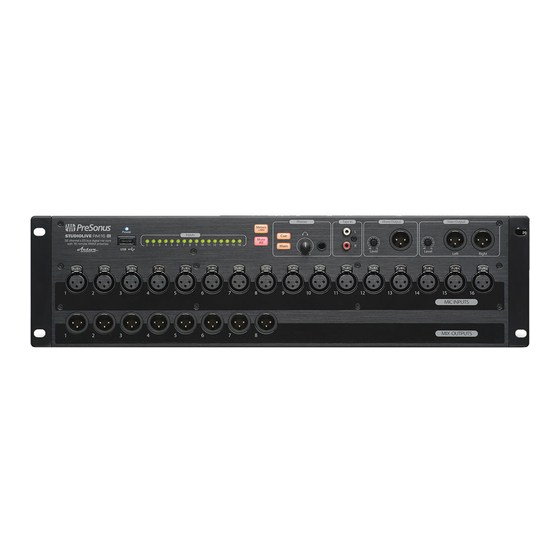
Hookup StudioLive™ RM-Series Mixers Front-Panel Connections and Controls Owner’s Manual 2.0 Hookup This section covers hardware connections and controls for both RM32AI and RM16AI mixers. Whenever differences in certain features are called out, the RM32AI will be mentioned first, followed by the RM16AI. Front-Panel Connections and Controls Main Outputs (Left and Right). -
Page 9: Front-Panel Connections And Controls
Hookup StudioLive™ RM-Series Mixers Front-Panel Connections and Controls Owner’s Manual On the other hand, if you want to use a subwoofer in addition to the speakers that are connected to the Main L/R outputs, leave the panning mode in LR and route the channels you want sent to the subwoofer to the Mono bus (Mono output). - Page 10 Hookup StudioLive™ RM-Series Mixers Front-Panel Connections and Controls Owner’s Manual Headphone Cue Button. Whenever this button is pressed, it illuminates in yellow and reroutes the mix assigned in the settings to Cue to the headphone output. (By default this is set to the Solo bus.) The Headphone Cue and Main buttons are radio buttons: Only one can be selected at a time, and selecting Cue will deselect Main, while selecting Main will deselect Cue.
- Page 11 Pin 2 = +48V Pin 3 = +48V Line Outputs. StudioLive RM32AI offers 16 XLR line outputs and the RM16AI offers 8 XLR line outputs that are fixed to the aux mixes and mirrored on the rear panel with DB25 output connectors.
-
Page 12: Rear-Panel Connections And Controls
Hookup StudioLive™ RM-Series Mixers Rear-Panel Connections and Controls Owner’s Manual Rear-Panel Connections and Controls Line Outputs. These balanced line outputs on DB25 connectors mirror the front-panel outputs. This comes in handy if you want to connect to wireless in-ear transmitters located in the same rack. - Page 13 Hookup StudioLive™ RM-Series Mixers Rear-Panel Connections and Controls Owner’s Manual Option card slot. Your StudioLive RM-series mixer comes with a FireWire s800 option card for digital input and output, network control, and digital S/PDIF output. Additional option cards will be available soon, including AVB, Dante, and Thunderbolt.
-
Page 14: Typical Band Hookup
StudioLive™ RM-Series Mixers Hookup Typical Band Hookup Owner’s Manual Typical Band Hookup acoustic wireless mic backup vocal mics lead vocal guitar/DI keyboard/DI DI Box wireless in-ear wireless in-ear wireless in-ear wireless in-ear (bass) (keys) (lead vocals) (lead guitar) AI Mixer Option Card S/PDIF S800 S800... - Page 15 StudioLive™ RM-Series Mixers Hookup Typical Band Hookup Owner’s Manual electric guitar electric guitar drum kit amp (rhythm) amp (lead) bass/DI main speakers subwoofers music source mo’ bass drum side monitor fill floor wedges floor wedges headphones iPad running iPhones running QMix-AI UC Surface...
-
Page 16: Typical Church Hookup
StudioLive™ RM-Series Mixers Hookup Typical Church Hookup Owner’s Manual Typical Church Hookup acoustic hanging podium backup vocal mics lead vocal keyboard/DI guitar/DI choir mics piano wireless in-ear wireless in-ear wireless in-ear wireless in-ear (bass) (keys) (lead vocals) (lead guitar) AI Mixer Option Card S/PDIF S800 S800... - Page 17 StudioLive™ RM-Series Mixers Hookup Typical Church Hookup Owner’s Manual electric guitar electric guitar drum kit amp (rhythm) amp (lead) bass/DI front of sanctuary speakers dvd player cry room subwoofers oor wedges oor wedges headphones iPads running iPhones running QMix-AI UC Surface...
-
Page 18: Installing The Uc Surface Touch-Control Software
• iPad 2 Downloading UC Surface for iPad and QMix-AI PreSonus’ UC Surface mix-control app for iPad and QMix-AI aux-mix control app for iPhone/iPod touch are free downloads from the Apple App Store. You’ll need this software to control your StudioLive RM-series mixer, so please download it now. -
Page 19: Wired Ethernet Control Setup
Power User Tip: When you launch UC Surface with the computer and StudioLive RM32AI or RM16AI connected to the same network, the software will automatically see the mixer. -
Page 20: Computer Recording Setup
Touch screen computer StudioLive RM32AI and RM16AI have been designed for tight integration with the included Capture and Studio One Artist software. You can record a live show quickly and with confidence to Capture, save the StudioLive AI mixer scene with the Capture Session, and then open that recording, complete with mixer scene, in Studio One. - Page 21 1. After registering your StudioLive RM mixer, download the Universal Control installer for Windows or Mac from your My PreSonus account. This installer includes the UC Surface mix-control software and necessary drivers. 2. Launch the installer and follow the onscreen instructions. When the installer is finished, reboot your computer to complete the installation.
-
Page 22: Computer Hookups
Installing the UC Surface Touch-Control Software StudioLive™ RM-Series Mixers Computer Hookups Owner’s Manual Computer Hookups 3.6.1 Command and Recording – FireWire-equipped computer – Wireless via Ethernet AI Mixer Option Card AI Mixer Option Card Control Touchscreen Computer FireWire-equipped Recording Computer UC Surface Capture or Studio One... -
Page 23: Command And Recording - Firewire-Equipped Computer - Wired
FireWire-equipped Control and Recording Computer UC Surface + Capture or Studio One ™ ™ ® Installing the UC Surface Touch-Control Software StudioLive™ RM-Series Mixers Computer Hookups Owner’s Manual 3.6.3 Command and Recording – FireWire-equipped computer – Wired AI Mixer Option Card FireWire-equipped Control and Recording Computer UC Surface... -
Page 24: Separate Command And Recording - Wireless With Dongle
Installing the UC Surface Touch-Control Software StudioLive™ RM-Series Mixers Computer Hookups Owner’s Manual 3.6.5 Separate Command and Recording – Wireless with Dongle AI Mixer Option Card AI Mixer Option Card FireWire-equipped Recording Computer Control Computer Capture or Studio One UC Surface ™... -
Page 25: Separate Touch Screen Command And Recording - Wireless Via Ethernet
Installing the UC Surface Touch-Control Software StudioLive™ RM-Series Mixers Computer Hookups Owner’s Manual 3.6.7 Separate Touch Screen Command and Recording – Wireless via Ethernet AI Mixer Option Card FireWire-equipped Recording Computer Capture or Studio One ™ ® Control Touchscreen Computer UC Surface ™... -
Page 26: Separate Touch Screen Command And Recording - Wired
Capture or Studio One ™ ® Control Touchscreen Computer Installing the UC Surface Touch-Control Software StudioLive™ RM-Series Mixers Computer Hookups UC Surface Owner’s Manual ™ 3.6.9 Separate Touch Screen Command and Recording – Wired AI Mixer Option Card Control Touchscreen Computer UC Surface ™... -
Page 27: Getting Started
Getting Started StudioLive™ RM-Series Mixers Level-Setting Procedure Owner’s Manual 4.0 Getting Started Before you begin, here are a few general rules of thumb: • Always press the Mute All button on the mixer front panel or turn down the Main faders in UC Surface and the Phones knob on the front panel before making connections. -
Page 28: A Tour Of Uc Surface Features
Owner’s Manual A Tour of UC Surface Features StudioLive RM32AI and RM16AI are controlled with the UC Surface mix-control application, which is designed specifically for live mixing. All primary mixing functionality is at your fingers without navigating complex views or deep menus. -
Page 29: Uc Surface Settings
A Tour of UC Surface Features StudioLive™ RM-Series Mixers UC Surface Settings Owner’s Manual Device Settings tab. This tab contains all device settings, such as Global Aux Mute, Talkback Input Source, Headphone Cue Source, and Permissions. Aux Routing tab. This tab displays the routing options for the auxiliary digital outputs on the installed option card. -
Page 30: Mix Scroll View
A Tour of UC Surface Features StudioLive™ RM-Series Mixers Mix Scroll View Owner’s Manual Backup tab. This is where you can backup and restore all the scenes and presets on your mixer to the local drive of your computer. Wireless Connection. This is where you go to change the network and password for wireless control of the mixer. - Page 31 A Tour of UC Surface Features StudioLive™ RM-Series Mixers Mix Scroll View Owner’s Manual EQ Micro View. This section of the channel strip displays the EQ curve that’s applied to the channel. It will also display the current value for the channel fader or Pan control whenever they’re moved.
-
Page 32: Meter Bridge
A Tour of UC Surface Features StudioLive™ RM-Series Mixers Meter Bridge Owner’s Manual Meter Bridge Meter Bridge. This area contains the level meters for all input channels. The selected channel will be shown with a blue box around the channel number. If an input clips, a red box will appear behind the channel number. - Page 33 A Tour of UC Surface Features StudioLive™ RM-Series Mixers Flex Fader and Mix Selection Area Owner’s Manual Mix Selection Area. This is where you select the mix that’s currently being controlled by the channel faders. This is also where you’ll find the Mix Settings area, which provides contextual information about the selected mix.
-
Page 34: Filter Dcas
A Tour of UC Surface Features StudioLive™ RM-Series Mixers Filter DCAs Owner’s Manual FX Settings. This area provides quick access to all FX mutes and Tap Tempo buttons for the delay effects on the selected FX mix bus. Refer to Flex Fader Channel Strip for information about the available features for FX mix buses. - Page 35 A Tour of UC Surface Features StudioLive™ RM-Series Mixers Filter DCAs Owner’s Manual Group Edit Mode. Name. Selecting this area will allow you to rename the group’s default name. Channel Selection. Select any channels you wish to add to the group. Channels that are not in the group will display as dark in the scroll view.
- Page 36 A Tour of UC Surface Features StudioLive™ RM-Series Mixers Filter DCAs Owner’s Manual Flex DCA Fader. When a Filter DCA is selected, the Flex fader controls the relative level of all channels in the group. Changes made using the Flex fader are only applied to the currently selected mix and will not affect other mixes in the system.
-
Page 37: Main Mix Area
A Tour of UC Surface Features StudioLive™ RM-Series Mixers Main Mix Area Owner’s Manual Main Mix Area Main Mix Bus. This area contains the channel strips for the Mono/Center and Main Left and Right outputs, which offer the following features and functions. EQ Micro View. - Page 38 A Tour of UC Surface Features StudioLive™ RM-Series Mixers Main Mix Area Owner’s Manual Talkback. This feature lets you communicate with the performers on stage or in the studio, and offers the functions listed below for configuring and operating it: Talk.
-
Page 39: Fat Channel
A Tour of UC Surface Features StudioLive™ RM-Series Mixers Fat Channel Owner’s Manual Fat Channel The UC Surface Fat Channel offers a noise gate/expander, compressor, limiter, and EQ, as well as input settings, A/B settings function (for the EQ, noise gate/ expander, and compressor), and access to the Fat Channel presets. - Page 40 A Tour of UC Surface Features StudioLive™ RM-Series Mixers Fat Channel Owner’s Manual A Note for iPad Users: The iPad version of the Fat Channel is arranged so that the noise gate/expander and compressor are on the Dynamics page (DYN), while the EQ is on a page of its own (EQ).
-
Page 41: Channel Settings
A Tour of UC Surface Features StudioLive™ RM-Series Mixers Fat Channel Owner’s Manual 5.7.1 Channel Settings Channel Name. This is the name of the mixer channel you’re working with and is based on the name of the icon you’ve selected when setting the Channel Type or the custom name you’ve given the channel. -
Page 42: Channel Input
A Tour of UC Surface Features StudioLive™ RM-Series Mixers Fat Channel Owner’s Manual Channel Tagging. In addition to setting the channel icon and name, selecting a Channel Type “tags” the channel, which lets you filter things like presets so that only common or relevant channel types are shown. Source Select. -
Page 43: Fat Channel Processing
A Tour of UC Surface Features StudioLive™ RM-Series Mixers Fat Channel Owner’s Manual Power User Tip: Dynamic and ribbon microphones are generally lower- output devices that require no external power source. In fact, unless a ribbon microphone calls specifically for phantom power, sending phantom power to it can cause severe damage. -
Page 44: Compressor
A Tour of UC Surface Features StudioLive™ RM-Series Mixers Fat Channel Owner’s Manual Attack. This adjusts the rate at which the gate opens on the selected channel or output. You can set the attack time from 0.02 to 500 ms. Power User Tip: A fast attack rate is crucial for percussive instruments. -
Page 45: Limiter
A Tour of UC Surface Features StudioLive™ RM-Series Mixers Fat Channel Owner’s Manual Compressing a signal usually results in an overall reduction in level (gain reduction), and the Makeup Gain control lets you increase the volume to make up for this gain loss, if desired. You can adjust the Makeup Gain from 0 dB (no gain adjustment) to +28 dB. -
Page 46: Preset List/Editor Button
A Tour of UC Surface Features StudioLive™ RM-Series Mixers Fat Channel Owner’s Manual Q. This adjusts the Q value for the selected frequency band. The Q is the ratio of the center frequency to the bandwidth. When the center frequency is constant, the bandwidth is inversely proportional to the Q, so as you raise the Q, you narrow the bandwidth. -
Page 47: Graphic Eq
A Tour of UC Surface Features StudioLive™ RM-Series Mixers Fat Channel Owner’s Manual Paste. Pastes the copied settings to the currently selected channel. A/B Button. This button is used for switching between, or comparing, two different Fat Channel settings. When you first switch from A to B, the B version will have the same settings as A. - Page 48 A Tour of UC Surface Features StudioLive™ RM-Series Mixers Fat Channel Owner’s Manual Gain Value. Each slider has its own Gain Value display located immediately below, which displays the current value in decibels (dB). Reset. This flattens the EQ curve by resetting all the sliders to 0 dB. Draw.
-
Page 49: Effects
A Tour of UC Surface Features StudioLive™ RM-Series Mixers Fat Channel Owner’s Manual 5.7.9 Effects Effects (FX) Editor. UC Surface offers two reverbs and two delays, which can be accessed and edited using the FX Editor by clicking or tapping the FX Edit button in the selected FX Flex Channel. When the FX Editor opens, you’ll find the following features functions: FX Label. - Page 50 A Tour of UC Surface Features StudioLive™ RM-Series Mixers Fat Channel Owner’s Manual Ambience: Decay Delay Parameters Time. The amount of time (in milliseconds) between the source signal and its echo. The simplest delay effect is a single repeat. A short delay between 30 and 100 ms can be used to create slap-back echo, while longer delay times produce a more distant echo.
-
Page 51: Working With Presets
A Tour of UC Surface Features StudioLive™ RM-Series Mixers Working With Presets Owner’s Manual Load Button. This button loads a preset that you’ve chosen from the Preset List. Audition Button. This lets you audition (try out) a preset before loading it and overwriting the current settings. -
Page 52: Mix Scene Quick Recall
A Tour of UC Surface Features StudioLive™ RM-Series Mixers Mix Scene Quick Recall Owner’s Manual Mix Scene Quick Recall UC Surface touch-control software lets you create and store up to eight snapshots of your mix. These mix scenes include each Fat Channel parameter for every input and bus, the position of every fader, the aux and effects mixes, channel mutes, solos, and input selection (analog input or digital playback stream). -
Page 53: Mute Groups
A Tour of UC Surface Features StudioLive™ RM-Series Mixers 5.10 Mute Groups Owner’s Manual 5.10 Mute Groups A Mute Group mutes and unmutes multiple channels and buses with the press of a single button. With the eight Mute Groups in UC Surface, you could, for example, assign the drum mics to Mute Group 1, the instrumentalists to Mute Group 2, the background vocalists to Mute Group 3, all the aux buses to Mute Group 4, and FX buses to Mute Group 5. -
Page 54: Resources
Resources StudioLive™ RM-Series Mixers Stereo Microphone Placement Owner’s Manual Resources Stereo Microphone Placement The following are a few recording applications to help you get started with your StudioLive. These are by no means the only ways to record these instruments. Microphone selection and placement is an art. - Page 55 Resources StudioLive™ RM-Series Mixers Stereo Microphone Placement Owner’s Manual Acoustic Guitar Point a small-diaphragm condenser microphone at the 12th fret, approximately 8 inches away. Point a large- diaphragm condenser microphone at the bridge of the guitar, approximately 12 inches from the guitar. Experiment with distances and microphone placement.
- Page 56 Resources StudioLive™ RM-Series Mixers Stereo Microphone Placement Owner’s Manual Drum Overheads (XY example) Place two small-diaphragm condenser microphones on an XY stereo-microphone holder (bar). Position the microphones so that each one is at a 45-degree angle, pointed down at the drum kit, approximately 7 or 8 feet above the floor or drum riser.
-
Page 57: Compression Setting Suggestions
Owner’s Manual Compression Setting Suggestions The following are the compression presets that were used in the PreSonus BlueMax. We have included them as a jumping- off point for setting up compression on the StudioLive. Vocals Soft. This is an easy compression with a low ratio setting for ballads, allowing a wider dynamic range. - Page 58 Resources StudioLive™ RM-Series Mixers Compression Setting Suggestions Owner’s Manual Keyboards Piano. This is a special setting for an even level across the keyboard. It is designed to help even up the top and bottom of an acoustic piano. In other words, it helps the left hand to be heard along with the right hand.
-
Page 59: Eq Frequency Guides
Resources StudioLive™ RM-Series Mixers EQ Frequency Guides Owner’s Manual EQ Frequency Guides Table 1 Instrument What to Cut Why to Cut What to Boost Why to Boost Human Voice 7 kHz Sibilance 8 kHz Big sound 2 kHz Shrill 3 kHz and above Clarity 1 kHz Nasal... -
Page 60: Eq Setting Suggestions
Resources StudioLive™ RM-Series Mixers EQ Setting Suggestions Owner’s Manual Table 2 BOOST • harder bass to low • vocal presence frequency • kick & tom attack instruments (kick, • more finger sound tom, bass) on bass • • brighten vocals, guitar and snare •... - Page 61 Resources StudioLive™ RM-Series Mixers EQ Setting Suggestions Owner’s Manual Pop Male Vocals LOW ON/OFF LOW SHELF LOW FREQ (Hz) LOW Q LOW GAIN LOW MID LOW MID LOW MID Q LOW MID GAIN ON/OFF FREQ (Hz) HIGH MID ON/ HI MID FREQ HIGH MID Q HIGH MID GAIN HIGH ON/OFF...
- Page 62 Resources StudioLive™ RM-Series Mixers EQ Setting Suggestions Owner’s Manual Acoustic Guitar LOW ON/OFF LOW SHELF LOW FREQ (Hz) LOW Q LOW GAIN LOW MID LOW MID LOW MID Q LOW MID GAIN ON/OFF FREQ (Hz) HIGH MID ON/ HI MID FREQ HIGH MID Q HIGH MID GAIN HIGH ON/OFF...
-
Page 63: Technical Specifications
Technical Specifications StudioLive™ RM-Series Mixers Computer system requirements: Owner’s Manual Technical Specifications Computer system requirements: Below are the minimum computer-system requirements for UC Surface. Apple iPad • iPad Air, iPad mini with Retina display, iPad (4th generation), iPad mini, iPad (3rd generation), or iPad 2 •... -
Page 64: Rm16 Ai And Rm32 Ai Technical Specifications
Technical Specifications StudioLive™ RM-Series Mixers RM16 AI and RM32 AI Technical Specifications Owner’s Manual RM16 AI and RM32 AI Technical Specifications RM16AI RM32AI Microphone Preamp Input Type XLR Female, balanced, locking XLR Female, balanced, locking Frequency Response to Direct Output (at unity gain) 20-40 kHz, ±0.5 dBu 20-40 kHz, ±0.5 dBu Frequency Response to Main Output (at unity gain) - Page 65 Technical Specifications StudioLive™ RM-Series Mixers RM16 AI and RM32 AI Technical Specifications Owner’s Manual RM16AI RM32AI Compressor Threshold Range -56 dB to 0 dB -56 dB to 0 dB Ratio 1:1 to 14:1 1:1 to 14:1 Attack Time 0.2 ms to 150 ms 0.2 ms to 150 ms Release Time 40 ms to 1,000 ms...
-
Page 66: Warranty
PreSonus-branded products under normal use. This Limited Warranty applies only to hardware products manufactured by or for PreSonus that can be identified by the PreSonus trademark, trade name, or logo affixed to them. Exclusions and Limitations: This warranty does not cover the following: 1. - Page 67 PreSonus will pay the return shipping charges. How to Get Warranty Service (USA): 1. You must have an active user account with PreSonus and your hardware must be on file with your account. If you do not have an account, please go to: http:// www.presonus.com/registration and complete the registration process.
-
Page 68: Warranty Information
Owner’s Manual How to Get Warranty Service (outside of USA): 1. You must have an active user account with PreSonus and your hardware must be on file with your account. If you do not have an account, please go to: http:// www.presonus.com/registration and complete the registration process. - Page 69 © 2014 PreSonus Audio Electronics, Inc. All Rights Reserved. AudioBox, Nimbit, PreSonus, QMix, StudioLive, and XMAX are trademarks or registered trademarks of PreSonus Audio Electronics, Inc. Capture and Studio One are trademarks or registered trademarks of PreSonus Software Ltd. Mac and Mac OS are registered trademarks of Apple, Inc., in the U.S. and other countries.
- Page 70 StudioLive RM-Series Mixers ™ with UC Surface Control Touch-Software-Controlled, Rack-Mount Digital Mixers Owner’s Manual 18011 Grand Bay Ct. • Baton Rouge, ® Louisiana 70809 USA• 1-225-216-7887 Part# 820-WLV0046-B www.presonus.com...
Need help?
Do you have a question about the StudioLive RM32AI and is the answer not in the manual?
Questions and answers