Table of Contents
Advertisement
INSTALLATION AND OPERATION MANUAL
INSTALLATION AND OPERATION MANUAL
MANUAL DE INSTALACIÓN Y FUNCIONAMIENTO
MANUAL DE INSTALACIÓN Y FUNCIONAMIENTO
INSTALLATIONS- UND BETRIEBSHANDBUCH
INSTALLATIONS- UND BETRIEBSHANDBUCH
MANUEL D'INSTALLATION ET DE FUNCTIONNEMENT
MANUEL D'INSTALLATION ET DE FUNCTIONNEMENT
MANUALE D'INSTALLAZIONE E D'USO
MANUALE D'INSTALLAZIONE E D'USO
Read and understand this manual before using this air conditioner. Keep this manual for future reference.
Read and understand this manual before using this air conditioner. Keep this manual for future reference.
Lea atentamente el presente manual antes de utilizar el sistema de aire acondicionado. Guárdelo para futuras consultas.
Lea atentamente el presente manual antes de utilizar el sistema de aire acondicionado. Guárdelo para futuras consultas.
Lesen Sie dieses Handbuch gründlich durch, bevor Sie diese Klimaanlage benutzen. Benutzen Sie dieses Handbuch
Lesen Sie dieses Handbuch gründlich durch, bevor Sie diese Klimaanlage benutzen. Benutzen Sie dieses Handbuch
für eventuell auftretende Fragen oder Probleme.
für eventuell auftretende Fragen oder Probleme.
Lisez ce manuel jusqu'à totale compréhension avant d'installer cet appareil de climatisation. Conservez ce manuel afin
Lisez ce manuel jusqu'à totale compréhension avant d'installer cet appareil de climatisation. Conservez ce manuel afin
de vous y référer ultérieurement.
de vous y référer ultérieurement.
Leggere e comprendere il presente manuale prima di utilizzare il condizionatore d'aria. Conservare il presente manuale
Leggere e comprendere il presente manuale prima di utilizzare il condizionatore d'aria. Conservare il presente manuale
per la consultazione futura.
per la consultazione futura.
Leia e compreenda este manual antes de utilizar este ar condicionado. Guarde este manual para referência futura.
Leia e compreenda este manual antes de utilizar este ar condicionado. Guarde este manual para referência futura.
Læs denne vejledning grundigt, inden du tager klimaanlægget i brug. Gem vejledningen til fremtidige opslag.
Læs denne vejledning grundigt, inden du tager klimaanlægget i brug. Gem vejledningen til fremtidige opslag.
Lees deze handleiding goed door voordat u de airconditioner gebruikt. Bewaar de handleiding voor later gebruik.
Lees deze handleiding goed door voordat u de airconditioner gebruikt. Bewaar de handleiding voor later gebruik.
Läs denna handbok noga innan luftkonditioneringsaggregatet används. Spara handboken för framtida bruk.
Läs denna handbok noga innan luftkonditioneringsaggregatet används. Spara handboken för framtida bruk.
Διαβάστε προσεκτικά αυτό το εγχειρίδιο πριν τη χρή ση του κλιματιστικού. Κρατήστε το εγχειρίδιο για μελλοντική αναφορά
Διαβάστε προσεκτικά αυτό το εγχειρίδιο πριν τη χρή ση του κλιματιστικού. Κρατήστε το εγχειρίδιο για μελλοντική αναφορά
DC INVERTER HVRN1 / FSN(1)E
MANUAL DE INSTALAÇÄO E DE FUNCIONAMENTO
MANUAL DE INSTALAÇÄO E DE FUNCIONAMENTO
BRUGER- OG MONTERINGSVEJLEDNING
BRUGER- OG MONTERINGSVEJLEDNING
INSTALLATIE- EN BEDIENINGSHANDLEIDING
INSTALLATIE- EN BEDIENINGSHANDLEIDING
HANDBOK FÖR INSTALLATION OCH ANVÄNDING
HANDBOK FÖR INSTALLATION OCH ANVÄNDING
ΕΓΧΕΙΡΙΔΙΟΕΓΚΑΤΑΣΤΑΣΗΣΚΑΙΛΕΙΤΟΥΡΓΙΑΣ
ΕΓΧΕΙΡΙΔΙΟΕΓΚΑΤΑΣΤΑΣΗΣΚΑΙΛΕΙΤΟΥΡΓΙΑΣ
.
.
Advertisement
Table of Contents
Troubleshooting

Related Manuals for Hitachi RCIM-2.0FSN


Summary of Contents for Hitachi RCIM-2.0FSN
- Page 1 DC INVERTER HVRN1 / FSN(1)E INSTALLATION AND OPERATION MANUAL INSTALLATION AND OPERATION MANUAL MANUAL DE INSTALAÇÄO E DE FUNCIONAMENTO MANUAL DE INSTALAÇÄO E DE FUNCIONAMENTO MANUAL DE INSTALACIÓN Y FUNCIONAMIENTO MANUAL DE INSTALACIÓN Y FUNCIONAMIENTO BRUGER- OG MONTERINGSVEJLEDNING BRUGER- OG MONTERINGSVEJLEDNING INSTALLATIONS- UND BETRIEBSHANDBUCH INSTALLATIONS- UND BETRIEBSHANDBUCH INSTALLATIE- EN BEDIENINGSHANDLEIDING...
- Page 3 HITACHI may bring the latest innovations to their customers Whilst every effort is made to ensure that all dimensions and specifications are correct, any printers' errors not rectified are outside the control of HITACHI, who cannot be held responsible for same...
- Page 4 ATTENTION: This product shall not be mixed with general house waste at the end of its life and it shall be retired according to the appropriated local or national regulations in a environmentally correct way. Due to the refrigerant, oil and other components contained in Air Conditioner, its dismantling must be done by a professional installer according to the applicable regulations.
- Page 7 DANGER – Immediate hazard which WILL result in severe injury or death. PELIGRO – Riesgos inmediatos que PRODUCIRÁN lesiones personales graves e incluso la muerte. GEFAHR – Unmittelbare Gefahrenquellen, die zu schweren Verletzungen oder zum Tod führen. DANGER – Dangers instantanés de blessures corporelles sévères ou de mort. PERICOLO –...
-
Page 8: Table Of Contents
INDEX ÍNDICE PART I OPERATION 1ª PARTE: FUNCIONAMIENTO 1. SAFETY SUMMARY 1. RESUMEN DE SEGURIDAD 2. IMPORTANT NOTICE 2. AVISO IMPORTANTE 3. SYSTEM DESCRIPTION 3. DESCRIPCIÓN DEL SISTEMA 4. BEFORE OPERATION 4. ANTES DEL FUNCIONAMIENTO 5. REMOTE CONTROLLER OPERATION 5. FUNCIONAMIENTO DEL CONTROL REMOTO 6. - Page 9 INDHOLDSFORTEGNELSE INHOUDSOPGAVE DEL I - BETJENING DEEL I BEDIENING 1. OVERSIGT OVER SIKKERHEDSFORSKRIFTER 1. OVERZICHT VEILIGHEID 2. VIGTIG INFORMATION 2. BELANGRIJKE MEDEDELING 3. BESKRIVELSE AF ANLÆG 3. BESCHRIJVING VAN HET SYSTEEM 4. FØR BETJENING 4. VOORDAT U HET SYSTEEM IN GEBRUIK NEEMT 5.
- Page 10 Kassette Kassette Lofthængt Vægmodel Gulv Inbouwversie Gulvpanel Cassette Cassette Plafondmodel Wandmodel Vloermodel I taket Inbouw- Kassett Kassett I taket Väggmodell Golv vloermodel Inbyggd golvtyp RCIM-2.0FSN RCI-2.0FSN1E RCD-2.0FSN RPC-2.0FSNE RPI-2.0FSN1E RPK-2.0FSNM RPF-2.0FSNE RPFI-2.0FSNE RCI-2.5FSN1E RCD-2.5FSN RPC-2.5FSNE RPI-2.5FSN1E RPK-2.5FSNM RPF-2.5FSNE RPFI-2.5FSNE RPFI...
- Page 11 CODIFICAÇÃO DE MODELOS Nota Importante: por favor, verifique, de acordo com o nome do modelo, qual é o seu tipo de ar condicionado, e como este é abreviado e mencionado neste manual de instruções. Este manual de instalação e de funcionamento só está relacionado com a unidade interior FSN(1)E combinada com as unidades exteriores HVRN1.
-
Page 13: Safety Summary
If this is not the case, contact your distributor. Temperature HITACHI pursues a policy of continuing improvement Maximum Minimum in design and performance of products. The right is Indoor 32°C DB/23°C WB... -
Page 14: System Description
SYSTEM DESCRIPTION Start-up and Operation: Maintenance: Check to ensure that all the stop valves are fully opened Periodically check the high pressure side pressure. If the and no obstacle exists at the inlet/outlet sides before start- pressure is higher than the maximum allowable pressure, up and during the operation. -
Page 15: Remote Controller Operation
REMOTE CONTROLLER OPERATION 5. REMOTE CONTROLLER OPERATION 5.1. OPTIONAL LIQUID CRYSTAL REMOTE CONTROL (PC-P2HTE) OK Switch RESET (Filter Reset) Switch After cleaning the air filter, press the “RESET” button. The FILTER indication will disappear and the next filter cleaning time will be set. It also stops the run procedure. - Page 16 REMOTE CONTROLLER OPERATION 5.1.1. OPERATION PROCEDURE FOR COOLING, HEATING, DRY AND FAN OPERATIONS Before Operation Supply electrical power to the system for approximately 12 hours before start-up or a long shutdown. Do not start the system immediately after power supply, it may cause a CAUTION: compressor failure because the compressor is not heated well.
- Page 17 A/C+VENTI. (La figura muestra el estado cuando el ajuste es "A/C + VENTI"). NOTE: Contact your distributor or dealer of HITACHI for detailed information. In case that the mode is changed to VENTI during individual operation of the air conditioner, the air conditioner is stopped.
- Page 18 REMOTE CONTROLLER OPERATION 5.1.5. OPERATION PROCEDURE FOR SWING LOUVER ADJUSTMENT 1. When the SWING LOUVER switch is pressed, the swing RCI (4-way cassette type) louver starts its operation. The range of the angle of swing is Indication approximately 70° from the horizontal to the vertical position. When mark “...
- Page 19 REMOTE CONTROLLER OPERATION 5.1.6. TIMER OPERATION PROCEDURE Setting current day and time 1. Hold down the SELECT( ) DAY switch for more than 3 seconds to change to current day setting mode. SET is indicated and the day blinks. All the days except the current day are indicated.
- Page 20 REMOTE CONTROLLER OPERATION Defining the schedule to be applied 1. Hold down the ( ) DAY/SCHEDULE switch for more than 3 seconds and the SET indicator appears. All the days and schedule numbers are indicated. 2.Press ( ) DAY/SCHEDULE switch until the day to be set flickers. By pressing it, the day flickers [Mon] [Tue] …...
- Page 21 REMOTE CONTROLLER OPERATION Automatic operation with heating (anti-freeze protection) 1. In normal mode, hold down the switch for more than 3 seconds to change the operation mode. The automatic heating setting is activated and the ON indicator appears to the right of the current time.
- Page 22 In the case that the plural indoor units are connected, the above items for each indoor unit are indicated one by one. Check the contents of the indications and contact your distributor or dealer of HITACHI. Power Failure Model code Indicated for a All the indications are OFF.
-
Page 23: Basic Troubleshooting
AUTOMATIC CONTROLS 6. AUTOMATIC CONTROLS The system is equipped with the following functions. SLOW AIR CONTROL DURING HEATING THREE MINUTE GUARD OPERATION The compressor remains off for at least 3 minutes once When the compressor is stopped while the thermostat it has stopped. -
Page 24: Name Of Parts
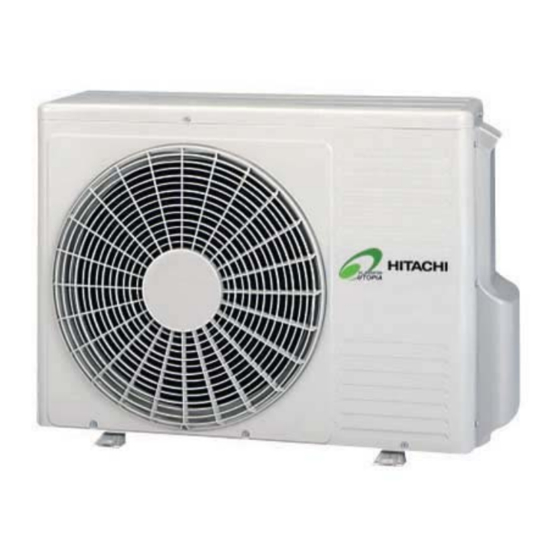
NAME OF PARTS PART II-INSTALLATION 8. NAME OF PARTS Name of parts. If do you want more information check the technical catalogue. RAS - DC INVERTER OUTDOOR UNIT (2/2.5HVRN1) No. Part Name Compressor Accumulator Heat Exchanger Fan Motor Strainer Distributor Reversing Valve Expansion Valve Stop Valve for Gas Line... -
Page 25: Refrigerant Cycle
REFRIGERANT CYCLE 9. REFRIGERANT CYCLE EXAMPLE: Refrigerant Flow Direction (Cooling) Refrigerant Flow Direction (Heating) Field Refrigerant Piping Flare Connection Brazing Connection No. Part Name No. Part Name Compressor High Pressure Switch for Protection Heat Exchanger Pressure Switch for Control Accumulator Stop Valve for Gas Line Expansion Valve Stop Valve for Liquid Line... -
Page 26: Installation Space
UNITS INSTALLATION 10.2. INSTALLATION SPACE RAS-2~2.5 HVRN1 (mm) a) In case of front side and either of the sides are open (single unit) b) In case that surrounding wall exist (single unit) c) In case that upper side obstacles exist (single unit) 0 <... -
Page 27: Installation Place Provision
UNITS INSTALLATION 10.3. INSTALLATION PLACE PROVISION 4. Provide an adequate drainage around the foundation. 1. Secure the outdoor unit with the anchor When installing the unit on a roof or a veranda, drain water may turn to ice in a cold morning. Base of Therefore, avoid draining in an area where people outdoor unit... -
Page 28: Refrigerant Piping & Refrigerant Charge
11. REFRIGERANT PIPING & REFRIGERANT CHARGE CAUTION: - Use refrigerant R410A in the refrigerant cycle. Do not charge oxygen, acetylene or other flammable and poisonous gases into the refrigerant cycle when performing a leakage test or an air-tight test. Gas line Liquid line - These types of gases are extremely dangerous and Liquid stop valve... - Page 29 REFRIGERANT PIPING & REFRIGERANT CHARGE 11.1. REFRIGERANT PIPING WORK 11.1.1. PIPING MATERIALS 11.1.2. SUSPENSION OF REFRIGERANT PIPING 1. Prepare locally-supplied copper pipes. Suspend the refrigerant piping at certain points and prevent 2. Select the piping size with the correct thickness and the refrigerant piping from touching the weak part of the correct material which can have sufficient pressure building such as wall, ceiling, etc…...
- Page 30 REFRIGERANT PIPING & REFRIGERANT CHARGE Calculation of Refrigerant Concentration 11.1.4. TIGHTENING Tightening work on the flare nut 1. Calculate the total quantity of refrigerant R (kg) charged in the system connecting all the indoor units of rooms to be air-conditioned. 2.
-
Page 31: Refrigerant Piping Length
Outdoor Unit and each Indoor Unit L(m) to piping length. In case that a piping length is shorter than 5 meters, contact the Hitachi dealer. When the Outdoor unit is installed heigher than Indoor Unit When the Outdoor unit is installed... - Page 32 REFRIGERANT PIPING & REFRIGERANT CHARGE The possible combination between Outdoor Unit and Indoor Unit are the following: Single System NOTE: L are the Length indicated in the chart. Units Mark Maximum Piping Length Actual piping length RAS-2/2.5HVRN1 Equivalent piping length 11.2.1.
- Page 33 REFRIGERANT PIPING & REFRIGERANT CHARGE 11.4. BRAZING WORK ATTENTION: Use nitrogen gas for blowing during pipe brazing. If Use a reducer valve when nitrogen gas blowing is oxygen, acetylene or fluorocarbon gas is used, it will performed during brazing. The gas pressure should cause an explosion or poisonous gas.
-
Page 34: Drain Piping
DRAIN PIPING 12. DRAIN PIPING 12.1. DRAIN DISCHARGING BOSS When the base of the outdoor unit is temporarily utilized as NOTE: a drain receiver and the drain water in it is discharged, this Do not use this drain boss set in a cold area, because drain boss is utilized to connect the drain piping. - Page 35 ELECTRICAL WIRING 13.2. ELECTRICAL WIRING CONNECTION FOR OUTDOOR UNITS The electrical wiring connection for the outdoor unit is Instructions for wiring and electrical Board shown in figure below: RAS-2/2.5 HVRN1 Earth terminal Side cover Transmission wires Power wires 13.2.1. SETTING OF DIP SWITCHES FOR OUTDOOR UNIT Quantity and Position of DIP Switches DSW301: Test Run Mode The PCB in the Outdoor Unit is operating with 7 types of DIP...
-
Page 36: Common Wiring
ELECTRICAL WIRING DSW4: Refrigerant Cycle No. Setting (Setting is DSW6: Function setting (No setting is required) required) Setting before shipment Setting for the ten digit 1 2 3 4 5 6 RSW1: Ref. Cycle No. Setting (Setting is required) DSW5: End Terminal Resistance (No setting is required) Setting position. - Page 37 MLFC European Standard, EN60 335-1. (Flame Retardant Polyflex Wire) manufactured by HITACHI Cable Ltd. Japan. In case that the power cables are connected in series, add each unit maximum current and select according to the next table: Selection according to...
- Page 38 Maximum Wiring Length: Total 1000m (including CSNET WEB). In case that the total wiring length is longer than 1000m, contact the Hitachi dealer. Outdoor Units Recommended Cable: Twist Pair Cable with Shield, over 0.75mm2 (Equivalent to KPEV-S)
- Page 39 ELECTRICAL WIRING 13.3.4. DIP SWITCH SETTING Dip Switch Setting (No H-Link example) Dip switch setting (H-Link example) Cycle No 0 Cycle No 1 Cycle No 2 Before Cancelation Cancelation Shipment NOTE: For single system, the rotary switch must start in 0. Mark Description Mark...
-
Page 40: Installation Of Remote Controller
INSTALLATION OF REMOTE CONTROLLER 14. INSTALLATION OF REMOTE CONTROLLER 14.1. INSTALLATION OF REMOTE CONTROL SWITCH <PC-P2HTE> All data related to Installation about Remote Control Switch for PC-P2HTE are in the specific Installation Manual. Please refer to Installation Manual PMML0120A. 15. TEST RUNNING When installation is completed, perform test run according to the following procedure, and hand over the system to the customer. - Page 41 TEST RUNNING 15.1. TEST RUN PROCEDURE BY REMOTE CONTROL SWITCH Turn ON the power source of the Units Operation Lamp Procedure for TEST RUN mode of remote control switch. Depress the MODE and the CHECK switches together for more than 3 Counting seconds.
- Page 42 TEST RUNNING 15.2. TEST RUN FROM OUTDOOR UNIT SIDE The procedure of test run from outdoor unit side is WARNING: indicated below. Setting of this DIP switch is available with Do not touch any other electrical parts when operating the power source ON. switches on the PCB.
-
Page 43: Troubleshooting
SAFETY SUMMARY & CONTROL DEVICE SETTING 16. SAFETY SUMMARY & CONTROL DEVICE SETTING Compressor Protection Fan Motor Protection High Pressure Switch: When the thermistor temperature is reached to the This switch cuts out the operation of the compressor setting, motor output is decreased. when the discharge pressure exceeds the setting. - Page 44 TROUBLESHOOTING Code Category Content of Abnormality Leading Cause Inlet Air Thermistor Outlet Air Thermistor Failure of Thermistor, Sensor, Connection. Sensor on Freeze Protection Thermistor Indoor Unit Gas Piping Thermistor Tripping of Protection Device for Fan Motor Failure of Fan Motor Compressor Thermistor Outdoor Air Thermistor Failure of Thermistor, Sensor, Connection...
Need help?
Do you have a question about the RCIM-2.0FSN and is the answer not in the manual?
Questions and answers