Table of Contents
Advertisement
Quick Links
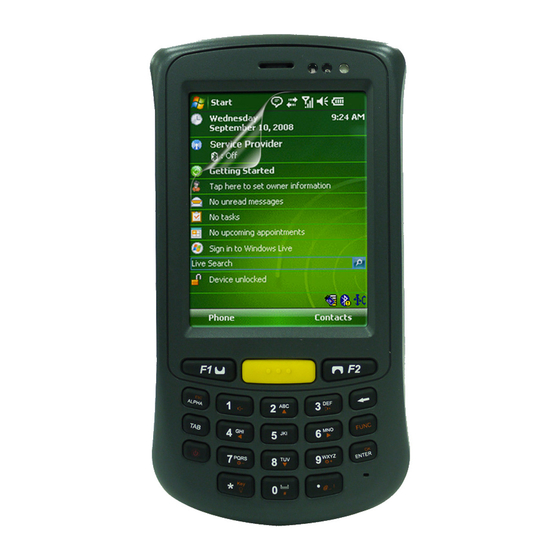
C350T Series PDA
User Manual
Notes:
All screens in this guide are simulated. Actual displays may be different.
Depend on the different software version on your C350T; you may get different
screens with same tasks.
Unless specified otherwise, all instructions to perform tasks in this guide
assume that you are starting from the home screen.
(V1.0)
Advertisement
Table of Contents

Related Manuals for Winmate C350T Series


Summary of Contents for Winmate C350T Series
- Page 1 C350T Series PDA User Manual (V1.0) Notes: All screens in this guide are simulated. Actual displays may be different. Depend on the different software version on your C350T; you may get different screens with same tasks. Unless specified otherwise, all instructions to perform tasks in this guide ...
- Page 2 To enable some functions need bigger storage space, such as camera or other APP, please insert a Micro SD card before using. If your C350T series PDA supports 3G, remember insert a SIM card to activate your data connection.
- Page 3 C350T Outlook Front View (without Barcode / RFID Reader) Proximity Sensor Power indicator Receiver Flashing Power Green On/Off Amber Charging Low power Function Button Function Button Micro USB Port (B type) 3.5” Touch Screen Power Button Press Sleep Microphone Hold Power on / off Version for Android OS: Menu...
- Page 4 Back View (without Barcode / RFID Reader) LED Flash Light 5M Pixel Camera Stylus Speaker Docking Connector...
- Page 5 Front View (with Barcode / RFID Reader) Proximity Sensor Power indicator Receiver Flashing Power Green On/Off Amber Charging Low power Function Button Function Button Micro USB Port (B type) 3.5” Touch Screen Power Button Press Sleep Microphone Hold Power on / off Version for Android OS: Menu Home...
- Page 6 Back View (with Barcode / RFID Reader) Sensor C350T-BR1 or C350T-BR2 = 1D/2D Barcode Reader C350T-B1R or C350T-B2R = 1D/2D Barcode + HF RFID Reader Bar Code Reader RFID Reader Stylus Docking Connector...
- Page 7 Key Pad Table:...
-
Page 8: Table Of Contents
ONTENTS NDEX Set up & Go ................1 Power On/Off ................5 Touch Screen and keys............... 6 Home Screen & Status ............. 12 Set up Language ..............16 Set up Date & Time ..............16 Internet Connection ..............17 Bluetooth................. 19 App Menu................ -
Page 9: Set Up & Go
& G ET UP 1. Turn Off the PDA Make sure the PDA is powered off and the USB cable is un-connected before you remove the back cover. Note: Please refer to page 5 for the details scenarios about how to turn off your C350T PDA under Android OS. - Page 10 3. Remove the Battery Pull the plastic strap on the battery, and then remove it. 4. Insert SIM Card Insert the SIM card (with its gold contacts facing down and cut-off corner facing inside) all the way into the SIM card slot.
- Page 11 5. Insert Micro SD Card Open the SD card holder by pushing the metal cover backward and lift it. Put the Micro SD card into the socket, close the metal cover, and push forward till it lucked. 6. Put back the Battery Reinsert the battery by latching the bottom first and then put it down.
-
Page 12: Using The Stylus
7. Put back the Back Cover Put back the back cover and make sure all the 2 buckles fit those on the device to fix the back cover. 8. Using the Stylus CAUTION! Never use anything other than the C350T stylus on the screen. Otherwise this could cause a permanent damage. -
Page 13: Power On/Off
OWER To turn on your C350T: Press and hold Power button about 1 second. You can feel a slight vibration when your C350T series PDA is turned on. Drag from left to right to un-lock the screen. To turn off your C350T: Press and hold Power button till the following window show up. -
Page 14: Touch Screen And Keys
OUCH CREEN Display & Touch Screen On/Off To save battery power, press the Power button to have the display & touch screen off and to force your C350T enter sleep mode. You can also have your C350T goes to sleep automatically by pressing: ... -
Page 15: Rotate The Screen
Adjust Screen Brightness Find it: > Settings > Display > Brightness Here you can see a brightness adjustment bar. Drag the slider to left to decrease or to right to increase the screen brightness. Press OK to finish your settings. ... - Page 16 Touch Tips One Touch: Choose an icon or option Press and Hold: Show options Drag: Scroll or move slowly Flick: Scroll or move quickly Zoom: Pinch the screen with two fingers apart or together to zoom in or out ...
- Page 17 EYPADS AND UNCTION UTTONS Main Function Keypads Menu Home Back Touch to close any menu or app and return to home screen. Or touch and hold on home screen to find the latest apps used. Touch to open menu options. ...
- Page 18 Keypads The keypad enables you to both enter information and interact with the PDA operating system and also operate secondary functions using the function button. When the green function button is pressed, the orange icon functions on the keypad Function Active Icon become available.
- Page 19 Power Key Menu Press and hold Power Button for 3 seconds to open the power key menu, where you can: Mute the PDA from “Silent mode” Turn off all wireless functions, including the call function, data services, Bluetooth, and Wi-Fi from “Airplane mode”...
-
Page 20: Home Screen & Status
& S CREEN TATUS Home Screen Home screen gives you all your latest information in one place. It is the screen you can see when you turn on C350T or touch from a menu. Home screen also provides a space where you can personalize your C350T by setting different wallpaper or having shortcuts of the apps frequently used. - Page 21 Add to Home Screen You can personalize your Home screen by changing wallpaper or adding some frequently-used shortcuts and widgets. To change your wall paper: Touch and hold home screen to open the Add to Home Screen list. Tap Wallpapers and select a wallpaper source. ...
- Page 22 You can also add a shortcut from the App Menu. Touch to open the App list. Find the App you are going to set, then touch and hold the App icon. The display will return to home screen with the new shortcut you just set. ...
- Page 23 Status & Notifications Icons at the top of the screen notify you about messages and C350T status. To view your notifications, touch the status bar and drag it down. Touch a notification to see details. The table shows different icon’s meanings.
-
Page 24: Set Up Language
ET UP ANGUAGE Your C350T series PDA support diverse languages. You can find a language list from: Find it: > Settings > Language & Keyboard > Select Language Select the language you like. The screen will return to Language & Keyboard Settings menu. The language ... -
Page 25: Internet Connection
NTERNET ONNECTION Your C350T can access the Internet with WiFi connection or Data Connection. WiFi Connection: To turn on WiFi function and scan available networks: Find it: > Settings > Wireless & Networks > WiFi. When your C350T is connected to the network, the Wi-Fi connected indicator appears in the status bar. -
Page 26: Data Connection
Names or Network Operators Caution! As 3G module is an advanced option for C350T series PDA, before accessing data connection, please make sure your C350T is built-in with 3G module. Note: If your C350T supports 3G services, we strongly recommended that you purchase a 3G service that meets your needs in local area. -
Page 27: Bluetooth
LUETOOTH To turn on Bluetooth function and scan available devices: Find it: > Settings > Wireless & Networks > Bluetooth To set up your Bluetooth connection: Find it: > Settings > Wireless & Networks > Bluetooth settings. Make sure your Bluetooth function is turned on. If not, turn on it by tapping Bluetooth. - Page 28 If necessary, touch OK, or enter the device passkey (like 0000) to connect to the device. When the device is connected, the Bluetooth connected indicator appears in the status bar. Note: Using a mobile device or accessory while driving may cause distraction and may be illegal.
-
Page 29: App Menu
Tap on to enter App Menu and see all available apps. When the App list is longer than one page, you have two ways to see more items. Swipe up/down Direction Keys ... - Page 30 Manage & Restore Apps From the home screen, press > Manage apps. To uninstall the Apps you have downloaded: Switch to Downloaded tab Touch the app you are going to uninstall Touch Uninstall to finish your settings. ...
-
Page 31: Software Update
This might take a few minutes. Please wait till system boot successfully. Erase the update file from the SD card in your C350T series PDA. Note: Before updating your C350T series PDA, please backup your personal data. The... -
Page 32: Text Entry
EXT ENTRY Touchscreen keypad You can open a keypad on your screen by touching a text box. To close the keypad, press Delete Shift Enter Switch to numbers Space / Symbol keypads Text input settings Find it: > Settings > Language & keyboard To edit your dictionary, touch User dictionary. -
Page 33: Messaging
ESSAGING To compose a new message: Find it: > Messaging > New message Touch here to search a contact Touch To and type keyword to search a known contact. Touch here to enter texts Touch Type to Compose and enter the message ... -
Page 34: Camera
AMERA C350T Series PDA supports dual built-in cameras which can be used for taking pictures or recording video clips. Main Camera at the rear side: LED Flash 5 Mega-Pixel Camera Note: Your C350T PDA built-in camera supports rotation function. When turn your C350T PDA to 90 degree (left or right), the preview screen display will rotate accordingly. - Page 35 Take Photos To take photos, open the Camera App: Find it: > Camera Caution! Please make sure the Micro SD card has been inserted. Preview Screen Special Effect Options Switch Flash Mode Store Location Zoom-in / out Focus Mode Camera shutter Gallery Here you can review Switch Photo...
- Page 36 Record Videos To record video clips, open the Camera App: Find it: > Camera > Caution! Please make sure the Micro SD card has been inserted. Recording Time Preview Screen LED Light On/Off White Balance Video Quality Special Effect Options Recording Button Gallery Here you can review...
-
Page 37: Photo & Video
& V HOTO IDEO The taken photos and recorded video clips will be restored in the Micro SD card. To review these files, please check: Find it: > Gallery Tap to open the file you are going to review. ... - Page 38 To delete photo or video files: Touch and hold on the file you are going to delete till the green mark shows up. Follow the same procedure on other files to be deleted. Tap trash can icon and then touch OK to finish the setting. ...
Need help?
Do you have a question about the C350T Series and is the answer not in the manual?
Questions and answers