Table of Contents
Advertisement
Instruction Manual
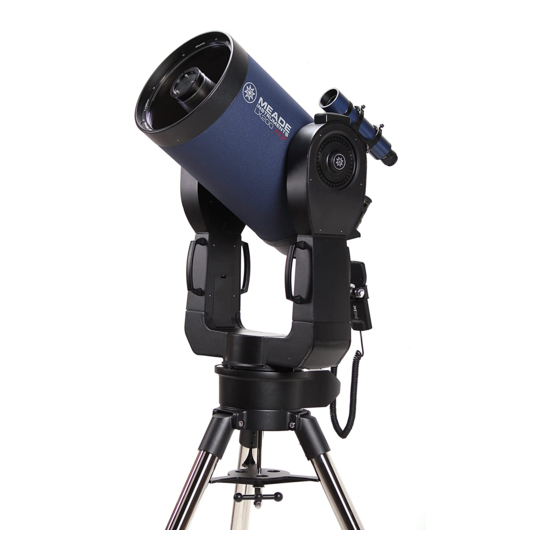
7" LX200 Maksutov-Cassegrain Telescope
8", 10", and 12" LX200 Schmidt-Cassegrain Telescopes
Meade Instruments Corporation
World's leading manufacturer of astronomical telescopes for the serious amateur.
6001 OAK CANYON, IRVINE, CALIFORNIA 92618-5200 U.S.A. • (949) 451-1450
FAX: (949) 451-1460 • www.meade.com
Advertisement
Table of Contents

Related Manuals for Meade LX20


Summary of Contents for Meade LX20
- Page 1 Instruction Manual 7" LX200 Maksutov-Cassegrain Telescope 8", 10", and 12" LX200 Schmidt-Cassegrain Telescopes Meade Instruments Corporation World's leading manufacturer of astronomical telescopes for the serious amateur. 6001 OAK CANYON, IRVINE, CALIFORNIA 92618-5200 U.S.A. • (949) 451-1450 FAX: (949) 451-1460 • www.meade.com...
- Page 2 NOTE: Instructions for the use of optional accessories are not included in this manual. For details in this regard, see the Meade General Catalog. In the Schmidt-Cassegrain design of the Meade 8", 10", and 12" models, light enters from the right, passes through a thin lens with 2-sided aspheric correction ("correcting plate"), proceeds to a spherical primary mirror, and then to a convex aspheric secondary mirror.
- Page 3 Never use the LX200 telescope to look at the Sun! Looking at or near the Sun will cause instant and irreversible damage to your eye. Eye damage is often painless, so there is no warning to the observer that damage has occurred until it is too late. Do not point the telescope or its viewfinder at or near the Sun.
-
Page 4: Table Of Contents
Contents 7" LX200 Maksutov-Cassegrain Telescope 8", 10", & 12" LX200 Schmidt-Cassegrain Telescope Introduction 1. What is the LX200? An Overview a. Heavy-Duty Mounts b. Built-in 64,359 Object Library c. Altazimuth Mode Operation d. Terrestrial Operation e. Keypad and Power Panel Functions 2. -
Page 5: Introduction
Important Note: If you are anxious to use your Meade LX200 Telescope for the first time, at the very least be sure to read TELESCOPE ASSEMBLY (page 7), and QUICK START (page 9) sections of this manual. -
Page 6: Unpacking And Inspection
SP26mm eyepiece; giant field tripod; foam-fitted carrying case; operating instructions. UNPACKING AND INSPECTION As you begin to unpack your telescope from its cartons, you will probably be interested in setting it up right away; we certainly understand your excitement but please take a few minutes to read this page before doing so. -
Page 7: Telescope Assembly
For visual (i.e., non-photographic) observations, the drive base (17, Fig. 1) of the telescope's fork mount is attached directly to the field tripod. The telescope in this way is mounted in an "Altazimuth"... -
Page 8: Mounting The Viewfinder
2. Mounting the Viewfinder Each 7", 8", 10", and 12" LX200 telescope is supplied as standard equipment with an 8x50mm straight-through viewfinder. The bracket for this viewfinder is packed separately from the finder itself, and 6 black nylon thumbscrews for Collimation are pre- threaded into the viewfinder bracket. -
Page 9: Quick Start
QUICK START To utilize all the features of the telescope, it is necessary to enter some information into the telescope's computer memory, and learn the menu structure of the keypad hand controller, which is described in the rest of this manual. As advanced as LX200 electronics are, the telescope is very straightforward to operate —... -
Page 10: Using The Lx200 In Altaz
The Declination manual slow-motion knob (1, Fig.4) is non-functional when power is supplied to the telescope. When the power is "on", only use the N, S, E, and W keys on the keypad hand controller. Serious... -
Page 11: Local Time And Date
Local Time and Date. NOTE: The Time function on the 16" LX200 telescope is a standard quartz clock. Like nearly any timepiece, the internal clock of the telescope should be periodically checked and updated to keep it as accurate as possible. -
Page 12: Using The Mode Key
(11, Fig. 1). lock the R.A. lock. Steps 2 and 3 are not required for the telescope to work, so don't worry about getting it exactly right. The telescope has some "illegal"... -
Page 13: Library Object Keys
The LX200 calculates the distance between the two stars that you chose in the alignment steps and compares this to the distance that you actually slewed the telescope. This is a check to be sure you centered the correct stars during the alignment steps. Should the LX200 discover a discrepancy, the keypad will display an "Align Mismatch —... -
Page 14: The Lx200 Keypad Hand Controller
LX200 Maksutov Cassegrain or Schmidt Cassegrain Telescope is easily mastered. So easy, in fact that the telescope becomes a natural extension of the observer. The LX200 gives you virtually every telescope function possible with every control in a compact hand held console. -
Page 15: Focus Key
Smart Drive, then resuming to an even slower tracking speed. The keypad display reads "Meade," then the version of the software is indicated briefly before defaulting to the TELESCOPE/OBJECT LIBRARY. Within 15 seconds, the planetary orbital calculations with their corresponding apparent sizes... -
Page 16: Ccd Connector
LX200 to perform mechanically, and where we can explore and select from its extensive library of stored objects. To explore either the TELESCOPE menu file or the OBJECT LIBRARY menu file, move the LCD arrow to the appropriate selection by using the PREV or the NEXT key and press the ENTER key. - Page 17 (4, Fig. 5), the 00 line of the R.A. setting circle (3, Fig. 5), and the HA pointer (5, Fig. 5) all line up. (If you do not start at the 00 H.A. position, the telescope will point to the ground instead of the sky, when the keypad display chooses its second star.) Press the ENTER key...
- Page 18 The menu also has provisions for correcting Declination drift. Smart Drive will retain the training given to the R/A drive, even after the telescope is turned off. There is of course a way to erase any training given to it at your command.
- Page 19 10. SLEW RATE: Option #10 in the TELESCOPE menu is for changing the slew rate of the LX200 telescope. Slowing down the slew rate will result in less noise as the telescope moves and will also use a little less power. To change the slew rate,...
-
Page 20: Object Library Menu File
Press ENTER again to read the coordinates. Press ENTER once more to determine how far off the telescope is pointing from the entered object (this is displayed in LCD bars, each bar is ten degrees, or if it is on the object, no bars). - Page 21 90 degrees, which assumes that you point the telescope straight up. If, however, you have instruments on the telescope which will not clear the fork arms, or if you want to avoid the 10° Field De-Rotator limit, this setting can be used.
-
Page 22: A. Timer = Menu Option
Coordinates Menu File You will at first see the RA = and DEC = coordinates of where the telescope is pointing. If you move the LX200 with the N, S, W, or E keys, the coordinates display will immediately update the new position in Right Ascension and Declination. -
Page 23: Timer = Menu Option
FREQ RATE DESCRIPTION NOTES 60.1 Hz Q Sidereal rate; Default rate at power up. Quartz setting Gives sidereal frequency accuracy to ±.005%; Best for astrophotos 60.0 Hz Solar and Average rate for tracking planets; Actual rates vary planetary rate due to retrogrades, oppositions, etc. -
Page 24: Magnification And Field Of View
For example, the focal length of the LX200 7" f/15 telescope is fixed at 2670mm; the focal length of the 8" f/10 telescope is fixed at 2000mm; the focal length of the 10" f/10 telescope is fixed at 2500mm;... -
Page 25: Appendix A: Equatorial Wedge
1. 8" Equatorial Wedge (For 7" and 8" LX200) The equatorial wedge permits use of the 8" LX200 telescope in an astronomical, or "equatorial," mode. The wedge fits onto the field tripod, described below, and accepts the base of the 7" or 8"... -
Page 26: Superwedge
2. SUPERWEDGE (For 10" and 12"LX200) The Superwedge permits use of the 10" and 12" LX200 telescope in an astronomical, or "equatorial," mode. The wedge fits onto the field tripod, described below, and accepts the base of the 10" and 12"... -
Page 27: Magnetic Compass
5, Fig. 10), are firmly tightened before placing the telescope onto the wedge. Grasping the 2 fork arms of the telescope firmly, with the power panel towards you, place the telescope onto the tilt plate of the wedge by sliding the knob (7" and 8" LX200) or screw (10" and 12"... -
Page 28: Finding True North
c. Finding True North The Magnetic Compass is now ready to use. Just follow these simple steps for a quick and easy azimuth alignment: 1. Loosen the knob/compass slightly. This allows for rotation of the equatorial wedge under the knob/compass (Fig. 17). The magnetic pointing arrow will point to magnetic north. -
Page 29: Appendix B: Equatorial Use
Celestial Pole (see MODE FUNCTIONS, page 16) astronomical objects may be followed, or tracked, simply by moving the telescope about one axis, the polar axis. In the case of the Meade LX200 7", 8", 10", and 12" Schmidt-Cassegrain telescopes, this tracking may be accomplished automatically with the electric motor drive. -
Page 30: Precise Polar Alignment
If the star drifts South (or down), the telescope's polar axis is pointing too far East (Fig. 22). b. If the star drifts North (or up), the telescope's polar axis is pointing too far West (Fig. 23). Move the wedge in azimuth (horizontally) to effect the appropriate change in polar alignment. -
Page 31: Appendix C: Star Library And Star Charts
1. Alignment Stars The LX200 utilizes 33 bright and well known stars to calibrate the telescope's Object Library in the ALTAZ and POLAR alignments. These stars were selected to allow observers from anywhere in the world on any given night, to be able to easily and quickly make precision alignments. -
Page 32: Star Charts
2. Star Charts (for Northern Hemisphere Observers) -
Page 34: Appendix D: Object Library
VQs have been obtained by observing the objects. To make the VQs as useful as possible, all observations have been made with the same telescope and eyepiece under substantially identical observing conditions. Only for very small objects was a higher power eyepiece used. Your "Visual Quality Rating"... -
Page 35: Catalog
The following types are distinguished in the CNGC: TYPE LEGEND None OPEN GLOB DNEB PNEB OPEN + DNEB None STAR MULTI+STAR MULTI+GAL DNEB GAL+OPEN GAL+GLOB GAL+DNEB GAL+OPEN+DNEB d. 1C Catalog This is the complete 1C catalog of a variety of objects that the standard NGC catalog missed. -
Page 36: Cngc Catalog
2. CNGC Catalog CNGC# SIZE 0045 00 14.0 -2310 10.4 0055 00 15.1 -39 13 1944 0104 0024.1 -7204 1854 4.0v 0129 00 29.9 +60 14 1260 6.5v 0134 00 30.4 -33 15 10.1 0188 00 44.3 +8521 8.1v 0205 00 40.4 +41 42 1044... - Page 37 CNGC Catalog (continued) CNGC# SIZE 1746 05 03.6 +2349 2520 6.1p 1763 04 56.8 -6624 1500 1807 05 10.7 +1632 1020 7.0v 1817 05 12.1 +1642 7.7v 1820 05 03.8 -67 17 1851 05 14.0 -4002 7.3v 1857 05 20.1 +3921 7.0v 1893...
- Page 38 CNGC Catalog (continued) CNGC# SIZE 2437 0741.9 -1449 1620 6.1v 2447 07 44.6 -2352 1320 6.2v 2451 07 45.4 -3758 2700 2.8v 2467 07 52.5 -2624 7.2p 2477 07 52.3 -3833 1620 5.8v 2516 07 58.2 -6052 1800 3.8v 2547 08 10.7 -49 16 1200...
- Page 39 CNGC Catalog (continued) CNGC# SIZE 4349 1224.2 -61 54 7.4v 4374 1225.1 +1253 4382 1225.5 +18 11 4395 1225.8 +3332 10.2 4406 1226.3 +1256 4438 1227.8 +1300 10.1 4472 1229.8 +0800 4486 1230.9 +1223 4501 1232.1 +1425 4517 1232.8 +0006 10.5 4548 1235.5...
- Page 40 CNGC Catalog (continued) SIZE CNGCtf 5927 1528.0 -5040 - 720 588 8.3v 5986 1546.1 3746 - 720 780 7.1v 6025 1603.7 6030 -54 5.1v 6067 16 13.3 5.6v 6087 16 18.9 -5754 5.4v 6093 16 17.1 -2300 7.2v 6101 1625.7 -72 13 9.3v 6121...
- Page 41 CNGC Catalog (continued) SIZE CNGC# 6981 20 53.5 -12 33 9.4v 6994 20 59.0 -1237 8.9p 7000 21 01.8 +44 12 7200 7009 21 04.3 -11 22 8.3p 7036 21 12.1 +4743 6.8v 7039 21 12.2 +4539 1500 7.6v 7063 21 24.4 +3630 7.0v...
-
Page 42: Star Catalog
3. STAR Catalog STAR # SIZE 00 08.3 +2906 2.1v 00 09.2 +59 10 2.3v 00 13.2 +15 12 2.8v 00 25.7 -77 15 2.8v 00 26.3 -42 18 2.4v 00 39.4 +3052 3.3v 00 40.5 +5633 2.2v 00 43.6 -1759 2.0v 00 56.7... -
Page 43: Star Catalog
STAR Catalog (continued) STAR# SIZE 06 22.9 +2231 2.8v 0622.7 -1758 2.0v 06 24.0 -5242 -0.7v 06 37.7 +1624 1.9v 06 37.7 -4312 3.2v 06 44.0 +2508 3.0v 06 45.2 -1643 -1.5v 06 48.2 -61 56 3.3v 06 49.9 -5037 2.9v 06 58.6 -2858... - Page 44 STAR Catalog (continued) STAR# SIZE *121 1226.6 -6306 1.3v *122 1226.7 -6307 1.7v *123 1229.9 -1631 3.0v *124 1231.2 -5707 1.6v *125 1234.4 -2324 2.7v *126 1237.2 -6909 2.7v *127 1241.6 -4858 2.9v *128 1241.5 -4858 3.0v *129 1241.7 -01 28 2.8v *130 1246.2...
- Page 45 STAR Catalog (continued) STAR# SIZE *181 1641.3 +31 36 2.8v *182 1648.7 -6902 1.9v *183 1650.2 -34 17 2.3v *184 1651.9 -3803 3.0v *185 1657.7 +0922 3.2v *186 1658.7 -5600 3.1v *187 1708.7 +6543 3.2v *188 17 10.4 -1544 2.4v *189 17 12.2 -43 14...
- Page 46 STAR Catalog (continued) STAR# SIZE *241 22 05.8 22 -00 19 - 3.0v *242 08.3 22 4658 -60 1.7v *243 - 18.6 22 16 - 2.9v 42.7 4652 2.1v *245 2243.1 +30 14 2.9v *246 22 53.6 22 -1550 - 3.3v 57.7 23 2938...
- Page 47 STAR Catalog (continued) STAR# SIZE *301 1226.6 -6306 1235.1 +1822 '302 *303 1241.7 -01 28 *304 1253.3 +21 15 *305 1323.9 +5455 *306 1349.1 +26 59 *307 14 15.3 +0308 *308 1420.4 +4830 *309 1440.0 -6051 *310 1441.2 +1344 *311 1445.0 +2704 *312...
- Page 48 4. M (Messier) Catalog SIZE M 1 M 05 34.5 +2201 - 360 774 8.4 6.5v 2 M 3 21 33.5 0050 972 1578 6.4v M 4 M 1342.3 +2823 - 1044 5.9v 1623.7 2631 5.8v 15 18.6 +0205 1740.1 -32 13 - 900 4800 4.2v 1754.0...
-
Page 49: M (Messier) Catalog
M (Messier) Catalog (continued) SIZE M 61 1222.0 +0428 1701.3 -3007 6.6v M 63 13 15.8 +42 02 1256.7 +21 41 11 18.9 +1305 M 66 11 20.2 +1259 M 67 0851.1 +11 49 1800 6.9v M 68 1239.4 -2646 8.2v M 69 18 31.4... -
Page 50: Appendix E: Maintaining Your Lx200
This is not particularly harmful, as long as the instrument is allowed to let the dew evaporate. This can be done with a hair dryer, or just setting up the telescope indoors with the dust covers removed. It is also advisable that you let the foam lined case for the LX200 dry out indoors for a day if the night was moist. -
Page 51: Collimation Of The Optical System
26mm eyepiece. To make a correct evaluation of the alignment it helps if the telescope has been allowed to either cool down or warm up to the ambient temperature where the instrument is set up. -
Page 52: Right Ascension Lock
LX200 will not tighten sufficiently due to internal wear of the clutch mechanism. In such an event, remove the R.A. lock lever using one of the hex wrenches supplied with the telescope. Then, with a pair of pliers, tighten the shaft protruding outward from the drive base until you cannot easily rotate the fork arm in R.A. -
Page 53: Appendix F: Lx200 Personal Computer Control
APPENDIX F: LX200 PERSONAL COMPUTER CONTROL Remote operation of a computerized telescope has only been a fanciful dream for most amateur astronomers. The realization of fully controlling a telescope through a personal computer has previously been staggering proposition monetary cost and expert knowledge of software and hardware. -
Page 54: The Rs-232 Cable
Intended for professional programmers, the LX200 Command Set is used to write custom software for remote operation of the telescope with a PC. Each command is listed in a section appropriate to its type. Each entry in the command list includes the command name, any parameters, any return values, and a description. -
Page 55: Telescope Motion
0, 1, 2, or 4 (see description) Slews telescope to current object coordinates. 0 is returned if the telescope can complete the slew, 1 is returned if the object is below the horizon, 2 is returned if the object is below the "higher" limit, and 4 is returned if the object is above the lower limit. -
Page 56: Miscellaneous
Gefs the brighter (Gb) or fainter (Gf) magnitude limit for the FIND operation. Command :Sb sMM.M# :Sf sMM.M# Returns Ok Sets the brighter (Sb) or fainter (Sf) magnitude limit for the FIND operation. Command :GI# :Gs# Returns NNN'# Gefs the larger (Gl) or smaller (Gs) size limit for the FIND operation. -
Page 57: Lx200 Demo Program
The LX200 Demo Program on the following pages, is written in Quick Basic and is intended to demonstrate how commands are sent to the telescope and information is received from the telescope. It is not a "polished" program and does not incorporate all of the RS-232 features available. - Page 58 RETURN telpos: LOCATE 6, 7: PRINT "TELESCOPE POSITION"; c$ = "#:GR#": PRINT #1, c$; : d$ = INPUT$(8, 1): RAL$ = LEFT$(d$, 3): RAMS = MID$(d$, 4, 4): LOCATE 7, 10: PRINT USING "RA : \\:\ \"; RAL$; RAM$; c$ = "#:GD#": PRINT #1, c$;...
- Page 59 OBDRAW: LOCATE 6, 31: PRINT" O B J E C T LOCATE 7, 31: PRINT "Object: LOCATE 8, 31: PRINT "Rating: "; MID$(info$, 10, 7); LOCATE 9, 31: PRINT "Magnitude: "; MID$(info$, 20, 5); LOCATE 10, 31: PRINT "Size: IF counter = 0 THEN LOCATE 11, 31: PRINT "RA:"; : LOCATE 12, 31: PRINT "DEC:";...
- Page 60 PRINT BOX$; RETURN help: LOCATE 14, 10: PRINT "E W N S keys move telescope. SPACE BAR stops."; LOCATE 15, 10: PRINT "M key to enter Messier object."; LOCATE 16, 10: PRINT "T key to enter sTar." LOCATE 17, 10: PRINT "P key to enter Planet (900 + orbit #).";...
- Page 61 Main Controller 16 MHz 68000 microprocessor; 1 Meg program memory 16KRAM; 512 byte non-volatile memory (EEROM) Telescope Size, Swung Down 9.25" x 16" x 32.5" 35mm Angular Film Coverage 0.74° x 0.52° 35mm Linear Film Coverage @: 4.7" X 6.6"...
-
Page 62: Appendix G: Lx200 Specifications
Main Controller 16 MHz 68000 microprocessor; 1 Meg program memory 16KRAM; 512 byte non-volatile memory (EEROM) Telescope Size, Swung Down 9.25" x 16"x25" 35mm Angular Film Coverage 0.97° x 0.68° 35mm Linear Film Coverage @: 50" 6.2" x 8.7"... - Page 64 Position the spreader bar so that the 3 arms of the spreader bar are lined up with the 3 tripod legs. Place the entire telescope onto the top of the tripod head, and thread the threaded rod into the central threaded hole in the bottom of the drive base of the telescope.
-
Page 65: Customer Service
LPlug the AC Adapter into an indoor wall receptacle. CAUTION: The AC adapter supplied with this telescope is for indoor use only. Do not plug this adapter into an outdoor AC receptacle or serious electrical shock may result. 2. Connect the 25-ft. (8-m) DC power cord to the AC adapter.
Need help?
Do you have a question about the LX20 and is the answer not in the manual?
Questions and answers