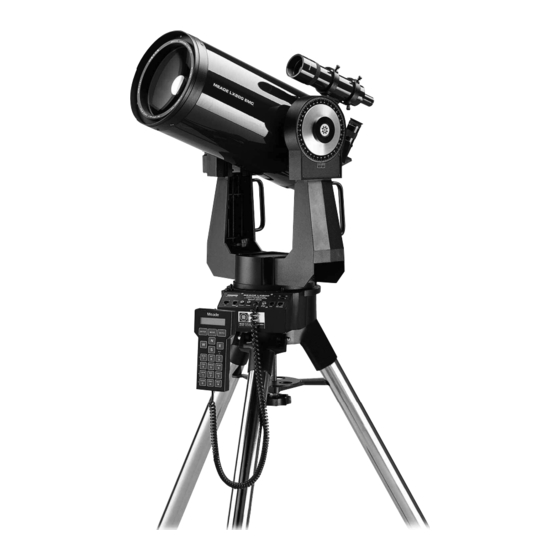
Meade LX200 Instruction Manual
7" maksutov-cassegrain telescope 8", 10", and 12" schmidt-cassegrain telescopes
Hide thumbs
Also See for LX200:
- Instruction manual (93 pages) ,
- Service manual (11 pages) ,
- Service (6 pages)

Subscribe to Our Youtube Channel
Related Manuals for Meade LX200


Summary of Contents for Meade LX200
- Page 1 Instruction Manual 7" LX200 Maksutov-Cassegrain Telescope 8", 10", and 12" LX200 Schmidt-Cassegrain Telescopes Meade Instruments Corporation...
- Page 2 LX200 Schmidt-Cassegrain telescopes now feature new baffle tube designs. These computer-optimized designs incorporate a series of 7 to 11 (depending on the focal ratio and size of the LX200) internal field-stops to eliminate almost all internal reflections, yielding the best image contrast available in any Schmidt-Cassegrain available today.
- Page 3 Never use the LX200 telescope to look at the Sun! Looking at or near the Sun will cause instant and irreversible damage to your eye. Eye damage is often painless, so there is no warning to the observer that damage has occurred until it is too late. Do not point the telescope or its viewfinder at or near the Sun.
-
Page 4: Table Of Contents
10.PREV and NEXT Keys ......15 The LX200 Power Panel ......15 1. -
Page 5: Introduction
The capabilities of the instrument are essentially limited not by the telescope, but by the acquired skills of the observer and photographer. The 7", 8", 10", and 12" LX200 are, with the exception of a few assembly operations features, operationally. -
Page 6: Unpacking And Inspection
1/4-20x1" long. When packaging the 10" or 12" LX200, be sure to release the R.A. lock (7, Fig. 1), and Dec. lock (2, Fig. 4), to prevent shock to the gears in the motor assemblies should the package suffer severe handling. -
Page 7: Telescope Assembly
TELESCOPE ASSEMBLY Use the following steps to assemble your telescope. NOTE: If the section is not applicable to all LX200 models, it is noted at the beginning of each section. 1. The Field Tripod The field tripods (Figs. 2 and 3) for Meade 8", 10", and 12"... -
Page 8: Mounting The Viewfinder
45. This will give the number of degrees of southern horizon that the 12" LX200 will not move to. For example, if the latitude of the observing site is 35°, then 10° (45-35) of southern sky is unavailable for observations. -
Page 9: Quick Start
2. Using the LX200 In LAND The 7", 8", 10", and 12" LX200 telescopes are shipped with the microprocessor set to LAND, the align menu option you will wish to use to view terrestrial objects. In this menu option 4 different motion speeds are active, allowing the telescope to be moved electronically by means of the keypad. -
Page 10: Using The Lx200 In Altaz
(1) = 480 arcsec/sec GUIDE (0) = 30 arcsec/sec The LX200 can also be moved manually with the R.A. and Dec. locks released, or as described above only. The Declination manual slow-motion knob (1, Fig.4) is non-functional when power is supplied to the telescope. When the power is “on”, only use the N, S, E, and W keys on the keypad hand controller. -
Page 11: Local Time And Date
This is all the information the LX200 needs to make use of all features. The next steps actually align the telescope with the night sky. -
Page 12: Using The Mode Key
90 degrees altitude to protect the viewfinder from hitting the fork arm. The LX200 will track an overhead object, but it does so by moving higher in altitude up to the illegal position, then... -
Page 13: Library Object Keys
TIME information as described in Entering Basic Information (page 10). The third option is used when the SITE information is not known or has not been entered into the LX200’s memory. a. 1-Star with Known SITE The 1-Star alignment routine was explained in detail in Setting Up the Telescope (page 11). -
Page 14: The Lx200 Keypad Hand Controller
LED flashlight! You will find within a few minutes of powering up the LX200 that the keypad becomes warm, which is normal for the system. -
Page 15: Focus Key
PREV and NEXT work as well to select the objects from the Object Library when using START FIND. Fig. 7: 16” LX200 Power Panel. (1) Ammeter; (2) RS-232 Connector; 3) Aux Connector; (4) Focuser Connector; (5) Reticle Connector; (6) Keypad Connector; (7) ON/OFF Switch, (8) N/S Switch;... -
Page 16: Ccd Connector
The CCD cameras effectively watch a star and detect slight movements. When star movements are detected, signals from the CCD electronics make drive corrections in the LX200, to bring the star to a home position. Most CCD autoguiding/imaging cameras are supplied with a cable which is compatible with the LX200 port. - Page 17 The LX200 will slew at any one of the four speeds of SLEW, FIND, CNTR, and GUIDE as activated by pressing the appropriately marked keys on the left...
- Page 18 8 minute pattern, or for every rotation of the worm) for greatly enhancing the tracking characteristics or the amount of East and West drift of your LX200. This greatly simplifies guiding during astrophotography. The menu also has provisions for correcting Declination drift. Smart Drive will retain the training given to the R/A drive, even after the telescope is turned off.
- Page 19 Meade Pictor 416 and Pictor 1616 CCD cameras. The HI-PRECISION feature increases the pointing accuracy of the LX200 to 1 arc-minute or better and also requires the “critical” alignment described above. This will yield the best pointing accuracy possible, placing objects onto the active area of the even the smallest CCD cameras available.
-
Page 20: Object Library Menu File
The position epoch of these objects is for real time, updated each time you turn on your LX200. Even the planet’s positions have their orbits calculated! This not only qualifies the LX200 as the most accurate integrated object library available, it will never require updated software for precession of the stars or planetary orbital changes. - Page 21 - 21 - so that your LX200 will not try to find objects below your setting. Enter the number of degrees above the horizon that will clear the obstructions in the sky.
-
Page 22: A. Timer = Menu Option
Coordinates Menu File You will at first see the RA = and DEC = coordinates of where the telescope is pointing. If you move the LX200 with the N, S, W, or E keys, the coordinates display will immediately update the new position in Right Ascension and Declination. -
Page 23: Timer = Menu Option
FREQ RATE DESCRIPTION 60.1 Hz Q Sidereal rate; Quartz setting power up. Gives sidereal frequency accuracy to ±.005%; Best for astrophotos 60.0 Hz Solar and Average rate for planetary rate tracking planets; Actual rates vary due oppositions, etc. 57.9 Hz Lunar rate tracking the Moon There are three menu file options in FREQ =. -
Page 24: Magnification And Field Of View
“seeing,” the 7” LX200 may be used at powers up to about 450X on astronomical objects, the 8” LX200 may be used at powers up to about 500X, the 10” LX200 up to about 600X, and the 12” LX200 up to about 750X. Generally, however, lower powers of perhaps 250X to 350X will be the maximum permissible, consistent with high image resolution. -
Page 25: Appendix A: Equatorial Wedge
(e.g., by placing the wedge alone on a table top and then mounting the telescope on the wedge). The 7" or 8" LX200, placed onto the equatorial wedge alone without the field tripod attached to the wedge may become seriously imbalanced, to the point where the telescope may actually tip over. -
Page 26: Superwedge
(e.g., by placing the Superwedge alone on a table top and then mounting the telescope on the wedge). The 10" and 12" LX200, placed onto the Superwedge alone without the field tripod attached to the wedge may become seriously imbalanced, to the point where the telescope may actually tip over. -
Page 27: Magnetic Compass
Grasping the 2 fork arms of the telescope firmly, with the power panel towards you, place the telescope onto the tilt plate of the wedge by sliding the knob (7" and 8" LX200) or screw (10" and 12" LX200) into the slot at the top of the curved-end of the wedge tilt-plate. -
Page 28: Finding True North
16° West Point of knob and Declination “North” line up Orienting Arrow Fig. 16: Magnetic Compass. Finding True North The Magnetic Compass is now ready to use. Just follow these simple steps for a quick and easy azimuth alignment: Loosen the knob/compass slightly. This allows for rotation of the equatorial wedge under the knob/compass (Fig. -
Page 29: Appendix B: Equatorial Use
Little Dipper Big Dipper Fig. 21: Locating Polaris. To line up the 7", 8", 10" or 12" LX200 with the Pole, follow this procedure: Using the bubble level located on the floor of the wedge, adjust the tripod legs so that the telescope/ wedge/tripod system reads “level.”... -
Page 30: Precise Polar Alignment
Notwithstanding the precision and sophistication of the drive system supplied with the Meade LX200 telescopes, the fewer tracking corrections required during the course of a long- exposure photograph, the better. (For our purposes, “long- exposure”... -
Page 31: Appendix C: Star Library And Star Charts
LX200 ALIGNMENT STAR LIBRARY AND STAR CHARTS: 1. Alignment Stars The LX200 utilizes 33 bright and well known stars to calibrate the telescope’s Object Library in the ALTAZ and alignments. These stars were selected to allow observers from anywhere in the world on any given night, to be able to easily and quickly make precision alignments. -
Page 32: Star Charts
- 32 - 2. Star Charts (for Northern Hemisphere Observers) Overhead Overhead Aldeberan Aldebaran Betelgeuse Rigel Rigel Betelgeuse Sirius SOUTHEAST SOUTH January 7:00 to 9:00 February 7:00 to 9:00 Overhead Overhead Alkaid Betelgeuse Polaris Aldebaran Sirius Rigel SOUTHWEST NORTH March 7:00 to 9:00 April 7:00 to 9:00 Overhead Overhead... - Page 33 Overhead Vega Alkaid Deneb Polaris NORTH July 7:00 to 9:00 Overhead Vega Deneb Polaris Alkaid NORTH September 7:00 to 9:00 Overhead Altair Deneb Vega Polaris NORTHWEST November 7:00 to 9:00 - 33 - Overhead Vega Alkaid Polaris NORTH August 7:00 to 9:00 Overhead Deneb Vega...
-
Page 34: Appendix D: Object Library
APPENDIX D: LX200 64,359-OBJECT LIBRARY 1. The LX200 64,359-Object Library The LX200 64,359-Object Library is a collection of the most studied and fantastic objects in the sky. It includes: • 15,928 SAO (Smithsonian Astrophysical Observatory) Catalog of Stars: All stars brighter than 7th magnitude. -
Page 35: Ic Catalog
Planet Catalog The LX200 calculates the orbital positions of the eight major planets for the current calendar date. To access a planet, use the STAR key and enter the appropriate number as indicated below: (NOTE: 903 is the Moon.) -
Page 36: Cngc Catalog
2. CNGC Catalog CNGC# SIZE 0045 00 14.0 -23 10 10.4 0055 00 15.1 -39 13 1944 0104 00 24.1 -72 04 1854 4.0v 0129 00 29.9 +60 14 1260 6.5v 0134 00 30.4 -33 15 10.1 0188 00 44.3 +85 21 8.1v 0205... - Page 37 CNGC Catalog (continued) CNGC# SIZE 1746 05 03.6 +23 49 2520 6.1p 1763 04 56.8 -66 24 1500 1807 05 10.7 +16 32 1020 7.0v 1817 05 12.1 +16 42 7.7v 1820 05 03.8 -67 17 1851 05 14.0 -40 02 7.3v 1857 05 20.1...
- Page 38 CNGC Catalog (continued) CNGC# SIZE 2437 07 41.9 -14 49 1620 6.1v 2447 07 44.6 -23 52 1320 6.2v 2451 07 45.4 -37 58 2700 2.8v 2467 07 52.5 -26 24 7.2p 2477 07 52.3 -38 33 1620 5.8v 2516 07 58.2 -60 52 1800...
- Page 39 CNGC Catalog (continued) CNGC# SIZE 4349 12 24.2 -61 54 7.4v 4374 12 25.1 +12 53 4382 12 25.5 +18 11 4395 12 25.8 +33 32 10.2 4406 12 26.3 +12 56 4438 12 27.8 +13 00 10.1 4472 12 29.8 +08 00 4486 12 30.9...
- Page 40 CNGC Catalog (continued) CNGC# SIZE 5927 15 28.0 -50 40 8.3v 5986 15 46.1 -37 46 7.1v 6025 16 03.7 -60 30 5.1v 6067 16 13.3 -54 13 5.6v 6087 16 18.9 -57 54 5.4v 6093 16 17.1 -23 00 7.2v 6101 16 25.7...
- Page 41 CNGC Catalog (continued) CNGC# SIZE 6523 18 03.2 -24 23 5400 6530 18 04.8 -24 20 4.6v 6531 18 04.6 -22 30 5.9v 6541 18 08.0 -43 44 6.6v 6543 17 58.6 +66 38 8.8p 6544 18 07.4 -25 01 8.3v 6546 18 07.2...
- Page 42 CNGC Catalog (continued) CNGC# SIZE 6981 20 53.5 -12 33 9.4v 6994 20 59.0 -12 37 8.9p 7000 21 01.8 +44 12 7200 7009 21 04.3 -11 22 8.3p 7036 21 12.1 +47 43 6.8v 7039 21 12.2 +45 39 1500 7.6v 7063...
-
Page 43: Star Catalog
3. STAR Catalog STAR# SIZE 00 08.3 +29 06 2.1v 00 09.2 +59 10 2.3v 00 13.2 +15 12 2.8v 00 25.7 -77 15 2.8v 00 26.3 -42 18 2.4v 00 39.4 +30 52 3.3v 00 40.5 +56 33 2.2v 00 43.6 -17 59 2.0v... - Page 44 STAR Catalog (continued) STAR# SIZE * 61 06 22.9 +22 31 2.8v * 62 06 22.7 -17 58 2.0v * 63 06 24.0 -52 42 -0.7v * 64 06 37.7 +16 24 1.9v * 65 06 37.7 -43 12 3.2v * 66 06 44.0 +25 08...
- Page 45 STAR Catalog (continued) STAR# SIZE *121 12 26.6 -63 06 1.3v *122 12 26.7 -63 07 1.7v *123 12 29.9 -16 31 3.0v *124 12 31.2 -57 07 1.6v *125 12 34.4 -23 24 2.7v *126 12 37.2 -69 09 2.7v *127 12 41.6...
- Page 46 STAR Catalog (continued) STAR# SIZE *181 16 41.3 +31 36 2.8v *182 16 48.7 -69 02 1.9v *183 16 50.2 -34 17 2.3v *184 16 51.9 -38 03 3.0v *185 16 57.7 +09 22 3.2v *186 16 58.7 -56 00 3.1v *187 17 08.7...
- Page 47 STAR Catalog (continued) STAR# SIZE *241 22 05.8 -00 19 3.0v *242 22 08.3 -46 58 1.7v *243 22 18.6 -60 16 2.9v *244 22 42.7 -46 52 2.1v *245 22 43.1 +30 14 2.9v *246 22 53.6 -15 50 3.3v *247 22 57.7...
- Page 48 STAR Catalog (continued) STAR# SIZE *301 12 26.6 -63 06 *302 12 35.1 +18 22 *303 12 41.7 -01 28 *304 12 53.3 +21 15 *305 13 23.9 +54 55 *306 13 49.1 +26 59 *307 14 15.3 +03 08 *308 14 20.4 +48 30...
-
Page 49: M (Messier) Catalog
4. M (Messier) Catalog SIZE 05 34.5 +22 01 21 33.5 -00 50 6.5v 13 42.3 +28 23 6.4v 16 23.7 -26 31 1578 5.9v 15 18.6 +02 05 1044 5.8v 17 40.1 -32 13 4.2v 17 54.0 -34 49 4800 3.3v 18 03.2... - Page 50 M (Messier) Catalog (continued) SIZE M 61 12 22.0 +04 28 M 62 17 01.3 -30 07 6.6v M 63 13 15.8 +42 02 M 64 12 56.7 +21 41 M 65 11 18.9 +13 05 M 66 11 20.2 +12 59 M 67 08 51.1...
-
Page 51: Appendix E: Maintaining Your Lx200
It is also advisable that you let the foam lined case for the LX200 dry out indoors for a day if the night was moist. Packing your telescope away in a moist case can result in giving it a steam bath later. -
Page 52: Collimation Of The Optical System
Schmidt-Cassegrain design of the 8”, 10”, and 12” LX200, such collimation is absolutely essential for good performance. Take special care to read and understand this section well so that your LX200 will give you the best optical performance. NOTE: The 7” LX200 does not require collimation. -
Page 53: Right Ascension Lock
3. Right Ascension Lock After a period of time, it is possible that the R.A. lock (7, Fig. 1) of the LX200 will not tighten sufficiently due to internal wear of the clutch mechanism. In such an event, remove the R.A. lock lever using one of the hex wrenches supplied with the telescope. -
Page 54: Appendix F: Lx200 Personal Computer Control
450 RETURN 460 END To use the above program, connect the completed cable to your PC serial port and to the LX200 RS-232 Port. Load BASIC GWBASIC), “LX200TST.BAS.” Nothing will appear on the computer screen. Press any one of the N, S, E, or W (lower case) keys on your... -
Page 55: Lx200 Command Set
West respectively. Press the space bar on the PC keyboard to stop. Press X to exit the program. If the LX200 does not respond to the N, S, E, or W keys, be sure the CAPSLOCK is OFF. If it still does not work, check the PC serial port pinouts of your computer to be sure they are wired correctly to the LX200 6-line connector. -
Page 56: Telescope Motion
0, 1, 2, or 4 (see description) Slews telescope to current object coordinates. returned if the telescope can complete the slew, 1 is returned if the object is below the horizon, 2 is returned if the object is below the “higher” limit, and 4 is returned if the object is above the lower limit. -
Page 57: Miscellaneous
Gets the brighter (Gb) or fainter (Gf) magnitude limit for the FIND operation. Command :Sb sMM.M# :Sf sMM.M# Returns Sets the brighter (Sb) or fainter (Sf) magnitude limit for the FIND operation. Command :Gl# :Gs# Returns NNN'# Gets the larger (Gl) or smaller (Gs) size limit for the FIND operation. -
Page 58: Lx200 Demo Program
Set is written in ASKII character format and can be used to write your own programs. The LX200 Demo Program on the following pages, is written in Quick Basic and is intended to demonstrate how commands are sent to the telescope and information is received from the telescope. - Page 59 B$ = "#:Qs#": PRINT #1, B$ RETURN telpos: LOCATE 6, 7: PRINT "TELESCOPE POSITION"; c$ = "#:GR#": PRINT #1, c$; : d$ = INPUT$(8, 1): RAL$ = LEFT$(d$, 3): RAM$ = MID$(d$, 4, 4): LOCATE 7, 10: PRINT USING "RA : \\:\ \"; RAL$; RAM$;...
- Page 60 OBDRAW: LOCATE 6, 31: PRINT " O B J E C T I N F O R M A T I O N"; LOCATE 7, 31: PRINT "Object: LOCATE 8, 31: PRINT "Rating: LOCATE 9, 31: PRINT "Magnitude: "; MID$(info$, 20, 5); LOCATE 10, 31: PRINT "Size: IF counter = 0 THEN LOCATE 11, 31: PRINT "RA:";...
- Page 61 PRINT BOX$; RETURN help: LOCATE 14, 10: PRINT "E W N S keys move telescope. SPACE BAR stops."; LOCATE 15, 10: PRINT "M key to enter Messier object."; LOCATE 16, 10: PRINT "T key to enter sTar."; LOCATE 17, 10: PRINT "P key to enter Planet (900 + orbit #).";...
-
Page 62: Appendix G: Lx200 Specifications
Accessories Shipping Weights (approx) Telescope Equatorial Wedge (optional) Super Wedge (optional) Field Tripod Case (for 10" models) Accessories - 62 - 7" LX200 f/15 8" LX200 f/6.3 Schmidt-Cassegrain Catadioptric Catadioptric 178mm (7") 203mm (8") 194mm (7.625") 209.6mm (8.25) 2670mm (105") 1280mm (50.4") - Page 63 Field Tripod Accessories Shipping Weights (approx) Telescope Equatorial Wedge (optional) Super Wedge (optional) Field Tripod Case (for 10" models) Accessories - 63 - 8" LX200 f/10 10" LX200 f/10 Schmidt-Cassegrain Schmidt-Cassegrain Catadioptric Catadioptric 203mm (8") 254mm (10") 209.6mm (8.25) 263.5mm (10.375) 2000mm (80")
-
Page 64: Meade Limited Warranty
ONE YEAR from the date of original purchase in the U.S.A. and Canada. Meade will repair or replace a product, or part thereof, found by Meade to be defective, provided the defective part is returned to Meade, freight-prepaid, with proof of purchase.
Need help?
Do you have a question about the LX200 and is the answer not in the manual?
Questions and answers