Advertisement
Table of Contents
Advertisement
Table of Contents

Related Manuals for Lathem 5000E


Summary of Contents for Lathem 5000E
- Page 1 Lathem Time Corporation...
- Page 2 This User's Manual has been prepared with the utmost care to cover all aspects of the time clock's use. Be sure to use your time clock after you have fully understood the hardware and software specifications and limits. No part of this publication may be reproduced, stored in a retrieval system, or transmitted, in any form or by any means, mechanical, photocopying, recording or otherwise.
- Page 3 • outside the temperature range between -5˚ and 45˚C • affected by chemicals or ozone. Place the time clock close to the wall outlet so that it is easily accessible to disconnect. For questions about the operation of this time clock, or to order supplies and accessories, please contact Lathem Time at (800)241-4990.
-
Page 4: Attached Accessories
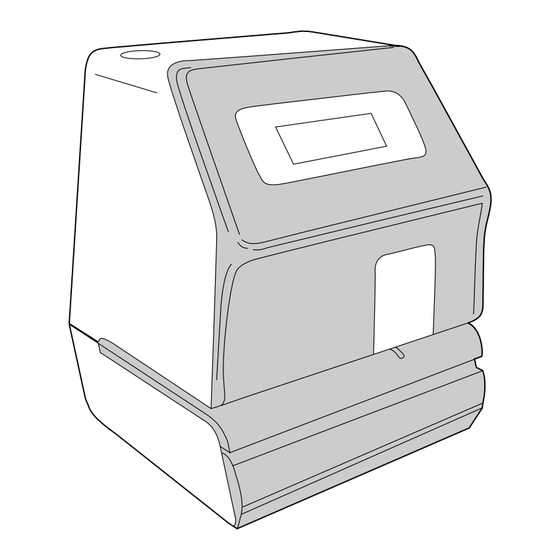
BEFORE USING YOUR TIME CLOCK Package Contents Unpack the time clock and check its contents to ensure that the time clock unit and all accessories as shown below are included. ATTACHED ACCESSORIES • Time clock • Ribbon cassette • Keys ...2 pcs. - Page 5 CONFIGURATION It is important to become familiar with the time clock before setting it up and using RESET switch DIP switch LCD panel Control keys Ribbon holder Print position adjuster The print position from the card edge is adjustable by pressing and sliding the print position button on outside bottom.
-
Page 6: Quick Easy Setup
QUICK EASY SETUP Unlock the key and remove the top case. Remove the PROTECTION PAD. Remove the PROTECTION PAD before you plug the AC cord into the AC outlet. Plug the AC cord into the AC outlet. When plugged in the LCD panel indicates the current time. - Page 7 HOW TO PROGRAM THE CLOCK To enter the program setting mode, you should plug the AC power cord into the AC outlet and remove the cover. Thereafter press the 5 tactile switches, SW5 to SW1. < > indicates pressing a tactile switch. Pressing longer will realize faster increments.
-
Page 8: Setting The Time
SETTING THE TIME HOUR MINUTE Press the [SW5 : MODE] key once, the "HOUR MINUTE" arrow flashes. Example : Set to Morning 10:08 AM Press the [SW3 : HOUR / MONTH] key until the correct hour appears. The seconds are automatically reset to 00. Keeping the SW3 pressed, advances the hour automatically. -
Page 9: Setting The Date
SETTING THE DATE YEAR MONTH Press the [SW5 : MODE] key twice, the "YEAR / MONTH / DAY" arrow flashes. Example : set to 21st Octobr, 2001 Press the [SW4 : YEAR] key until the correct year appears. Keeping the SW4 pressed, advances the year automatically. - Page 10 SETTING THE STARTING DAYLIGHT SAVING TIME When the daylight saving time is set, one hour will be automatically added to the day advance time on the starting date and, similarly, one hour will be automatically subtracted on the ending date of the daylight saving time. START DAYLIGHT SAVING...
- Page 11 SETTING THE ENDING DAYLIGHT SAVING TIME DAYLIGHT SAVING Press the [SW5: MODE] key four times, the "END DAYLIGHT SAVING" arrow flashes. Example: End on 28th of October, 2001 Press the [SW4: YEAR] key until the correct year appers. Keeping the SW4 pressed, advances the year automatically.
-
Page 12: Setting The Number
SETTING THE NUMBER INITIAL NUMBER SET INITIAL NUMBER Press the [SW5: MODE] key five times, the "INITIAL NUMBER SET" arrow flashes. Example: Setting initial number to 675829. HOUR MINUTE YEAR MONTH Press the SW2, 3 or 4 key until the correct number appears. - Page 13 At the time of chenging the date, the number is automatically reset to "0". Plug the AC cord out from the AC outlet. Confirm the LCD disappeared. If optional Ni-Cd battery is used, it should be taken off. MODE Plug the AC cord into the AC outlet while pressing the [SW5: MODE] key.
- Page 14 PREPROGRAMED COMMENTS SETTING COMMENT Press the [SW5: MODE] key seven times, the "COMMENT" arrow flashes. Example: Setting the comment to SENT. MINUTE Press the SW2 key until the correct number appears. Comment SENT OUT CMFD FILED PAID RCVD • The comment will change according to country selection by DIP switch 2-6, 7 and 8.
-
Page 15: Setting The Password
SETTING THE PASSWORD When the password is set, you are asked to enter it. If the password you entered does not coincide with the setting, you can not change the setting values. You may set a password by any 4-digit number from 0001 to 9998. Note a number "00 00"... - Page 16 HOW TO CHANGE SETTINGS WHEN PASSWORD IS SET Once password is set, you have to enter the password for changing any settings. "99 99" will be displayed when you press the [SW5: MODE] key before entering password. Press the [SW5: MODE] key. Example: Password "2878"...
-
Page 17: Ca N Ce L I Ng T He Passw Ord
CA N CE L I NG T HE PASSW ORD The code "00 00" must be entered to cancel the password. DIPSW 1-2, 4, 5and 8: ON 1 2 3 4 5 6 7 8 1 2 3 4 5 6 7 8 DIPSW1 Set DIPSW 1-2, 4, 5, 8, and DIPSW 2- 1, 3, 5, 7, 8, to ON. -
Page 18: Print Method Setting
PRINT METHOD SETTING LEFT OR RIGHT PRINT Right DIP switch 1-7:ON DIP switch 1-7:OFF The DIPSW1-7 is used to select whether to print flush right or flush left on the card. PRINT SWITCH Automatic print Inserting the card automatically initiates printing. - Page 19 NUMBER OF YEAR DIGITS Year can be printed either 2 digits or 4 digits. DIPSW 1-6 is used for the selection. DIPSW1-6: OFF '01 OCT 21 AM10:08 DIPSW1-6: ON 2001 OCT 21 AM10:08 TYPE OF LANGUAGE You can choose 8 differents languages for printing month, day of the week, and preprogrammed comments.Use DIPSW 2-5 ~ 2-8...
-
Page 20: Wall Mounting
WALL MOUNTING Four screws • Leave screw heads about 1/8" from wall. • Remove the top case and hang on the wall. REPLACING RIBBON CASSETTE 1. Carefully slide the exposed ribbon under the print head. 2. Push cassette with the projection into the ribbon cassette holder until snapped into place. -
Page 21: Dip Switch Setting
DIP SWITCH SETTING DIPSW1 DIPSW2 : OFF : ON Print example JAN 31 AM12:00 31 JAN AM12:00 JAN 31 '00 AM12:00 31 JAN '00 AM12:00 '00 JAN 31 AM12:00 '00 JAN 31 AM12:00:00 '00 JAN 31 JAN 31 31 AM12:00 MO, 31 AM12:00 MO, 31 JAN '00 000000 JAN 31 '00... - Page 22 DIPSW1 : OFF : ON NUMBER OF YEAR DIGITS LEFT OR RIGHT PRINT PRINT SWITCH TYPE OF MINUTES LEADING 0 TYPE OF AN HOUR TYPE OF LANGUAGE DIPSW2 Print example '00 JAN 31 AM12:00 2000 JAN 31 AM12:00 JAN 31 AM12:00 AM12:00 JAN 31 AM12:40 JAN 31 AM12.67...
-
Page 23: Specifications
SPECIFICATIONS MAIN FUNCTION Calendar Year up to 2099 (Automatically adjusted to leap year) Clock accuracy Monthly accuracy 15 seconds (at ordinary temperatures) Display Digital LCD with 7 segments Date, Hour, Minute and day of the week indication Daylight saving time Auto Preprogramed Selectable 7 different kinds...
Need help?
Do you have a question about the 5000E and is the answer not in the manual?
Questions and answers
how can we change the time to appear in 100's
To change the time display to appear in hundreds on the Lathem 5000E, set DIP switch 2-5 to ON.
This answer is automatically generated