
Subscribe to Our Youtube Channel
Related Manuals for Sony LBT-VR70


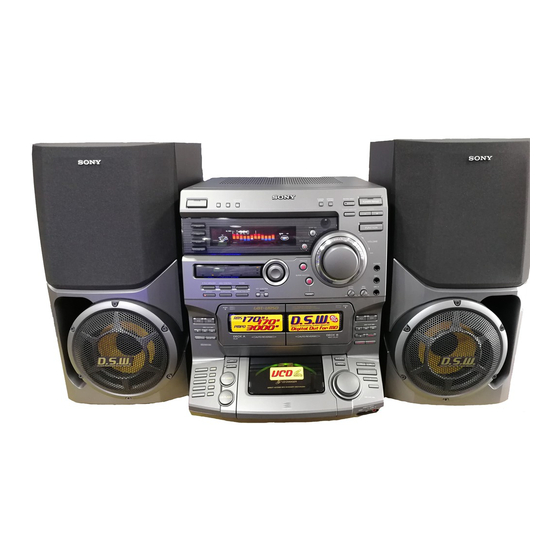
Summary of Contents for Sony LBT-VR70
- Page 1 3-865-554-12(1) Compact Hi-Fi Stereo System Operating Instructions LBT-VR70 LBT-VR50 ©1999 by Sony Corporation...
-
Page 2: Using This Manual
Normal display for LBT-VR50 quality still picture. * PBC = Play Back Control Wide display is used for LBT-VR70 and normal display is used for LBT-VR50. Normal display is used for illustration purposes. The instructions in this manual describe the controls on the player. -
Page 3: Table Of Contents
Table of Contents Getting Started DJ Effects Step 1: Hooking up the system .... 4 Looping part of a CD ......37 Step 2: Setting the time ......7 Flashing part of a CD ......37 Step 3: Presetting radio stations ..8 Sound Adjustment Basic Operations Adjusting the sound ...... -
Page 4: Getting Started Step 1: Hooking Up The System
Getting Started Step 1: Hooking up the system Follow steps 1 through 7 to hook up your system using the supplied cords and accessories. AM loop antenna Right speaker Left speaker FM antenna The above illustration is of the LBT-VR50. Connect the speakers. - Page 5 Connect the FM/AM antennas. Set SYSTEM SELECT (color system) to the appropriate position (PAL or Set up the AM loop antenna, then NTSC), according to your TV. connect it. Extend the FM wire antenna horizontally. AM loop antenna SYSTEM AUTO SELECT NTSC If your TV automatically changes the...
- Page 6 Step 1: Hooking up the system Inserting two R6 (size AA) (continued) batteries into the remote If your system has a VOLTAGE SELECTOR on the rear panel, set it to the position of your local power line voltage. VOLTAGE SELECTOR Tips Connect the power cord to a wall •...
-
Page 7: Step 2: Setting The Time
Using the remote Step 2: Setting the You can control Sony TVs using the buttons below. time TV 1/u VIDEO You must set the time before using the timer TV VOL functions. TV CH Press t/CLOCK SET. The hour indication flashes. -
Page 8: Step 3: Presetting Radio Stations
Step 3: Presetting Press TUNING +/–. The frequency indication changes and radio stations scanning stops when the system tunes in a station. “TUNED” and “STEREO” (for a stereo program) appear. You can preset up to 30 stations, 20 for FM and 10 for AM. - Page 9 To erase a preset number 1 Press and hold TUNER MEMORY until the preset number flashes in the display. 2 Press TUNING +/– to select the preset number you want to erase. Select “ALL ERASE” to erase all preset numbers. 3 Press ENTER/NEXT.
-
Page 10: Basic Operations
Basic Operations Playing a VIDEO CD Turn on your TV and select the video input. Refer to the instructions included with your TV for details. You can play both VIDEO CDs without PBC functions (Ver. 1.1) and VIDEO CDs with Press PUSH OPEN and place a PBC functions (Ver. - Page 11 Tips Do this • Pressing ·P while the system power is off Stop playback Press p. automatically turns on the system and starts Press ·P (or P on the Pause VIDEO CD playback if there is a VIDEO CD on remote)* .
-
Page 12: Playing A Cd
Playing a CD Press PUSH OPEN and place a CD on the disc tray. — Normal Play If the disc is not placed properly, it will not be recognized. You can play up to five CDs in a row. With the label side up. -
Page 13: Recording A Video Cd/Cd
Do this Recording a Stop playback Press p. VIDEO CD/CD Press ·P (or P on the remote). Pause Press ·P again to resume playback (or CD ( on the — CD Synchro Recording remote). This function lets you easily record from a Select a track During playback or pause, turn CD to a tape. -
Page 14: To Stop Recording
Recording a VIDEO CD/CD Tips (continued) • When you want to record on the reverse side, press ª after pressing CD SYNC in step 5 so the indicator on the ª button (for the reverse side) Press PUSH OPEN and place a CD. lights up green. -
Page 15: Listening To The Radio
Listening to the Press TUNING MODE repeatedly until “PRESET” appears in the radio display. Each time you press this button, the — Preset Tuning tuning mode changes as follows: MANUAL n AUTO n PRESET Before using this function, preset radio stations in the tuner’s memory (see “Step 3: Presetting radio stations”... -
Page 16: Recording From The Radio
Recording from the Press TUNING +/– to tune in the desired preset station. radio Preset number Frequency You can record a radio program on a tape by tuning in a preset station. You can use TYPE I (normal) or TYPE II (CrO ) tapes. -
Page 17: Playing A Tape
Tips Playing a tape • When you want to record on the reverse side, press ª after pressing r REC in step 5 so the indicator on the ª button (for the reverse side) lights up green. • When you record on both sides, be sure to start You can play any type of tape, TYPE I from the front side. - Page 18 Playing a tape (continued) To search for the beginning of a track (AMS) Press ) to search forward or 0 to search backward when playing the front side (or Press PUSH 6 and insert a recorded vice-versa when playing the reverse side). tape in deck A or B.
-
Page 19: Recording From A Tape
Recording from a Press DIRECTION repeatedly until A appears to record on one side or tape ß (or RELAY) to record on both sides. — High-speed Dubbing Press P. You can use TYPE I (normal) or TYPE II (CrO ) tapes. The recording level is Dubbing starts. -
Page 20: The Video Cd/Cd Player Playing A Video Cd With The Pbc Functions (Ver. 2.0)
The VIDEO CD/CD Player Playing a VIDEO CD Start playing a VIDEO CD with the PBC functions (Ver. 2.0). with the PBC A PBC menu appears on your TV and “PBC” appears in the display. functions (Ver. 2.0) Turn the jog dial to select a number ––... -
Page 21: Using The Cd Display
Tips Using the CD • When appears on the TV screen, you have pressed an invalid button. Press a button display indicated by the instructions on the menu screen. • When you press NEXT during playback or while playing moving pictures, the next scene on the disc appears. -
Page 22: Using The On-Screen Display
Using the CD display (continued) Using the on- screen display During Normal Play of a VIDEO CD without the PBC functions (Ver.1.1) or audio CD You can check the current operating status n Elapsed time on the current track and disc information of VIDEO CDs or audio CDs during playback or in stop mode, Remaining time on the current track superimposing a display on top of the video... - Page 23 • During playback of an audio CD in • During stop mode of a VIDEO CD or Program Play mode audio CD in Program Play mode STOP PLAY 0 : 20 TOTAL 40 : 00 ACTIVE DISC 2-10 PROGRAM PROGRAM 1.
- Page 24 Using the on-screen display ON SCREEN OFF (continued) No display (except for special menus). Notes • Normally, leave the display mode set to either • During stop mode of a VIDEO CD (except ON SCREEN 1 or 2. When you select ON Program Play mode) SCREEN OFF, you cannot check the operating status while operating the CD player.
-
Page 25: Locating A Specific Part Of A Disc
Locating a specific Press 1 to select “1) SCENE SEARCH.” part of a disc “SCENE –” and the total number of scenes appear on the TV screen. –– Special Menu Total number of scenes This player has 4 different search features. SCENE- (1-312) Select the desired search feature from the... -
Page 26: Locating The Desired Track
Locating a specific part of a disc To stop playback (continued) Press p. To use time search with VIDEO Notes • On some CDs, you may not be able to start CDs with the PBC functions (Ver. playing from the scene you select because 2.0) starting playback from certain scenes is Select “2) TIME SEARCH”... - Page 27 Locating a section within To switch to a 12 frame display You can switch the digest display from 9 to 12 a track frames. –– Track Digest 1 Press SPECIAL MENU. 2 Press 5. You can have the CD player divide a VIDEO CD track into either 9 or 12 different sections 3 Proceed with steps 1 and 2 of “Locating the and display the first scene of each section on...
-
Page 28: Resuming Playback From The Point You Stopped A Video Cd
Locating a specific part of a disc Resuming playback (continued) from the point you To switch to a 12 frame display You can switch the digest display from 9 to 12 stopped a VIDEO frames. 1 Press SPECIAL MENU. 2 Press 5. ––... -
Page 29: Setting The Sharpness
While playing a VIDEO CD, press p Setting the to stop playback. sharpness “RESUME” appears on your TV screen. If “RESUME” does not appear, Resume –– Active Picture Play is not available. Press ·P (or CD ( on the This function emphasizes the outline of the remote). -
Page 30: Playing Cd Tracks Repeatedly
Playing CD tracks Playing CD tracks repeatedly in random order — Repeat Play — Shuffle Play This function lets you repeat a single CD or You can play all the tracks on one or all CDs all CDs in Normal Play, Shuffle Play, and in random order. -
Page 31: Programming Cd Tracks
To cancel Shuffle Play Programming CD Press PLAY MODE repeatedly until “ALL DISCS SHUFFLE,” “1 DISC SHUFFLE,” or tracks “PROGRAM” disappears from the display. The tracks continue playing in their original –– Program Play order. To select the desired CD You can create a program of up to 32 tracks from all the CDs in the order you want them Press one of the DISC 1 - DISC 5 buttons... - Page 32 Programming CD tracks To cancel Program Play (continued) Press PLAY MODE repeatedly until “PROGRAM,” “ALL DISCS SHUFFLE,” or “1 DISC SHUFFLE” disappears from the Place CDs and close the front cover. display. Press Press FUNCTION repeatedly until CHECK on the remote Check the program “CD”...
-
Page 33: Playing Cds Without Interruption
Playing CDs without interruption –– CD Non-Stop Play You can play CDs without pausing between tracks. You cannot use this function with VIDEO CDs. Press FUNCTION repeatedly until “CD” appears in the display. Press CD NON-STOP so the indicator lights up. “NON-STOP PLAY”... -
Page 34: The Tape Deck Recording On A Tape Manually
The Tape Deck Recording on a Press P. Recording starts. tape manually Start playing the source to be recorded. You can record from CDs, tapes, or the radio. For example, you can record just the desired songs or begin recording from the middle of a tape. -
Page 35: Recording Cds By Specifying The Track Order
Recording CDs by Place CDs and close the front cover. specifying the Insert a blank tape into deck B. track order Press FUNCTION repeatedly until “CD” appears in the display. — Program Edit You can record tracks from all the CDs in the Press PLAY MODE repeatedly until order you want. - Page 36 Recording CDs by specifying the Selecting the tape length track order (continued) automatically — Tape Select Edit Repeat steps 5 through 7 to program You can check the most suitable tape length the tracks to be recorded on side B. for recording a CD.
-
Page 37: Dj Effects Looping Part Of A Cd
DJ Effects Looping part of a Flashing part of a — CD Loop — CD Flash With the Loop function, you can repeat part With the Flash function, you can “flash” the of a CD during playback. This lets you create CD sound during playback. -
Page 38: Sound Adjustment Adjusting The Sound
Sound Adjustment For a powerful sound (GROOVE) Adjusting the Press GROOVE. The volume switches to power mode, the sound sound effect changes, the super woofer level changes to “HIGH,” and the indicator on the GROOVE button lights up. Press GROOVE You can create a more powerful sound and again to return to the previous volume. -
Page 39: Selecting The Audio Emphasis
To cancel the audio emphasis Selecting the audio Press EFFECT (or FILE SELECT ON/OFF on the remote) repeatedly so the indicator on the emphasis EFFECT button goes off. Music menu options The audio emphasis menu lets you select the “SUR ”... -
Page 40: Adjusting The Audio Emphasis
Selecting the audio emphasis Adjusting the (continued) audio emphasis To cancel the Synchronized Equalizer function Press SYNC EQ again so the indicator goes You can adjust the audio emphasis using the off. graphic equalizer and surround effect. The Synchronized Equalizer function is canceled also when: Adjusting the graphic –... -
Page 41: Activating The Surround Effect
Activating the surround Press B/b repeatedly to select a effect frequency band. You can enjoy the surround effect. SURROUND Press V/v to adjust the level. Repeat steps 3 and 4 to adjust the other frequency bands. Press ENTER when finished. Note If you choose another audio emphasis (other than “EFFECT OFF”), the adjusted sound effect is lost. -
Page 42: Making A Personal Audio Emphasis File
Making a personal Press B/b to select the file number (P FILE) where you want to store audio emphasis file the sound effect. — Personal File Press ENTER. The adjusted sound effects are stored You can create personal files of audio under the selected file number. -
Page 43: Other Features
Other Features Singing Press KARAOKE PON/MPX repeatedly to obtain the desired along: Karaoke karaoke effect. Each time you press this button, the display changes as follows: You can sing along with any stereo CD or KARAOKE PON tape by turning down the singer’s voice. You need to connect an optional microphone. -
Page 44: Mixing And Recording Sounds
Singing along: Karaoke Mixing and recording (continued) sounds Adjusting the microphone echo ECHO LEVEL Turn ECHO LEVEL to adjust the echo effect. To cancel the echoing Turn ECHO LEVEL to MIN. Prepare the microphone and the Adjusting the key karaoke effect. Then, insert a blank tape in deck B. -
Page 45: Falling Asleep To Music
Tips Falling asleep to • If acoustic feedback (howling) occurs, move the microphone away from the speakers or change the music direction of the microphone. • If you want to record your voice through the microphone only, you can do so by selecting CD —... -
Page 46: Waking Up To Music
Waking up to Press TUNING +/– to select “DAILY,” then press ENTER/ music NEXT. “ON” appears and the hour indication — Daily Timer flashes in the display. You can wake up to music at a preset time every day. Make sure you have set the clock (see “Step 2: Setting the time”... -
Page 47: Timer-Recording Radio Programs
Notes Timer-recording • The system turns on 15 seconds before the preset time. radio programs • You cannot set the timer if the timer on and off times are the same. • When you set the Sleep Timer, the Daily Timer will not turn on the system until the Sleep Timer To timer-record, you must preset the radio turns it off. - Page 48 Timer-recording radio programs Notes (continued) • The system turns on 15 seconds before the preset time. • If the system is on at the preset time, the Timer Set the time to start recording. recording will not be made. • You cannot set the timer if the timer on and off Press TUNING +/–...
-
Page 49: Optional Av Components
Optional AV Components Connecting an MD deck Connecting audio for digital recording components You can record a CD to an MD digitally by connecting your MD deck using an optical cable. Refer to the instructions included with Connecting a turntable your MD deck for details. -
Page 50: Connecting Video Components
To the audio inputs of outputs of the VCR the VCR When you connect a Sony MD deck, you can use the MD (, P, and p buttons on this system’s remote to perform play, pause, and stop operations. To the S VIDEO input... -
Page 51: Connecting Outdoor Antennas
Note Connecting The input signal from the VIDEO1 and VIDEO2 INPUT jacks do not output via the S VIDEO OUT outdoor antennas jack. Connecting a camcorder Connect an outdoor antenna to improve the or video game reception. Refer to the instructions of each component. -
Page 52: Additional Information Precautions
• When you move the system, take out any discs. If you have any questions or problems concerning your stereo system, please consult your nearest Sony dealer. Detector slots... -
Page 53: Troubleshooting
The tape may get entangled in the Should any problem persist, consult your tape deck. nearest Sony dealer. Cleaning the tape heads Clean the tape heads after every 10 hours of use. General When the tape heads become dirty —... - Page 54 Troubleshooting (continued) Speakers Sound comes from only one channel or the There is no microphone sound. left and right volumes are unbalanced. •Turn VOLUME or MIC LEVEL to adjust •Check the speaker connections and the microphone volume. placement. •Make sure the microphone is connected to the MIC 1 or MIC 2 jack correctly.
-
Page 55: Tape Deck
Tape Deck If other problems not described above occur, reset the system as follows: The tape does not record. • No tape is in the cassette holder. 1 Unplug the power cord. • The tab has been removed from the 2 Plug the power cord back in. -
Page 56: Specifications
MIC 1/2 (phone jack): sensitivity 1 mV, 40 – 13,000 Hz ( ±3 dB), impedance 10 kilohms using a Sony TYPE I VIDEO1 IN (phono jacks): sensitivity 250 mV, cassette impedance 47 kilohms 40 – 14,000 Hz ( ±3 dB),... - Page 57 Speakers SS-VR70 for LBT-VR70 Speaker system 4-way, 4-unit, magnetically shielded type Speaker units Super Woofer: 20 cm dia., cone type Woofer: 20 cm dia., cone type Low Tweeter: 6 cm dia., cone type High Tweeter: 6 cm dia., cone type...
-
Page 58: Glossary
VIDEO CD Glossary A compact disc which contains moving pictures. VIDEO CDs contain compact picture information using the MPEG 1 format, one of Auto Pause the world wide standards of digital compact An automatic pause function which is technology. The picture information is activated according to the signal encoded on compressed about 120 times. -
Page 59: Index
Recording K, L Index a radio program 16 Karaoke 43 a VIDEO CD/CD 13 adjusting the key 44 another tape 19 adjusting the microphone CDs by specifying the echo 44 track order 35 to reduce the vocals Active picture 29 on a tape manually 34 (KARAOKE PON) 43 Adjusting... - Page 60 Sony Corporation Printed in Indonesia...
Need help?
Do you have a question about the LBT-VR70 and is the answer not in the manual?
Questions and answers